RENAULT MEGANE COUPE CABRIOLET 2016 X95 / 3.G Manual PDF
Manufacturer: RENAULT, Model Year: 2016, Model line: MEGANE COUPE CABRIOLET, Model: RENAULT MEGANE COUPE CABRIOLET 2016 X95 / 3.GPages: 242, PDF Size: 5.06 MB
Page 71 of 242
1.65
VEHICLE SETTINGS CUSTOMISATION MENU
Adjusting the settings
Press one of buttons 2 or 3 to select a
function to change:
a) Auto door locking while driving;
b) Unlock driver’s door only;
c) Front parking sensor;
d) Rear parking sensor;
e) Parking sensor volume;
f) LANGUAGE.
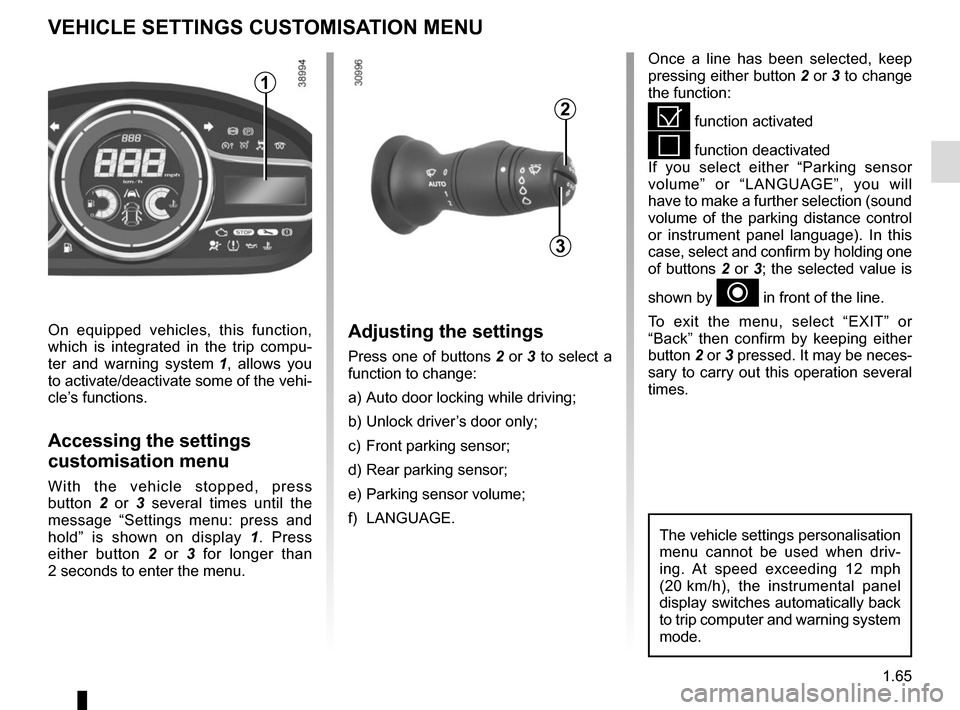
On equipped vehicles, this function,
which is integrated in the trip compu-
ter and warning system
1, allows you
to activate/deactivate some of the vehi-
cle’s functions.
Accessing the settings
customisation menu
With the vehicle stopped, press
button 2 or 3 several times until the
message “Settings menu: press and
hold” is shown on display 1. Press
either button 2 or 3 for longer than
2 seconds to enter the menu.
Once a line has been selected, keep
pressing either button 2 or 3 to change
the function:
= function activated
< function deactivated
If you select either “Parking sensor
volume” or “LANGUAGE”, you will
have to make a further selection (sound
volume of the parking distance control
or instrument panel language). In this
case, select and confirm by holding one
of buttons 2 or 3; the selected value is
shown by
~ in front of the line.
To exit the menu, select “EXIT” or
“Back” then confirm by keeping either
button 2 or 3 pressed. It may be neces-
sary to carry out this operation several
times.
The vehicle settings personalisation
menu cannot be used when driv-
ing. At speed exceeding 12 mph
(20 km/h), the instrumental panel
display switches automatically back
to trip computer and warning system
mode.
2
3
1
Page 72 of 242
1.66
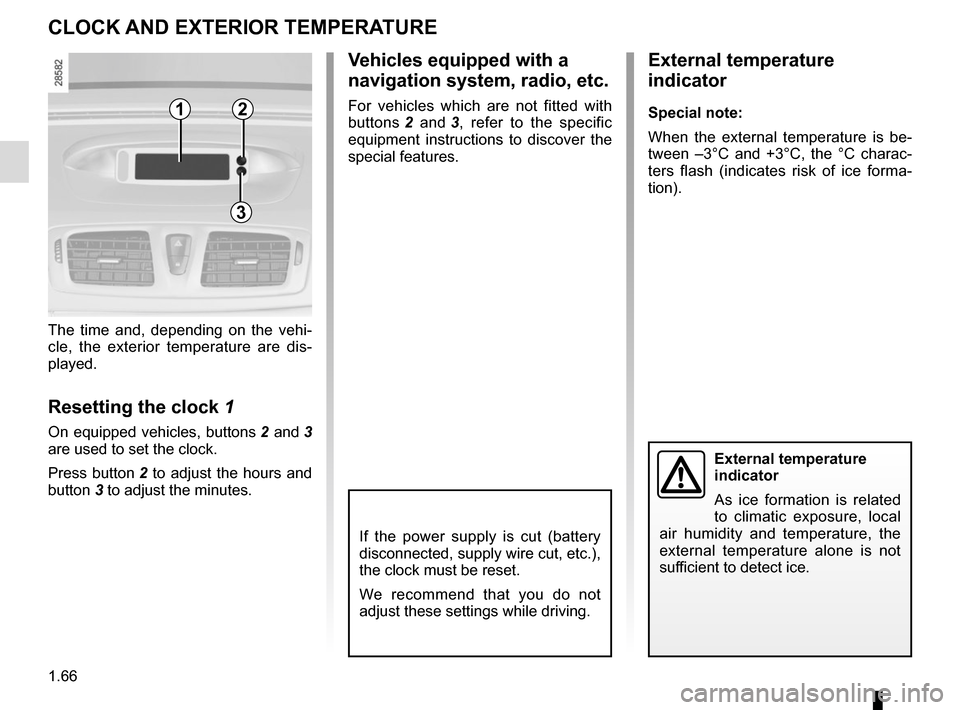
The time and, depending on the vehi-
cle, the exterior temperature are dis-
played.
Resetting the clock 1
On equipped vehicles, buttons 2 and 3
are used to set the clock.
Press button 2 to adjust the hours and
button 3 to adjust the minutes.
External temperature
indicator
As ice formation is related
to climatic exposure, local
air humidity and temperature, the
external temperature alone is not
sufficient to detect ice.
CLOCK AND EXTERIOR TEMPERATURE
External temperature
indicator
Special note:
When the external temperature is be-
tween –3°C and +3°C, the °C charac-
ters flash (indicates risk of ice forma-
tion).
Vehicles equipped with a
navigation system, radio, etc.
For vehicles which are not fitted with
buttons 2 and 3, refer to the specific
equipment instructions to discover the
special features.12
3
If the power supply is cut (battery
disconnected, supply wire cut, etc.),
the clock must be reset.
We recommend that you do not
adjust these settings while driving.
Page 73 of 242
1.67
AUDIBLE AND VISUAL SIGNALS
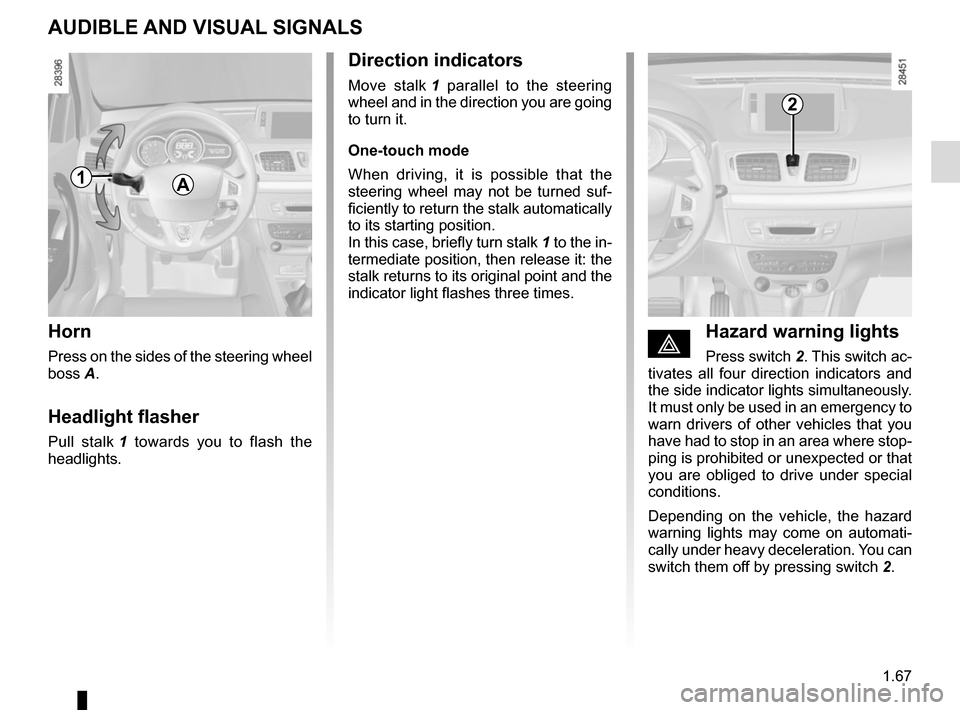
Horn
Press on the sides of the steering wheel
boss A.
Headlight flasher
Pull stalk 1 towards you to flash the
headlights.
éHazard warning lights
Press switch 2. This switch ac-
tivates all four direction indicators and
the side indicator lights simultaneously.
It must only be used in an emergency to
warn drivers of other vehicles that you
have had to stop in an area where stop-
ping is prohibited or unexpected or that
you are obliged to drive under special
conditions.
Depending on the vehicle, the hazard
warning lights may come on automati-
cally under heavy deceleration. You can
switch them off by pressing switch 2.
Direction indicators
Move stalk 1 parallel to the steering
wheel and in the direction you are going
to turn it.
One-touch mode
When driving, it is possible that the
steering wheel may not be turned suf-
ficiently to return the stalk automatically
to its starting position.
In this case, briefly turn stalk 1 to the in-
termediate position, then release it: the
stalk returns to its original point and the
indicator light flashes three times.
A
2
1
Page 74 of 242
1.68
Daytime running lights
function
Depending on the vehicle, the daytime
running lights come on automatically
when the engine is started.
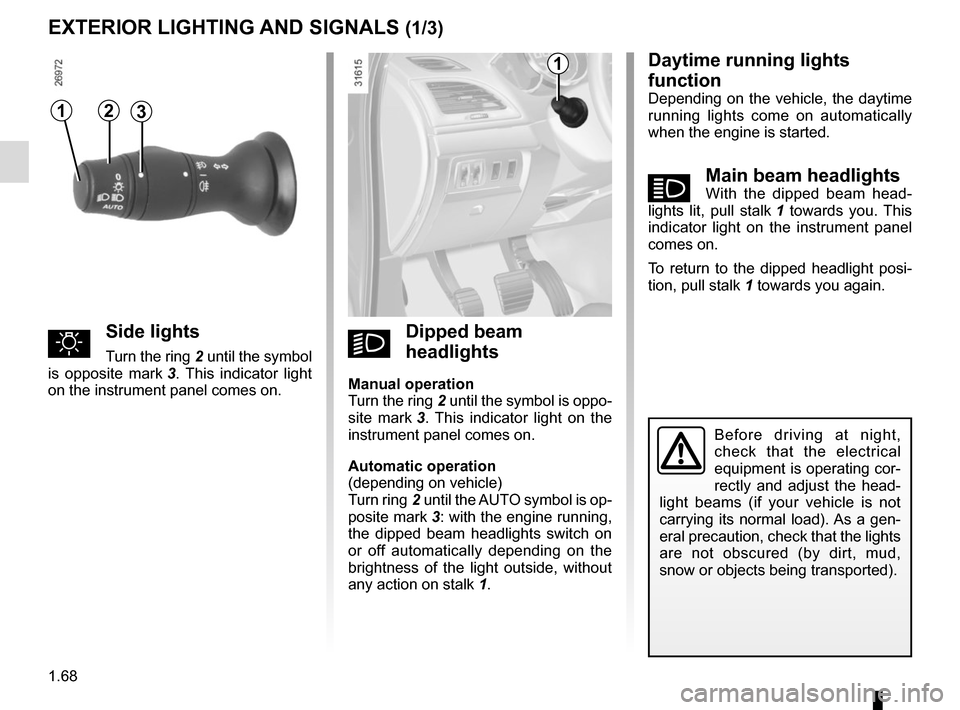
áMain beam headlightsWith the dipped beam head-
lights lit, pull stalk 1 towards you. This
indicator light on the instrument panel
comes on.
To return to the dipped headlight posi-
tion, pull stalk 1 towards you again.
Before driving at night,
check that the electrical
equipment is operating cor-
rectly and adjust the head-
light beams (if your vehicle is not
carrying its normal load). As a gen-
eral precaution, check that the lights
are not obscured (by dirt, mud,
snow or objects being transported).
EXTERIOR LIGHTING AND SIGNALS (1/3)
1
31
uSide lights
Turn the ring 2 until the symbol
is opposite mark 3. This indicator light
on the instrument panel comes on.kDipped beam
headlights
Manual operation
Turn the ring 2 until the symbol is oppo-
site mark 3. This indicator light on the
instrument panel comes on.
Automatic operation
(depending on vehicle)
Turn ring 2 until the AUTO symbol is op-
posite mark 3: with the engine running,
the dipped beam headlights switch on
or off automatically depending on the
brightness of the light outside, without
any action on stalk 1.
2
Page 75 of 242
1.69
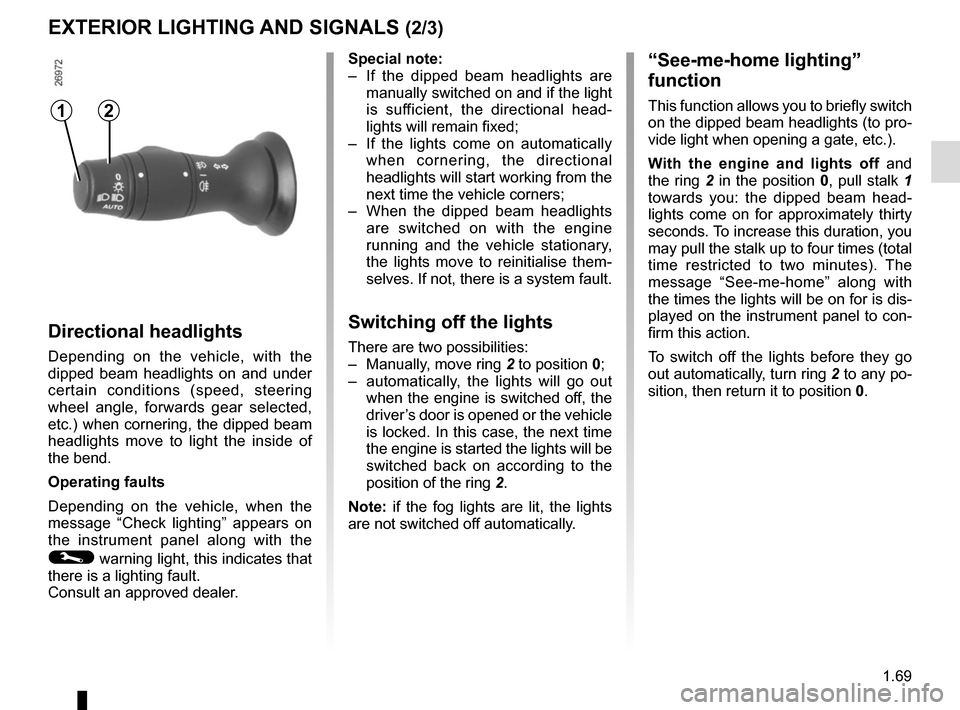
EXTERIOR LIGHTING AND SIGNALS (2/3)
Special note:
– If the dipped beam headlights are manually switched on and if the light
is sufficient, the directional head-
lights will remain fixed;
– If the lights come on automatically when cornering, the directional
headlights will start working from the
next time the vehicle corners;
– When the dipped beam headlights are switched on with the engine
running and the vehicle stationary,
the lights move to reinitialise them-
selves. If not, there is a system fault.
Switching off the lights
There are two possibilities:
– Manually, move ring 2 to position 0;
– automatically, the lights will go out when the engine is switched off, the
driver’s door is opened or the vehicle
is locked. In this case, the next time
the engine is started the lights will be
switched back on according to the
position of the ring 2.
Note: if the fog lights are lit, the lights
are not switched off automatically.
“See-me-home lighting”
function
This function allows you to briefly switch
on the dipped beam headlights (to pro-
vide light when opening a gate, etc.).
With the engine and lights off and
the ring 2 in the position 0, pull stalk 1
towards you: the dipped beam head-
lights come on for approximately thirty
seconds. To increase this duration, you
may pull the stalk up to four times (total
time restricted to two minutes). The
message “See-me-home” along with
the times the lights will be on for is dis-
played on the instrument panel to con-
firm this action.
To switch off the lights before they go
out automatically, turn ring 2 to any po-
sition, then return it to position 0.
Directional headlights
Depending on the vehicle, with the
dipped beam headlights on and under
certain conditions (speed, steering
wheel angle, forwards gear selected,
etc.) when cornering, the dipped beam
headlights move to light the inside of
the bend.
Operating faults
Depending on the vehicle, when the
message “Check lighting” appears on
the instrument panel along with the
© warning light, this indicates that
there is a lighting fault.
Consult an approved dealer.
12
Page 76 of 242
1.70
EXTERIOR LIGHTING AND SIGNALS (3/3)
Switching on the fog lights remains
the responsibility of the driver: the
indicator lights on the instrument
panel inform you whether the fog
lights are lit (indicator light on) or not
(indicator light not on).
4
5
1
gFront fog lights
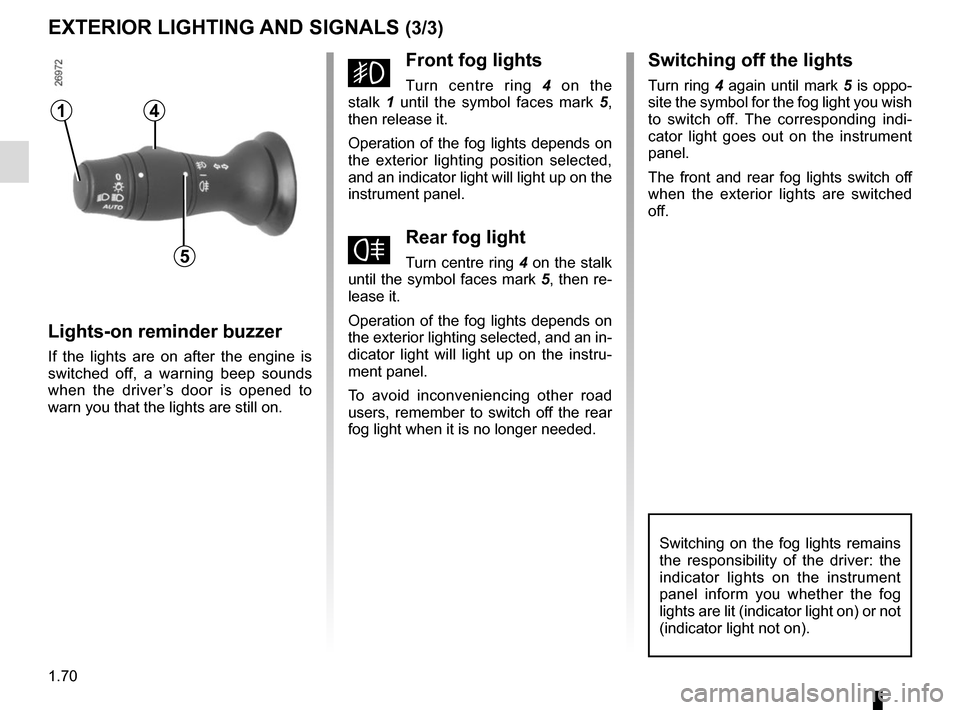
Turn centre ring 4 on the
stalk 1 until the symbol faces mark 5,
then release it.
Operation of the fog lights depends on
the exterior lighting position selected,
and an indicator light will light up on the
instrument panel.
fRear fog light
Turn centre ring 4 on the stalk
until the symbol faces mark 5, then re-
lease it.
Operation of the fog lights depends on
the exterior lighting selected, and an in-
dicator light will light up on the instru-
ment panel.
To avoid inconveniencing other road
users, remember to switch off the rear
fog light when it is no longer needed.
Lights-on reminder buzzer
If the lights are on after the engine is
switched off, a warning beep sounds
when the driver’s door is opened to
warn you that the lights are still on.
Switching off the lights
Turn ring 4 again until mark 5 is oppo-
site the symbol for the fog light you wish
to switch off. The corresponding indi-
cator light goes out on the instrument
panel.
The front and rear fog lights switch off
when the exterior lights are switched
off.
14
5
Page 77 of 242
1.71
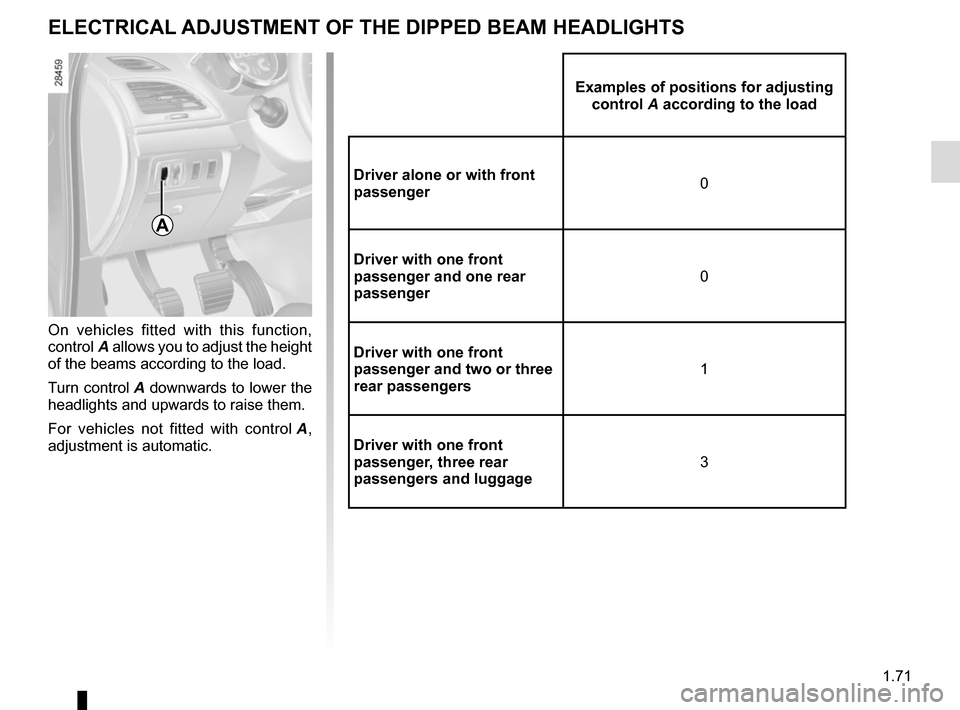
On vehicles fitted with this function,
control A allows you to adjust the height
of the beams according to the load.
Turn control A downwards to lower the
headlights and upwards to raise them.
For vehicles not fitted with control A,
adjustment is automatic.
ELECTRICAL ADJUSTMENT OF THE DIPPED BEAM HEADLIGHTS
A
Examples of positions for adjusting control A according to the load
Driver alone or with front
passenger 0
Driver with one front
passenger and one rear
passenger 0
Driver with one front
passenger and two or three
rear passengers 1
Driver with one front
passenger, three rear
passengers and luggage 3
Page 78 of 242
1.72
Special note
When driving the vehicle, the wiping
speed slows down whenever the vehi-
cle stops. For example, fast wiping
speed will slow to normal wiping speed.
As soon as the vehicle moves off,
wiping will return to the speed originally
selected.
If stalk 1 is operated, it overrides and
cancels the automatic function.Vehicle fitted with intermittent
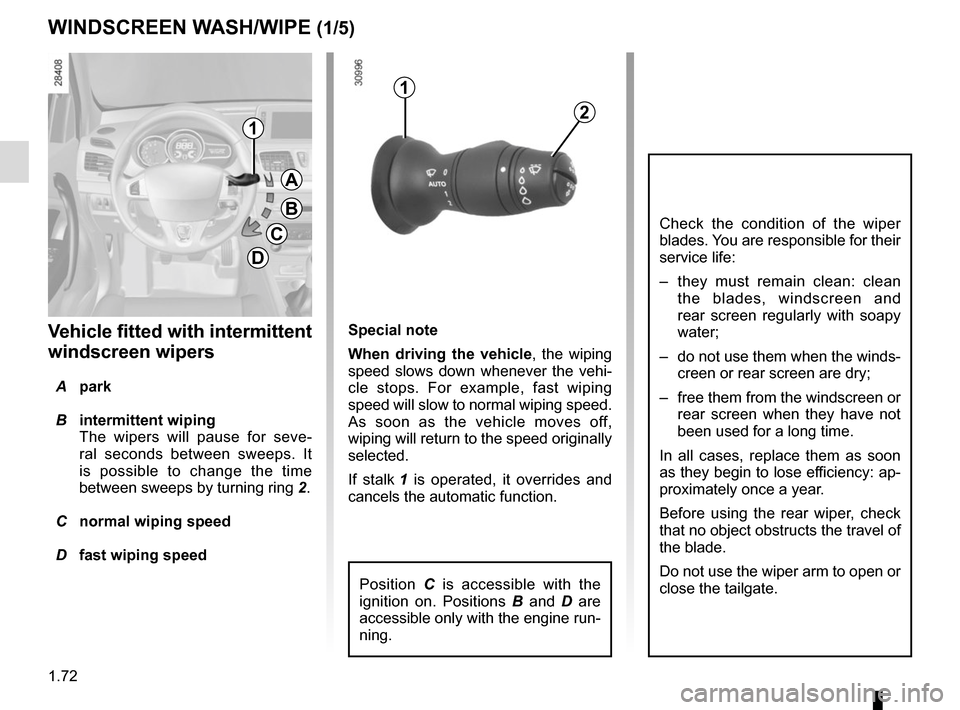
windscreen wipers
A park
B intermittent wiping
The wipers will pause for seve-
ral seconds between sweeps. It
is possible to change the time
between sweeps by turning ring 2.
C normal wiping speed
D fast wiping speed
WINDSCREEN WASH/WIPE (1/5)
1
1
A
B
C
D
2
Position C is accessible with the
ignition on. Positions B and D are
accessible only with the engine run-
ning.
Check the condition of the wiper
blades. You are responsible for their
service life:
– they must remain clean: clean the blades, windscreen and
rear screen regularly with soapy
water;
– do not use them when the winds- creen or rear screen are dry;
– free them from the windscreen or rear screen when they have not
been used for a long time.
In all cases, replace them as soon
as they begin to lose efficiency: ap-
proximately once a year.
Before using the rear wiper, check
that no object obstructs the travel of
the blade.
Do not use the wiper arm to open or
close the tailgate.
Page 79 of 242
1.73
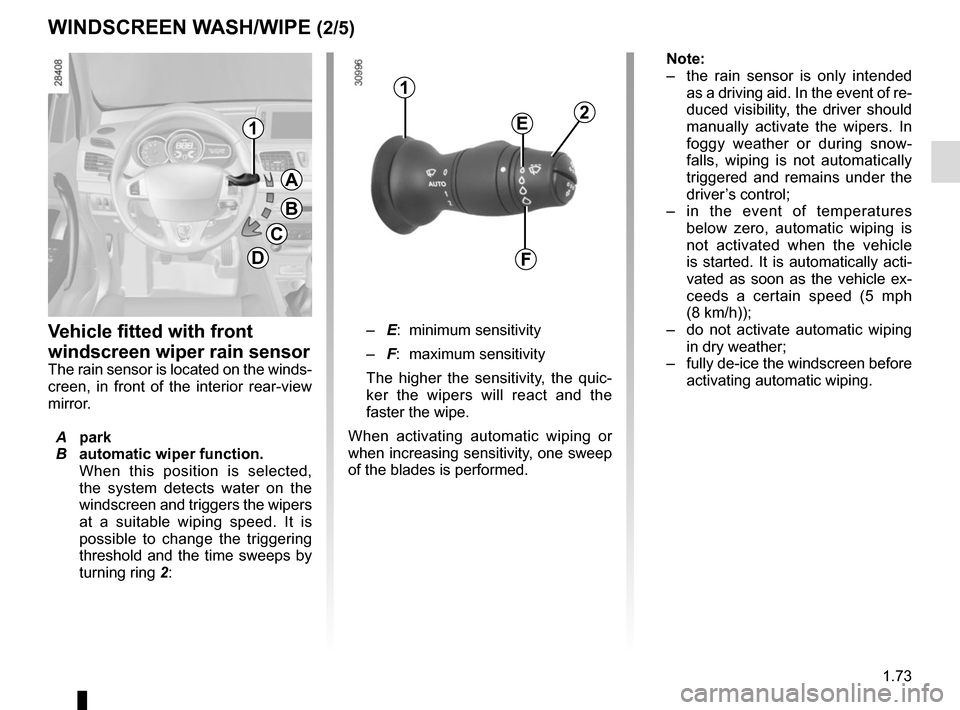
– E: minimum sensitivity
– F: maximum sensitivity
The higher the sensitivity, the quic-
ker the wipers will react and the
faster the wipe.
When activating automatic wiping or
when increasing sensitivity, one sweep
of the blades is performed.
1
A
B
C
D
Vehicle fitted with front
windscreen wiper rain sensor
The rain sensor is located on the winds-
creen, in front of the interior rear-view
mirror.
A park
B automatic wiper function.
When this position is selected,
the system detects water on the
windscreen and triggers the wipers
at a suitable wiping speed. It is
possible to change the triggering
threshold and the time sweeps by
turning ring 2:
1
E
F
2
Note:
– the rain sensor is only intended
as a driving aid. In the event of re-
duced visibility, the driver should
manually activate the wipers. In
foggy weather or during snow-
falls, wiping is not automatically
triggered and remains under the
driver’s control;
– in the event of temperatures
below zero, automatic wiping is
not activated when the vehicle
is started. It is automatically acti-
vated as soon as the vehicle ex-
ceeds a certain speed (5 mph
(8 km/h));
– do not activate automatic wiping
in dry weather;
– fully de-ice the windscreen before
activating automatic wiping.
WINDSCREEN WASH/WIPE (2/5)
Page 80 of 242
1.74
WINDSCREEN WASH/WIPE (3/5)
Operating fault
In the event of a malfunction of the
automatic wiping, the wiper is set to
intermittent wiping. Contact an au-
thorised dealer.
The operation of the rain sensor can
be disturbed in the event of:
– damaged wiper blades; a screen
of water or traces left by a blade in
the sensor’s detection zone may
increase the response time of the
automatic wiper, or increase the
wiping frequency;
– a windscreen with any chip or
crack level with the sensor, or a
windscreen covered in dust, dirt,
insects, ice, the use of washing
wax and water-repellent chemi-
cals; the automatic wiping will
be less sensitive, or even unres-
ponsive.
1
A
B
C
D
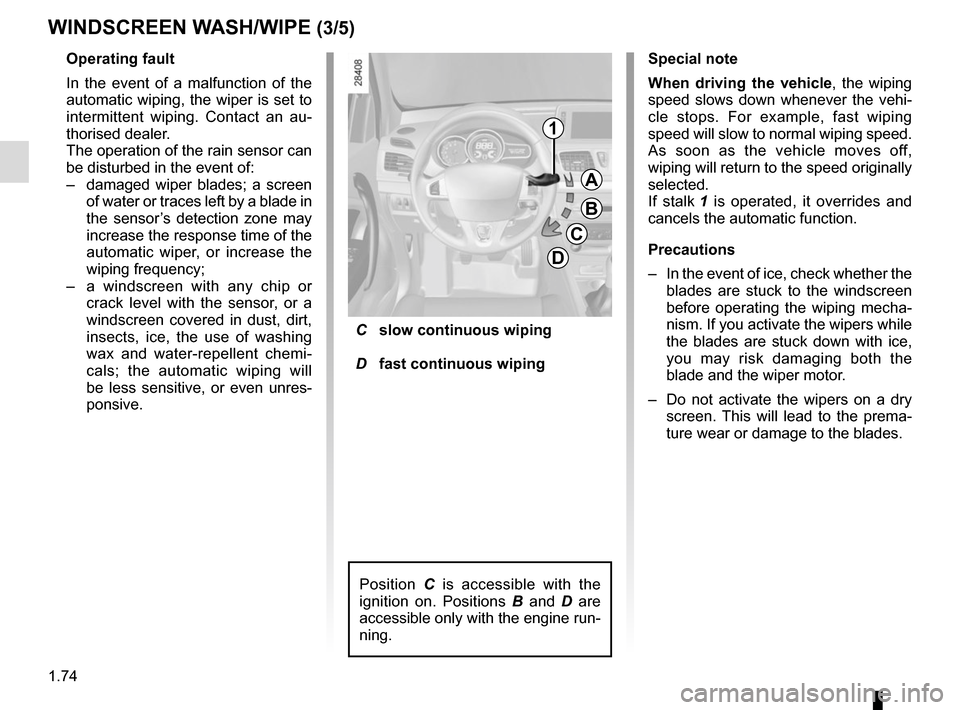
C slow continuous wiping
D fast continuous wiping
Position C is accessible with the
ignition on. Positions B and D are
accessible only with the engine run-
ning.
Special note
When driving the vehicle, the wiping
speed slows down whenever the vehi-
cle stops. For example, fast wiping
speed will slow to normal wiping speed.
As soon as the vehicle moves off,
wiping will return to the speed originally
selected.
If stalk 1 is operated, it overrides and
cancels the automatic function.
Precautions
– In the event of ice, check whether the
blades are stuck to the windscreen
before operating the wiping mecha-
nism. If you activate the wipers while
the blades are stuck down with ice,
you may risk damaging both the
blade and the wiper motor.
– Do not activate the wipers on a dry
screen. This will lead to the prema-
ture wear or damage to the blades.