stop start RENAULT SCENIC 2018 User Guide
[x] Cancel search | Manufacturer: RENAULT, Model Year: 2018, Model line: SCENIC, Model: RENAULT SCENIC 2018Pages: 364, PDF Size: 10.43 MB
Page 74 of 364
1.68
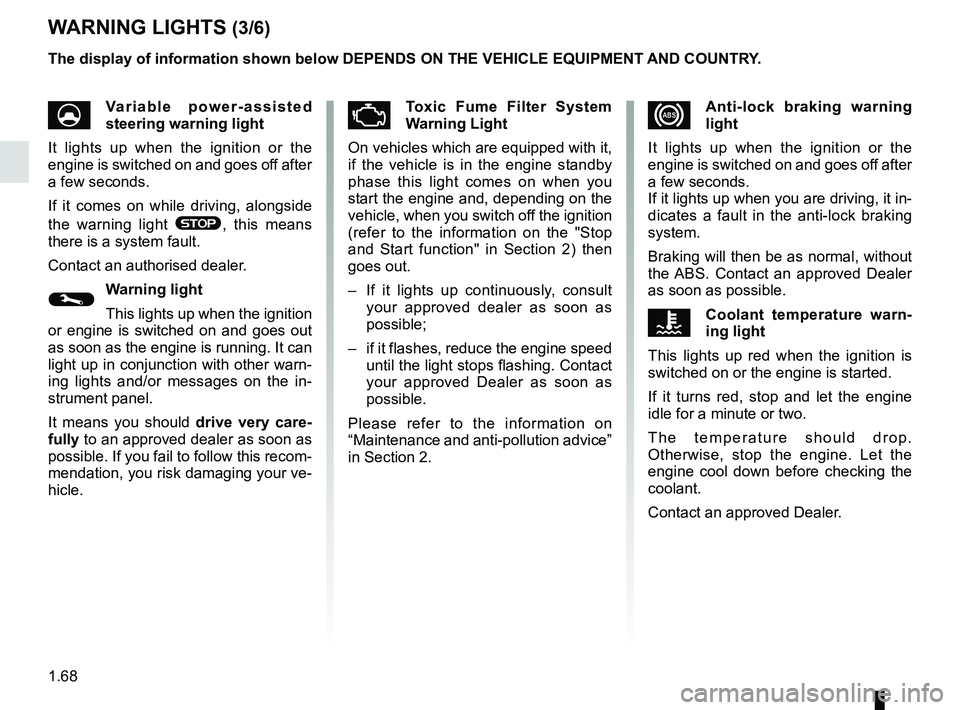
xAnti-lock braking warning
light
It lights up when the ignition or the
engine is switched on and goes off after
a few seconds.
If it lights up when you are driving, it in-
dicates a fault in the anti-lock braking
system.
Braking will then be as normal, without
the ABS. Contact an approved Dealer
as soon as possible.
ÔCoolant temperature warn-
ing light
This lights up red when the ignition is
switched on or the engine is started.
If it turns red, stop and let the engine
idle for a minute or two.
The temperature should drop.
Otherwise, stop the engine. Let the
engine cool down before checking the
coolant.
Contact an approved Dealer.
WARNING LIGHTS (3/6)
UVariable power-assisted
steering warning light
It lights up when the ignition or the
engine is switched on and goes off after
a few seconds.
If it comes on while driving, alongside
the warning light
®, this means
there is a system fault.
Contact an authorised dealer.
©Warning light
This lights up when the ignition
or engine is switched on and goes out
as soon as the engine is running. It can
light up in conjunction with other warn-
ing lights and/or messages on the in-
strument panel.
It means you should drive very care-
fully to an approved dealer as soon as
possible. If you fail to follow this recom-
mendation, you risk damaging your ve-
hicle.
ÄToxic Fume Filter System
Warning Light
On vehicles which are equipped with it,
if the vehicle is in the engine standby
phase this light comes on when you
start the engine and, depending on the
vehicle, when you switch off the ignition
(refer to the information on the "Stop
and Start function" in Section 2) then
goes out.
– If it lights up continuously, consult your approved dealer as soon as
possible;
– if it flashes, reduce the engine speed until the light stops flashing. Contact
your approved Dealer as soon as
possible.
Please refer to the information on
“Maintenance and anti-pollution advice”
in Section 2.
The display of information shown below DEPENDS ON THE VEHICLE EQUIPMENT \
AND COUNTRY.
Page 76 of 364
1.70
WARNING LIGHTS (5/6)
The display of information shown below DEPENDS ON THE VEHICLE EQUIPMENT \
AND COUNTRY.
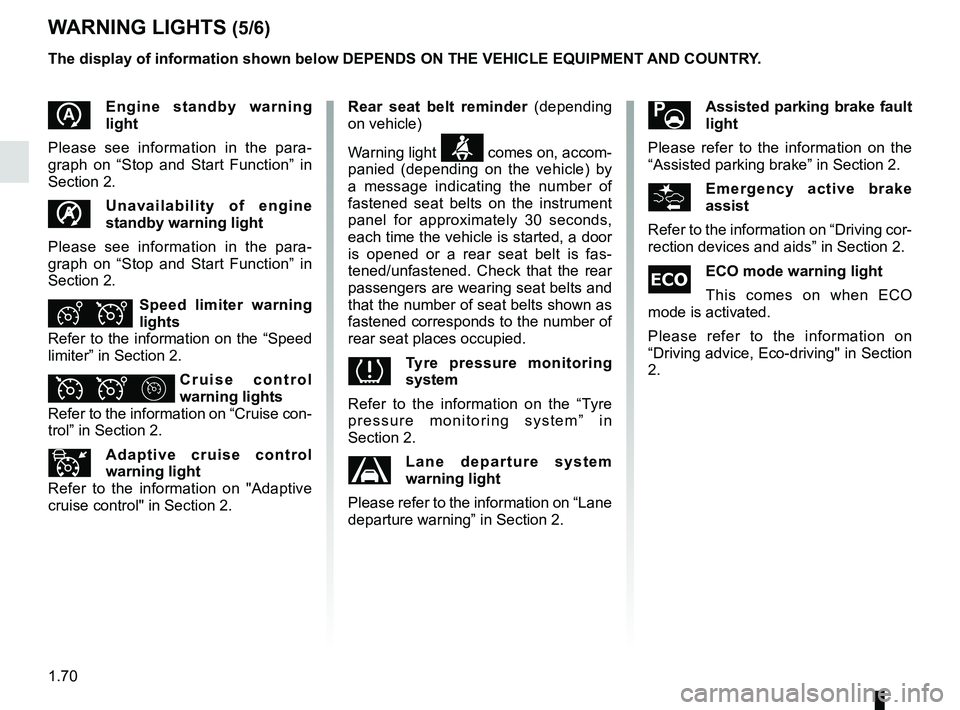
Assisted parking brake fault
light
Please refer to the information on the
“Assisted parking brake” in Section 2.
Emergency active brake
assist
Refer to the information on “Driving cor-
rection devices and aids” in Section 2.
\fECO mode warning light
This comes on when ECO
mode is activated.
Please refer to the information on
“Driving advice, Eco-driving" in Section
2.
Rear seat belt reminder (depending
on vehicle)
Warning light
ß comes on, accom-
panied (depending on the vehicle) by
a message indicating the number of
fastened seat belts on the instrument
panel for approximately 30 seconds,
each time the vehicle is started, a door
is opened or a rear seat belt is fas-
tened/unfastened. Check that the rear
passengers are wearing seat belts and
that the number of seat belts shown as
fastened corresponds to the number of
rear seat places occupied.
Tyre pressure monitoring
system
Refer to the information on the “Tyre
pressure monitoring system” in
Section 2.
Lane departure system
warning light
Please refer to the information on “Lane
departure warning” in Section 2.
Engine standby warning
light
Please see information in the para-
graph on “Stop and Start Function” in
Section 2.
Unavailability of engine
standby warning light
Please see information in the para-
graph on “Stop and Start Function” in
Section 2.
ÐÎSpeed limiter warning
lights
Refer to the information on the “Speed
limiter” in Section 2.
ÏΦ Cruise control
warning lights
Refer to the information on “Cruise con-
trol” in Section 2.
Adaptive cruise control
warning light
Refer to the information on "Adaptive
cruise control" in Section 2.
Page 81 of 364
1.75
DISPLAYS AND INDICATORS (4/6)
1110
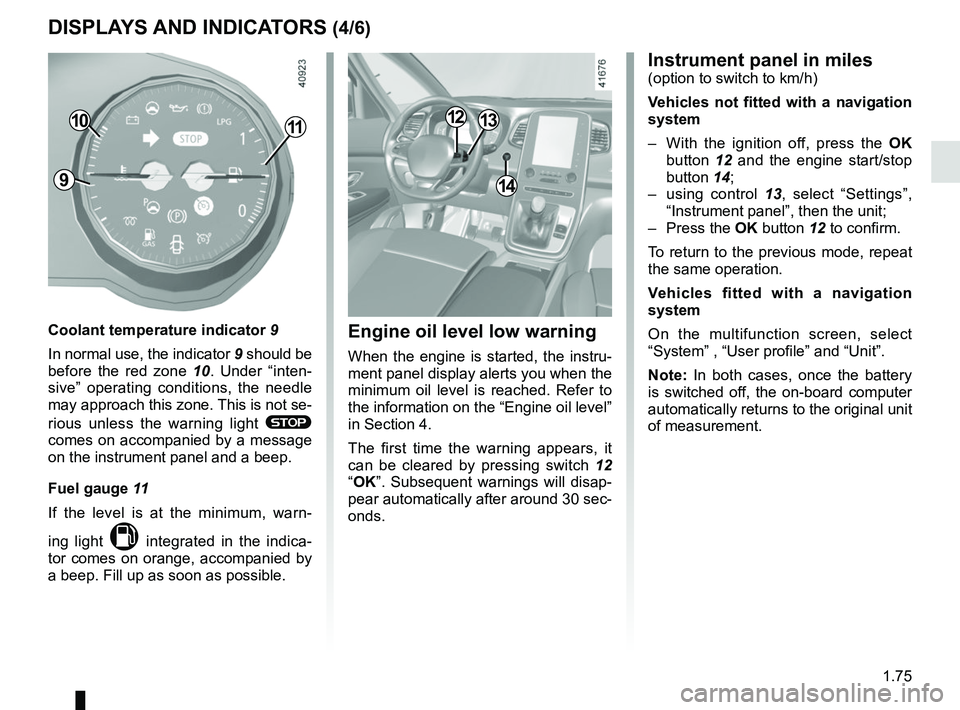
Coolant temperature indicator 9
In normal use, the indicator 9 should be
before the red zone 10. Under “inten-
sive” operating conditions, the needle
may approach this zone. This is not se-
rious unless the warning light
®
comes on accompanied by a message
on the instrument panel and a beep.
Fuel gauge 11
If the level is at the minimum, warn-
ing light
M integrated in the indica-
tor comes on orange, accompanied by
a beep. Fill up as soon as possible.
914
1213
Instrument panel in miles(option to switch to km/h)
Vehicles not fitted with a navigation
system
– With the ignition off, press the OK
button 12 and the engine start/stop
button 14;
– using control 13, select “Settings”,
“Instrument panel”, then the unit;
– Press the OK button 12 to confirm.
To return to the previous mode, repeat
the same operation.
Vehicles fitted with a navigation
system
On the multifunction screen, select
“System” , “User profile” and “Unit”.
Note: In both cases, once the battery
is switched off, the on-board computer
automatically returns to the original unit
of measurement.
Engine oil level low warning
When the engine is started, the instru-
ment panel display alerts you when the
minimum oil level is reached. Refer to
the information on the “Engine oil level”
in Section 4.
The first time the warning appears, it
can be cleared by pressing switch 12
“OK”. Subsequent warnings will disap-
pear automatically after around 30 sec-
onds.
Page 83 of 364
1.77
DISPLAYS AND INDICATORS (6/6)
Operating faults
In the event of a malfunction (the dis-
play fails to open when the engine is
started, or the display retracts, with the
engine running, following an object im-
pacting the display):
– stop and restart the engine;
or
– from the multifunction screen, change the display opening settings.
If there is still a problem, contact an au-
thorised dealer.
With the display opened or closed,
no object should be placed on it or
in its housing.
Do not use solvents, detergents or
an abrasive cloth to clean the dis-
play.
Only use a microfibre wipe.
Page 93 of 364
1.87
TRIP COMPUTER AND WARNING SYSTEM: warning message
These appear with the ® warning light and require you to stop immediately, for your own safety, as soon as traf-
fic conditions allow. Stop your engine and do not restart it. Contact an approved Dealer.
Some examples of warning messages are given below. Note: the messages appear on the display either individually or al-
ternately (when there are several messages to be displayed), and may b\
e accompanied by a warning light and/or a beep.
Examples of messages Interpreting the display selected
“Engine failure hazard” Indicates an injection fault, the vehicle’s engine has overheated or there is a
serious engine fault.
“Power steering fault” Indicates a fault in the steering system.
“Braking system fault” or “Stop vehicle” Indicates a fault in the braking system. Apply the electronic parking brake ma-
nually and ensure that the vehicle is immobilised using a chock.
“Electric failure DANGER” Indicates a fault in the vehicle battery charging circuit (alternator e\
tc.).
“Puncture” Indicates a puncture on the tyre displayed on the instrument panel.
Page 97 of 364
1.91
STEERING WHEEL/POWER-ASSISTED STEERING
Power-assisted steering
Variable power-assisted steering
The variable power assisted steering
system is equipped with an electronic
control system which alters the level of
assistance to suit the vehicle speed.
Steering is made easier during parking
manoeuvres (for added comfort) while
the force needed to steer increases
progressively as the speed rises (for
enhanced safety at high speeds).
Special feature of Stop and Start
With the engine on standby, power-as-
sisted steering is no longer operational.
It returns to its original state when the
engine is restarted or when the speed
moves above 1 mph or 1 km/h (hill,
slope, etc.).
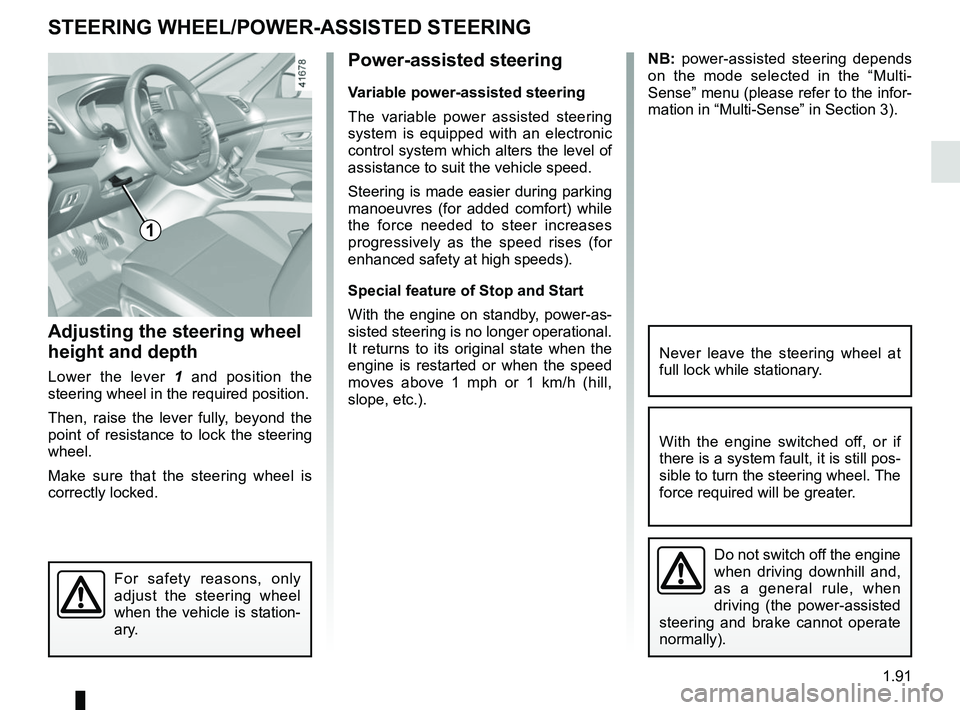
Adjusting the steering wheel
height and depth
Lower the lever 1 and position the
steering wheel in the required position.
Then, raise the lever fully, beyond the
point of resistance to lock the steering
wheel.
Make sure that the steering wheel is
correctly locked.
For safety reasons, only
adjust the steering wheel
when the vehicle is station-
ary.
Never leave the steering wheel at
full lock while stationary.
Do not switch off the engine
when driving downhill and,
as a general rule, when
driving (the power-assisted
steering and brake cannot operate
normally).
With the engine switched off, or if
there is a system fault, it is still pos-
sible to turn the steering wheel. The
force required will be greater.
1
NB: power-assisted steering depends
on the mode selected in the “Multi-
Sense” menu (please refer to the infor-
mation in “Multi-Sense” in Section 3).
Page 100 of 364
1.94
AUDIBLE AND VISUAL SIGNALS
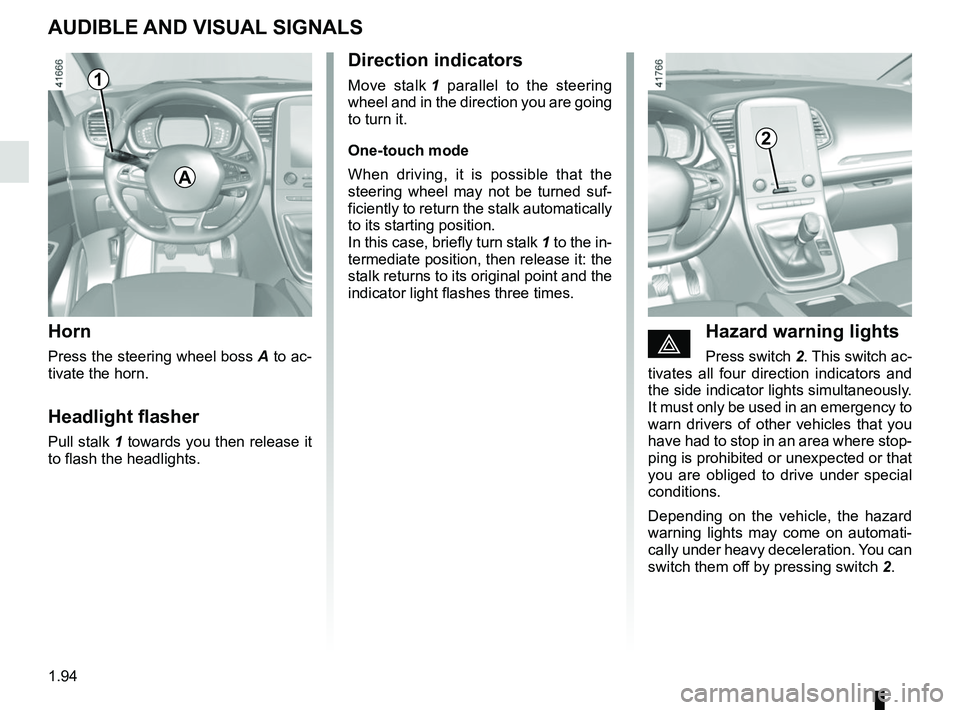
Horn
Press the steering wheel boss A to ac-
tivate the horn.
Headlight flasher
Pull stalk 1 towards you then release it
to flash the headlights.
éHazard warning lights
Press switch 2. This switch ac-
tivates all four direction indicators and
the side indicator lights simultaneously.
It must only be used in an emergency to
warn drivers of other vehicles that you
have had to stop in an area where stop-
ping is prohibited or unexpected or that
you are obliged to drive under special
conditions.
Depending on the vehicle, the hazard
warning lights may come on automati-
cally under heavy deceleration. You can
switch them off by pressing switch 2.
Direction indicators
Move stalk 1 parallel to the steering
wheel and in the direction you are going
to turn it.
One-touch mode
When driving, it is possible that the
steering wheel may not be turned suf-
ficiently to return the stalk automatically
to its starting position.
In this case, briefly turn stalk 1 to the in-
termediate position, then release it: the
stalk returns to its original point and the
indicator light flashes three times.
2
A
1
Page 109 of 364
1.103
WINDSCREEN WASH, WIPE (1/6)
Special note
When driving the vehicle, the wiping
speed slows down whenever the ve-
hicle stops. For example, fast wiping
speed will slow to normal wiping speed.
As soon as the vehicle moves off,
wiping will return to the speed originally
selected.
If stalk 1 is operated, it overrides and
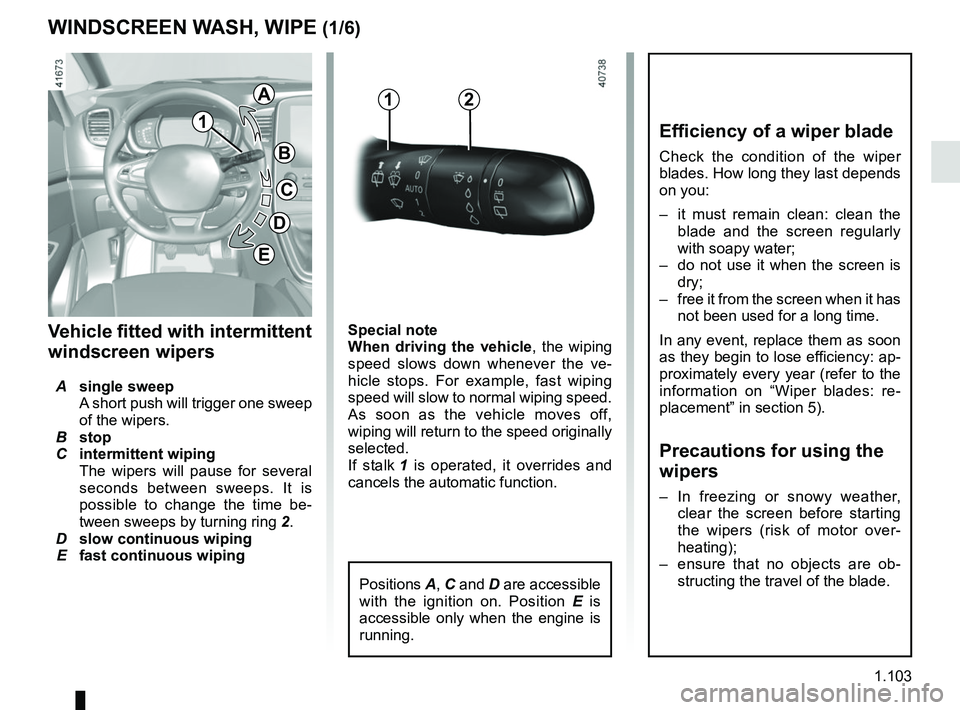
cancels the automatic function.Vehicle fitted with intermittent
windscreen wipers
A single sweep
A short push will trigger one sweep
of the wipers.
B stop
C intermittent wiping
The wipers will pause for several
seconds between sweeps. It is
possible to change the time be-
tween sweeps by turning ring 2.
D slow continuous wiping
E fast continuous wiping
1
1A
B
C
D
2
E
Positions A, C and D are accessible
with the ignition on. Position E is
accessible only when the engine is
running.
Efficiency of a wiper blade
Check the condition of the wiper
blades. How long they last depends
on you:
– it must remain clean: clean the blade and the screen regularly
with soapy water;
– do not use it when the screen is dry;
– free it from the screen when it has not been used for a long time.
In any event, replace them as soon
as they begin to lose efficiency: ap-
proximately every year (refer to the
information on “Wiper blades: re-
placement” in section 5).
Precautions for using the
wipers
– In freezing or snowy weather, clear the screen before starting
the wipers (risk of motor over-
heating);
– ensure that no objects are ob- structing the travel of the blade.
Page 110 of 364
1.104
WINDSCREEN WASH, WIPE (2/6)
1
F
2
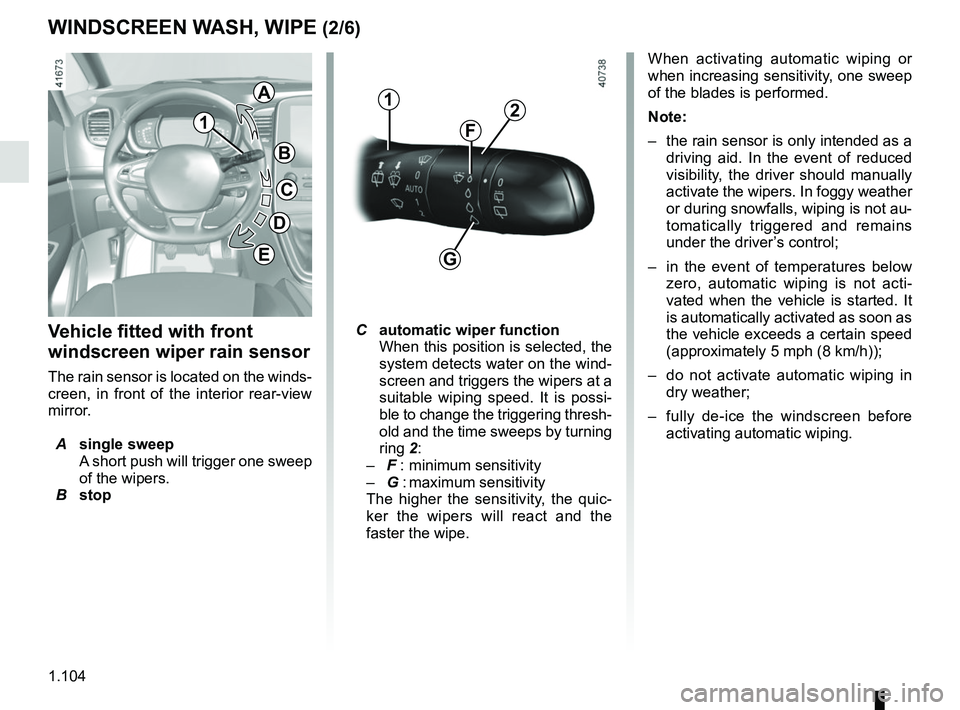
Vehicle fitted with front
windscreen wiper rain sensor
The rain sensor is located on the winds-
creen, in front of the interior rear-view
mirror.
A single sweep
A short push will trigger one sweep
of the wipers.
B stop
C automatic wiper function
When this position is selected, the
system detects water on the wind-
screen and triggers the wipers at a
suitable wiping speed. It is possi-
ble to change the triggering thresh-
old and the time sweeps by turning
ring 2:
– F : minimum sensitivity
– G : maximum sensitivity
The higher the sensitivity, the quic-
ker the wipers will react and the
faster the wipe. When activating automatic wiping or
when increasing sensitivity, one sweep
of the blades is performed.
Note:
–
the rain sensor is only intended as a
driving aid. In the event of reduced
visibility, the driver should manually
activate the wipers. In foggy weather
or during snowfalls, wiping is not au-
tomatically triggered and remains
under the driver’s control;
– in the event of temperatures below
zero, automatic wiping is not acti-
vated when the vehicle is started. It
is automatically activated as soon as
the vehicle exceeds a certain speed
(approximately 5 mph (8 km/h));
– do not activate automatic wiping in
dry weather;
– fully de-ice the windscreen before
activating automatic wiping.
G
1
A
B
C
D
E
Page 112 of 364
1.106
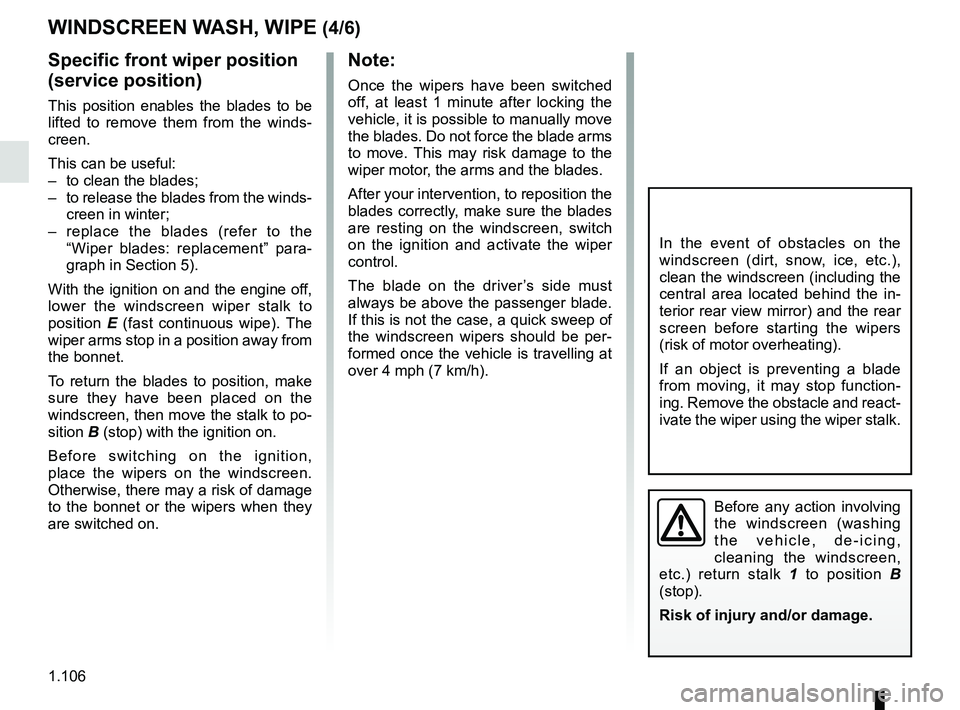
Before any action involving
the windscreen (washing
the vehicle, de-icing,
cleaning the windscreen,
etc.) return stalk 1 to position B
(stop).
Risk of injury and/or damage.
In the event of obstacles on the
windscreen (dirt, snow, ice, etc.),
clean the windscreen (including the
central area located behind the in-
terior rear view mirror) and the rear
screen before starting the wipers
(risk of motor overheating).
If an object is preventing a blade
from moving, it may stop function-
ing. Remove the obstacle and react-
ivate the wiper using the wiper stalk.
WINDSCREEN WASH, WIPE (4/6)
Note:
Once the wipers have been switched
off, at least 1 minute after locking the
vehicle, it is possible to manually move
the blades. Do not force the blade arms
to move. This may risk damage to the
wiper motor, the arms and the blades.
After your intervention, to reposition the
blades correctly, make sure the blades
are resting on the windscreen, switch
on the ignition and activate the wiper
control.
The blade on the driver’s side must
always be above the passenger blade.
If this is not the case, a quick sweep of
the windscreen wipers should be per-
formed once the vehicle is travelling at
over 4 mph (7 km/h).
Specific front wiper position
(service position)
This position enables the blades to be
lifted to remove them from the winds-
creen.
This can be useful:
– to clean the blades;
– to release the blades from the winds-creen in winter;
– replace the blades (refer to the “Wiper blades: replacement” para-
graph in Section 5).
With the ignition on and the engine off,
lower the windscreen wiper stalk to
position E (fast continuous wipe). The
wiper arms stop in a position away from
the bonnet.
To return the blades to position, make
sure they have been placed on the
windscreen, then move the stalk to po-
sition B (stop) with the ignition on.
Before switching on the ignition,
place the wipers on the windscreen.
Otherwise, there may a risk of damage
to the bonnet or the wipers when they
are switched on.