Automatic RENAULT TRAFIC 2015 X82 / 3.G Owners Manual
[x] Cancel search | Manufacturer: RENAULT, Model Year: 2015, Model line: TRAFIC, Model: RENAULT TRAFIC 2015 X82 / 3.GPages: 292, PDF Size: 6.66 MB
Page 7 of 292
1.1
Section 1: Getting to know your vehicle
Key, remote controls . . . . . . . . . . . . . . . . . . . . . . . . . . . . . . . . . . . .\
. . . . . . . . . . . . . . . . . . . . . . . . . 1.2
RENAULT card: General information, use, deadlocking . . . . . . . . . . . . . . . . . . . . . . . . . . . . . . . . . . 1.7
Opening and closing the doors . . . . . . . . . . . . . . . . . . . . . . . . . . . . . . . . . . . .\
. . . . . . . . . . . . . . . . . 1.14
Tailgate . . . . . . . . . . . . . . . . . . . . . . . . . . . . . . . . . . . .\
. . . . . . . . . . . . . . . . . . . . . . . . . . . . . . . . . . . 1.22
Locking, unlocking the opening elements . . . . . . . . . . . . . . . . . . . . . . . . . . . . . . . . . . . .\
. . . . . . . . . 1.23
Automatic locking when driving . . . . . . . . . . . . . . . . . . . . . . . . . . . . . . . . . . . . \
. . . . . . . . . . . . . . . . . 1.27
Headrests - Seats . . . . . . . . . . . . . . . . . . . . . . . . . . . . . . . . . . . .\
. . . . . . . . . . . . . . . . . . . . . . . . . . . 1.28
Steering wheel/Power-assisted steering . . . . . . . . . . . . . . . . . . . . . . . . . . . . . . . . . . . . \
. . . . . . . . . . 1.31
Seat belts. . . . . . . . . . . . . . . . . . . . . . . . . . . . . . . \
. . . . . . . . . . . . . . . . . . . . . . . . . . . . . . . . . . . . . . . 1.32
Additional methods of restraint . . . . . . . . . . . . . . . . . . . . . . . . . . . . . . . . . . . .\
. . . . . . . . . . . . . . . . . 1.37in addition to the front seat belts . . . . . . . . . . . . . . . . . . . . . . . . . . . . . . . . . . . .\
. . . . . . . . . . 1.37
to the rear seatbelt . . . . . . . . . . . . . . . . . . . . . . . . . . . . . . . . . . . . \
. . . . . . . . . . . . . . . . . . . . . 1.41
side . . . . . . . . . . . . . . . . . . . . . . . . . . . . . . . . . . . . \
. . . . . . . . . . . . . . . . . . . . . . . . . . . . . . . . . 1.42
Child safety: General information . . . . . . . . . . . . . . . . . . . . . . . . . . . . . . . . . . . .\
. . . . . . . . . . . . . . . 1.44 Choosing a child seat mounting . . . . . . . . . . . . . . . . . . . . . . . . . . . . . . . . . . . . \
. . . . . . . . . . . 1.47
fitting a child seat, general information . . . . . . . . . . . . . . . . . . . . . . . . . . . . . . . . . . . . \
. . . . . . 1.49
Child seats: attachment by seat belt or by Isofix system . . . . . . . . . . . . . . . . . . . . . . . . . . . . . . . . . . 1.51
Child safety: deactivating/activating the front passenger airbag . . . . . . . . . . . . . . . . . . . . . . . . . . . . 1.77
Driving position . . . . . . . . . . . . . . . . . . . . . . . . . . . . . . . . . . . .\
. . . . . . . . . . . . . . . . . . . . . . . . . . . . . 1.80
Instrument panel . . . . . . . . . . . . . . . . . . . . . . . . . . . . . . . . . . . .\
. . . . . . . . . . . . . . . . . . . . . . . . . . . . 1.84 Trip computer and warning system . . . . . . . . . . . . . . . . . . . . . . . . . . . . . . . . . . . .\
. . . . . . . . 1.90
Clock and outdoor temperature . . . . . . . . . . . . . . . . . . . . . . . . . . . . . . . . . . . . \
. . . . . . . . . . . . . . . . . 1.99
Rear view mirrors . . . . . . . . . . . . . . . . . . . . . . . . . . . . . . . . . . . .\
. . . . . . . . . . . . . . . . . . . . . . . . . . . 1.101
Exterior lighting and signals. . . . . . . . . . . . . . . . . . . . . .\
. . . . . . . . . . . . . . . . . . . . . . . . . . . . . . . . . . 1.103
Headlight beam adjustment . . . . . . . . . . . . . . . . . . . . . . . . . . . . . . . . . . . . \
. . . . . . . . . . . . . . . . . . . . 1.106
Audible and visual signals . . . . . . . . . . . . . . . . . . . . . . . . . . . . . . . . . . . . \
. . . . . . . . . . . . . . . . . . . . . 1.108
Washers, wipers . . . . . . . . . . . . . . . . . . . . . . . . . . . . . . . . . . . .\
. . . . . . . . . . . . . . . . . . . . . . . . . . . . 1.109
Fuel tank (filling with fuel) . . . . . . . . . . . . . . . . . . . . . . . . . . . . . . . . . . . .\
. . . . . . . . . . . . . . . . . . . . . 1.112
Page 9 of 292
1.3
Radio frequency remote
control operating range
This varies according to the environ-
ment: take care not to lock or unlock
the doors by inadvertently pressing the
buttons on the remote control.
Note: on certain vehicles, if a door is
not opened within approximately 2 mi-
nutes of the door being unlocked by
remote control, the doors will lock again
automatically.
Interference
Interference by factors in the imme-
diate vicinity (external installations or
the use of equipment operating on the
same frequency as the remote control)
may affect the operation of the remote
control.
KEY, RADIO FREQUENCY REMOTE CONTROLS: general information (2/2)
For replacement, or if you
require an additional remote
control.
You must only contact an approved
Dealer.
– To replace a remote control, the vehicle and all its keys must be
taken to an authorised dealer
as the vehicle and remote con-
trol are required to initialise the
system.
– Depending on the vehicle, you have the option of using up to
four remote controls.
Remote control unit failure
Make sure that the correct battery
type is being used, and that the bat-
tery is in good condition and inser-
ted correctly. These batteries have
a service life of approximately two
years.
To learn how to change the battery,
please refer to the information on
the “Key, radio frequency remote
control: Batteries” in Section 5.
Page 10 of 292
1.4
KEYS/RADIO FREQUENCY REMOTE CONTROL: use (1/2)
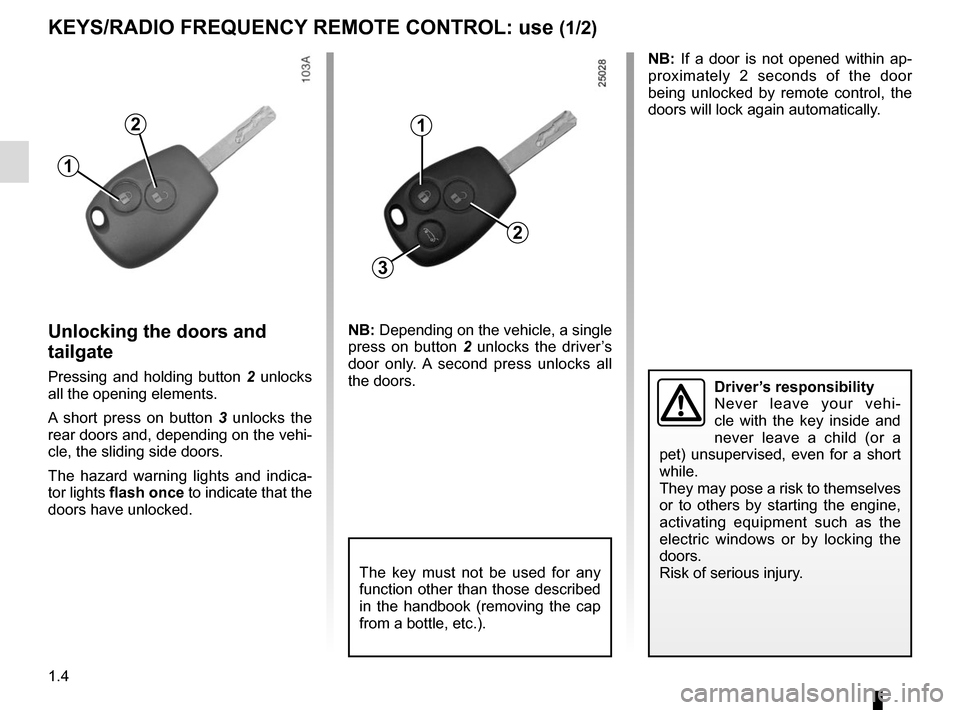
Unlocking the doors and
tailgate
Pressing and holding button 2 unlocks
all the opening elements.
A short press on button 3 unlocks the
rear doors and, depending on the vehi-
cle, the sliding side doors.
The hazard warning lights and indica-
tor lights flash once to indicate that the
doors have unlocked.
2
1
Driver’s responsibility
Never leave your vehi-
cle with the key inside and
never leave a child (or a
pet) unsupervised, even for a short
while.
They may pose a risk to themselves
or to others by starting the engine,
activating equipment such as the
electric windows or by locking the
doors.
Risk of serious injury.
The key must not be used for any
function other than those described
in the handbook (removing the cap
from a bottle, etc.).
1
3
2
NB: If a door is not opened within ap-
proximately 2 seconds of the door
being unlocked by remote control, the
doors will lock again automatically.
NB: Depending on the vehicle, a single
press on button 2 unlocks the driver’s
door only. A second press unlocks all
the doors.
Page 33 of 292
1.27
RENAULT ANTI-INTRUDER DEVICE (RAID)
Driver’s responsibility
If you decide to keep the
doors locked when you are
driving, remember that it
may be more difficult for those as-
sisting you to gain access to the
passenger compartment in the
event of an emergency.
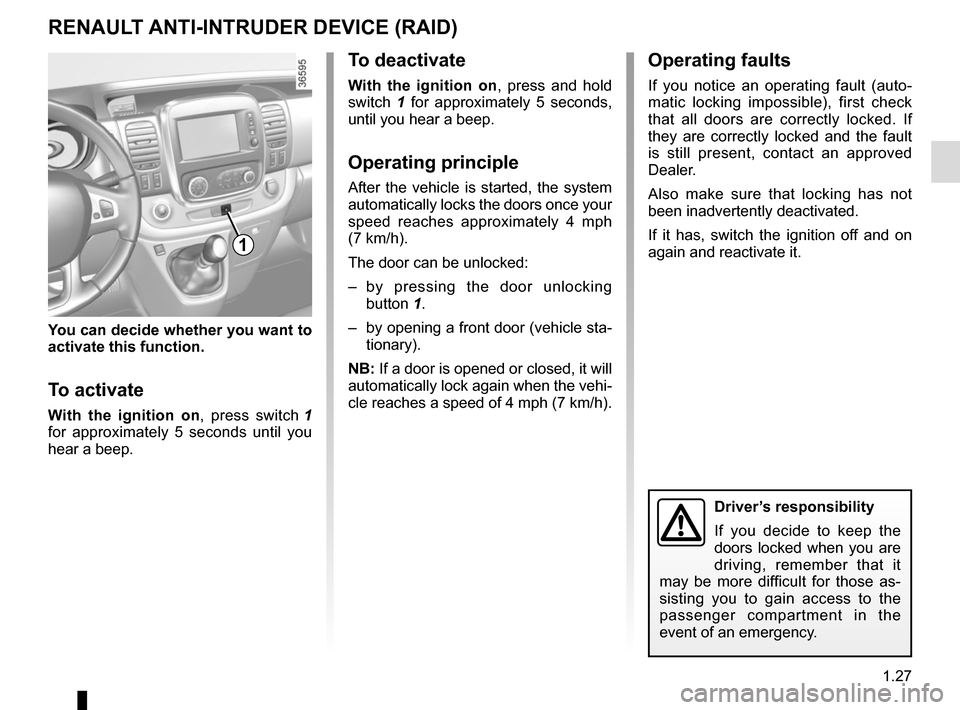
You can decide whether you want to
activate this function.
To activate
With the ignition on , press switch 1
for approximately 5 seconds until you
hear a beep.
To deactivate
With the ignition on , press and hold
switch 1 for approximately 5 seconds,
until you hear a beep.
Operating principle
After the vehicle is started, the system
automatically locks the doors once your
speed reaches approximately 4 mph
(7 km/h).
The door can be unlocked:
– by pressing the door unlocking button 1.
– by opening a front door (vehicle sta- tionary).
NB: If a door is opened or closed, it will
automatically lock again when the vehi-
cle reaches a speed of 4 mph (7 km/h).
Operating faults
If you notice an operating fault (auto-
matic locking impossible), first check
that all doors are correctly locked. If
they are correctly locked and the fault
is still present, contact an approved
Dealer.
Also make sure that locking has not
been inadvertently deactivated.
If it has, switch the ignition off and on
again and reactivate it.
1
Page 95 of 292
1.89
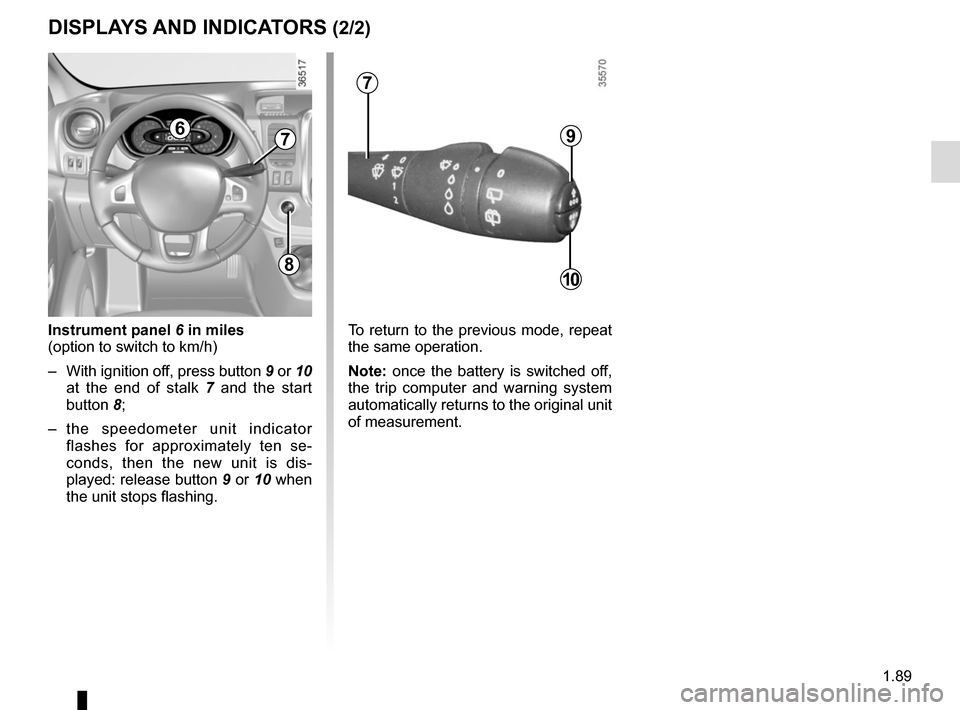
Instrument panel 6 in miles
(option to switch to km/h)
– With ignition off, press button 9 or 10 at the end of stalk 7 and the start
button 8;
– the speedometer unit indicator flashes for approximately ten se-
conds, then the new unit is dis-
played: release button 9 or 10 when
the unit stops flashing.
9
10
67
7
To return to the previous mode, repeat
the same operation.
Note: once the battery is switched off,
the trip computer and warning system
automatically returns to the original unit
of measurement.
DISPLAYS AND INDICATORS (2/2)
8
Page 97 of 292
1.91
ON-BOARD COMPUTER: general information (2/2)
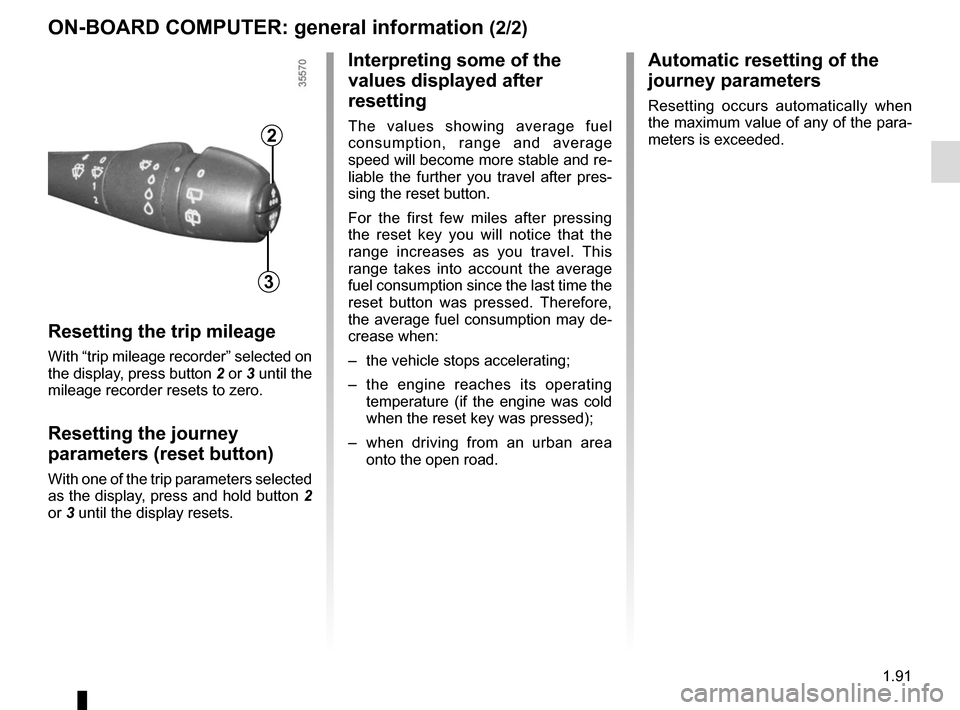
Resetting the trip mileage
With “trip mileage recorder” selected on
the display, press button 2 or 3 until the
mileage recorder resets to zero.
Resetting the journey
parameters (reset button)
With one of the trip parameters selected
as the display, press and hold button 2
or 3 until the display resets.
Interpreting some of the
values displayed after
resetting
The values showing average fuel
consumption, range and average
speed will become more stable and re-
liable the further you travel after pres-
sing the reset button.
For the first few miles after pressing
the reset key you will notice that the
range increases as you travel. This
range takes into account the average
fuel consumption since the last time the
reset button was pressed. Therefore,
the average fuel consumption may de-
crease when:
– the vehicle stops accelerating;
– the engine reaches its operating
temperature (if the engine was cold
when the reset key was pressed);
– when driving from an urban area
onto the open road.
Automatic resetting of the
journey parameters
Resetting occurs automatically when
the maximum value of any of the para-
meters is exceeded.
2
3
Page 102 of 292
1.96
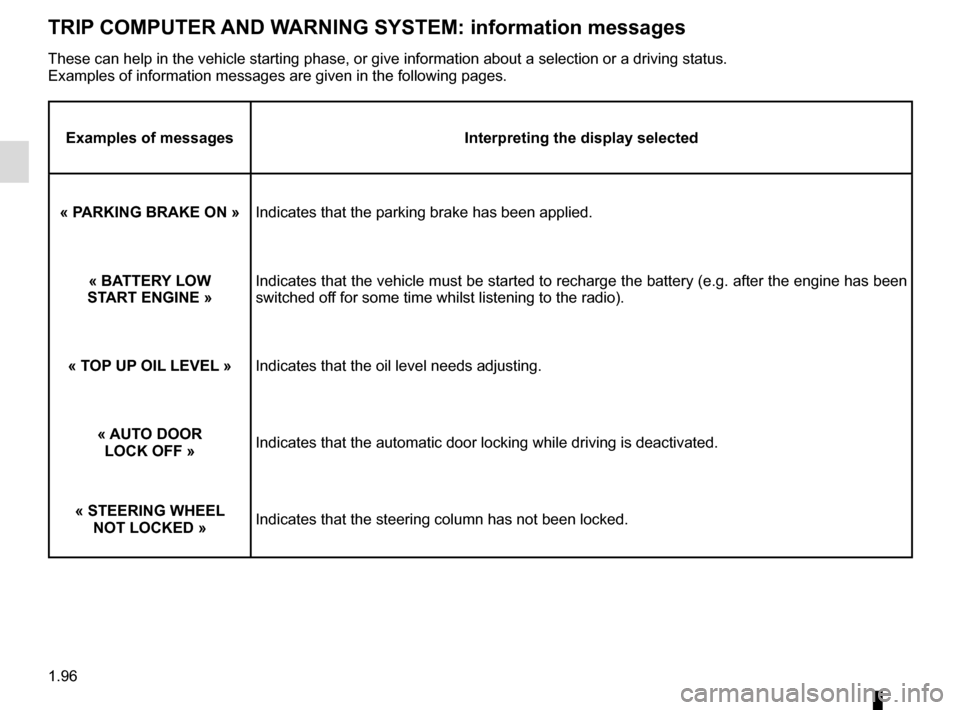
TRIP COMPUTER AND WARNING SYSTEM: information messages
Examples of messagesInterpreting the display selected
« PARKING BRAKE ON » Indicates that the parking brake has been applied.
« BATTERY LOW
START ENGINE » Indicates that the vehicle must be started to recharge the battery (e.g\
. after the engine has been
switched off for some time whilst listening to the radio).
« TOP UP OIL LEVEL » Indicates that the oil level needs adjusting.
« AUTO DOOR LOCK OFF » Indicates that the automatic door locking while driving is deactivated.
« STEERING WHEEL NOT LOCKED » Indicates that the steering column has not been locked.
These can help in the vehicle starting phase, or give information about \
a selection or a driving status.
Examples of information messages are given in the following pages.
Page 110 of 292
1.104
EXTERIOR LIGHTING AND SIGNALS (2/3)
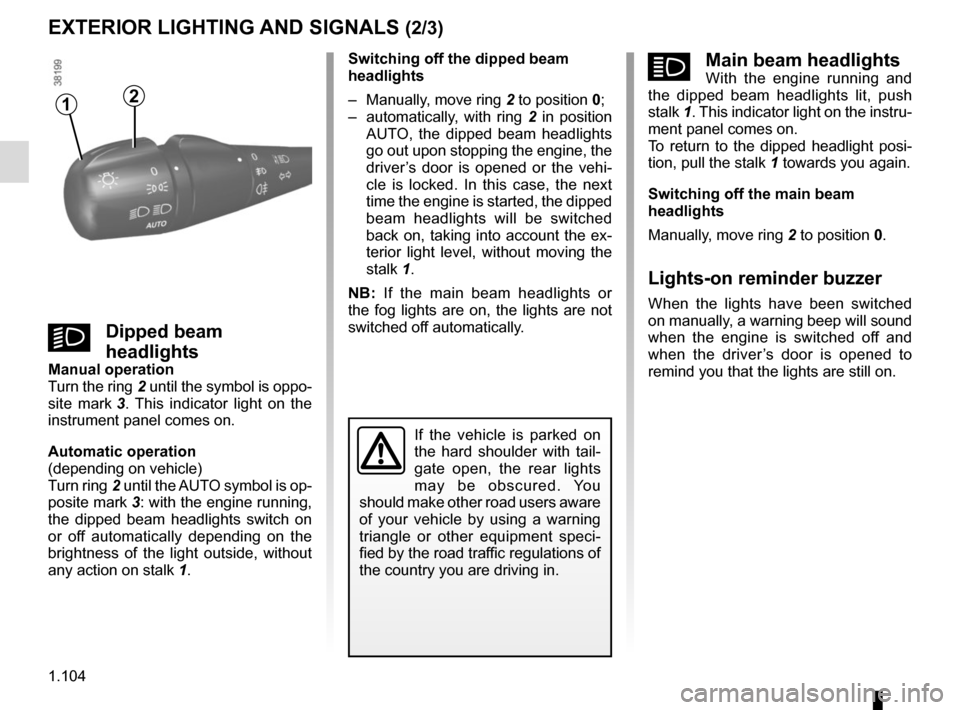
áMain beam headlightsWith the engine running and
the dipped beam headlights lit, push
stalk 1. This indicator light on the instru-
ment panel comes on.
To return to the dipped headlight posi-
tion, pull the stalk 1 towards you again.
Switching off the main beam
headlights
Manually, move ring 2 to position 0.
Lights-on reminder buzzer
When the lights have been switched
on manually, a warning beep will sound
when the engine is switched off and
when the driver’s door is opened to
remind you that the lights are still on.
12
Switching off the dipped beam
headlights
– Manually, move ring 2 to position 0;
– automatically, with ring 2 in position
AUTO, the dipped beam headlights
go out upon stopping the engine, the
driver’s door is opened or the vehi-
cle is locked. In this case, the next
time the engine is started, the dipped
beam headlights will be switched
back on, taking into account the ex-
terior light level, without moving the
stalk 1.
NB: If the main beam headlights or
the fog lights are on, the lights are not
switched off automatically.
kDipped beam
headlights
Manual operation
Turn the ring 2 until the symbol is oppo-
site mark 3. This indicator light on the
instrument panel comes on.
Automatic operation
(depending on vehicle)
Turn ring 2 until the AUTO symbol is op-
posite mark 3: with the engine running,
the dipped beam headlights switch on
or off automatically depending on the
brightness of the light outside, without
any action on stalk 1.
If the vehicle is parked on
the hard shoulder with tail-
gate open, the rear lights
may be obscured. You
should make other road users aware
of your vehicle by using a warning
triangle or other equipment speci-
fied by the road traffic regulations of
the country you are driving in.
Page 111 of 292
1.105
EXTERIOR LIGHTING AND SIGNALS (3/3)
Cornering lights function
Whenever the dipped beam headlights
are on and under certain conditions (at
speed, the steering wheel at an angle,
in forward gear, the indicator lights on,
etc.), when taking a corner one of the
front fog lights will come on to light the
inside of the bend.
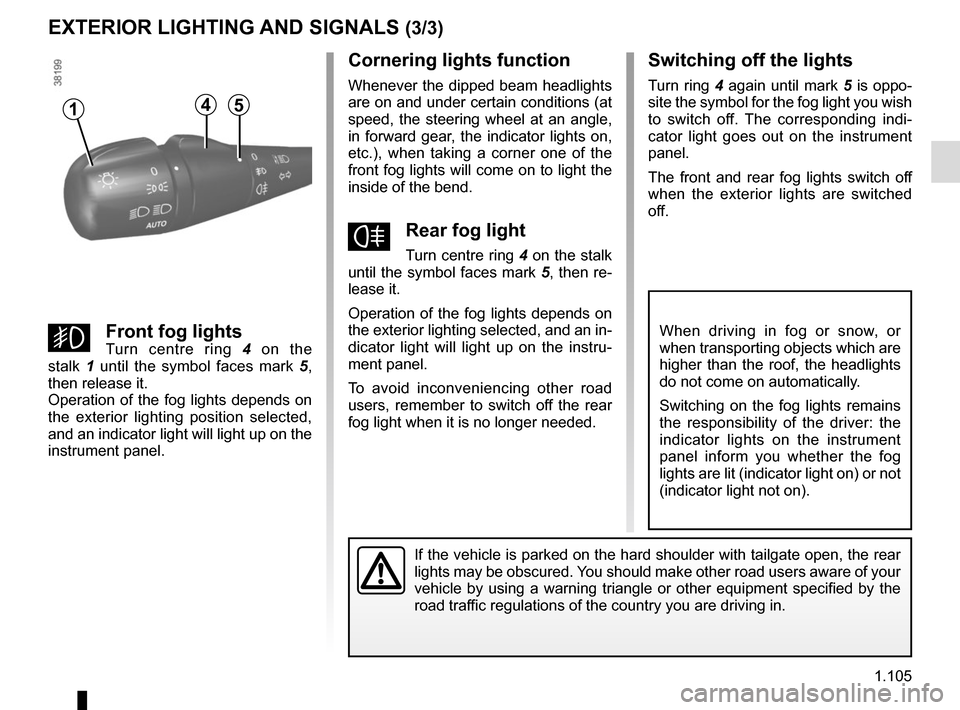
fRear fog light
Turn centre ring 4 on the stalk
until the symbol faces mark 5, then re-
lease it.
Operation of the fog lights depends on
the exterior lighting selected, and an in-
dicator light will light up on the instru-
ment panel.
To avoid inconveniencing other road
users, remember to switch off the rear
fog light when it is no longer needed.
Switching off the lights
Turn ring 4 again until mark 5 is oppo-
site the symbol for the fog light you wish
to switch off. The corresponding indi-
cator light goes out on the instrument
panel.
The front and rear fog lights switch off
when the exterior lights are switched
off.
gFront fog lightsTurn centre ring 4 on the
stalk 1 until the symbol faces mark 5,
then release it.
Operation of the fog lights depends on
the exterior lighting position selected,
and an indicator light will light up on the
instrument panel.
When driving in fog or snow, or
when transporting objects which are
higher than the roof, the headlights
do not come on automatically.
Switching on the fog lights remains
the responsibility of the driver: the
indicator lights on the instrument
panel inform you whether the fog
lights are lit (indicator light on) or not
(indicator light not on).
If the vehicle is parked on the hard shoulder with tailgate open, the re\
ar
lights may be obscured. You should make other road users aware of your
vehicle by using a warning triangle or other equipment specified by the \
road traffic regulations of the country you are driving in.
415
Page 114 of 292
1.108
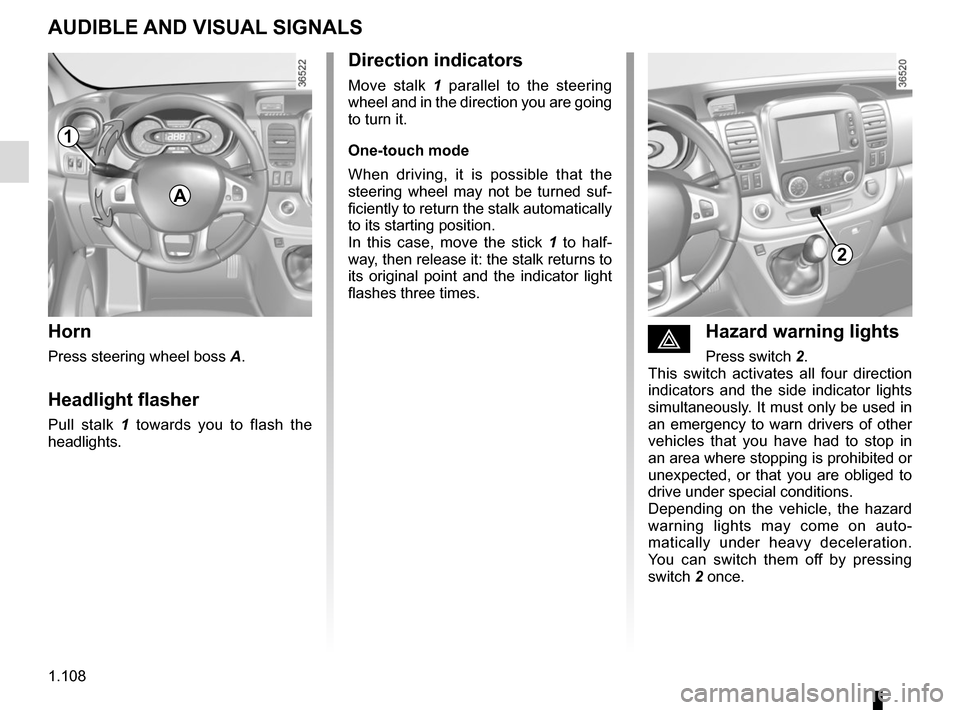
éHazard warning lights
Press switch 2.
This switch activates all four direction
indicators and the side indicator lights
simultaneously. It must only be used in
an emergency to warn drivers of other
vehicles that you have had to stop in
an area where stopping is prohibited or
unexpected, or that you are obliged to
drive under special conditions.
Depending on the vehicle, the hazard
warning lights may come on auto-
matically under heavy deceleration.
You can switch them off by pressing
switch 2 once.
Direction indicators
Move stalk 1 parallel to the steering
wheel and in the direction you are going
to turn it.
One-touch mode
When driving, it is possible that the
steering wheel may not be turned suf-
ficiently to return the stalk automatically
to its starting position.
In this case, move the stick 1 to half-
way, then release it: the stalk returns to
its original point and the indicator light
flashes three times.
Horn
Press steering wheel boss A.
Headlight flasher
Pull stalk 1 towards you to flash the
headlights.
AUDIBLE AND VISUAL SIGNALS
A
2
1