display RENAULT TWINGO 2016 3.G User Guide
[x] Cancel search | Manufacturer: RENAULT, Model Year: 2016, Model line: TWINGO, Model: RENAULT TWINGO 2016 3.GPages: 216, PDF Size: 7.15 MB
Page 57 of 216
1.51
ON-BOARD COMPUTER: general information (2/2)
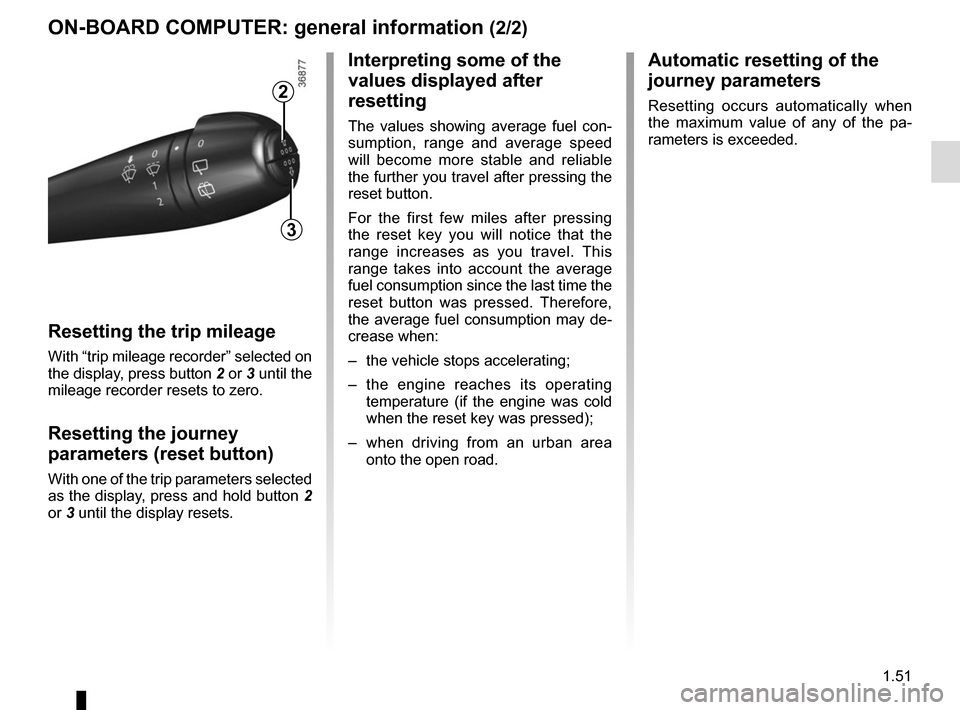
Resetting the trip mileage
With “trip mileage recorder” selected on
the display, press button 2 or 3 until the
mileage recorder resets to zero.
Resetting the journey
parameters (reset button)
With one of the trip parameters selected
as the display, press and hold button 2
or 3 until the display resets.
Interpreting some of the
values displayed after
resetting
The values showing average fuel con-
sumption, range and average speed
will become more stable and reliable
the further you travel after pressing the
reset button.
For the first few miles after pressing
the reset key you will notice that the
range increases as you travel. This
range takes into account the average
fuel consumption since the last time the
reset button was pressed. Therefore,
the average fuel consumption may de-
crease when:
– the vehicle stops accelerating;
– the engine reaches its operating
temperature (if the engine was cold
when the reset key was pressed);
– when driving from an urban area
onto the open road.
Automatic resetting of the
journey parameters
Resetting occurs automatically when
the maximum value of any of the pa-
rameters is exceeded.2
3
Page 58 of 216
1.52
ON-BOARD COMPUTER: trip settings (1/4)
The display of information shown below DEPENDS ON THE VEHICLE EQUIPMENT \
AND COUNTRY.
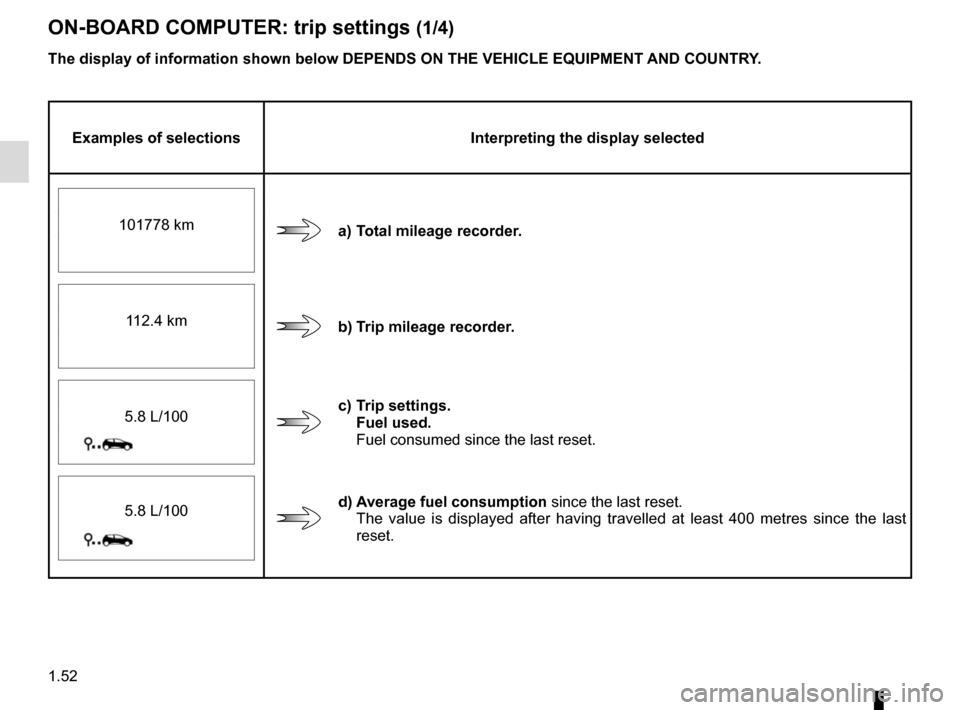
Examples of selectionsInterpreting the display selected
a) Total mileage recorder.
101778 km
b) Trip mileage recorder.
112.4 km
c) Trip settings.
Fuel used.
Fuel consumed since the last reset.
5.8 L/100
d) Average fuel consumption
since the last reset.
The value is displayed after having travelled at least 400 metres since \
the last
reset.
5.8 L/100
Page 59 of 216
1.53
ON-BOARD COMPUTER: trip settings (2/4)
The display of information shown below DEPENDS ON THE VEHICLE EQUIPMENT \
AND COUNTRY.
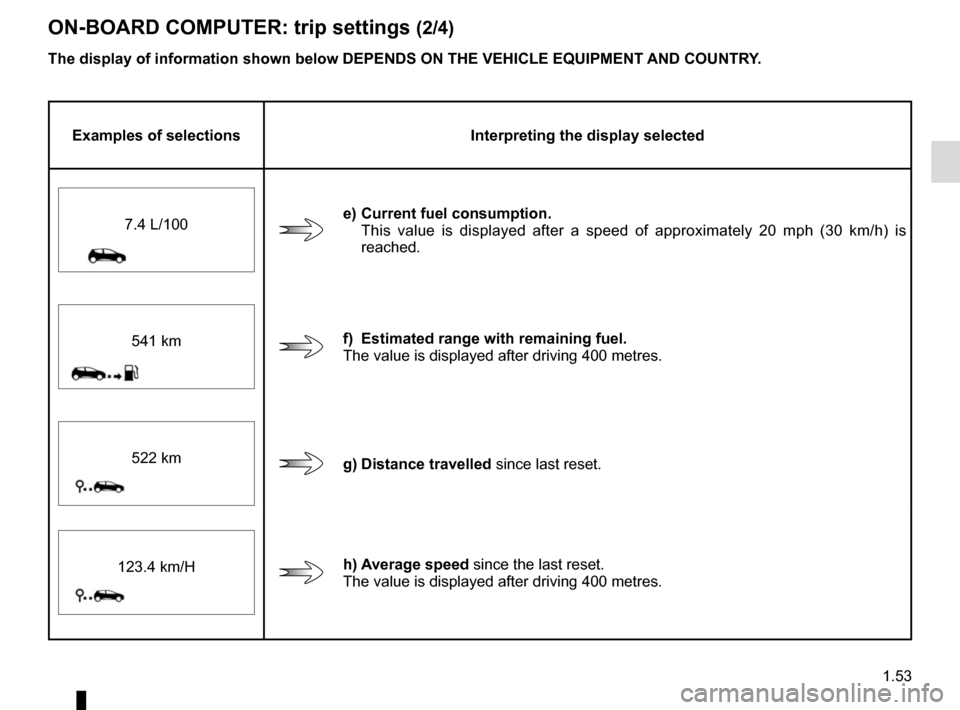
Examples of selectionsInterpreting the display selected
e) Current fuel consumption.
This value is displayed after a speed of approximately 20 mph (30 km/h)\
is
reached.
7.4 L/100
f) Estimated range with remaining fuel.
The value is displayed after driving 400 metres.
541 km
g) Distance travelled since last reset.
522 km
h) Average speed since the last reset.
The value is displayed after driving 400 metres.
123.4 km/H
Page 60 of 216
1.54
ON-BOARD COMPUTER: trip settings (3/4)
The display of information shown below DEPENDS ON THE VEHICLE EQUIPMENT \
AND COUNTRY.
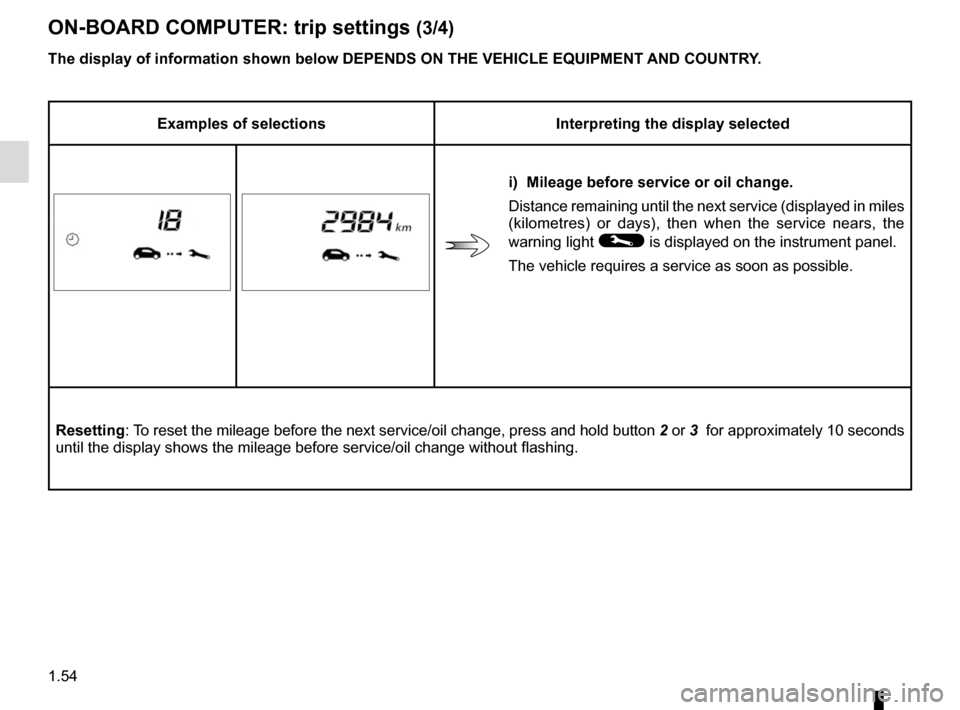
Examples of selectionsInterpreting the display selected
i) Mileage before service or oil change.
Distance remaining until the next service (displayed in miles
(kilometres) or days), then when the service nears, the
warning light
© is displayed on the instrument panel.
The vehicle requires a service as soon as possible.
Resetting: To reset the mileage before the next service/oil change, press and hold b\
utton 2 or 3 for approximately 10 seconds
until the display shows the mileage before service/oil change without fl\
ashing.
Page 61 of 216
1.55
The display of information shown below DEPENDS ON THE VEHICLE EQUIPMENT \
AND COUNTRY.
ON-BOARD COMPUTER: trip settings (4/4)
Examples of selectionsInterpreting the display selected
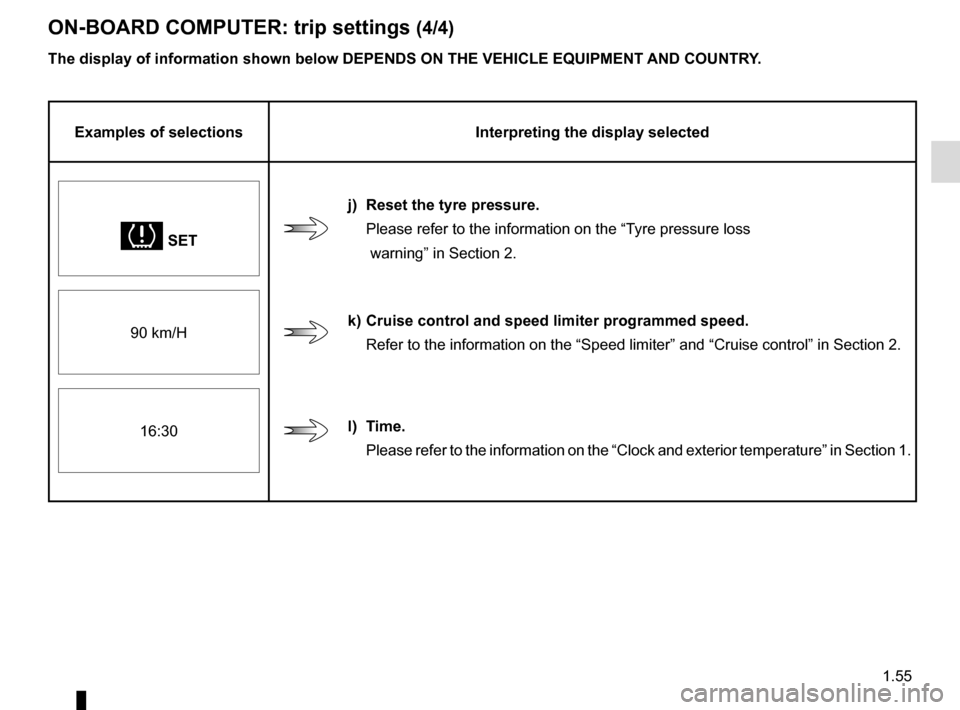
\b SET
j) Reset the tyre pressure.
Please refer to the information on the “Tyre pressure loss
warning” in Section 2.
90 km/H
k) Cruise control and speed limiter programmed speed. Refer to the information on the “Speed limiter” and “Cruise con\
trol” in Section 2.
16:30
l) Time. Please refer to the information on the “Clock and exterior temperatur\
e” in Section 1.
Page 62 of 216
1.56
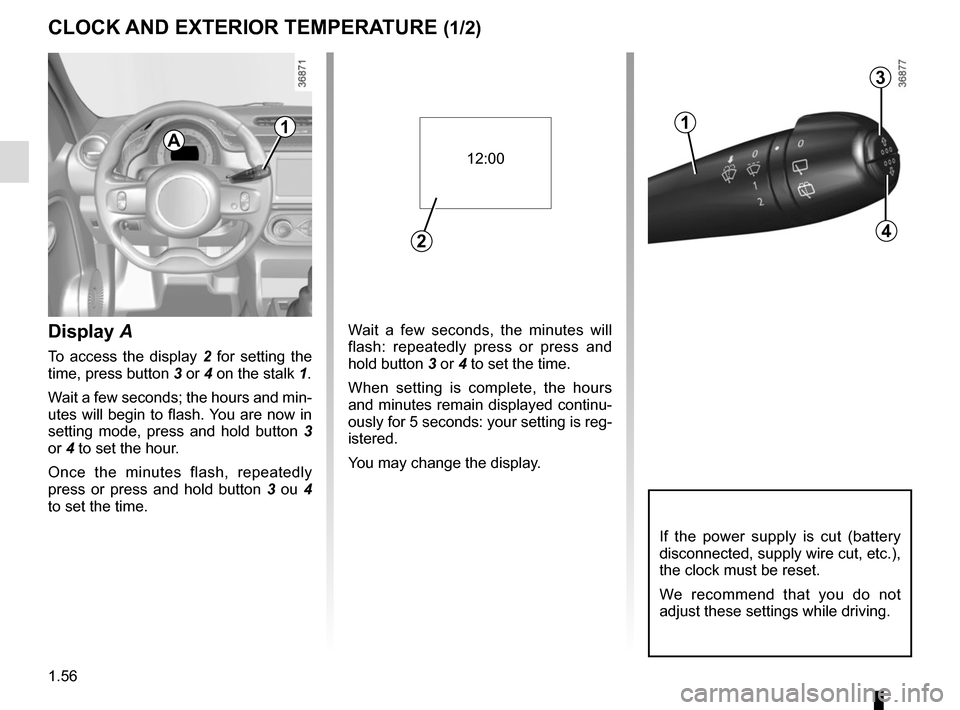
Wait a few seconds, the minutes will
flash: repeatedly press or press and
hold button 3 or 4 to set the time.
When setting is complete, the hours
and minutes remain displayed continu-
ously for 5 seconds: your setting is reg-
istered.
You may change the display.Display A
To access the display 2 for setting the
time, press button 3 or 4 on the stalk 1.
Wait a few seconds; the hours and min-
utes will begin to flash. You are now in
setting mode, press and hold button 3
or 4 to set the hour.
Once the minutes flash, repeatedly
press or press and hold button 3 ou 4
to set the time.
CLOCK AND EXTERIOR TEMPERATURE (1/2)
3
4
If the power supply is cut (battery
disconnected, supply wire cut, etc.),
the clock must be reset.
We recommend that you do not
adjust these settings while driving.
12:00
2
11
A
Page 63 of 216
1.57
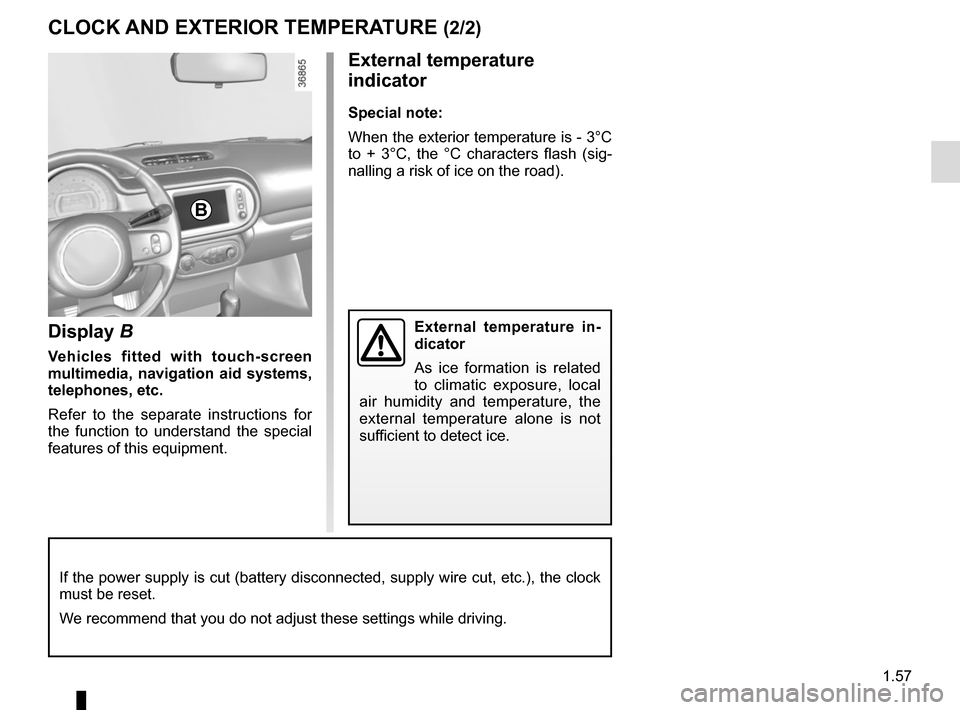
Display B
Vehicles fitted with touch-screen
multimedia, navigation aid systems,
telephones, etc.
Refer to the separate instructions for
the function to understand the special
features of this equipment.
External temperature
indicator
Special note:
When the exterior temperature is - 3°C
to + 3°C, the °C characters flash (sig-
nalling a risk of ice on the road).
External temperature in-
dicator
As ice formation is related
to climatic exposure, local
air humidity and temperature, the
external temperature alone is not
sufficient to detect ice.
CLOCK AND EXTERIOR TEMPERATURE (2/2)
If the power supply is cut (battery disconnected, supply wire cut, etc.\
), the clock
must be reset.
We recommend that you do not adjust these settings while driving.
B
Page 80 of 216
2.6
FUNCTION STOP AND START (3/4)
Conditions preventing the
standby of the engine
Certain conditions prevent the system
from using the engine standby function,
including when:
– reverse gear is engaged;
– the bonnet is not locked;
– the outdoor temperature is too low or too high (less than around 0 °C or
higher than around 30 °C);
– the battery is not sufficiently charged;
– the difference between the vehicle interior temperature and the auto-
matic climate control instruction is
too high;
– for vehicles with automatic gear- boxes, the gradient is steeper than
approximately 5%;
– the “Clear View” function is activated (please see “Automatic Climate
Control” in Section 3); – the engine temperature is too low;
– the emission control system is being
regenerated;
or
– ...
Warning light
is displayed on the
instrument panel. This notifies you that
engine standby is not available.
Deactivate the Stop and
Start function when per-
forming any operations in
the engine compartment.
Special feature of the automatic
engine re-start
Under certain conditions, the engine
can restart on its own in order to guar-
antee your safety and comfort.
This can occur especially when:
– the outdoor temperature is too low or too high (less than around 0 °C or
higher than around 30 °C);
– the “Clear View” function is activated (please see “Automatic Climate
Control” in Section 3);
– the battery is not sufficiently charged;
– the vehicle speed is above 3 mph (5 km/h) (downhill slope, etc.); ;
– repeated pressing on the brake pedal or braking system require-
ment;
– ...
Special note: for some of these
conditions, automatic restarting of
the engine is deactivated if a front
door or the tailgate is open.
Page 84 of 216

2.10
Fuel consumption is accredited in ac-
cordance with a standard regulatory
method. Identical for all manufactur-
ers, this enables vehicles to be com-
pared with one another. Consumption
in real time depends on vehicle usage
conditions, the equipment fitted and the
user’s driving style. To optimise fuel
consumption, please refer to the follow-
ing advice.
Depending on the vehicle, you will have
various functions which enable you to
lower your fuel consumption:
– gear change indicator;
– the journey record and eco-driving advice via the multimedia display;
– ECO mode activated by button ECO.
If fitted on the vehicle, the navigation
system provides additional information.
1
2
Journey recordOnce the engine is switched off, you
will see “Journey record” displayed on
the screen 2 , enabling you to view in-
formation relating to your last journey.
This indicates:
– average fuel consumption;
– number of miles/kilometres travelled;
– number of miles/kilometres saved.
DRIVING ADVICE, ECO-DRIVING (1/4)
Gear change indicator 1
To obtain optimum consumption levels,
a warning light on the instrument panel
lets you know the best time to move up
or down a gear:
Š move up a gear;
‰ move down a gear.
Page 91 of 216
2.17
Note
The standard tyre pressure cannot be
less than that recommended and indi-
cated on the door frame.
Display
Check tyre pressure
The warning light
comes on (not
flashing).
This indicates that at least one tyre is
flat.
Check and, if necessary, readjust the
pressures of the four wheels when cold.
The warning light
goes off after a
few minutes’ driving.
Puncture
Warning light
comes on steady,
accompanied by a beep and warning
light
®They indicate that at least one wheel
is punctured or severely underinfla-
ted. Replace it or contact an approved
dealer if it is punctured. Top up the tyre
pressure if the wheel is deflated.
Check tyre sensors
The warning light
flashes for
several seconds, then stays on, along
with the warning light
©.
They indicate that at least one wheel is
not fitted with sensors. In other cases,
contact an authorised dealer.
TYRE PRESSURE LOSS WARNING (2/3)
2
Warning light ® re-
quires you to stop immedi-
ately, for your own safety,
as soon as traffic conditions
allow.
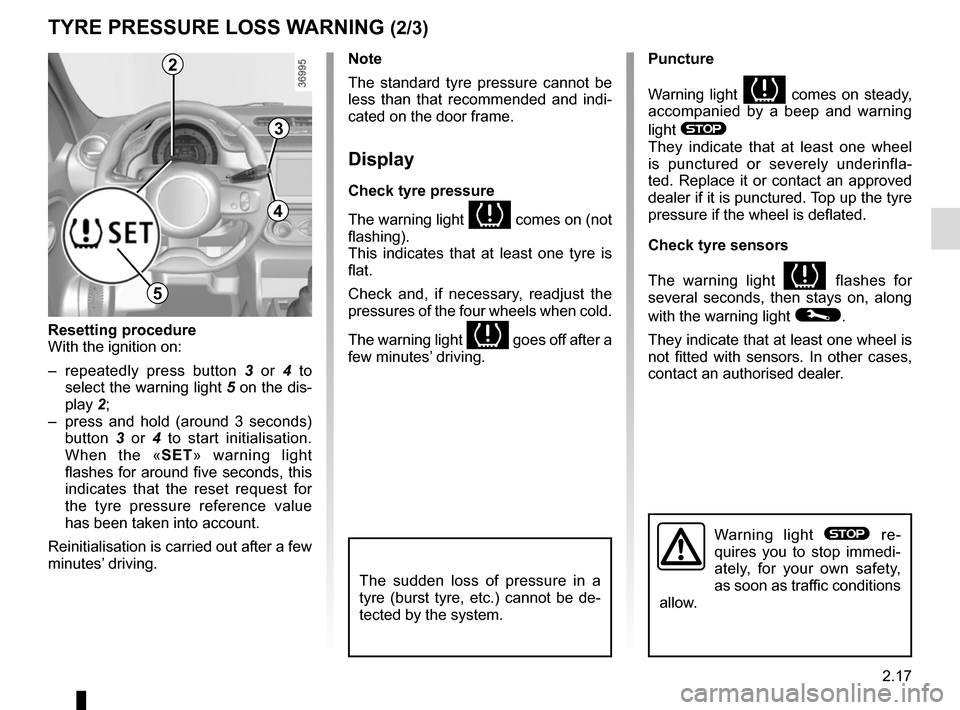
Resetting procedure
With the ignition on:
– repeatedly press button 3 or 4 to
select the warning light 5 on the dis-
play 2;
– press and hold (around 3 seconds) button 3 or 4 to start initialisation.
When the «SET» warning light
flashes for around five seconds, this
indicates that the reset request for
the tyre pressure reference value
has been taken into account.
Reinitialisation is carried out after a few
minutes’ driving.
3
4
The sudden loss of pressure in a
tyre (burst tyre, etc.) cannot be de-
tected by the system.
5