ESP RENAULT TWINGO 2016 3.G Owners Manual
[x] Cancel search | Manufacturer: RENAULT, Model Year: 2016, Model line: TWINGO, Model: RENAULT TWINGO 2016 3.GPages: 216, PDF Size: 7.15 MB
Page 9 of 216
1.3
KEY, RADIO FREQUENCY REMOTE CONTROL: general information (2/2)
Radio frequency remote
control operating range
This varies according to the surroun-
dings: take care not to lock or unlock
the doors by inadvertently pressing the
buttons on the remote control.
Note: If a door or the luggage compart-
ment lid is open or not closed properly,
the doors and luggage compartment lid
lock/unlock quickly.
Interference
Interference by factors in the imme-
diate vicinity (external installations or
the use of equipment operating on the
same frequency as the remote control)
may affect the operation of the remote
control.
Replacement and additional keys
or remote controls.
You must only contact an approved
dealer:
– If you need to replace a key it will be necessary to take the vehicle
and all of its keys to an approved
Dealer in order to initialise the
system.
– Depending on the vehicle, you have the option of using up to
four remote controls.
Remote control unit failure
Make sure that the correct battery
type is being used, and that the bat-
tery is in good condition and inser-
ted correctly. These batteries have
a service life of approximately two
years.
Refer to Section 5: “Radio fre-
quency remote control: batteries”
for the battery changing procedure.
The key must not be used for any
function other than those described
in the handbook (removing the cap
from a bottle, etc.).
Driver’s responsibility
when parking or stopping
the vehicle
Never leave an animal,
child or adult who is not self-suffi-
cient alone on your vehicle, even for
a short time.
They may pose a risk to themselves
or to others by starting the engine,
activating equipment such as the
electric windows or locking the
doors.
Also, in hot and/or sunny weather,
please remember that the tempera-
ture inside the passenger compart-
ment increases very quickly.
RISK OF DEATH OR SERIOUS
INJURY.
Page 10 of 216
1.4
1
2
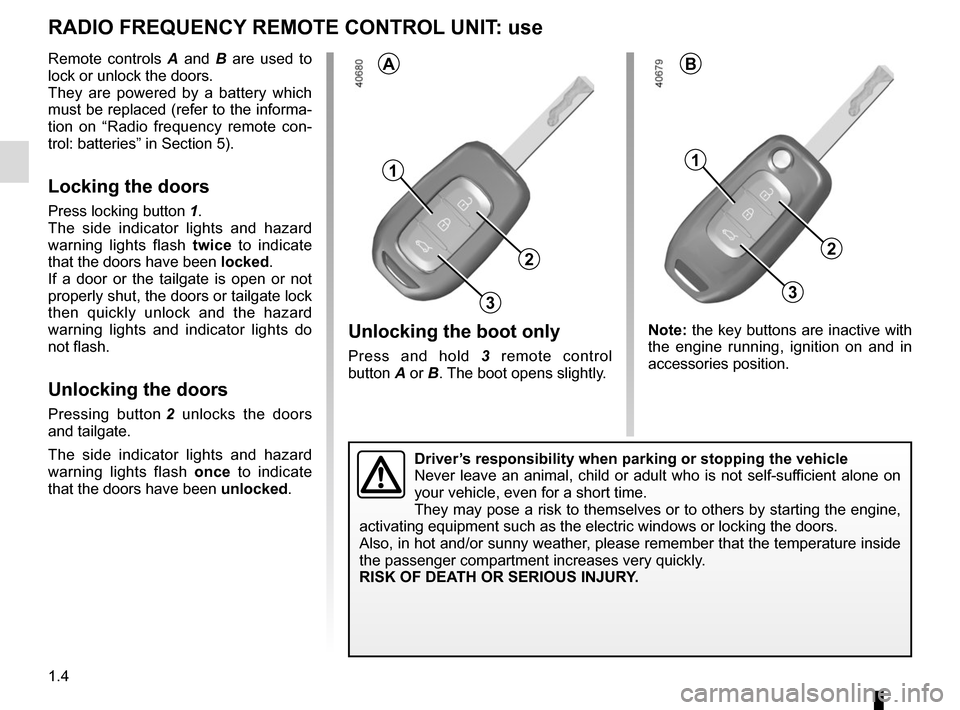
Unlocking the boot only
Press and hold 3 remote control
button A or B. The boot opens slightly.
RADIO FREQUENCY REMOTE CONTROL UNIT: use
Remote controls A and B are used to
lock or unlock the doors.
They are powered by a battery which
must be replaced (refer to the informa-
tion on “Radio frequency remote con-
trol: batteries” in Section 5).
Locking the doors
Press locking button 1.
The side indicator lights and hazard
warning lights flash twice to indicate
that the doors have been locked.
If a door or the tailgate is open or not
properly shut, the doors or tailgate lock
then quickly unlock and the hazard
warning lights and indicator lights do
not flash.
Unlocking the doors
Pressing button 2 unlocks the doors
and tailgate.
The side indicator lights and hazard
warning lights flash once to indicate
that the doors have been unlocked.
BA
Note: the key buttons are inactive with
the engine running, ignition on and in
accessories position.
3
1
2
3
Driver’s responsibility when parking or stopping the vehicle
Never leave an animal, child or adult who is not self-sufficient alone on
your vehicle, even for a short time.
They may pose a risk to themselves or to others by starting the engine, \
activating equipment such as the electric windows or locking the doors.
Also, in hot and/or sunny weather, please remember that the temperature inside
the passenger compartment increases very quickly.
RISK OF DEATH OR SERIOUS INJURY.
Page 13 of 216
1.7
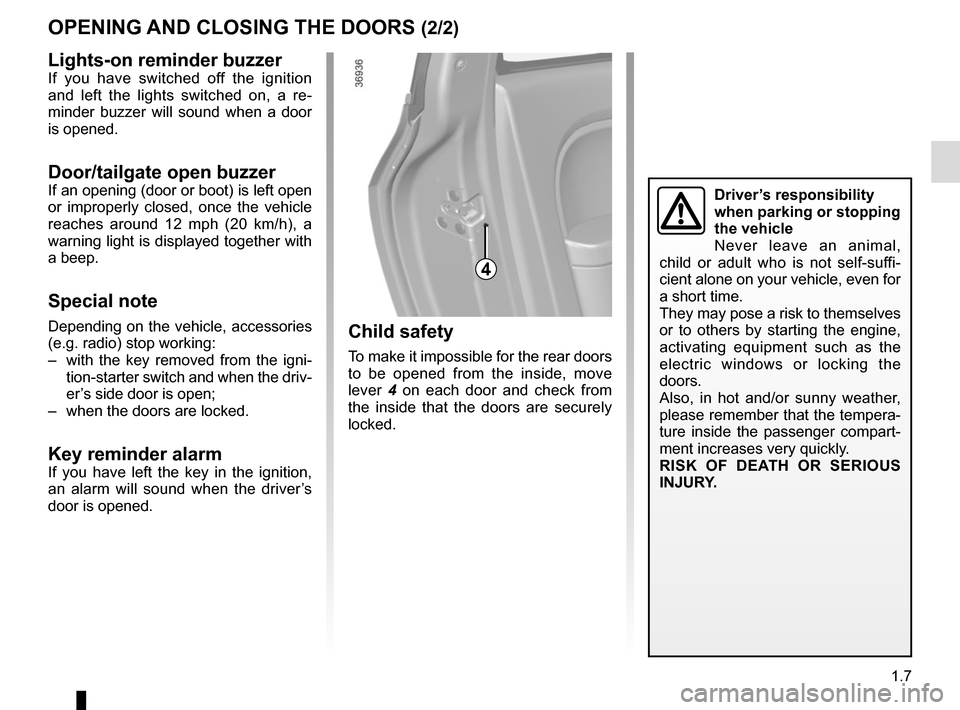
Child safety
To make it impossible for the rear doors
to be opened from the inside, move
lever 4 on each door and check from
the inside that the doors are securely
locked.
OPENING AND CLOSING THE DOORS (2/2)
Driver’s responsibility
when parking or stopping
the vehicle
Never leave an animal,
child or adult who is not self-suffi-
cient alone on your vehicle, even for
a short time.
They may pose a risk to themselves
or to others by starting the engine,
activating equipment such as the
electric windows or locking the
doors.
Also, in hot and/or sunny weather,
please remember that the tempera-
ture inside the passenger compart-
ment increases very quickly.
RISK OF DEATH OR SERIOUS
INJURY.
4
Lights-on reminder buzzerIf you have switched off the ignition
and left the lights switched on, a re-
minder buzzer will sound when a door
is opened.
Door/tailgate open buzzerIf an opening (door or boot) is left open
or improperly closed, once the vehicle
reaches around 12 mph (20 km/h), a
warning light is displayed together with
a beep.
Special note
Depending on the vehicle, accessories
(e.g. radio) stop working:
– with the key removed from the igni- tion-starter switch and when the driv-
er’s side door is open;
– when the doors are locked.
Key reminder alarmIf you have left the key in the ignition,
an alarm will sound when the driver’s
door is opened.
Page 15 of 216
1.9
LOCKING/UNLOCKING THE DOORS (2/2)
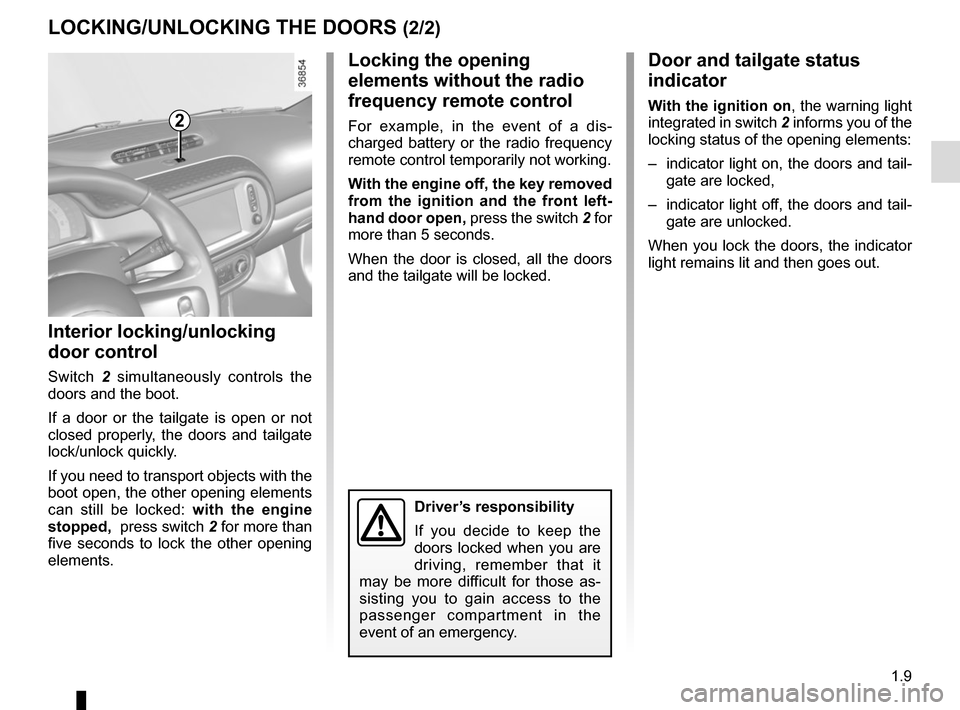
Door and tailgate status
indicator
With the ignition on, the warning light
integrated in switch 2 informs you of the
locking status of the opening elements:
– indicator light on, the doors and tail- gate are locked,
– indicator light off, the doors and tail- gate are unlocked.
When you lock the doors, the indicator
light remains lit and then goes out.
Locking the opening
elements without the radio
frequency remote control
For example, in the event of a dis-
charged battery or the radio frequency
remote control temporarily not working.
With the engine off, the key removed
from the ignition and the front left-
hand door open, press the switch 2 for
more than 5 seconds.
When the door is closed, all the doors
and the tailgate will be locked.
Interior locking/unlocking
door control
Switch 2 simultaneously controls the
doors and the boot.
If a door or the tailgate is open or not
closed properly, the doors and tailgate
lock/unlock quickly.
If you need to transport objects with the
boot open, the other opening elements
can still be locked: with the engine
stopped, press switch 2 for more than
five seconds to lock the other opening
elements.
2
Driver’s responsibility
If you decide to keep the
doors locked when you are
driving, remember that it
may be more difficult for those as-
sisting you to gain access to the
passenger compartment in the
event of an emergency.
Page 16 of 216
1.10
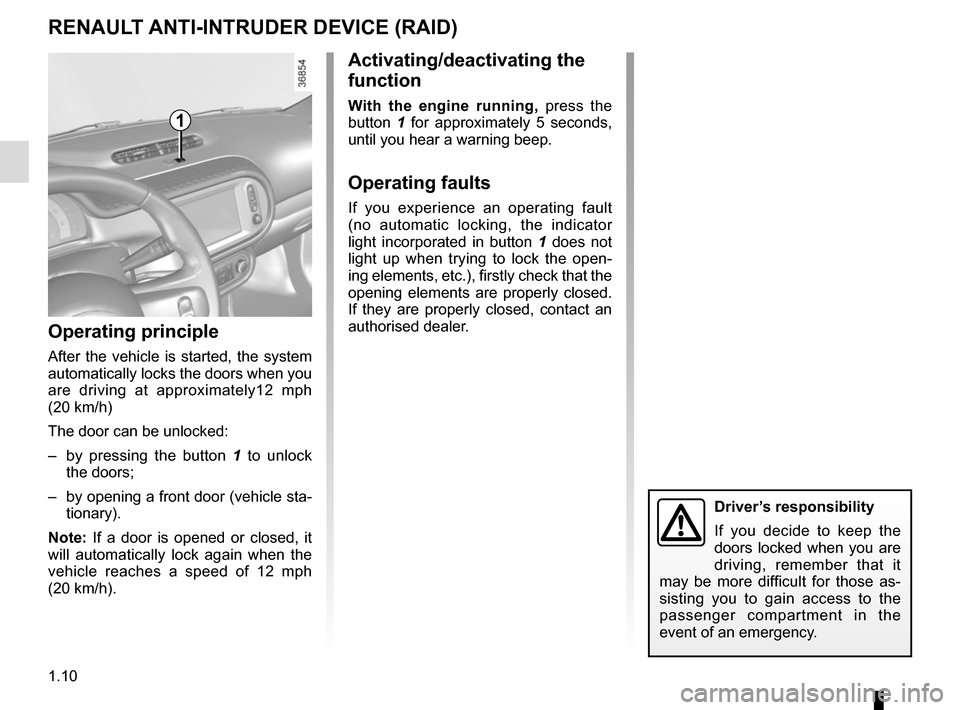
Operating principle
After the vehicle is started, the system
automatically locks the doors when you
are driving at approximately12 mph
(20 km/h)
The door can be unlocked:
– by pressing the button 1 to unlock
the doors;
– by opening a front door (vehicle sta- tionary).
Note: If a door is opened or closed, it
will automatically lock again when the
vehicle reaches a speed of 12 mph
(20 km/h).
Activating/deactivating the
function
With the engine running, press the
button 1 for approximately 5 seconds,
until you hear a warning beep.
Operating faults
If you experience an operating fault
(no automatic locking, the indicator
light incorporated in button 1 does not
light up when trying to lock the open-
ing elements, etc.), firstly check that the
opening elements are properly closed.
If they are properly closed, contact an
authorised dealer.
RENAULT ANTI-INTRUDER DEVICE (RAID)
1
Driver’s responsibility
If you decide to keep the
doors locked when you are
driving, remember that it
may be more difficult for those as-
sisting you to gain access to the
passenger compartment in the
event of an emergency.
Page 19 of 216
1.13
SEAT BELTS (2/3)
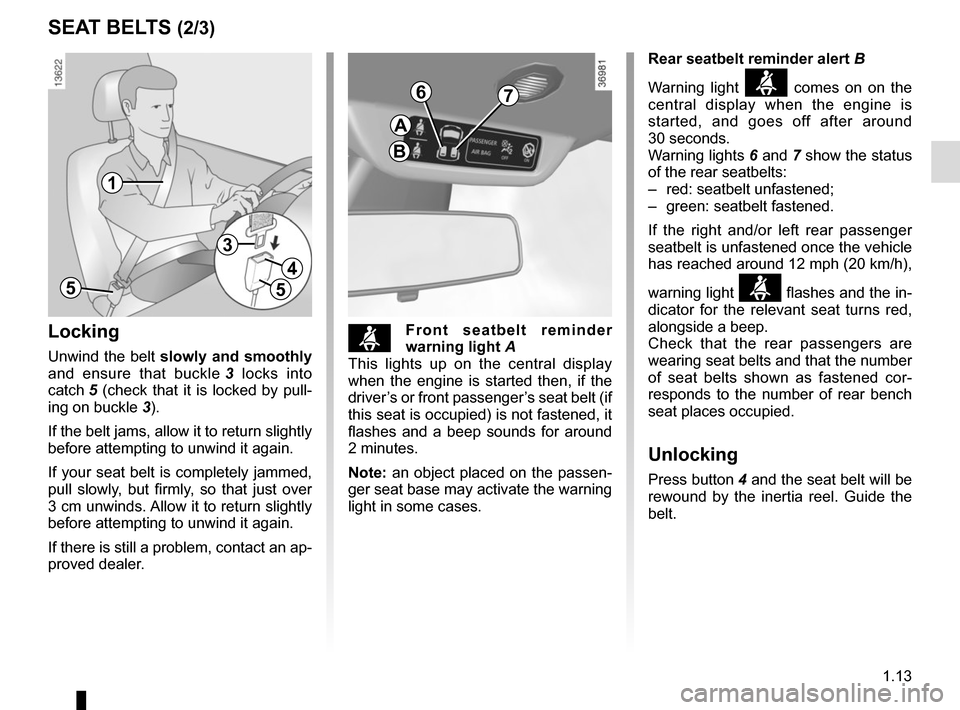
ßFront seatbelt reminder
warning light A
This lights up on the central display
when the engine is started then, if the
driver’s or front passenger’s seat belt (if
this seat is occupied) is not fastened, it
flashes and a beep sounds for around
2 minutes.
Note: an object placed on the passen-
ger seat base may activate the warning
light in some cases.Locking
Unwind the belt slowly and smoothly
and ensure that buckle 3 locks into
catch 5 (check that it is locked by pull- ing on buckle 3).
If the belt jams, allow it to return slightly
before attempting to unwind it again.
If your seat belt is completely jammed,
pull slowly, but firmly, so that just over
3 cm unwinds. Allow it to return slightly
before attempting to unwind it again.
If there is still a problem, contact an ap-
proved dealer.
1
5
3
4
5
Rear seatbelt reminder alert B
Warning light
ß comes on on the
central display when the engine is
started, and goes off after around
30 seconds.
Warning lights 6 and 7 show the status
of the rear seatbelts:
– red: seatbelt unfastened;
– green: seatbelt fastened.
If the right and/or left rear passenger
seatbelt is unfastened once the vehicle
has reached around 12 mph (20 km/h),
warning light
ß flashes and the in-
dicator for the relevant seat turns red,
alongside a beep.
Check that the rear passengers are
wearing seat belts and that the number
of seat belts shown as fastened cor-
responds to the number of rear bench
seat places occupied.
Unlocking
Press button 4 and the seat belt will be
rewound by the inertia reel. Guide the
belt.
67
A
B
Page 29 of 216
1.23
CHILD SAFETY: General information (1/2)
Carrying children
Children, and adults, must be correctly
seated and strapped in for all journeys.
The children being carried in your vehi-
cle are your responsibility.
A child is not a miniature adult. Children
are at risk of specific injuries as their
muscles and bones have not yet fin-
ished growing. The seat belt alone
would not provide suitable protection.
Use an approved child seat and ensure
you use it correctly.
A collision at 30 mph
(50 km/h) is the same as fall-
ing a distance of 10 metres.
Transporting a child without
a restraint is the equivalent of allow-
ing him or her to play on a fourth-
floor balcony without railings.
Never travel with a child held in your
arms. In the event of an accident,
you will not be able to keep hold of
the child, even if you yourself are
wearing a seat belt.
If your vehicle has been involved in
a road accident, replace the child
seat and have the seat belts and
ISOFIX anchorage points checked.
To prevent the doors being
opened, use the “Child
safety” device (refer to the
information on “Opening
and closing the doors” in Section 1).
Driver’s responsibility
when parking or stopping
the vehicle
Never leave an animal,
child or adult who is not self-suffi-
cient alone on your vehicle, even for
a short time.
They may pose a risk to themselves
or to others by starting the engine,
activating equipment such as the
electric windows or by locking the
doors.
Also, in hot and/or sunny weather,
please remember that the tempera-
ture inside the passenger compart-
ment increases very quickly.
RISK OF DEATH OR SERIOUS
INJURY.
Page 30 of 216
1.24
CHILD SAFETY: General information (2/2)
Using a child seat
The level of protection offered by the
child seat depends on its ability to re-
strain your child and on its installation.
Incorrect installation compromises the
protection it offers the child in the event
of harsh braking or an impact.
Before purchasing a child seat, check
that it complies with the regulations for
the country you are in and that it can
be fitted in your vehicle. Consult an ap-
proved dealer to find out which seats
are recommended for your vehicle.
Before fitting a child seat, read the
manual and respect its instructions. If
you experience any difficulties during
installation, contact the manufacturer
of the equipment. Keep the instructions
with the seat.Set a good example by always fas-
tening your seat belt and teaching
your child:
– to strap themselves in correctly;
– to always get in and out of the car at the kerb, away from busy traf-
fic.
Do not use a second-hand child
seat or one without an instruction
manual.
Check that there are no objects in
the vicinity of the child seat which
could impede its operation.
Never leave a child unat-
tended in the vehicle.
Check that your child is
always strapped in and that
the belt or safety harness used is
correctly set and adjusted. Avoid
wearing bulky clothing which could
cause the belts to slacken.
Never let your child put their head or
arms out of the window.
Check that the child is in the correct
position for the entire journey, espe-
cially if asleep.
Page 38 of 216
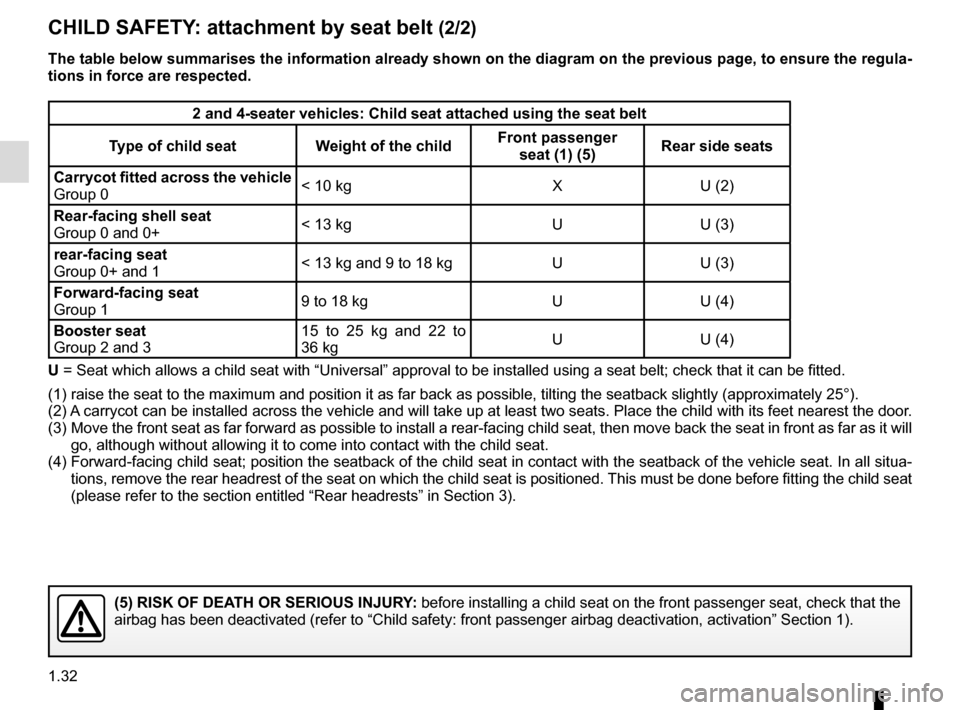
1.32
CHILD SAFETY: attachment by seat belt (2/2)
The table below summarises the information already shown on the diagram \
on the previous page, to ensure the regula-
tions in force are respected.
2 and 4-seater vehicles: Child seat attached using the seat belt
Type of child seat Weight of the child Front passenger
seat (1) (5) Rear side seats
Carrycot fitted across the vehicle
Group 0 < 10 kg X U (2)
Rear-facing shell seat
Group 0 and 0+ < 13 kg U U (3)
rear-facing seat
Group 0+ and 1 < 13 kg and 9 to 18 kg U U (3)
Forward-facing seat
Group 1 9 to 18 kg U U (4)
Booster seat
Group 2 and 3 15 to 25 kg and 22 to
36 kg
U U (4)
U = Seat which allows a child seat with “Universal” approval to be ins\
talled using a seat belt; check that it can be fitted.
(1) raise the seat to the maximum and position it as far back as possi\
ble, tilting the seatback slightly (approximately 25°).
(2) A carrycot can be installed across the vehicle and will take up at least \
two seats. Place the child with its feet nearest the d oor.
(3) Move the front seat as far forward as possible to install a rear-facing \
child seat, then move back the seat in front as far as it will
go, although without allowing it to come into contact with the child sea\
t.
(4) Forward-facing child seat; position the seatback of the child seat in co\
ntact with the seatback of the vehicle seat. In all sit ua-
tions, remove the rear headrest of the seat on which the child seat is p\
ositioned. This must be done before fitting the child s eat
(please refer to the section entitled “Rear headrests” in Section\
3).
(5) RISK OF DEATH OR SERIOUS INJURY: before installing a child seat on the front passenger seat, check that \
the
airbag has been deactivated (refer to “Child safety: front passenger\
airbag deactivation, activation” Section 1).
Page 40 of 216
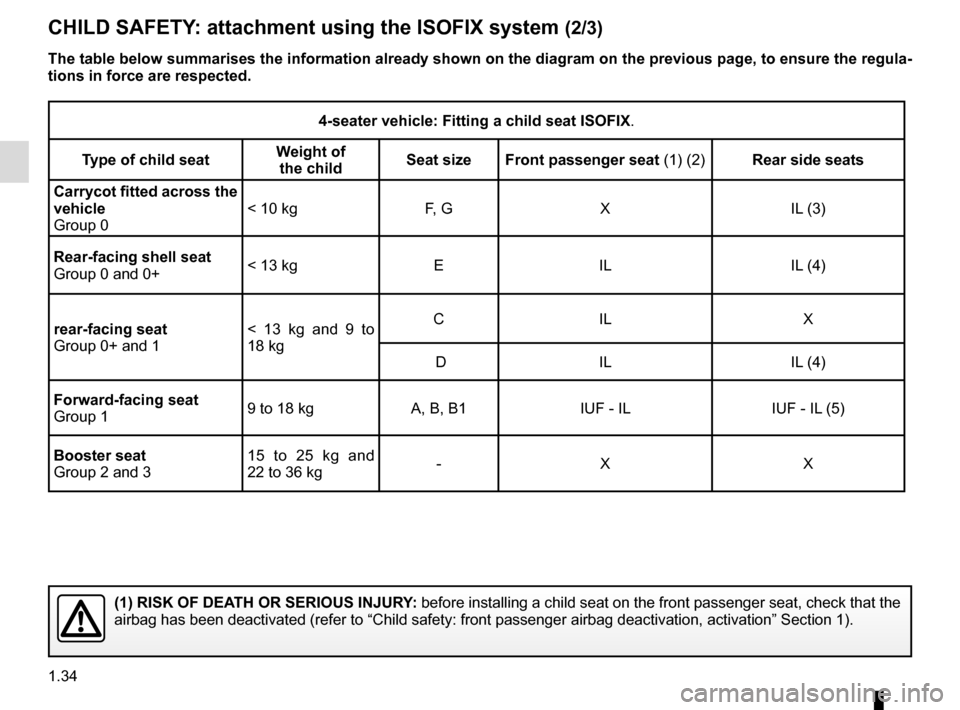
1.34
CHILD SAFETY: attachment using the ISOFIX system (2/3)
The table below summarises the information already shown on the diagram \
on the previous page, to ensure the regula-
tions in force are respected.
4-seater vehicle: Fitting a child seat ISOFIX.
Type of child seat Weight of
the child Seat size Front passenger seat (1) (2)
Rear side seats
Carrycot fitted across the
vehicle
Group 0 < 10 kg
F, GX IL (3)
Rear-facing shell seat
Group 0 and 0+ < 13 kg
EIL IL (4)
rear-facing seat
Group 0+ and 1 < 13 kg and 9 to
18 kgCI
L X
D IL IL (4)
Forward-facing seat
Group 1 9 to 18 kg
A, B, B1 IUF - IL IUF - IL (5)
Booster seat
Group 2 and 3 15 to 25 kg and
22 to 36 kg
-X X
(1) RISK OF DEATH OR SERIOUS INJURY: before installing a child seat on the front passenger seat, check that \
the
airbag has been deactivated (refer to “Child safety: front passenger\
airbag deactivation, activation” Section 1).