RENAULT ZOE 2017 1.G Owners Manual
Manufacturer: RENAULT, Model Year: 2017, Model line: ZOE, Model: RENAULT ZOE 2017 1.GPages: 220, PDF Size: 4.07 MB
Page 131 of 220
3.5
3
Deactivating the air-
conditioning
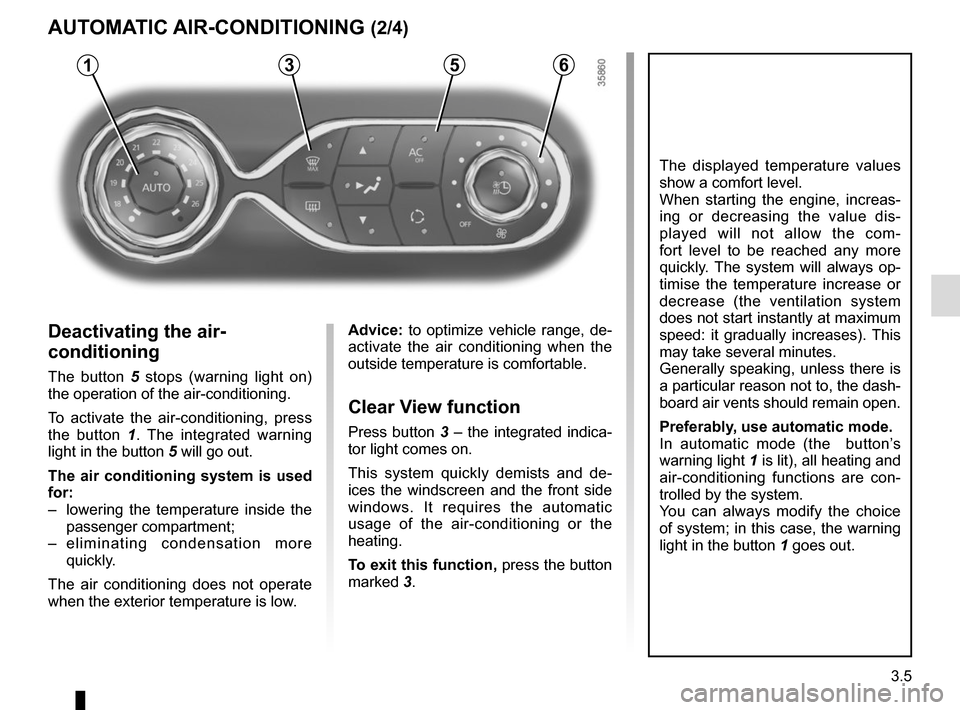
The button 5 stops (warning light on)
the operation of the air-conditioning.
To activate the air-conditioning, press
the button 1 . The integrated warning
light in the button 5 will go out.
The air conditioning system is used
for:
– lowering the temperature inside the passenger compartment;
– eliminating condensation more quickly.
The air conditioning does not operate
when the exterior temperature is low.
5
AUTOMATIC AIR-CONDITIONING (2/4)
The displayed temperature values
show a comfort level.
When starting the engine, increas-
ing or decreasing the value dis-
played will not allow the com-
fort level to be reached any more
quickly. The system will always op-
timise the temperature increase or
decrease (the ventilation system
does not start instantly at maximum
speed: it gradually increases). This
may take several minutes.
Generally speaking, unless there is
a particular reason not to, the dash-
board air vents should remain open.
Preferably, use automatic mode.
In automatic mode (the button’s
warning light 1 is lit), all heating and
air-conditioning functions are con-
trolled by the system.
You can always modify the choice
of system; in this case, the warning
light in the button 1 goes out.
Advice: to optimize vehicle range, de-
activate the air conditioning when the
outside temperature is comfortable.
Clear View function
Press button 3 – the integrated indica-
tor light comes on.
This system quickly demists and de-
ices the windscreen and the front side
windows. It requires the automatic
usage of the air-conditioning or the
heating.
To exit this function, press the button
marked 3.
61
Page 132 of 220
3.6
AUTOMATIC AIR-CONDITIONING (3/4)
Adjusting the ventilation
speed
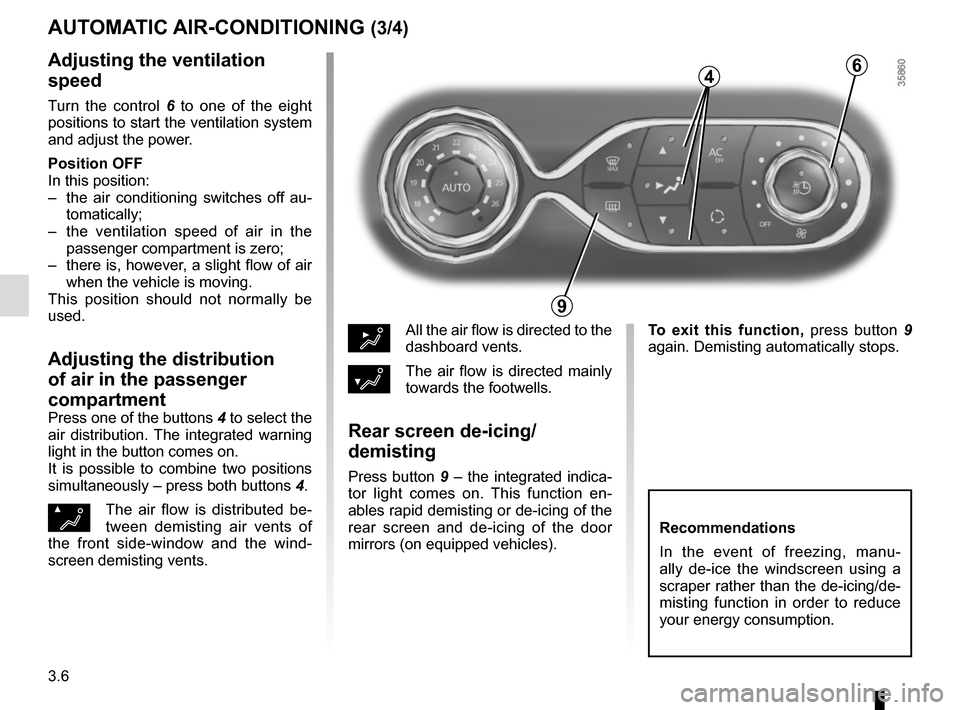
Turn the control 6 to one of the eight
positions to start the ventilation system
and adjust the power.
Position OFF
In this position:
– the air conditioning switches off au- tomatically;
– the ventilation speed of air in the passenger compartment is zero;
– there is, however, a slight flow of air when the vehicle is moving.
This position should not normally be
used.
Adjusting the distribution
of air in the passenger
compartment
Press one of the buttons 4 to select the
air distribution. The integrated warning
light in the button comes on.
It is possible to combine two positions
simultaneously – press both buttons 4.
ØThe air flow is distributed be-
tween demisting air vents of
the front side-window and the wind-
screen demisting vents.
½All the air flow is directed to the
dashboard vents.
¿The air flow is directed mainly
towards the footwells.
Rear screen de-icing/
demisting
Press button 9 – the integrated indica-
tor light comes on. This function en-
ables rapid demisting or de-icing of the
rear screen and de-icing of the door
mirrors (on equipped vehicles).
9
6
Recommendations
In the event of freezing, manu-
ally de-ice the windscreen using a
scraper rather than the de-icing/de-
misting function in order to reduce
your energy consumption.
To exit this function, press button 9
again. Demisting automatically stops.
4
Page 133 of 220
3.7
Depending on the vehicle, the system
determines whether or not air recircula-
tion is used, based on the quality of the
outside air.
The air quality is confirmed by the ap-
pearance of one of the following warn-
ing lights on the multimedia display (for
the cleanest and the least clean air re-
spectively):
.
AUTOMATIC AIR-CONDITIONING (4/4)
Air recirculation (isolation of
the passenger compartment)
K
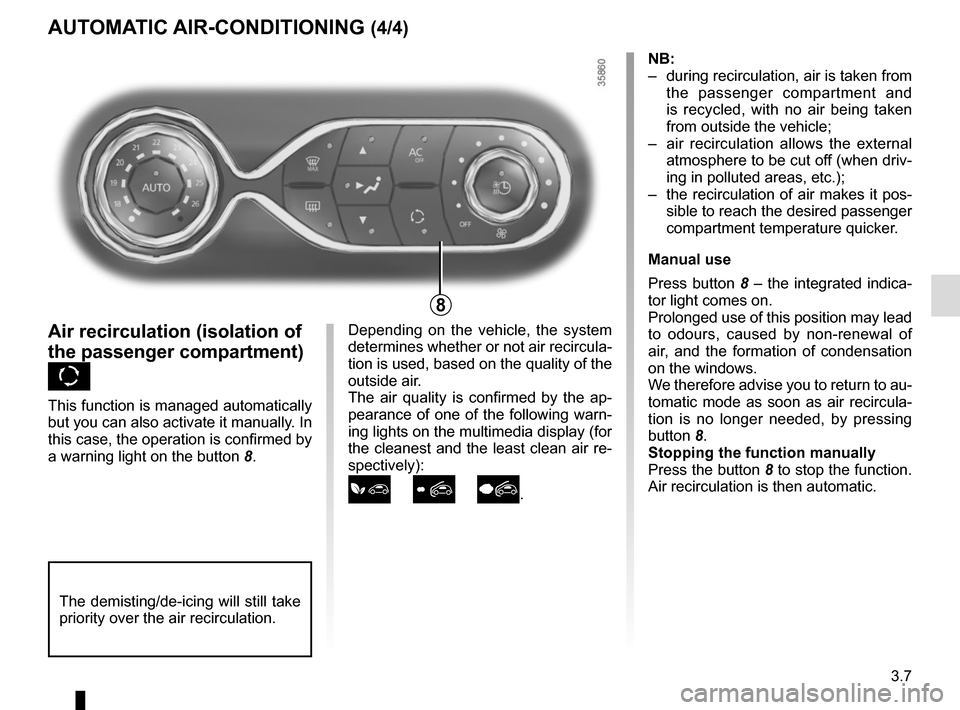
This function is managed automatically
but you can also activate it manually. In
this case, the operation is confirmed by
a warning light on the button 8. NB:
– during recirculation, air is taken from
the passenger compartment and
is recycled, with no air being taken
from outside the vehicle;
– air recirculation allows the external atmosphere to be cut off (when driv-
ing in polluted areas, etc.);
– the recirculation of air makes it pos- sible to reach the desired passenger
compartment temperature quicker.
Manual use
Press button 8 – the integrated indica-
tor light comes on.
Prolonged use of this position may lead
to odours, caused by non-renewal of
air, and the formation of condensation
on the windows.
We therefore advise you to return to au-
tomatic mode as soon as air recircula-
tion is no longer needed, by pressing
button 8.
Stopping the function manually
Press the button 8 to stop the function.
Air recirculation is then automatic.
8
The demisting/de-icing will still take
priority over the air recirculation.
Page 134 of 220
3.8
AIR CONDITIONING: remote activation
The air-conditioning can be activated
using the card RENAULT or by the con-
nected services.
This function enables you to bring your
vehicle to a comfortable temperature
before using it.
1
Operating condition
– the engine must be switched off;
– the traction battery charge level must be greater than 25% or, depending
on the vehicle, 45%
Activating the function
It is carried out by:
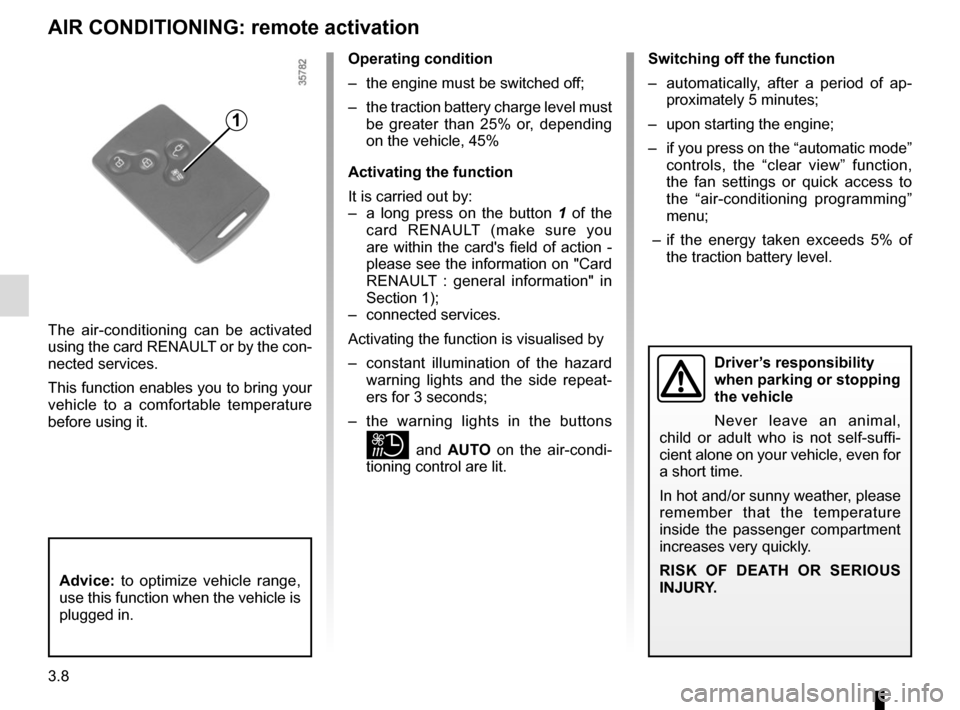
– a long press on the button 1 of the
card RENAULT (make sure you
are within the card's field of action -
please see the information on "Card
RENAULT : general information" in
Section 1);
– connected services.
Activating the function is visualised by
– constant illumination of the hazard warning lights and the side repeat-
ers for 3 seconds;
– the warning lights in the buttons
and AUTO on the air-condi-
tioning control are lit. Switching off the function
– automatically, after a period of ap-
proximately 5 minutes;
– upon starting the engine;
– if you press on the “automatic mode” controls, the “clear view” function,
the fan settings or quick access to
the “air-conditioning programming”
menu;
– if the energy taken exceeds 5% of the traction battery level.
Driver’s responsibility
when parking or stopping
the vehicle
Never leave an animal,
child or adult who is not self-suffi-
cient alone on your vehicle, even for
a short time.
In hot and/or sunny weather, please
remember that the temperature
inside the passenger compartment
increases very quickly.
RISK OF DEATH OR SERIOUS
INJURY.
Advice: to optimize vehicle range,
use this function when the vehicle is
plugged in.
Page 135 of 220
3.9
AIR CONDITIONING: programming (1/4)
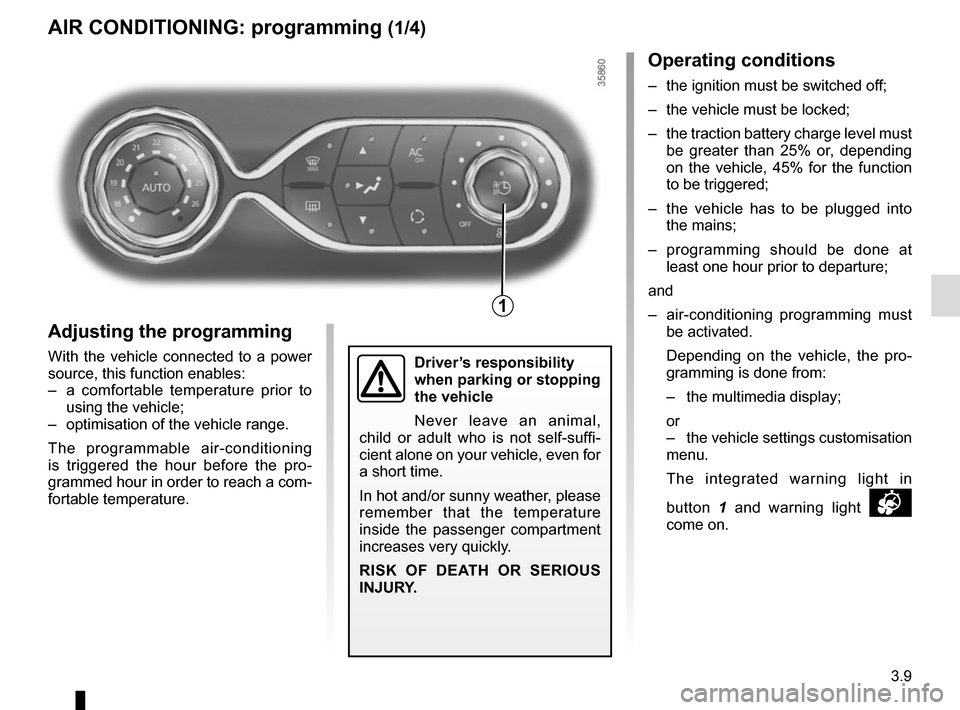
Adjusting the programming
With the vehicle connected to a power
source, this function enables:
– a comfortable temperature prior to using the vehicle;
– optimisation of the vehicle range.
The programmable air-conditioning
is triggered the hour before the pro-
grammed hour in order to reach a com-
fortable temperature.
1
Driver’s responsibility
when parking or stopping
the vehicle
Never leave an animal,
child or adult who is not self-suffi-
cient alone on your vehicle, even for
a short time.
In hot and/or sunny weather, please
remember that the temperature
inside the passenger compartment
increases very quickly.
RISK OF DEATH OR SERIOUS
INJURY.
Operating conditions
– the ignition must be switched off;
– the vehicle must be locked;
– the traction battery charge level must be greater than 25% or, depending
on the vehicle, 45% for the function
to be triggered;
– the vehicle has to be plugged into the mains;
– programming should be done at least one hour prior to departure;
and
– air-conditioning programming must be activated.
Depending on the vehicle, the pro- gramming is done from:
– the multimedia display;
or
– the vehicle settings customisation menu.
The integrated warning light in
button 1 and warning light
come on.
Page 136 of 220
3.10
AIR CONDITIONING: programming (2/4)
The two programmed times cannot
be activated simultaneously.
A
12
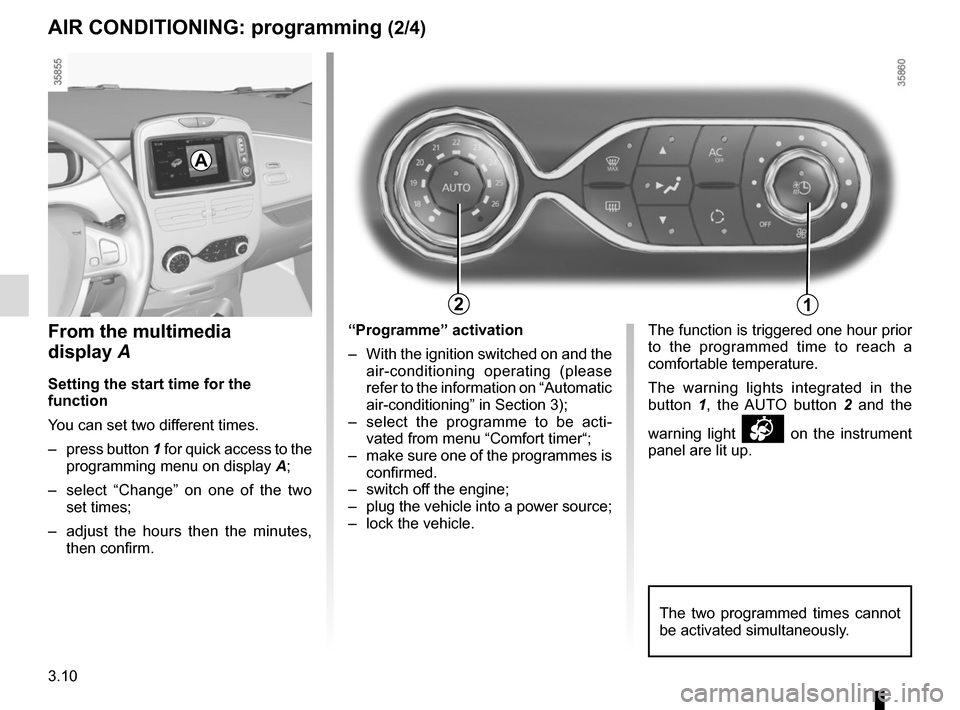
From the multimedia
display A
Setting the start time for the
function
You can set two different times.
– press button 1 for quick access to the
programming menu on display A;
– select “Change” on one of the two set times;
– adjust the hours then the minutes, then confirm. The function is triggered one hour prior
to the programmed time to reach a
comfortable temperature.
The warning lights integrated in the
button
1, the AUTO button 2 and the
warning light
on the instrument
panel are lit up.
“Programme” activation
– With the ignition switched on and the
air-conditioning operating (please
refer to the information on “Automatic
air-conditioning” in Section 3);
– select the programme to be acti- vated from menu “Comfort timer“;
– make sure one of the programmes is confirmed.
– switch off the engine;
– plug the vehicle into a power source;
– lock the vehicle.
Page 137 of 220
3.11
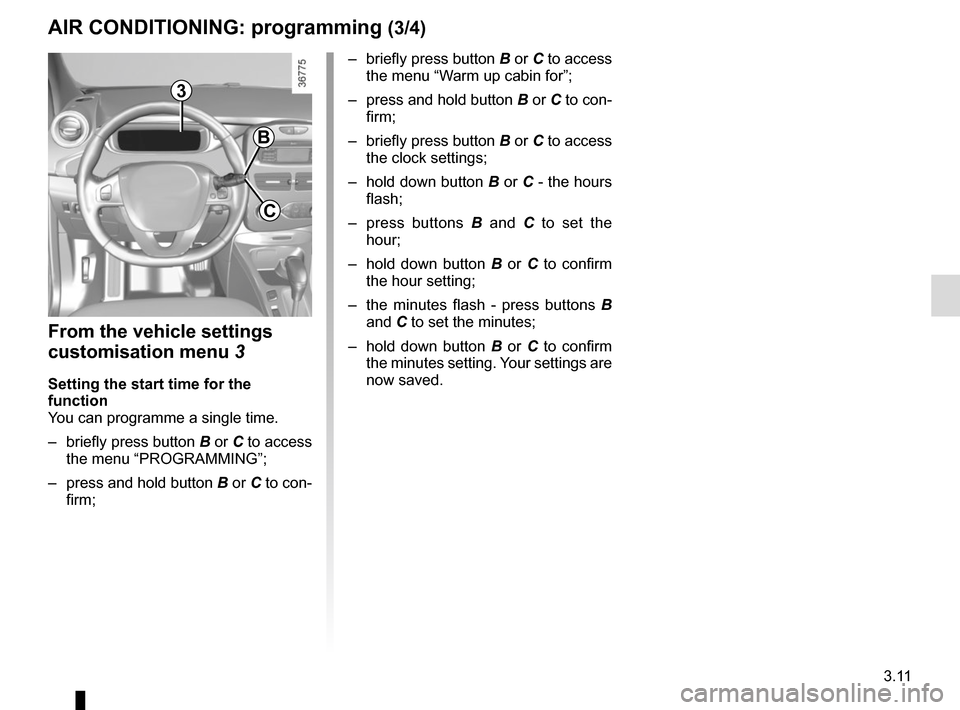
From the vehicle settings
customisation menu 3
Setting the start time for the
function
You can programme a single time.
– briefly press button B or C to access
the menu “PROGRAMMING”;
– press and hold button B or C to con-
firm; – briefly press button B or C to access
the menu “Warm up cabin for”;
– press and hold button B or C to con-
firm;
– briefly press button B or C to access the clock settings;
– hold down button B or C - the hours
flash;
– press buttons B and C to set the
hour;
– hold down button B or C to confirm
the hour setting;
– the minutes flash - press buttons B and C to set the minutes;
– hold down button B or C to confirm
the minutes setting. Your settings are
now saved.
3
B
C
AIR CONDITIONING: programming (3/4)
Page 138 of 220

3.12
Stopping the programmed air
conditioning
The air conditioning stops automati-
cally around ten minutes after the set
end time.
However, the function can be deacti-
vated if:
– the charging socket is disconnected;
– the “Remote Activation” function is activated – please see the informa-
tion on “Air conditioning: remote acti-
vation” in Section 2;
– the traction battery charging level is lower than 15% or, depending on the
vehicle, 30%Driver’s responsibility
when parking or stopping
the vehicle
Never leave an animal,
child or adult who is not self-suffi-
cient alone on your vehicle, even for
a short time.
In hot and/or sunny weather, please
remember that the temperature
inside the passenger compartment
increases very quickly.
RISK OF DEATH OR SERIOUS
INJURY.
AIR CONDITIONING: programming (4/4)
Connected services
The air conditioning can also be acti-
vated using the connected services.
For more information regarding the op-
erating conditions, please contact an
authorised dealer.
“Programme” activation
– With the ignition switched on and the air-conditioning operating (please
refer to the information on “Automatic
air-conditioning” in Section 3);
– press the button 1.
The function is triggered one hour prior
to the programmed time to reach a
comfortable temperature.
The warning lights integrated in the
button 1, the AUTO button 2 and the
warning light
on the instrument
panel are lit up.
12
Page 139 of 220
3.13
1
2
FRAGRANCE DIFFUSER.
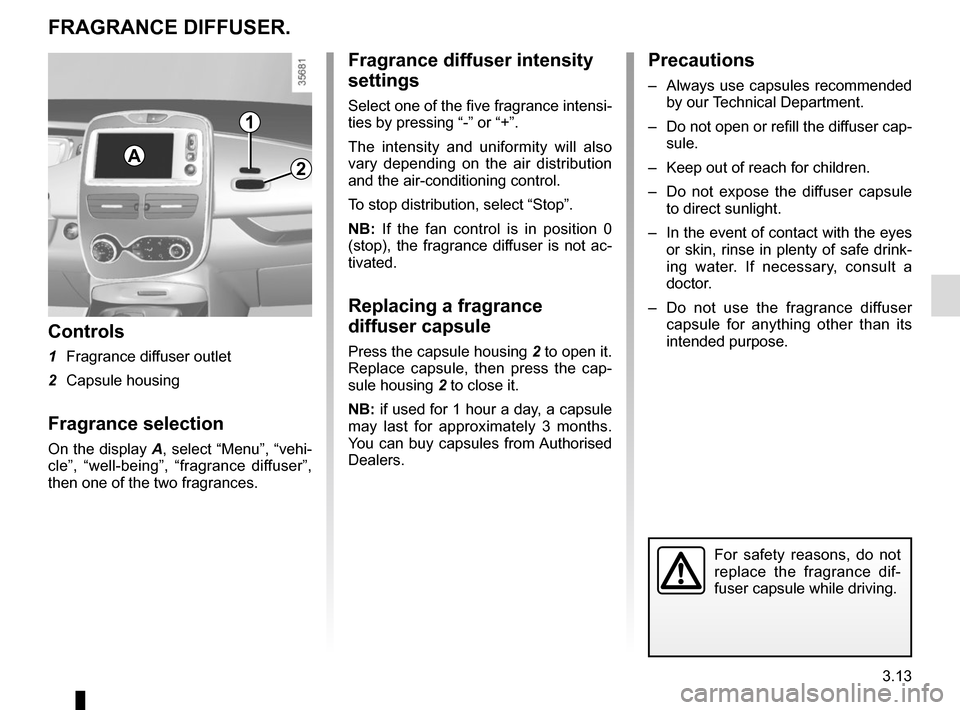
Controls
1 Fragrance diffuser outlet
2 Capsule housing
Fragrance selection
On the display A, select “Menu”, “vehi-
cle”, “well-being”, “fragrance diffuser”,
then one of the two fragrances.
Fragrance diffuser intensity
settings
Select one of the five fragrance intensi-
ties by pressing “-” or “+”.
The intensity and uniformity will also
vary depending on the air distribution
and the air-conditioning control.
To stop distribution, select “Stop”.
NB: If the fan control is in position 0
(stop), the fragrance diffuser is not ac-
tivated.
Replacing a fragrance
diffuser capsule
Press the capsule housing 2 to open it.
Replace capsule, then press the cap-
sule housing 2 to close it.
NB: if used for 1 hour a day, a capsule
may last for approximately 3 months.
You can buy capsules from Authorised
Dealers.
Precautions
– Always use capsules recommended by our Technical Department.
– Do not open or refill the diffuser cap- sule.
– Keep out of reach for children.
– Do not expose the diffuser capsule to direct sunlight.
– In the event of contact with the eyes or skin, rinse in plenty of safe drink-
ing water. If necessary, consult a
doctor.
– Do not use the fragrance diffuser capsule for anything other than its
intended purpose.
For safety reasons, do not
replace the fragrance dif-
fuser capsule while driving.
A
Page 140 of 220
3.14
AIR IONIZER
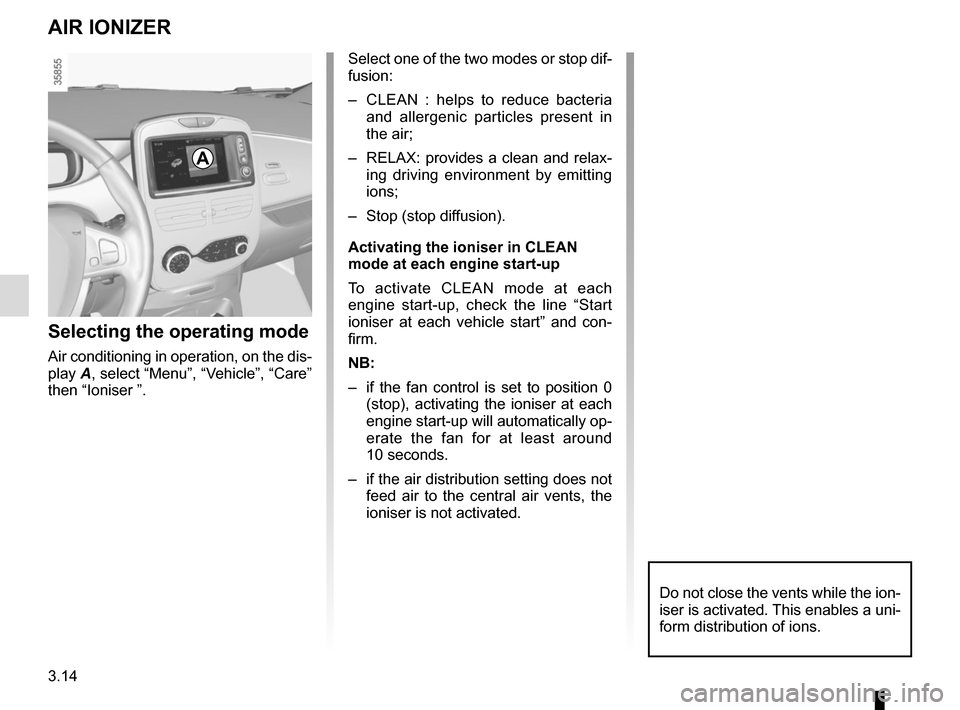
Selecting the operating mode
Air conditioning in operation, on the dis-
play A, select “Menu”, “Vehicle”, “Care”
then “Ioniser ”.
Select one of the two modes or stop dif-
fusion:
– CLEAN : helps to reduce bacteria and allergenic particles present in
the air;
– RELAX: provides a clean and relax- ing driving environment by emitting
ions;
– Stop (stop diffusion).
Activating the ioniser in CLEAN
mode at each engine start-up
To activate CLEAN mode at each
engine start-up, check the line “Start
ioniser at each vehicle start” and con-
firm.
NB:
– if the fan control is set to position 0 (stop), activating the ioniser at each
engine start-up will automatically op-
erate the fan for at least around
10 seconds.
– if the air distribution setting does not feed air to the central air vents, the
ioniser is not activated.
Do not close the vents while the ion-
iser is activated. This enables a uni-
form distribution of ions.
A