SAAB 9-3 2005 Owners Manual
Manufacturer: SAAB, Model Year: 2005, Model line: 9-3, Model: SAAB 9-3 2005Pages: 292, PDF Size: 23 MB
Page 131 of 292
129 Interior equipment
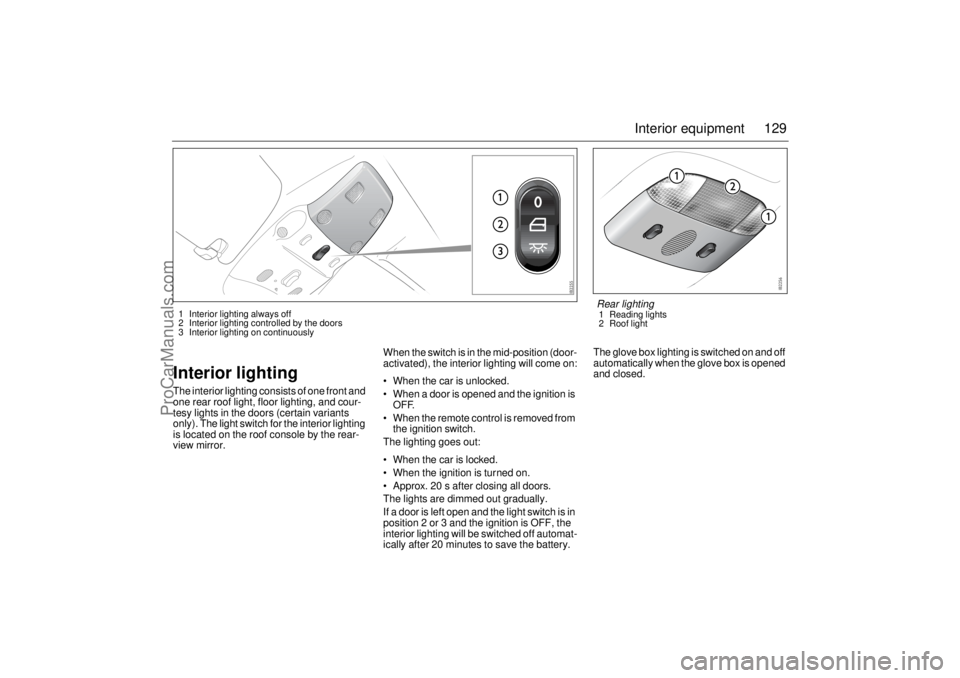
Interior lightingThe interior lighting consists of one front and
one rear roof light, floor lighting, and cour-
tesy lights in the doors (certain variants
only). The light switch for the interior lighting
is located on the roof console by the rear-
view mirror.When the switch is in the mid-position (door-
activated), the interior lighting will come on:
When the car is unlocked.
When a door is opened and the ignition is
OFF.
When the remote control is removed from
the ignition switch.
The lighting goes out:
When the car is locked.
When the ignition is turned on.
Approx. 20 s after closing all doors.
The lights are dimmed out gradually.
If a door is left open and the light switch is in
position 2 or 3 and the ignition is OFF, the
interior lighting will be switched off automat-
ically after 20 minutes to save the battery.The glove box lighting is switched on and off
automatically when the glove box is opened
and closed.1 Interior lighting always off
2 Interior lighting controlled by the doors
3 Interior lighting on continuously
Rear lighting1 Reading lights
2 Roof light
ProCarManuals.com
Page 132 of 292
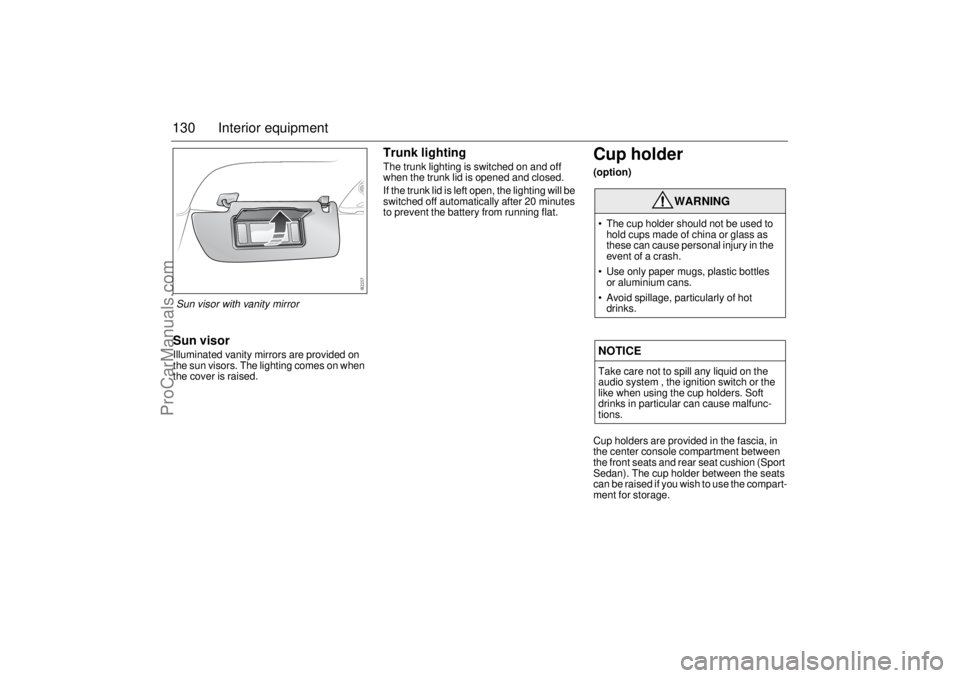
130 Interior equipmentSun visorIlluminated vanity mirrors are provided on
the sun visors. The lighting comes on when
the cover is raised.
Trunk lightingThe trunk lighting is switched on and off
when the trunk lid is opened and closed.
If the trunk lid is left open, the lighting will be
switched off automatically after 20 minutes
to prevent the battery from running flat.
Cup holder(option)
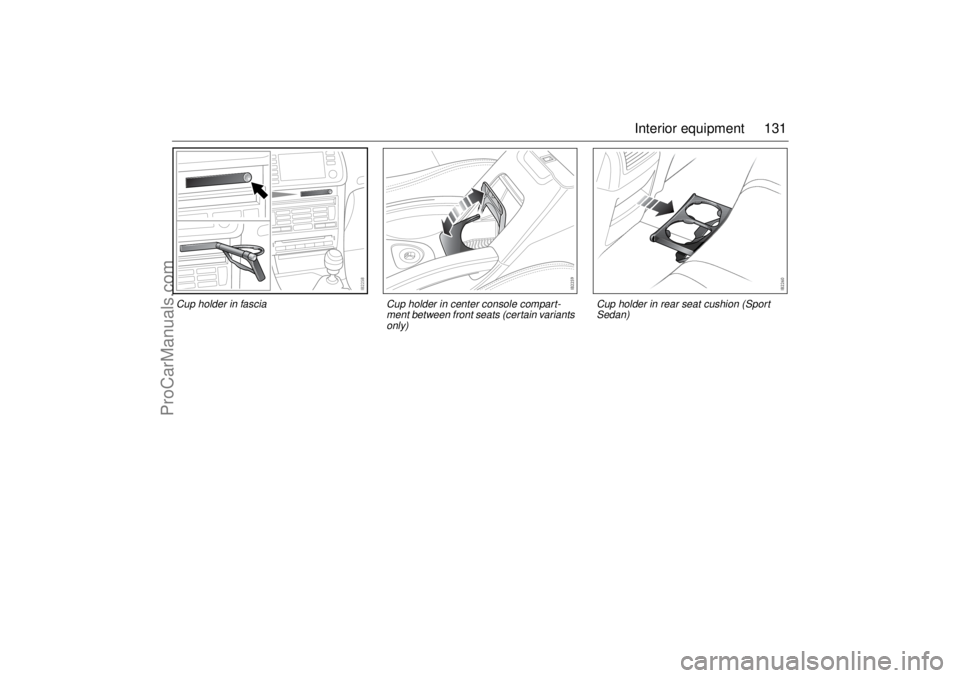
Cup holders are provided in the fascia, in
the center console compartment between
the front seats and rear seat cushion (Sport
Sedan). The cup holder between the seats
can be raised if you wish to use the compart-
ment for storage.
WARNING
The cup holder should not be used to
hold cups made of china or glass as
these can cause personal injury in the
event of a crash.
Use only paper mugs, plastic bottles
or aluminium cans.
Avoid spillage, particularly of hot
drinks.NOTICETake care not to spill any liquid on the
audio system , the ignition switch or the
like when using the cup holders. Soft
drinks in particular can cause malfunc-
tions.
Sun visor with vanity mirror
ProCarManuals.com
Page 133 of 292
131 Interior equipment
Cup holder in fascia
Cup holder in center console compart-
ment between front seats (certain variants
only)
Cup holder in rear seat cushion (Sport
Sedan)
ProCarManuals.com
Page 134 of 292
132 Interior equipmentPower Outlet(if equipped)
You can use the electrical socket in the stor-
age compartment under the armrest
between the front seats to charge a mobile
phone, for example. There is a recess on
each side of the compartment which will
accept a lead so that you can close the lid
without damaging the charger lead.
Storage compartmentsThere are additional storage compartments
in the rear seat armrest, below the front ash-
tray and in the doors.
WARNING
The maximum output of the cigarette
lighter socket is 240 W (20 A). The rating
of the socket in the compartment between
the seats is the same. Overloading can
result in melting or even fire.
WARNING
The glove box must be closed while trav-
elling. An open glove box door could
cause personal injury in the event of a
crash.
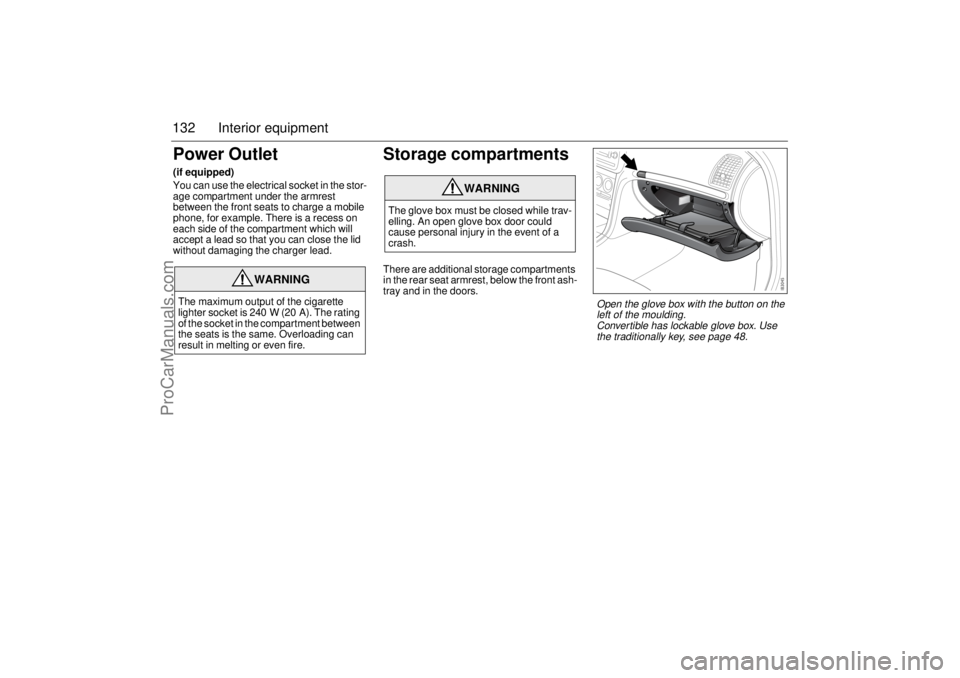
Open the glove box with the button on the
left of the moulding.
Convertible has lockable glove box. Use
the traditionally key, see page 48.
ProCarManuals.com
Page 135 of 292
133 Interior equipment
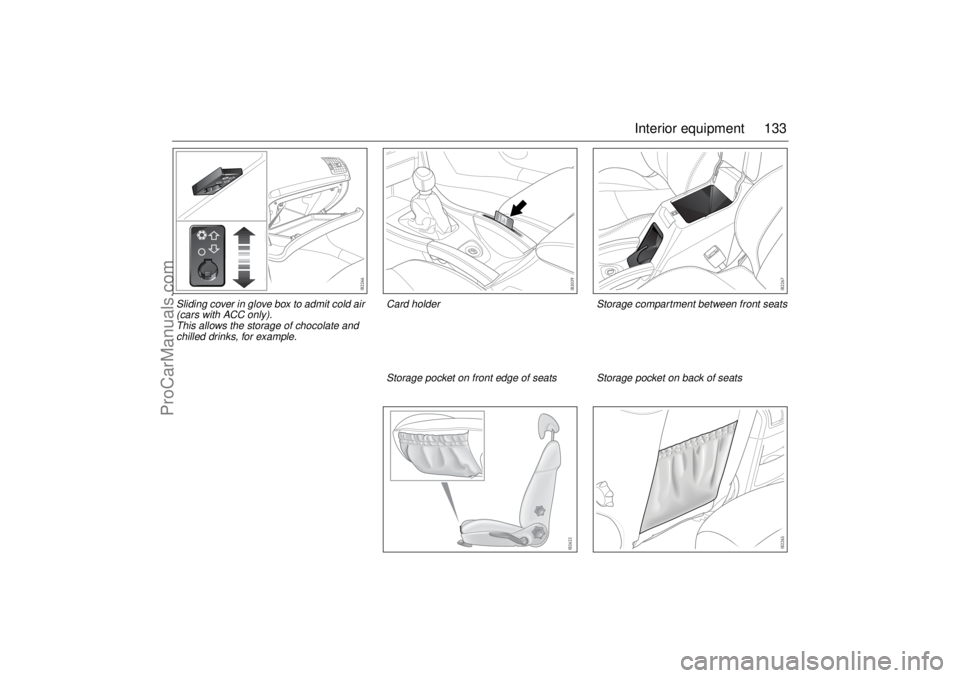
Sliding cover in glove box to admit cold air
(cars with ACC only).
This allows the storage of chocolate and
chilled drinks, for example.
Storage compartment between front seats
Storage pocket on front edge of seats
Storage pocket on back of seats
Card holder
ProCarManuals.com
Page 136 of 292
134 Interior equipmentRearview mirrorsDoor mirrorsTo adjust
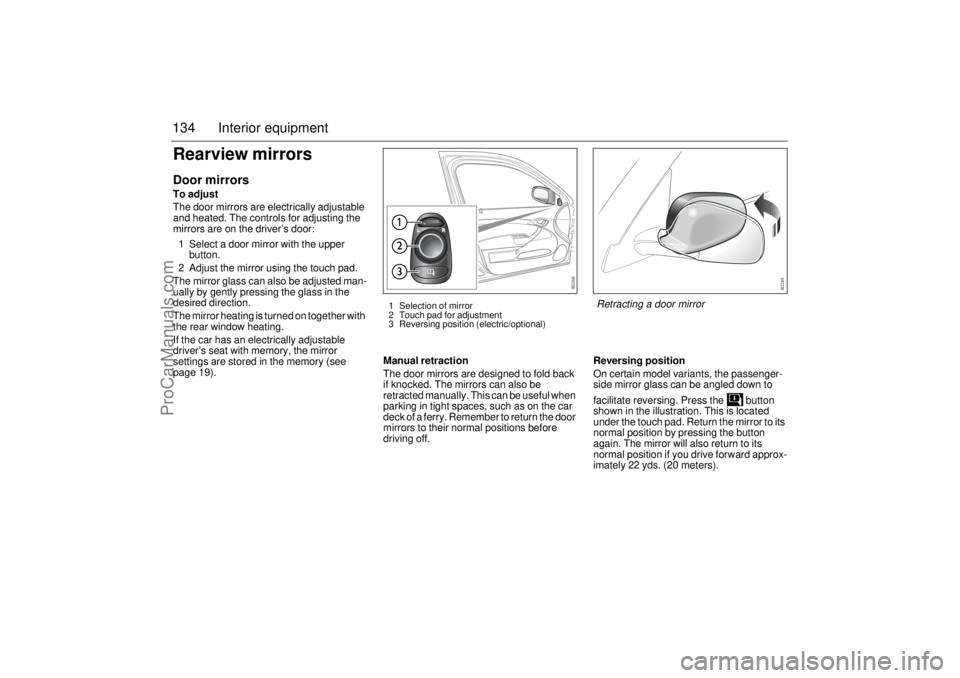
The door mirrors are electrically adjustable
and heated. The controls for adjusting the
mirrors are on the driver’s door:
1 Select a door mirror with the upper
button.
2 Adjust the mirror using the touch pad.
The mirror glass can also be adjusted man-
ually by gently pressing the glass in the
desired direction.
The mirror heating is turned on together with
the rear window heating.
If the car has an electrically adjustable
driver’s seat with memory, the mirror
settings are stored in the memory (see
page 19).Manual retraction
The door mirrors are designed to fold back
if knocked. The mirrors can also be
retracted manually. This can be useful when
parking in tight spaces, such as on the car
deck of a ferry. Remember to return the door
mirrors to their normal positions before
driving off.Reversing position
On certain model variants, the passenger-
side mirror glass can be angled down to
facilitate reversing. Press the button
shown in the illustration. This is located
under the touch pad. Return the mirror to its
normal position by pressing the button
again. The mirror will also return to its
normal position if you drive forward approx-
imately 22 yds. (20 meters).
1 Selection of mirror
2 Touch pad for adjustment
3 Reversing position (electric/optional)
Retracting a door mirror
ProCarManuals.com
Page 137 of 292
135 Interior equipment
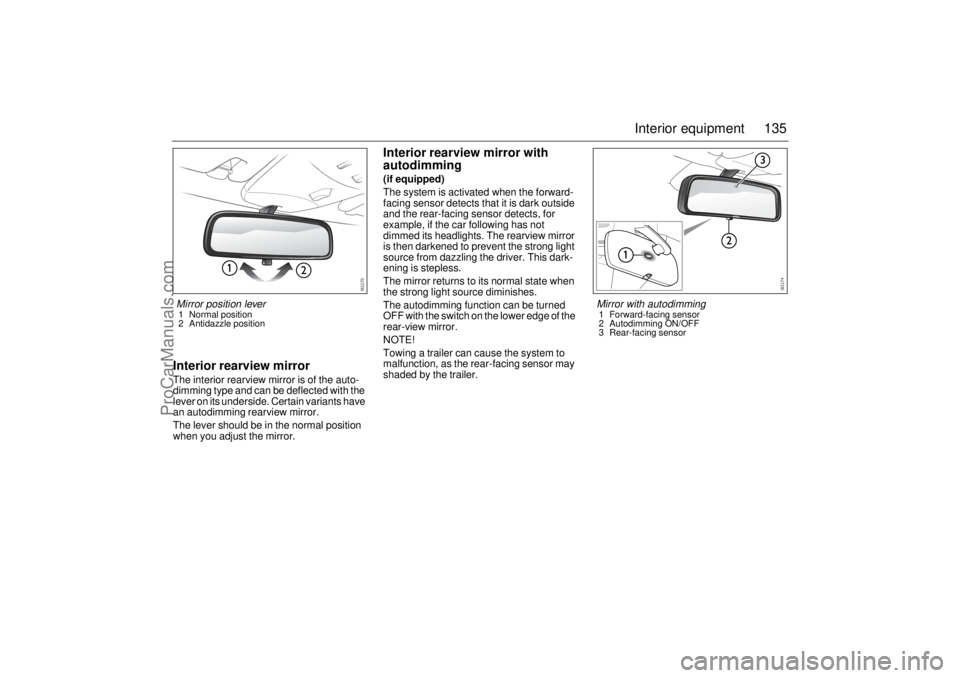
Interior rearview mirrorThe interior rearview mirror is of the auto-
dimming type and can be deflected with the
lever on its underside. Certain variants have
an autodimming rearview mirror.
The lever should be in the normal position
when you adjust the mirror.
Interior rearview mirror with
autodimming(if equipped)
The system is activated when the forward-
facing sensor detects that it is dark outside
and the rear-facing sensor detects, for
example, if the car following has not
dimmed its headlights. The rearview mirror
is then darkened to prevent the strong light
source from dazzling the driver. This dark-
ening is stepless.
The mirror returns to its normal state when
the strong light source diminishes.
The autodimming function can be turned
OFF with the switch on the lower edge of the
rear-view mirror.
NOTE!
Towing a trailer can cause the system to
malfunction, as the rear-facing sensor may
shaded by the trailer.
Mirror position lever1 Normal position
2 Antidazzle position
Mirror with autodimming1 Forward-facing sensor
2 Autodimming ON/OFF
3 Rear-facing sensor
ProCarManuals.com
Page 138 of 292
136 Interior equipmentInterior rearview mirror with
garage opener, autodimming
function and compass(if equipped
Retain your original garage door opener
(transmitter) for future programming proce-
dures (i.e., new vehicle purchase). It is also
suggested that upon the sale of the vehicle,
the programmed garage opener buttons be
erased for security purposes, see
page 138.Preparations for first-time programming
Before programming the garage opener for
the first time, you must delete any factory
codes.
Press and hold the two outer buttons until
the indicator light begins to flash-after
20 seconds. Release both buttons. Do not
hold for longer that 30 seconds. The garage
opener is now in the train (or learning) mode
and can be programmed at any time begin-
ning with "Programming" - step 2.
Programming
The garage opener can record and store the
frequencies of three different remote con-
trols.
The battery in the remote control should be
fairly new for programming to work well.
Do not repeat "Programming" - step two
to train additional devices to a second or
third button. Begin with "Programming" -
step three.
1 Turn the ignition ON.
2 Press and hold the two outer buttons
(buttons one and three) - releasing only
when the indicator light begins to flash
(after 20 seconds). Do not hold the
buttons for longer than 30 seconds and
do not repeat step two to program a
second and/or third hand-held transmit-
ter to the remaining two buttons.
3 Position the end of your hand-held
transmitter 1-3 inches (5-14 cm) away
from the button you wish to program
while keeping the indicator light in view.
WARNING
Make sure that people and objects are out
of the way of moving door or gate to
prevent potential harm or damage.
When programming the garage opener,
you may be operating a garage door or
gate operator. Therefore it is advised to
park outside of the garage.
Do not use the garage opener with any
garage door opener that lacks the safety
stop and reverse feature as required by
federal safety standards. (This includes
any garage door opener model manufac-
tured before April 1, 1982.). A garage
door opener which cannot detect an
object, signaling the door to stop and
reverse, does not meet current federal
safety standards. Using a garage door
opener without these features increases
risk of serious injury or death.
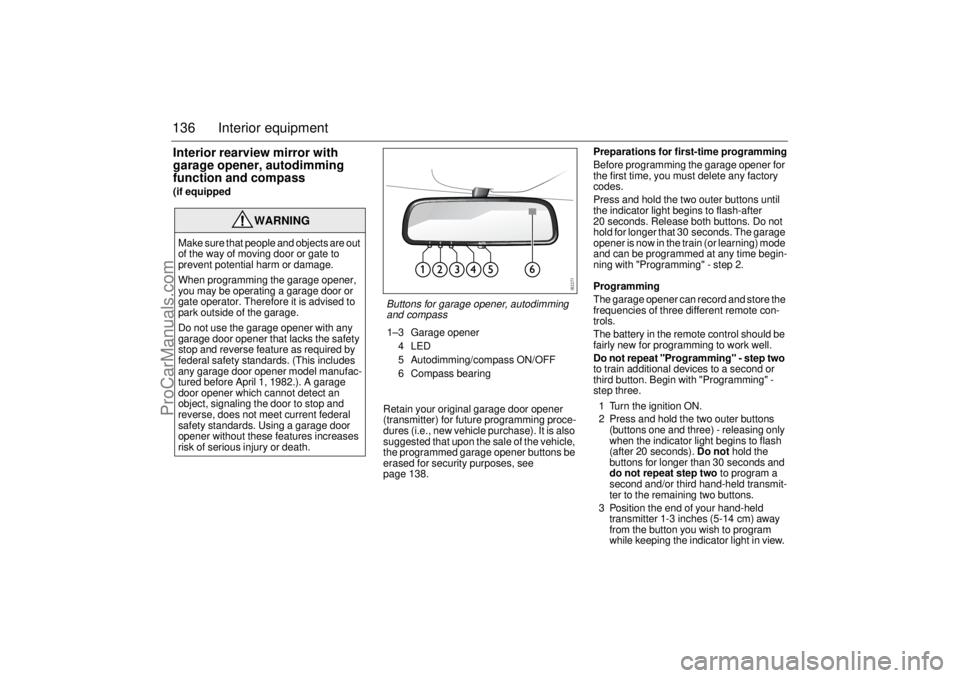
Buttons for garage opener, autodimming
and compass1–3 Garage opener
4LED
5 Autodimming/compass ON/OFF
6 Compass bearing
ProCarManuals.com
Page 139 of 292

137 Interior equipment
The transmitter should face the mirror
from below or left side of the mirror.
4 Simultaneously press and hold both the
chosen and hand-held transmitter
buttons. Do not release the buttons
until step 5 has been completed.
Note: Some gate operators and garage
door openers may require you to replace
this Programming Step 4 with procedures
noted in the "Gate Operator / Canadian Pro-
gramming" section.
5 After the indicator light changes from a
slow to a rapidly blinking light, release
both the mirror and hand-held transmit-
ter buttons.
6 Press and hold the just-trained button
and observe the indicator light.
If the indicator light stays on
constantly, programming is
complete and your device should acti-
vate when the button is pressed and
released.
Note: To program the remaining two but-
tons, begin with "Programming" - step
three. Do not repeat step two.
If the indicator light blinks rapidly for two
seconds and then turns to a constant
light continue with "Programming"
steps 7-9 to complete the programming of
a rolling code equipped device (most com-
monly a garage door opener).
7 At the garage door opener receiver
(motor-head unit) in the garage, locate
the "learn" or "smart" button. This can usually
be found where the hanging antenna wire is attached to the motor-
head unit.
8 Firmly press and release the "learn" or
"smart" button. (The name and color of
the button may vary by manufacturer.)
Note: There are 30 seconds in which to ini-
tiate step nine.
9 Return to the vehicle and firmly press,
hold for two seconds and release the
programmed button. Repeat the
"press/hold/release" sequence a
second time, and, depending on the
brand of the garage door opener (or
other rolling code equipped device),
repeat this sequence a third time to
complete the programming process.
The garage opener should now activate
your rolling code equipped device.
Note: To program the remaining two but-
tons, begin with "Programming" -
step
three
. Do not repeat step two. Gate Operator / Canadian Programming
Canadian radio-frequency laws require
transmitter signals to "time-out" (or quit)
after several seconds of transmission -
which may not be long enough for the
garage opener to pick up the signal during
programming. Similar to this Canadian law,
some U.S. gate operators are designed to
"time-out" in the same manner.
If you live in Canada or you are having diffi-
culties programming a gate operator by
using the "Programming" procedures
(regardless of where you live), replace
"Programming " step 4 with the following:
Note: If programming a garage door opener
or gate operator, it is advised to unplug the
device during the "cycling" process to pre-
vent possible overheating.
4 Continue to press and hold the button
while you press and release - every two
seconds ("cycle") your hand-held transmit-
ter until the frequency signal has success-
fully been accepted by the garage opener.
(The indicator light will flash slowly and then
rapidly.)
Proceed with "Programming" step five to
complete.
NOTICESwitch off the power supply to the garage
door or gate (or park the car beyond the
range of the remote control) while
programming using the "cycling" method
to prevent damaging the electrical motor.
ProCarManuals.com
Page 140 of 292
138 Interior equipmentReprogramming a single button
To program a device to the garage opener
using a button previously trained, follow
these steps:
1 Press and hold the desired button. DO
NOT release the button.
2 The indicator light will begin to flash after
20 seconds. Without releasing the
button, proceed with "Programming" -
step 3.
Erasing the three buttons
To erase programming from the three but-
tons (individual buttons cannot be erased
but can be "reprogrammed" as outlined
below), follow the step noted:
Press and hold the two outer buttons until
the indicator light begins to flash-after
20 seconds. Release both buttons. Do
not hold for longer that 30 seconds. The
garage opener is now in the train (or
learning) mode and can be programmed
at any time beginning with "Programming"
- step 3.Opening a garage door
To operate, simply press and release the
programmed button. Activation will now
occur for the trained device (i.e. garage door
opener, gate operator, security system,
entry door lock, home/office lighting, etc.).
For convenience, the hand-held transmitter
of the device may also be used at any time.
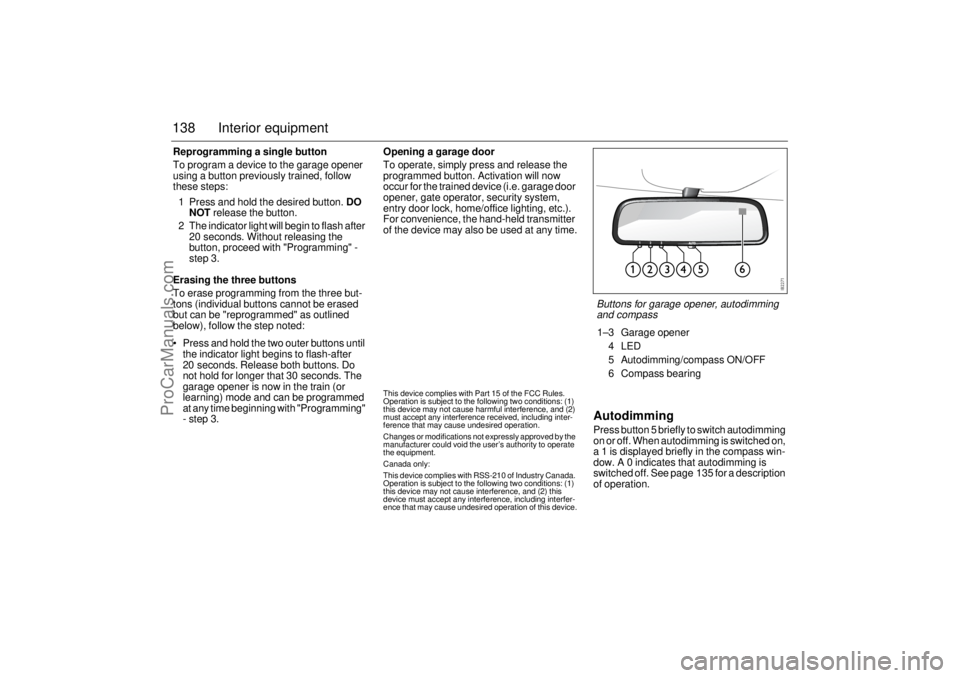
AutodimmingPress button 5 briefly to switch autodimming
on or off. When autodimming is switched on,
a 1 is displayed briefly in the compass win-
dow. A 0 indicates that autodimming is
switched off. See page 135 for a description
of operation.
This device complies with Part 15 of the FCC Rules.
Operation is subject to the following two conditions: (1)
this device may not cause harmful interference, and (2)
must accept any interference received, including inter-
ference that may cause undesired operation.
Changes or modifications not expressly approved by the
manufacturer could void the user’s authority to operate
the equipment.
Canada only:
This device complies with RSS-210 of Industry Canada.
Operation is subject to the following two conditions: (1)
this device may not cause interference, and (2) this
device must accept any interference, including interfer-
ence that may cause undesired operation of this device.
Buttons for garage opener, autodimming
and compass1–3 Garage opener
4LED
5 Autodimming/compass ON/OFF
6 Compass bearing
ProCarManuals.com