air SAAB 9-7X 2008 Owners Manual
[x] Cancel search | Manufacturer: SAAB, Model Year: 2008, Model line: 9-7X, Model: SAAB 9-7X 2008Pages: 426, PDF Size: 2.77 MB
Page 296 of 426
Brake Wear
Your vehicle has disc brakes. Disc brake pads have
built-in wear indicators that make a high-pitched warning
sound when the brake pads are worn and new pads are
needed. The sound can come and go or be heard all the
time your vehicle is moving, except when you are pushing
on the brake pedal rmly.
{CAUTION:
The brake wear warning sound means that soon
the brakes will not work well. That could lead to
an accident. When you hear the brake wear
warning sound, have your vehicle serviced.
Notice:Continuing to drive with worn-out brake
pads could result in costly brake repair.
Some driving conditions or climates can cause a brake
squeal when the brakes are rst applied or lightly applied.
This does not mean something is wrong with the brakes.
Properly torqued wheel nuts are necessary to help
prevent brake pulsation. When tires are rotated, inspect
brake pads for wear and evenly tighten wheel nuts
in the proper sequence to torque specications
inCapacities and Specifications on page 5-122.
Brake linings should always be replaced as complete
axle sets.
Brake Pedal Travel
See your dealer/retailer if the brake pedal does not
return to normal height, or if there is a rapid increase
in pedal travel. This could be a sign that brake service
might be required.
Brake Adjustment
Every time you make a brake stop, the disc brakes
adjust for wear.
Replacing Brake System Parts
The braking system on a vehicle is complex. Its many
parts have to be of top quality and work well together if
the vehicle is to have really good braking. Your vehicle
was designed and tested with top-quality brake parts.
When you replace parts of the braking system — for
example, when the brake linings wear down and you
need new ones put in — be sure you get new approved
replacement parts. If you do not, the brakes might not
work properly. For example, if someone puts in brake
linings that are wrong for your vehicle, the balance
between the front and rear brakes can change — for
the worse. The braking performance you have come to
expect can change in many other ways if someone puts
in the wrong replacement brake parts.
5-42
ProCarManuals.com
Page 299 of 426
Notice:If you leave your radio or other accessories
on during the jump starting procedure, they could
be damaged. The repairs would not be covered
by your warranty. Always turn off your radio and
other accessories when jump starting your vehicle.
3. Turn off the ignition on both vehicles. Unplug
unnecessary accessories plugged into the cigarette
lighter or the accessory power outlets, if equipped.
Turn off the radio and all lamps that are not
needed. This will avoid sparks and help to save
both batteries. And it could save the radio!
4. Open both hoods and locate the batteries. Find
the positive (+) and negative (−) terminals on each
battery. Your vehicle has a remote negative (−) jump
starting terminal. You should always use this remote
terminal instead of the terminal on the battery.
The remote negative (−) terminal is located on
the front engine lift bracket on vehicles with the
4.2L L6 engine or the engine accessory drive bracket
for vehicles with the 5.3L or 6.0L V8 engines, and is
marked GND (Ground). SeeEngine Compartment
Overview on page 5-12for more information on
location.
{CAUTION:
Using a match near a battery can cause battery
gas to explode. People have been hurt doing
this, and some have been blinded. Use a
ashlight if you need more light.
Be sure the battery has enough water. You do
not need to add water to the battery installed
in your new vehicle. But if a battery has ller
caps, be sure the right amount of uid is there.
If it is low, add water to take care of that rst.
If you do not, explosive gas could be present.
Battery uid contains acid that can burn you.
Do not get it on you. If you accidentally get it
in your eyes or on your skin, ush the place
with water and get medical help immediately.
5-45
ProCarManuals.com
Page 302 of 426
Notice:If the jumper cables are connected or
removed in the wrong order, electrical shorting may
occur and damage the vehicle. The repairs would
not be covered by your warranty. Always connect
and remove the jumper cables in the correct
order, making sure that the cables do not touch
each other or other metal.
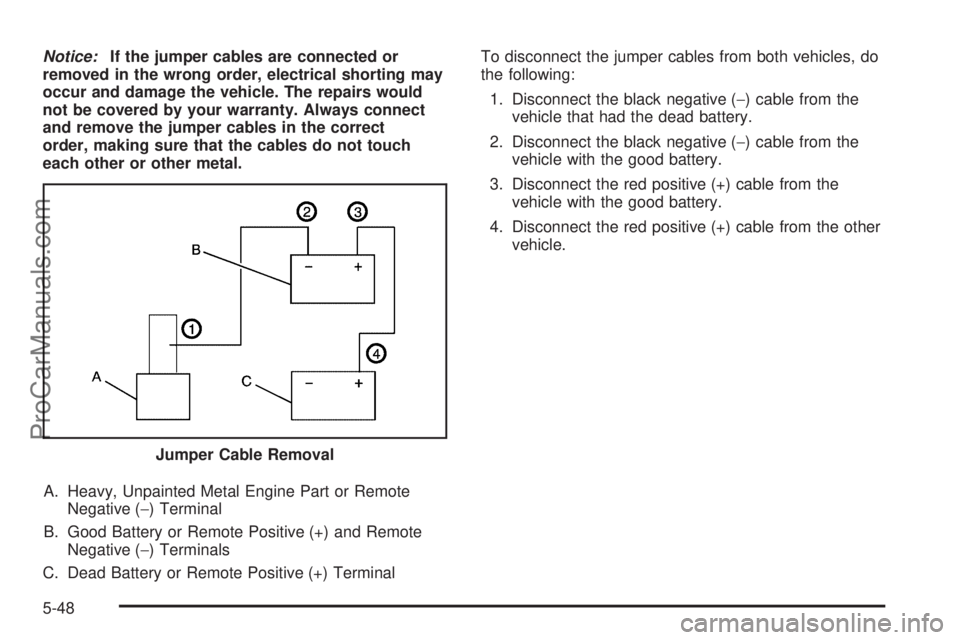
A. Heavy, Unpainted Metal Engine Part or Remote
Negative (−) Terminal
B. Good Battery or Remote Positive (+) and Remote
Negative (−) Terminals
C. Dead Battery or Remote Positive (+) TerminalTo disconnect the jumper cables from both vehicles, do
the following:
1. Disconnect the black negative (−) cable from the
vehicle that had the dead battery.
2. Disconnect the black negative (−) cable from the
vehicle with the good battery.
3. Disconnect the red positive (+) cable from the
vehicle with the good battery.
4. Disconnect the red positive (+) cable from the other
vehicle.
Jumper Cable Removal
5-48
ProCarManuals.com
Page 303 of 426
All-Wheel Drive
When to Check Lubricant
It is not necessary to regularly check uid unless you
suspect there is a leak or you hear an unusual noise.
A uid loss could indicate a problem. Have it inspected
and repaired.
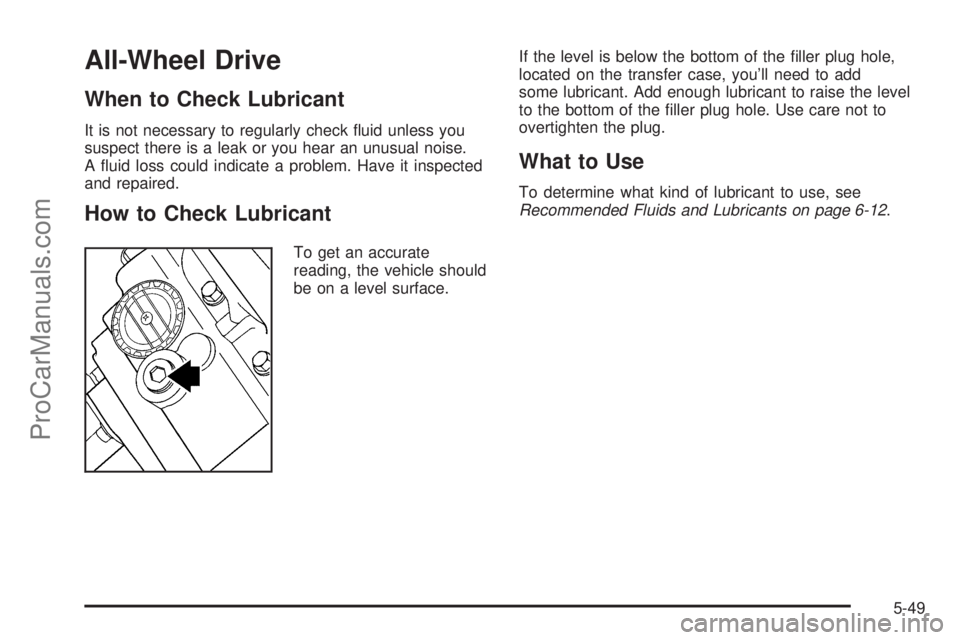
How to Check Lubricant
To get an accurate
reading, the vehicle should
be on a level surface.If the level is below the bottom of the ller plug hole,
located on the transfer case, you’ll need to add
some lubricant. Add enough lubricant to raise the level
to the bottom of the ller plug hole. Use care not to
overtighten the plug.
What to Use
To determine what kind of lubricant to use, see
Recommended Fluids and Lubricants on page 6-12.
5-49
ProCarManuals.com
Page 304 of 426
Rear Axle
When to Check Lubricant
It is not necessary to regularly check rear axle uid
unless you suspect there is a leak or you hear an
unusual noise. A uid loss could indicate a problem.
Have it inspected and repaired.
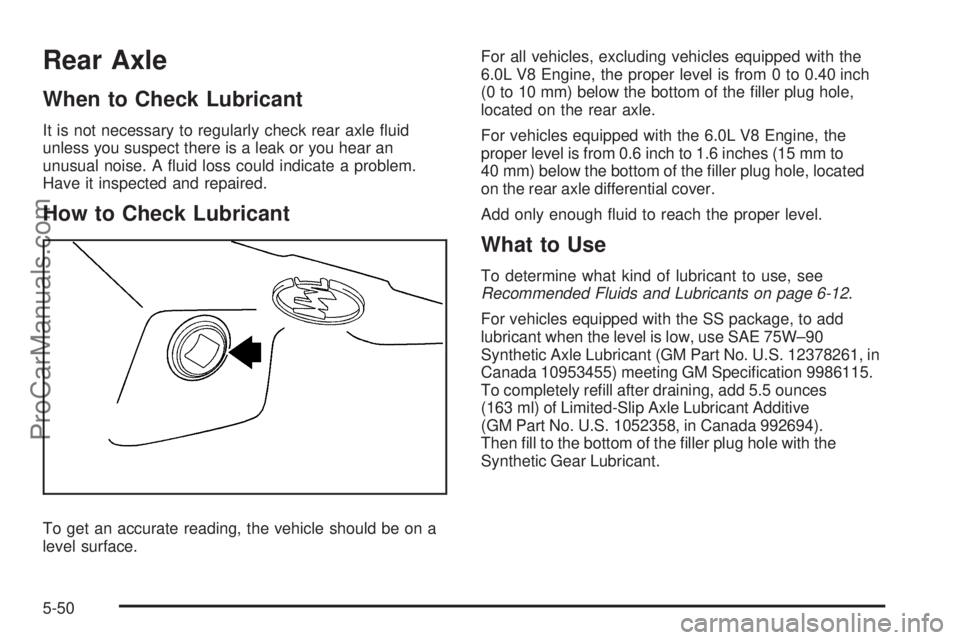
How to Check Lubricant
To get an accurate reading, the vehicle should be on a
level surface.For all vehicles, excluding vehicles equipped with the
6.0L V8 Engine, the proper level is from 0 to 0.40 inch
(0 to 10 mm) below the bottom of the ller plug hole,
located on the rear axle.
For vehicles equipped with the 6.0L V8 Engine, the
proper level is from 0.6 inch to 1.6 inches (15 mm to
40 mm) below the bottom of the ller plug hole, located
on the rear axle differential cover.
Add only enough uid to reach the proper level.
What to Use
To determine what kind of lubricant to use, see
Recommended Fluids and Lubricants on page 6-12.
For vehicles equipped with the SS package, to add
lubricant when the level is low, use SAE 75W–90
Synthetic Axle Lubricant (GM Part No. U.S. 12378261, in
Canada 10953455) meeting GM Specication 9986115.
To completely rell after draining, add 5.5 ounces
(163 ml) of Limited-Slip Axle Lubricant Additive
(GM Part No. U.S. 1052358, in Canada 992694).
Then ll to the bottom of the ller plug hole with the
Synthetic Gear Lubricant.
5-50
ProCarManuals.com
Page 305 of 426
Front Axle
When to Check Lubricant
It is not necessary to regularly check front axle uid
unless you suspect there is a leak or you hear an
unusual noise. A uid loss could indicate a problem.
Have it inspected and repaired.
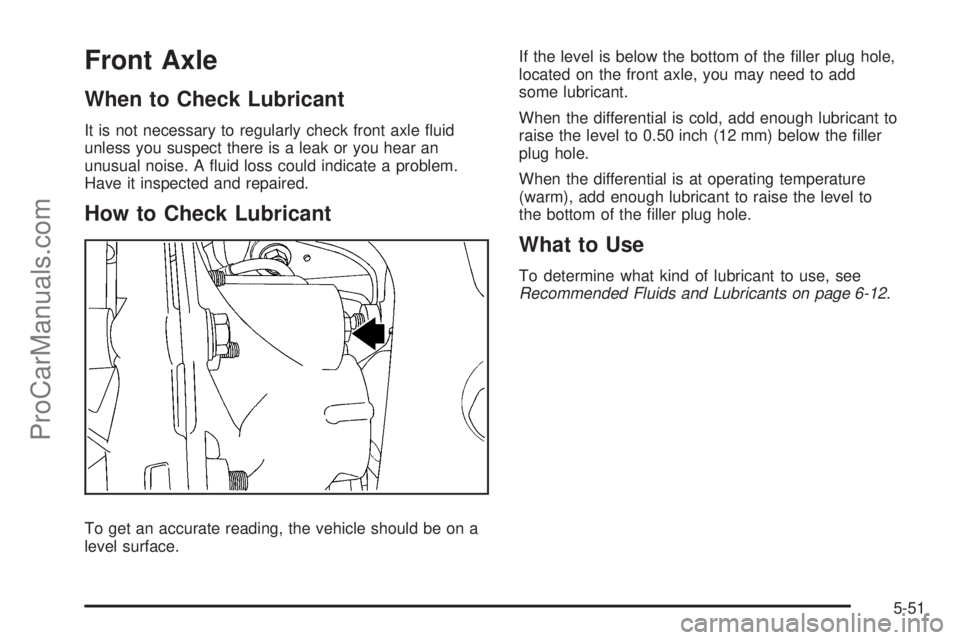
How to Check Lubricant
To get an accurate reading, the vehicle should be on a
level surface.If the level is below the bottom of the ller plug hole,
located on the front axle, you may need to add
some lubricant.
When the differential is cold, add enough lubricant to
raise the level to 0.50 inch (12 mm) below the ller
plug hole.
When the differential is at operating temperature
(warm), add enough lubricant to raise the level to
the bottom of the ller plug hole.
What to Use
To determine what kind of lubricant to use, see
Recommended Fluids and Lubricants on page 6-12.
5-51
ProCarManuals.com
Page 314 of 426
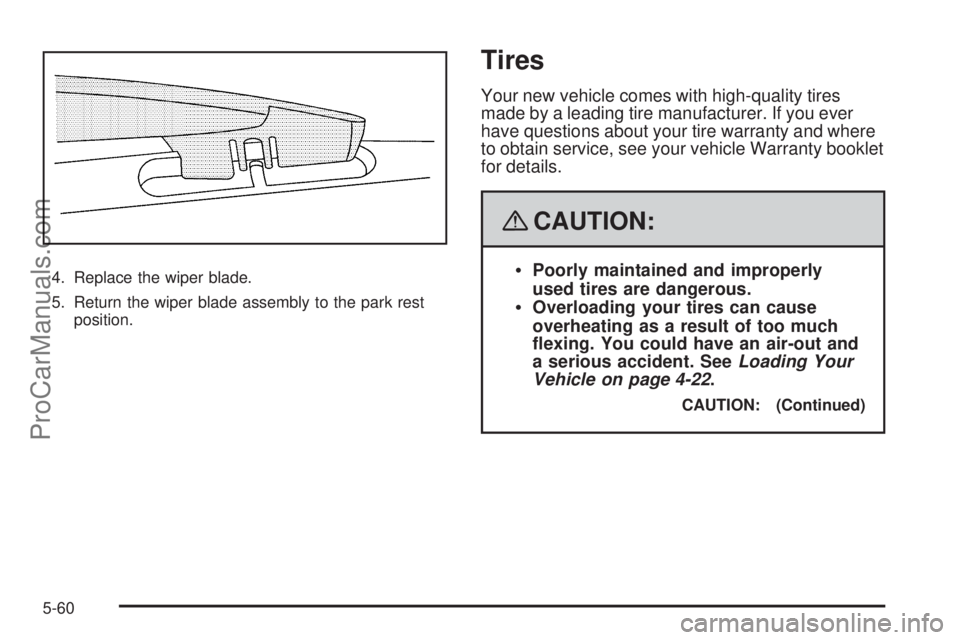
4. Replace the wiper blade.
5. Return the wiper blade assembly to the park rest
position.
Tires
Your new vehicle comes with high-quality tires
made by a leading tire manufacturer. If you ever
have questions about your tire warranty and where
to obtain service, see your vehicle Warranty booklet
for details.
{CAUTION:
Poorly maintained and improperly
used tires are dangerous.
Overloading your tires can cause
overheating as a result of too much
exing. You could have an air-out and
a serious accident. SeeLoading Your
Vehicle on page 4-22.
CAUTION: (Continued)
5-60
ProCarManuals.com
Page 318 of 426
Tire Terminology and Denitions
Air Pressure:The amount of air inside the
tire pressing outward on each square inch of the
tire. Air pressure is expressed in pounds per
square inch (psi) or kilopascal (kPa).
Accessory Weight
:This means the combined
weight of optional accessories. Some examples of
optional accessories are, automatic transmission,
power steering, power brakes, power windows,
power seats, and air conditioning.
Aspect Ratio
:The relationship of a tire’s height
to its width.
Belt
:A rubber coated layer of cords that
is located between the plies and the tread.
Cords may be made from steel or other
reinforcing materials.
Bead
:The tire bead contains steel wires wrapped
by steel cords that hold the tire onto the rim.
Bias Ply Tire
:A pneumatic tire in which the plies
are laid at alternate angles less than 90 degrees
to the centerline of the tread.Cold Tire Pressure
:The amount of air pressure in
a tire, measured in pounds per square inch (psi) or
kilopascals (kPa) before a tire has built up heat
from driving. SeeInflation - Tire Pressure on
page 5-67.
Curb Weight
:The weight of a motor vehicle with
standard and optional equipment including the
maximum capacity of fuel, oil, and coolant,
but without passengers and cargo.
DOT Markings
:A code molded into the sidewall
of a tire signifying that the tire is in compliance
with the U.S. Department of Transportation (DOT)
motor vehicle safety standards. The DOT code
includes the Tire Identication Number (TIN),
an alphanumeric designator which can also identify
the tire manufacturer, production plant, brand,
and date of production.
GVWR
:Gross Vehicle Weight Rating.
SeeLoading Your Vehicle on page 4-22.
GAWR FRT
:Gross Axle Weight Rating for
the front axle. SeeLoading Your Vehicle on
page 4-22.
GAWR RR
:Gross Axle Weight Rating for the rear
axle. SeeLoading Your Vehicle on page 4-22.
5-64
ProCarManuals.com
Page 319 of 426
Intended Outboard Sidewall:The side of an
asymmetrical tire, that must always face outward
when mounted on a vehicle.
Kilopascal (kPa)
:The metric unit for air pressure.
Light Truck (LT-Metric) Tire
:A tire used on
light duty trucks and some multipurpose passenger
vehicles.
Load Index
:An assigned number ranging from 1
to 279 that corresponds to the load carrying
capacity of a tire.
Maximum Ination Pressure
:The maximum
air pressure to which a cold tire can be inated.
The maximum air pressure is molded onto the
sidewall.
Maximum Load Rating
:The load rating for a tire
at the maximum permissible ination pressure
for that tire.
Maximum Loaded Vehicle Weight
:The sum of
curb weight, accessory weight, vehicle capacity
weight, and production options weight.
Normal Occupant Weight
:The number of
occupants a vehicle is designed to seat multiplied
by 150 lbs (68 kg). SeeLoading Your Vehicle
on page 4-22.Occupant Distribution
:Designated seating
positions.
Outward Facing Sidewall
:The side of an
asymmetrical tire that has a particular side that
faces outward when mounted on a vehicle. The
side of the tire that contains a whitewall, bears
white lettering, or bears manufacturer, brand,
and/or model name molding that is higher or
deeper than the same moldings on the other
sidewall of the tire.
Passenger (P-Metric) Tire
:A tire used on
passenger cars and some light duty trucks
and multipurpose vehicles.
Recommended Ination Pressure
:Vehicle
manufacturer’s recommended tire ination
pressure as shown on the tire placard.
SeeInflation - Tire Pressure on page 5-67
andLoading Your Vehicle on page 4-22.
Radial Ply Tire
:A pneumatic tire in which
the ply cords that extend to the beads are laid
at 90 degrees to the centerline of the tread.
Rim
:A metal support for a tire and upon which
the tire beads are seated.
Sidewall
:The portion of a tire between the tread
and the bead.
5-65
ProCarManuals.com
Page 321 of 426
Ination - Tire Pressure
Tires need the correct amount of air pressure to
operate effectively.
Notice:Do not let anyone tell you that
under-ination or over-ination is all right.
It is not. If your tires do not have enough air
(under-ination), you can get the following:
Too much exing
Too much heat
Tire overloading
Premature or irregular wear
Poor handling
Reduced fuel economy
If your tires have too much air (over-ination),
you can get the following:
Unusual wear
Poor handling
Rough ride
Needless damage from road hazardsA vehicle specic Tire and Loading Information
label is attached to your vehicle. This label shows
your vehicle’s original equipment tires and the
correct ination pressures for your tires when they
are cold. The recommended cold tire ination
pressure, shown on the label, is the minimum
amount of air pressure needed to support your
vehicle’s maximum load carrying capacity.
For additional information regarding how much
weight your vehicle can carry, and an example of
the Tire and Loading Information label, seeLoading
Your Vehicle on page 4-22. How you load your
vehicle affects vehicle handling and ride comfort.
Never load your vehicle with more weight than it
was designed to carry.
When to Check
Check your tires once a month or more.
Do not forget to check the pressure of the spare
tire. SeeSpare Tire on page 5-101for additional
information.
5-67
ProCarManuals.com