tow SATURN ASTRA 2008 User Guide
[x] Cancel search | Manufacturer: SATURN, Model Year: 2008, Model line: ASTRA, Model: SATURN ASTRA 2008Pages: 304, PDF Size: 1.92 MB
Page 120 of 304
Daytime Running
Lamps (DRL)
Daytime Running Lamps (DRL) can
make it easier for others to see
the front of your vehicle during the
day. DRL can be helpful in many
different driving conditions, but they
can be especially helpful in the
short periods after dawn and before
sunset. Fully functional daytime
running lamps are required on all
vehicles �rst sold in Canada.
The DRL system makes the
low-beam headlamps turn on at
a reduced brightness when
the following conditions are met:
The engine is running.
The light sensor determines it
is night and the exterior lamps
control is in the off position.
The light sensor determines
it is daytime.The taillamps and other lamps will
be off.
The DRL turns off when the engine
is not running.
The regular headlamps or parking
lamps should be used when needed.
Delayed Headlamps
Vehicles with headlamp exit delay,
keep the headlamps and taillamps
on for 30 seconds.
To activate:
1. Turn the ignition off and remove
the key from the ignition.
2. Open the driver door.
3. Pull the multifunction lever
toward the steering wheel.
To deactivate, do either of the
following:
Insert the key into the ignition.
Pull the multifunction lever toward
the steering wheel again while
the driver door is open.
Fog Lamps
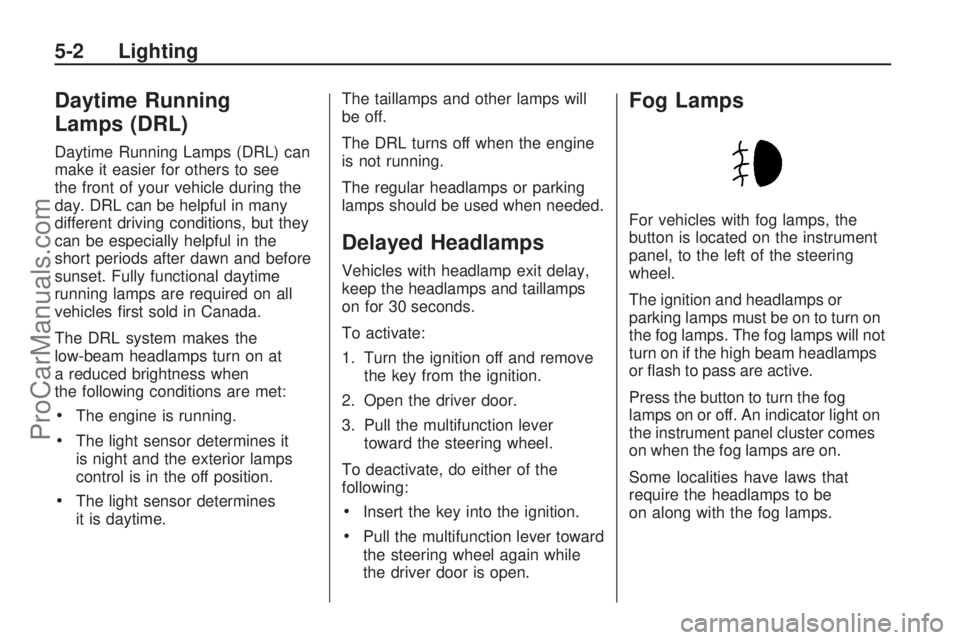
For vehicles with fog lamps, the
button is located on the instrument
panel, to the left of the steering
wheel.
The ignition and headlamps or
parking lamps must be on to turn on
the fog lamps. The fog lamps will not
turn on if the high beam headlamps
or �ash to pass are active.
Press the button to turn the fog
lamps on or off. An indicator light on
the instrument panel cluster comes
on when the fog lamps are on.
Some localities have laws that
require the headlamps to be
on along with the fog lamps.
5-2 Lighting
ProCarManuals.com
Page 158 of 304

PARK (P):This position locks the
front wheels. It is the best position
to use when the engine is started
because your vehicle cannot
move easily.
{CAUTION
It is dangerous to get out of
your vehicle if the shift lever is
not fully in PARK (P) with the
parking brake �rmly set. Your
vehicle can roll.
Do not leave your vehicle when
the engine is running unless
you have to. If you have left the
engine running, the vehicle can
move suddenly. You or others
could be injured. To be sure
your vehicle will not move, even
when you are on fairly level
ground, always set your parking
brake and move the shift lever to
PARK (P). SeeShifting Into Park
on page 8-11.Make sure the shift lever is fully in
PARK (P) before starting the engine.
Your vehicle has an automatic
transmission shift lock control
system. The regular brakes must be
applied before you can shift from
PARK (P) when the ignition key is in
ON/RUN. If you cannot shift out of
PARK (P) while holding the brake
pedal down, seeShifting Out of
Park on page 8-13.
REVERSE (R):Use this gear to
back up.
Notice:Shifting to R (Reverse)
while the vehicle is moving
forward could damage the
transmission. The repairs would
not be covered by the vehicle
warranty. Shift to R (Reverse)
only after the vehicle is stopped.
To rock your vehicle back and
forth to get out of snow, ice, or sand
without damaging the transmission,
seeRocking Your Vehicle to Get
It Out on page 8-30.NEUTRAL (N):In this position,
the engine does not connect with the
wheels. To restart while you are
already moving, use NEUTRAL (N)
only. Also, use NEUTRAL (N)
when your vehicle is being towed.{CAUTION
Shifting into a drive gear while
the engine is running at high
speed is dangerous. Unless
your foot is �rmly on the brake
pedal, the vehicle could move
very rapidly. You could lose
control and hit people or
objects. Do not shift into a
drive gear while the engine is
running at high speed.
8-6 Driving and Operating
ProCarManuals.com
Page 163 of 304
A warning chime will sound and
a brake warning light located on the
instrument panel cluster will come
on, if the parking brake is set,
the ignition is on and the vehicle
speed is greater than 5 mph
(8 km/h).
Notice:Driving with the parking
brake on can overheat the
brake system and cause
premature wear or damage
to brake system parts. Make sure
that the parking brake is fully
released and the brake warning
light is off before driving.Shifting Into Park
{CAUTION
It can be dangerous to get out
of your vehicle if the shift lever
is not fully in PARK (P) with the
parking brake �rmly set. Your
vehicle can roll. If you have left
the engine running, the vehicle
can move suddenly. You or
others could be injured. To be
sure your vehicle will not move,
even when you are on fairly level
ground, use the steps that
follow.1. Hold the brake pedal down
with your right foot and set
the parking brake. SeeParking
Brake on page 8-10for more
information.
2. Move the shift lever into
PARK (P) by holding in the button
on the shift lever and pushing the
shift lever all the way toward the
front of the vehicle.
3. Turn the ignition key to
LOCK/OFF.
4. Remove the key and take it
with you. If you can leave
your vehicle with the ignition
key in your hand, your vehicle
is in PARK (P).
Driving and Operating 8-11
ProCarManuals.com
Page 165 of 304
Shifting Out of Park
This vehicle has an electronic shift
lock release system. The shift
lock release is designed to:
Prevent ignition key removal
unless the shift lever is in
PARK (P) with the shift lever
button fully released.
Prevent movement of the shift
lever out of PARK (P), unless
the ignition is in the ON/RUN
position and the regular brake
pedal is applied.
The shift lock release is always
functional except in the case of an
uncharged or low voltage (less
than 9 volt) battery.
If your vehicle has an uncharged
battery or a battery with low voltage,
try charging or jump starting the
battery. SeeJump Starting on
page 9-68for more information.To shift out of PARK (P) use the
following sequence:
1. Apply the brake pedal.
2. Press the shift lever button.
3. Move the shift lever to the
desired position.
If you still are unable to shift out of
PARK (P):
1. Fully release the shift lever
button.
2. While holding down the brake
pedal, press the shift lever
button again.
3. Move the shift lever to the
desired position.
If you still cannot move the shift
lever from PARK (P), consult your
dealer/retailer or a professional
towing service.
Parking the Vehicle
Before you get out of your vehicle,
move the shift lever into FIRST (1) or
REVERSE (R) and �rmly apply the
parking brake. Once the shift lever
has been placed into FIRST (1) or
REVERSE (R) with the clutch pedal
pressed in, you can turn the ignition
off and release the clutch.
Parking Over Things
That Burn
{CAUTION
Things that can burn could
touch hot exhaust parts under
your vehicle and ignite. Do not
park over papers, leaves, dry
grass, or other things that
can burn.
Driving and Operating 8-13
ProCarManuals.com
Page 182 of 304

Rocking Your Vehicle to
Get It Out
First, turn the steering wheel left and
right to clear the area around the
front wheels. Turn off any stability
system. SeeStabiliTrak
®System on
page 8-19. Then shift back and forth
between REVERSE (R) and a
forward gear, or with a manual
transmission, between FIRST (1) or
SECOND (2) and REVERSE (R),
spinning the wheels as little as
possible. To prevent transmission
wear, wait until the wheels stop
spinning before shifting gears.Release the accelerator pedal
while you shift, and press lightly
on the accelerator pedal when
the transmission is in gear. By slowly
spinning the wheels in the forward
and reverse directions, you will
cause a rocking motion that could
free your vehicle. If that does not get
your vehicle out after a few tries, it
might need to be towed out. If your
vehicle does need to be towed out,
seeTowing Your Vehicle on
page 9-72.
Loading the Vehicle
It is very important to know how
much weight your vehicle can
carry. This weight is called the
vehicle capacity weight and
includes the weight of all
occupants, cargo and all
nonfactory-installed options.
Two labels on your vehicle
show how much weight it may
properly carry, the Tire and
Loading Information label and
the Certi�cation label.
8-30 Driving and Operating
ProCarManuals.com
Page 184 of 304

Steps for Determining Correct
Load Limit
1.Locate the statement “The
combined weight of occupants
and cargo should never
exceed XXX kg or XXX lbs”
on your vehicle placard.
2.Determine the combined
weight of the driver and
passengers that will be riding
in your vehicle.
3.Subtract the combined weight
of the driver and passengers
from XXX kg or XXX lbs.
4.The resulting �gure equals the
available amount of cargo and
luggage load capacity. For
example, if the “XXX” amount
equals 1400 lbs and there will
be �ve 150 lb passengers in
your vehicle, the amount of
available cargo and luggage
load capacity is 650 lbs
(1400−750 (5 x 150) =
650 lbs).
5.Determine the combined
weight of luggage and
cargo being loaded on the
vehicle. That weight may not
safely exceed the available
cargo and luggage load
capacity calculated in Step 4.
6.If your vehicle will be towing
a trailer, the load from your
trailer will be transferred
to your vehicle. Consult this
manual to determine how
this reduces the available
cargo and luggage load
capacity of your vehicle.
The vehicle is neither designed
nor intended to tow a trailer.
A.Vehicle Capacity Weight for
Example 1=1,000 lbs
(453 kg).
B.Subtract Occupant Weight
150 lbs (68 kg)×2=300 lbs
(136 kg).
C.Available Occupant and
Cargo Weight=700 lbs
(317 kg).
Example 1
8-32 Driving and Operating
ProCarManuals.com
Page 192 of 304
Buying New Tires.............9-54
Different Size Tires
and Wheels.....................9-55
Uniform Tire Quality
Grading...........................9-56
Wheel Alignment and
Tire Balance....................9-58
Wheel Replacement..........9-58
Tire Chains.......................9-59
Tire Changing
If a Tire Goes Flat............9-60
Changing a Flat Tire.........9-60
Removing the Spare
Tire and Tools.................9-61
Removing the Flat Tire
and Installing the
Spare Tire
.......................9-62
Storing a Flat or Spare
Tire and Tools.................9-66
Compact Spare Tire..........9-67
Jump Starting
Jump Starting...................9-68
Towing
Towing Your Vehicle.........9-72
Recreational Vehicle
Towing............................9-72
Towing a Trailer................9-72
Appearance Care
Interior Cleaning................9-72
Exterior Cleaning..............9-75
Sheet Metal Damage........9-78
Finish Damage..................9-79
Underbody Maintenance. . . .9-79
Chemical Paint Spotting. . . .9-79
Vehicle Care/Appearance
Materials.........................9-80
Service
For service and parts needs,
visit your dealer/retailer. You will
receive genuine Saturn parts
and Saturn-trained and supported
service people.
Genuine Saturn parts have one of
these marks.
9-2 Vehicle Service and Care
ProCarManuals.com
Page 197 of 304
A.Engine Air Cleaner/Filter on
page 9-11.
B. Engine Oil Fill Cap.Engine Oil
on page 9-7.
C. Brake Fluid Reservoir.Brakes
on page 9-22.
D. Coolant Reservoir.Cooling
System on page 9-16.
E. Coolant Reservoir Pressure Cap.
Pressure Cap on page 9-15.
F.Engine Compartment Fuse Block
on page 9-34.
G.Battery on page 9-25.
H.Windshield Washer Fluid on
page 9-20.
I. Engine Oil Dipstick.Engine Oil
on page 9-7.Engine Oil
If the low oil level light appears on
the instrument cluster, check
the engine oil level right away.
SeeLow Oil Level Light on
page 4-23. You should check the
engine oil level regularly; this is just
a reminder.
Checking Engine Oil
It is a good idea to check the
engine oil every time you get fuel.
In order to get an accurate reading,
the oil must be warm and the
vehicle must be on level ground.
The engine oil dipstick handle
is a yellow loop. SeeEngine
Compartment Overview on page 9-6
for the location of the engine oil
dipstick.
1. Turn off the engine and give the
oil several minutes to drain back
into the oil pan. If you do not
do this, the oil dipstick might not
show the actual level.
2. Pull the dipstick and clean it with
a paper towel or cloth, then push
it back in all the way. Remove it
again, keeping the tip down
and check the level.
Vehicle Service and Care 9-7
ProCarManuals.com
Page 222 of 304

License Plate Lamp
To replace one of these bulbs:
1. Push tab in and pull down on it to
remove the license plate lamp.2. Turn and pull the license plate
lamp toward you through the
opening.3. Turn the bulb socket
counterclockwise and pull the
bulb straight out of the socket.
4. Install the new bulb.
5. Reverse Steps 1 through 3 to
reinstall the license plate lamp.
9-32 Vehicle Service and Care
ProCarManuals.com
Page 250 of 304
Tire Changing
If a Tire Goes Flat
It is unusual for a tire to blowout
while you are driving, especially if
you maintain your vehicle’s tires
properly. If air goes out of a tire, it is
much more likely to leak out slowly.
But if you should ever have a
blowout, here are a few tips about
what to expect and what to do:
If a front tire fails, the �at tire creates
a drag that pulls the vehicle toward
that side. Take your foot off the
accelerator pedal and grip the
steering wheel �rmly. Steer to
maintain lane position, and then
gently brake to a stop well out of the
traffic lane.
A rear blowout, particularly on a
curve, acts much like a skid and
may require the same correction you
would use in a skid. In any rear
blowout remove your foot from the
accelerator pedal. Get the vehicle
under control by steering theway you want the vehicle to go.
It may be very bumpy and noisy, but
you can still steer. Gently brake to
a stop, well off the road if possible.
{CAUTION
Lifting a vehicle and getting
under it to do maintenance or
repairs is dangerous without the
appropriate safety equipment
and training. The jack provided
with your vehicle is designed
only for changing a �at tire. If it
is used for anything else, you or
others could be badly injured or
killed if the vehicle slips off the
jack. Use the jack provided with
your vehicle only for changing a
�at tire.
If a tire goes �at, the next part
shows how to use the jacking
equipment to change a �at tire
safely.
Changing a Flat Tire
If a tire goes �at, avoid further tire
and wheel damage by driving slowly
to a level place. Turn on the
hazard warning �ashers.
{CAUTION
Changing a tire can be
dangerous. The vehicle can slip
off the jack and roll over or fall
on you or other people. You and
they could be badly injured or
even killed. Find a level place
to change your tire. To help
prevent the vehicle from
moving:
1. Set the parking brake
�rmly.
2. Put an automatic
transmission shift lever in
P (Park), or shift a manual
transmission to 1 (First) or
R (Reverse).
(Continued)
9-60 Vehicle Service and Care
ProCarManuals.com