low beam SATURN AURA 2008 Owners Manual
[x] Cancel search | Manufacturer: SATURN, Model Year: 2008, Model line: AURA, Model: SATURN AURA 2008Pages: 362, PDF Size: 2.29 MB
Page 117 of 362
Instrument Panel Overview...............................3-4
Hazard Warning Flashers................................3-6
Other Warning Devices...................................3-6
Horn.............................................................3-6
Tilt and Telescopic Steering Wheel...................3-6
Turn Signal/Multifunction Lever.........................3-7
Turn and Lane-Change Signals........................3-7
Headlamp High/Low-Beam Changer..................3-8
Flash-to-Pass.................................................3-8
Windshield Wipers..........................................3-8
Windshield Washer.........................................3-9
Cruise Control..............................................3-10
Headlamps..................................................3-13
Headlamps on Reminder................................3-14
Headlamps Off in PARK (P)...........................3-14
Delayed Headlamps......................................3-14
Daytime Running Lamps (DRL).......................3-14
Automatic Headlamp System..........................3-15
Instrument Panel Brightness...........................3-16
Dome Lamp.................................................3-16
Entry/Exit Lighting.........................................3-16
Parade Dimming...........................................3-17Overhead Console Reading Lamps.................3-17
Trunk Lamp.................................................3-17
Battery Run-Down Protection..........................3-17
Accessory Power Outlet(s).............................3-18
Climate Controls............................................3-19
Automatic Climate Control System...................3-19
Outlet Adjustment.........................................3-24
Warning Lights, Gages, and Indicators............3-25
Instrument Panel Cluster................................3-26
Speedometer and Odometer...........................3-27
Trip Odometer..............................................3-27
Tachometer.................................................3-27
Safety Belt Reminders...................................3-28
Airbag Readiness Light..................................3-29
Passenger Airbag Status Indicator...................3-30
Charging System Light..................................3-32
Brake System Warning Light..........................3-32
Antilock Brake System Warning Light...............3-33
Electronic Stability Control (ESC)/Traction
Control System (TCS) Indicator/
Warning Light...........................................3-34
Section 3 Instrument Panel
3-1
ProCarManuals.com
Page 123 of 362
Turn Signal/Multifunction Lever
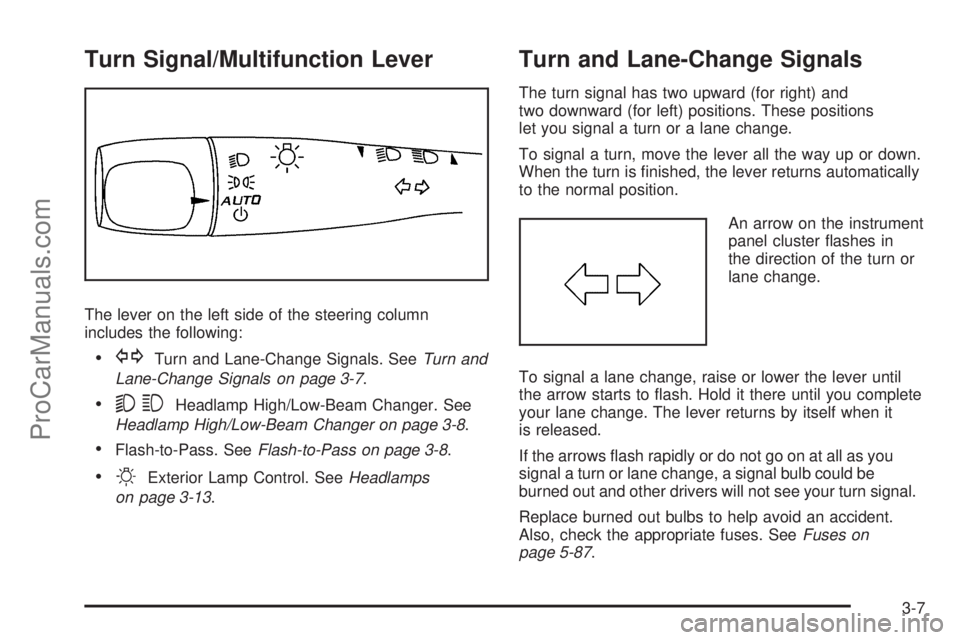
The lever on the left side of the steering column
includes the following:
GTurn and Lane-Change Signals. SeeTurn and
Lane-Change Signals on page 3-7.
53Headlamp High/Low-Beam Changer. See
Headlamp High/Low-Beam Changer on page 3-8.
Flash-to-Pass. SeeFlash-to-Pass on page 3-8.
OExterior Lamp Control. SeeHeadlamps
on page 3-13.
Turn and Lane-Change Signals
The turn signal has two upward (for right) and
two downward (for left) positions. These positions
let you signal a turn or a lane change.
To signal a turn, move the lever all the way up or down.
When the turn is �nished, the lever returns automatically
to the normal position.
An arrow on the instrument
panel cluster �ashes in
the direction of the turn or
lane change.
To signal a lane change, raise or lower the lever until
the arrow starts to �ash. Hold it there until you complete
your lane change. The lever returns by itself when it
is released.
If the arrows �ash rapidly or do not go on at all as you
signal a turn or lane change, a signal bulb could be
burned out and other drivers will not see your turn signal.
Replace burned out bulbs to help avoid an accident.
Also, check the appropriate fuses. SeeFuses on
page 5-87.
3-7
ProCarManuals.com
Page 124 of 362
Headlamp High/Low-Beam Changer
To change the headlamps from low beam to high
beam, push the turn signal/multifunction lever away
from you.
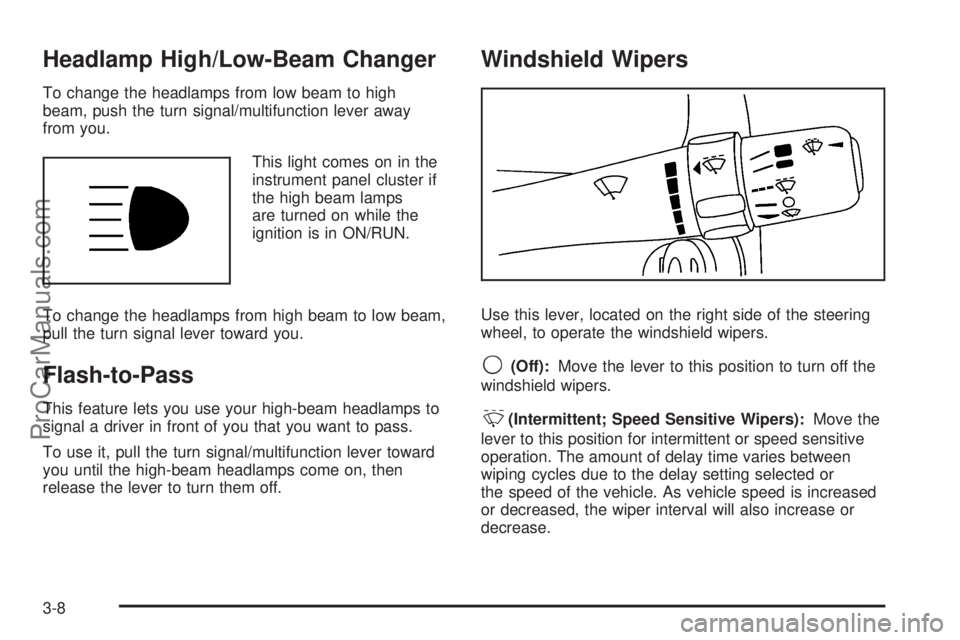
This light comes on in the
instrument panel cluster if
the high beam lamps
are turned on while the
ignition is in ON/RUN.
To change the headlamps from high beam to low beam,
pull the turn signal lever toward you.
Flash-to-Pass
This feature lets you use your high-beam headlamps to
signal a driver in front of you that you want to pass.
To use it, pull the turn signal/multifunction lever toward
you until the high-beam headlamps come on, then
release the lever to turn them off.
Windshield Wipers
Use this lever, located on the right side of the steering
wheel, to operate the windshield wipers.
9(Off):Move the lever to this position to turn off the
windshield wipers.
&(Intermittent; Speed Sensitive Wipers):Move the
lever to this position for intermittent or speed sensitive
operation. The amount of delay time varies between
wiping cycles due to the delay setting selected or
the speed of the vehicle. As vehicle speed is increased
or decreased, the wiper interval will also increase or
decrease.
3-8
ProCarManuals.com
Page 130 of 362
Headlamps on Reminder
If you open the driver’s door and turn off the ignition
while leaving the lamps on, you will hear a warning
chime.
Headlamps Off in PARK (P)
This feature works when the ignition is in the ON/RUN
position and it is dark outside. To turn the headlamps off
when it is dark outside but keep other exterior lights on,
turn the exterior lamp control to the parking lamp position.
To turn on the headlamps along with the other lamps
when it is dark outside, turn the exterior lamp control to
the AUTO or headlamp position.
This function does not work for vehicles �rst sold in
Canada.
Delayed Headlamps
The delayed headlamps feature keeps the headlamps
on for 20 seconds after the key is turned to LOCK/OFF,
then the headlamps automatically turn off.
To override the 20 second delayed headlamp feature
while it is active turn the turn signal/multifunction
lever up one position and then back to AUTO.
Daytime Running Lamps (DRL)
Daytime Running Lamps (DRL) can make it easier for
others to see the front of your vehicle during the day. DRL
are helpful in many different driving conditions, but they
can be especially helpful in the short periods after dawn
and before sunset. Fully functional DRL are required on
all vehicles �rst sold in Canada. The vehicle has a light
sensor on top of the instrument panel that controls the
DRL. Make sure it is not covered, or the head lamps will
be on when they are not needed.
The DRL system makes the low-beam headlamps come
on at a reduced brightness when the following
conditions are met:
The ignition is on.
The exterior lamps control is in AUTO.
The exterior lamps control is in the parking lamps
only position (This applies only to vehicles that
are �rst sold in Canada).
The light sensor detects daytime light.
The parking brake is released or the vehicle is not
in PARK.
When the DRL system is on, the taillamps, sidemarker
lamps, parking lamps, and instrument panel lights are not
on unless you turn the exterior lamps control to the
parking lamp position.
As with any vehicle, you should turn on the regular
headlamp system when they are needed.
3-14
ProCarManuals.com
Page 156 of 362
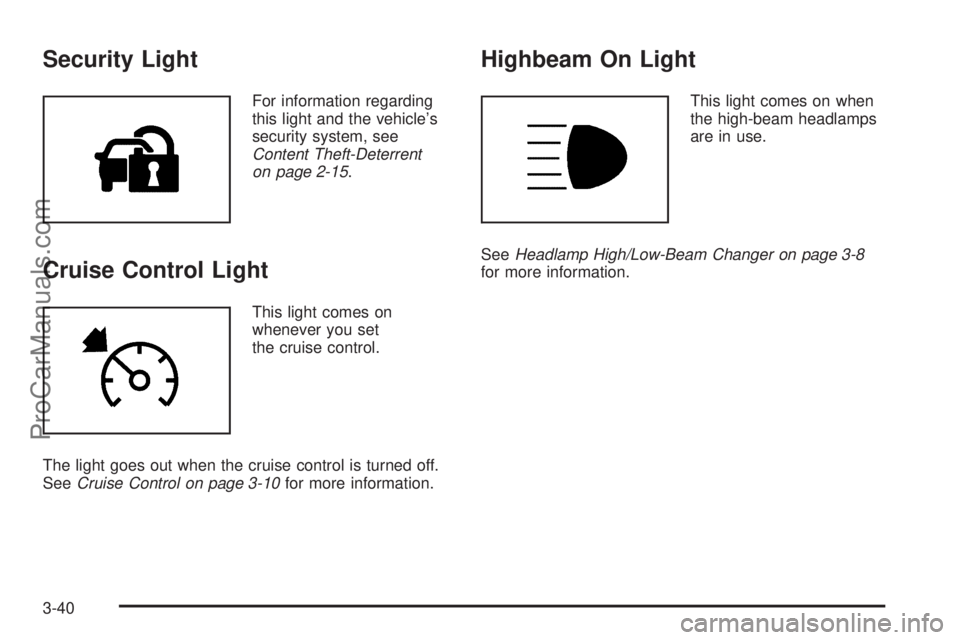
Security Light
For information regarding
this light and the vehicle’s
security system, see
Content Theft-Deterrent
on page 2-15.
Cruise Control Light
This light comes on
whenever you set
the cruise control.
The light goes out when the cruise control is turned off.
SeeCruise Control on page 3-10for more information.
Highbeam On Light
This light comes on when
the high-beam headlamps
are in use.
SeeHeadlamp High/Low-Beam Changer on page 3-8
for more information.
3-40
ProCarManuals.com
Page 261 of 362
To disconnect the jumper cables from both vehicles,
do the following:
1. Disconnect the black negative (−) cable from the
vehicle that had the dead battery.
2. Disconnect the black negative (−) cable from the
vehicle with the good battery.
3. Disconnect the red positive (+) cable from the
vehicle with the good battery.
4. Disconnect the red positive (+) cable from the
other vehicle.
5. Return the caps over the positive (+) and
negative (–) terminals to their original positions.Headlamp Aiming
Headlamp aim has been preset at the factory and
should need no further adjustment.
However, if your vehicle is damaged in a crash,
the headlamp aim may be affected. Aim adjustment
to the low-beam headlamps may be necessary if
oncoming drivers �ash their high-beam headlamps
at you (for vertical aim).
If the headlamps need to be re-aimed, it is
recommended that you take the vehicle to your
dealer/retailer for service.
5-41
ProCarManuals.com
Page 311 of 362
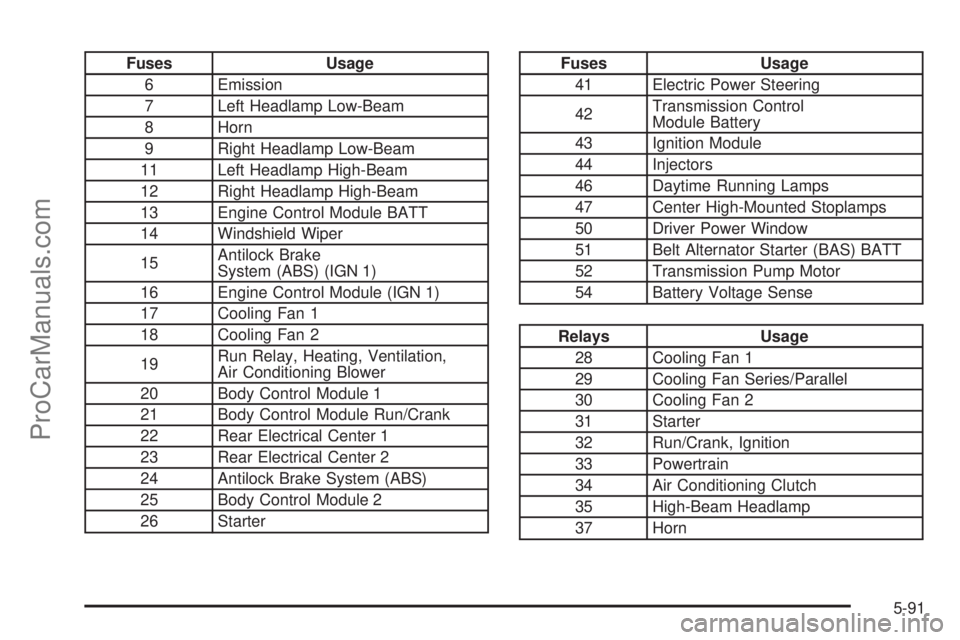
Fuses Usage
6 Emission
7 Left Headlamp Low-Beam
8 Horn
9 Right Headlamp Low-Beam
11 Left Headlamp High-Beam
12 Right Headlamp High-Beam
13 Engine Control Module BATT
14 Windshield Wiper
15Antilock Brake
System (ABS) (IGN 1)
16 Engine Control Module (IGN 1)
17 Cooling Fan 1
18 Cooling Fan 2
19Run Relay, Heating, Ventilation,
Air Conditioning Blower
20 Body Control Module 1
21 Body Control Module Run/Crank
22 Rear Electrical Center 1
23 Rear Electrical Center 2
24 Antilock Brake System (ABS)
25 Body Control Module 2
26 StarterFuses Usage
41 Electric Power Steering
42Transmission Control
Module Battery
43 Ignition Module
44 Injectors
46 Daytime Running Lamps
47 Center High-Mounted Stoplamps
50 Driver Power Window
51 Belt Alternator Starter (BAS) BATT
52 Transmission Pump Motor
54 Battery Voltage Sense
Relays Usage
28 Cooling Fan 1
29 Cooling Fan Series/Parallel
30 Cooling Fan 2
31 Starter
32 Run/Crank, Ignition
33 Powertrain
34 Air Conditioning Clutch
35 High-Beam Headlamp
37 Horn
5-91
ProCarManuals.com
Page 312 of 362
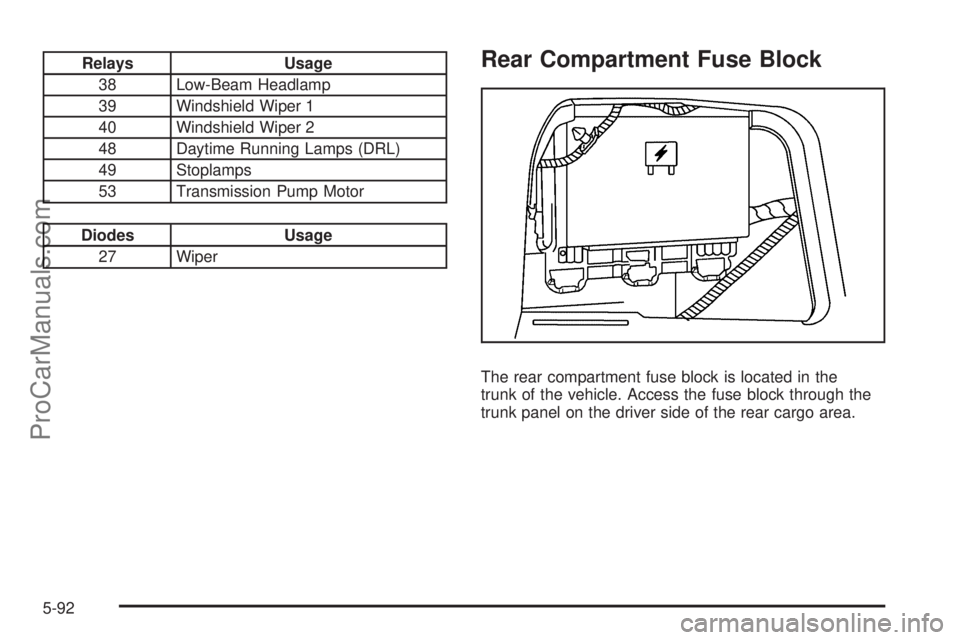
Relays Usage
38 Low-Beam Headlamp
39 Windshield Wiper 1
40 Windshield Wiper 2
48 Daytime Running Lamps (DRL)
49 Stoplamps
53 Transmission Pump Motor
Diodes Usage
27 Wiper
Rear Compartment Fuse Block
The rear compartment fuse block is located in the
trunk of the vehicle. Access the fuse block through the
trunk panel on the driver side of the rear cargo area.
5-92
ProCarManuals.com
Page 355 of 362
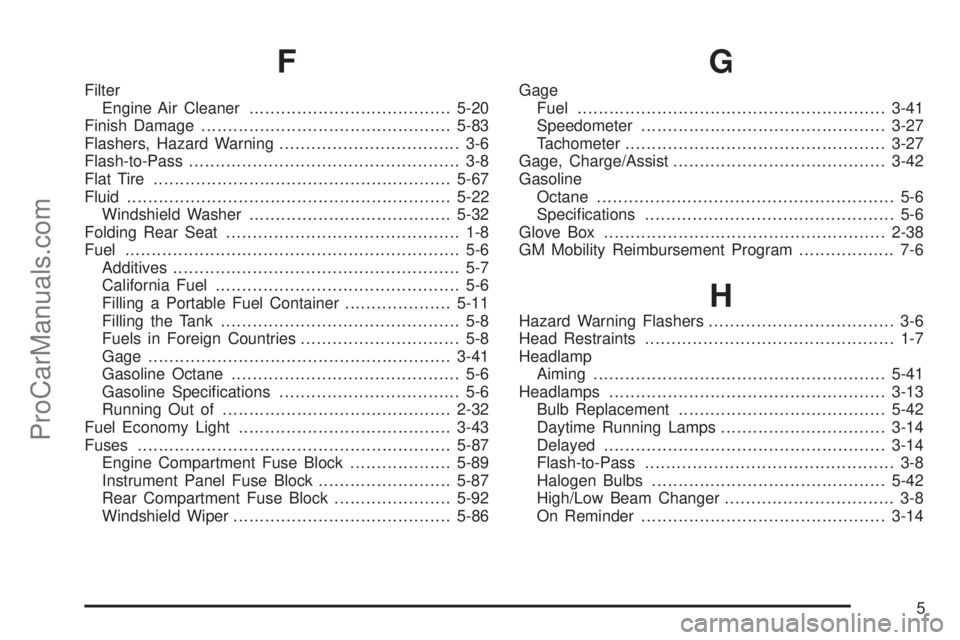
F
Filter
Engine Air Cleaner......................................5-20
Finish Damage...............................................5-83
Flashers, Hazard Warning.................................. 3-6
Flash-to-Pass................................................... 3-8
Flat Tire........................................................5-67
Fluid.............................................................5-22
Windshield Washer......................................5-32
Folding Rear Seat............................................ 1-8
Fuel............................................................... 5-6
Additives...................................................... 5-7
California Fuel.............................................. 5-6
Filling a Portable Fuel Container....................5-11
Filling the Tank............................................. 5-8
Fuels in Foreign Countries.............................. 5-8
Gage.........................................................3-41
Gasoline Octane........................................... 5-6
Gasoline Speci�cations.................................. 5-6
Running Out of...........................................2-32
Fuel Economy Light........................................3-43
Fuses...........................................................5-87
Engine Compartment Fuse Block...................5-89
Instrument Panel Fuse Block.........................5-87
Rear Compartment Fuse Block......................5-92
Windshield Wiper.........................................5-86
G
Gage
Fuel..........................................................3-41
Speedometer..............................................3-27
Tachometer.................................................3-27
Gage, Charge/Assist........................................3-42
Gasoline
Octane........................................................ 5-6
Speci�cations............................................... 5-6
Glove Box.....................................................2-38
GM Mobility Reimbursement Program.................. 7-6
H
Hazard Warning Flashers................................... 3-6
Head Restraints............................................... 1-7
Headlamp
Aiming.......................................................5-41
Headlamps....................................................3-13
Bulb Replacement.......................................5-42
Daytime Running Lamps...............................3-14
Delayed.....................................................3-14
Flash-to-Pass............................................... 3-8
Halogen Bulbs............................................5-42
High/Low Beam Changer................................ 3-8
On Reminder..............................................3-14
5
ProCarManuals.com
Page 357 of 362

Light (cont.)
Oil Pressure...............................................3-39
Passenger Airbag Status Indicator..................3-30
Safety Belt Reminders..................................3-28
Security.....................................................3-40
Tire Pressure..............................................3-35
Light, Auto Stop Mode.....................................3-42
Lighting
Entry/Exit...................................................3-16
Parade Dimming..........................................3-17
Lights............................................................3-13
Flash-to-Pass............................................... 3-8
High/Low Beam Changer................................ 3-8
On Reminder..............................................3-14
Loading Your Vehicle.......................................4-22
Lockout Protection..........................................2-10
Locks
Delayed Locking........................................... 2-8
Door........................................................... 2-7
Lockout Protection.......................................2-10
Power Door.................................................. 2-7
Programmable Automatic Door Locks............... 2-8
Rear Door Security Locks............................... 2-9
Loss of Control...............................................4-12
Lumbar
Manual Controls............................................ 1-3M
Maintenance Schedule
Additional Required Services........................... 6-6
At Each Fuel Fill........................................... 6-9
At Least Once a Month.................................. 6-9
At Least Once a Year..................................6-10
Introduction.................................................. 6-2
Maintenance Footnotes.................................. 6-7
Maintenance Record....................................6-14
Maintenance Replacement Parts....................6-13
Maintenance Requirements............................. 6-2
Owner Checks and Services........................... 6-9
Recommended Fluids and Lubricants.............6-12
Scheduled Maintenance................................. 6-4
Using.......................................................... 6-2
Your Vehicle and the Environment................... 6-2
Malfunction Indicator Light................................3-36
Manual Lumbar Controls.................................... 1-3
Manual Seats................................................... 1-2
Manual, Using.................................................... iii
Message
DIC Warnings and Messages........................3-46
Mirrors
Manual Rearview Mirror................................2-34
Manual Rearview Mirror with OnStar
®.............2-34
7
ProCarManuals.com