steering SATURN AURA 2010 Owner's Manual
[x] Cancel search | Manufacturer: SATURN, Model Year: 2010, Model line: AURA, Model: SATURN AURA 2010Pages: 428, PDF Size: 2.78 MB
Page 155 of 428

Instrument Panel Overview
Hazard Warning Flashers
|(Hazard Warning Flasher):Press this button
located on the instrument panel, to make the front and
rear turn signal lamps flash on and off. This warns
others that you are having trouble.
Press
|again to turn the flashers off.
Horn
Press near or on the horn symbols on the steering
wheel pad to sound the horn.
Tilt and Telescopic Steering Wheel
A tilt and telescope wheel lets the steering wheel
be adjusted.
The lever is located on the left side of the steering
wheel column.To adjust the steering wheel:
1. Pull the lever down.
2. Move the steering wheel up or down or backward
or forward into a comfortable position.
3. Pull the lever up to lock the steering wheel in place.
Do not adjust the steering wheel while driving.
4-3
ProCarManuals.com
Page 156 of 428

Turn Signal/Multifunction Lever
The lever on the left side of the steering column
operates the following:
G:Turn and Lane-Change Signals
53:Headlamp High/Low-Beam Changer
O:Exterior Lamp Control
Flash-to-Pass.
Information for these features is on the pages following.
Turn and Lane-Change Signals
An arrow on the instrument
panel cluster flashes in the
direction of the turn or
lane change.
Move the lever all the way up or down to signal a turn.
Raise or lower the lever until the arrow starts to flash
to signal a lane change. Hold it there until lane change
is complete.
The lever returns to its starting position when it is
released.
If after signaling a turn or lane change the arrows flash
rapidly or do not come on, a signal bulb could be
burned out.
Have the bulbs replaced. If the bulb is not burned out,
check the fuse. SeeFuses on page 6-97.
4-4
ProCarManuals.com
Page 157 of 428

Headlamp High/Low-Beam Changer
To change the headlamps from low beam to high
beam, push the turn signal/multifunction lever away
from you.
This instrument panel cluster light
3comes on if the
high beam lamps are turned on while the ignition is
in ON/RUN.
To change the headlamps from high beam to low beam,
pull the turn signal lever toward you.
Flash-to-Pass
This feature lets the high-beam headlamps be used to
signal a driver in front of you that you want to pass.
Pull the turn signal/multifunction lever toward you until
the high-beam headlamps come on, then release
the lever to turn them off.
Windshield Wipers
The windshield wiper lever is on the right side of the
steering column.
Move the lever to control the windshield wipers.
9(Off):Turns the windshield wipers off.
&(Intermittent; Speed Sensitive Wipers):For
intermittent or speed sensitive operation. The amount of
delay time varies between wiping cycles due to the
delay setting selected or the speed of the vehicle. As
vehicle speed is increased or decreased, the wiper
interval also increases or decreases.
4-5
ProCarManuals.com
Page 159 of 428

Cruise Control
Cruise control lets a speed of about 40 km/h (25 mph)
or more be maintained without keeping your foot on
the accelerator. Cruise control does not work at speeds
below 40 km/h (25 mph).
{WARNING:
Cruise control can be dangerous where you
cannot drive safely at a steady speed. So, do not
use the cruise control on winding roads or in
heavy traffic.
Cruise control can be dangerous on slippery roads.
On such roads, fast changes in tire traction can
cause excessive wheel slip, and you could lose
control. Do not use cruise control on slippery roads.
Setting Cruise Control
{WARNING:
If you leave your cruise control on when you are
not using cruise, you might hit a button and go
into cruise when you do not want to. You could be
startled and even lose control. Keep the cruise
control switch off until you want to use cruise
control.
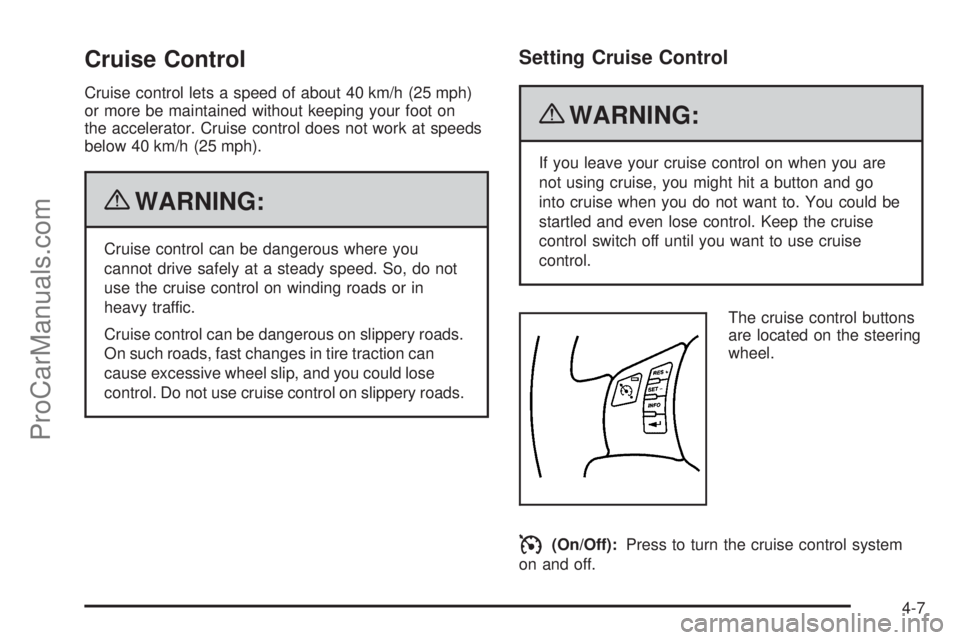
The cruise control buttons
are located on the steering
wheel.
I(On/Off):Press to turn the cruise control system
on and off.
4-7
ProCarManuals.com
Page 162 of 428

Headlamps
The band on the lever located on the left side of the
steering column, operates the exterior lamps.
The exterior lamp control has the following four
positions:
2(Headlamps):Turns on the headlamps, parking
lamps, and taillamps.
;(Parking Lamps):Turns on the parking lamps and
taillamps only.
AUTO (Automatic Headlamp System):Automatically
turns on the Daytime Running Lamps during daytime,
and the headlamps, parking lamps, and taillamps
at night.
P(Off/On):Turn the band to this position to turn on
the Automatic Headlamp System. In Canada, this
position only works when a vehicle is in the P (Park)
position.
To turn on the Automatic Headlamp System, turn the
switch to off/on. To turn them off, turn the switch to off/on
again. This is a momentary control switch that springs
back when released. The Automatic Headlamp System
always turns on at the beginning of an ignition cycle.
Headlamps on Reminder
If the driver’s door is opened and the ignition is turned
off while leaving the lamps on, a warning chime will
sound.
Headlamps Off in Park
This feature works when the ignition is in the ON/RUN
position and it is dark outside. To turn the headlamps
off when it is dark outside but keep other exterior lights
on, turn the exterior lamp control to the parking lamp
position.
To turn on the headlamps along with the other lamps
when it is dark outside, turn the exterior lamp control to
the AUTO or headlamp position.
This function does not work for vehicles first sold in
Canada.
4-10
ProCarManuals.com
Page 164 of 428

The DRL and automatic headlamp systems will only
be affected when the light sensor sees a change
in lighting lasting longer than this delay.
If vehicle is started in a dark garage, the automatic
headlamp system comes on immediately. Once
the vehicle leaves the garage, it takes about one minute
for the automatic headlamp system to change to DRL
if it is light outside. During that delay, the instrument
panel cluster may not be as bright as usual. Make sure
the instrument panel brightness control is in the full
bright position. SeeInstrument Panel Brightness
on page 4-13.
To idle the vehicle with the automatic headlamp system
off, turn the ignition on and set the exterior light
switch to the off/on position. For vehicles first sold in
Canada, the transmission must stay in P (Park) for this
function.
The regular headlamps should be used when needed.Fog Lamps
For vehicles with fog lamps, the button for this feature is
located on the instrument panel, to the left of the
steering wheel.
The ignition must be on for the fog lamps to work.
#:Press to turn the fog lamps on or off. An indicator
light comes on when the fog lamps are on.
The parking lamps automatically turn on and off when
the fog lamps are turned on and off.
The fog lamps turn off while the high-beam headlamps
are turned on.
Some localities have laws that require the headlamps to
be on along with the fog lamps.
4-12
ProCarManuals.com
Page 165 of 428

Instrument Panel Brightness
The knob with this symbol
is located on the
instrument panel to the left
of the steering column.
Turn the knob clockwise or counterclockwise to brighten
or dim the lights.
Turn the knob completely clockwise to turn on the
interior lamps.
Dome Lamps
The dome lamps come on when any door is opened.
They turn off after all the doors are closed.
The dome lamps can also be turned on by turning the
instrument panel brightness knob, located on the
instrument panel to the left of the steering column,
clockwise to the farthest position. In this position, the
dome lamps remain on whether a door is opened
or closed.
Entry/Exit Lighting
The lamps inside the vehicle come on when any door is
opened. These lamps fade out about 20 seconds
after all of the doors have been closed or when the
ignition is turned to ON/RUN. They also come on when
the unlock symbol button or the horn symbol is
pressed on the Remote Keyless Entry (RKE) system
transmitter.
The lamps inside the vehicle stay on for about
20 seconds after the key is removed from the ignition to
provide light as you exit.
Parade Dimming
Parade dimming is a separate lighting mode that comes
on while the parking lamps are turned on during the
day. It prevents the display lights and indicator
lights from being dim, while the parking lamps are used
during the day.
Reading Lamps
For vehicles with front overhead console and rear
reading lamps, press the lens to turn the lamp on and
off, while the doors are closed. These lamps come
on automatically when any door is opened.
4-13
ProCarManuals.com
Page 191 of 428

Here are four things that some owners ask about.
These are normal and do not indicate a problem with
the fuel gage:
•At the service station, the gas pump shuts off
before the gage reads full.
•It takes a little more or less fuel to fill up than the
gage indicated. For example, the gage may have
indicated the fuel tank was half full, but it actually
took a little more or less than half the fuel tank’s
capacity to fill it.
•The indicator moves a little when while turning a
corner or speeding up.
•The gage goes back to empty when the ignition is
turned off.
Driver Information Center (DIC)
Your vehicle has a Driver Information Center (DIC).
The DIC display gives you the status of many of your
vehicle’s systems. The DIC is also used to display driver
personalization menu modes and warning/status
messages. All messages will appear in the DIC display,
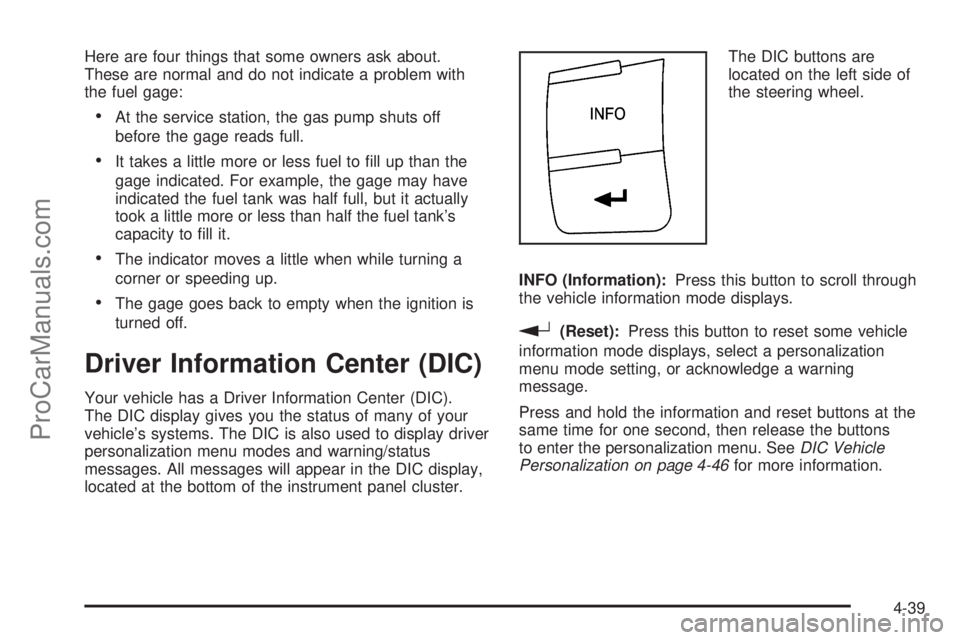
located at the bottom of the instrument panel cluster.The DIC buttons are
located on the left side of
the steering wheel.
INFO (Information):Press this button to scroll through
the vehicle information mode displays.
r(Reset):Press this button to reset some vehicle
information mode displays, select a personalization
menu mode setting, or acknowledge a warning
message.
Press and hold the information and reset buttons at the
same time for one second, then release the buttons
to enter the personalization menu. SeeDIC Vehicle
Personalization on page 4-46for more information.
4-39
ProCarManuals.com
Page 196 of 428

LOW FUEL
This message displays when your vehicle is low on fuel.
Refill the fuel tank as soon as possible. SeeFuel
Gage on page 4-38,Fuel on page 6-5, andFilling the
Tank on page 6-10for more information.
LOW TRACTION
If your vehicle has the Traction Control System (TCS),
this message displays and the ESC/TCS light on
the instrument panel cluster flashes when the system is
actively limiting wheel spin. Slippery road conditions
may exist if this message is displayed, so adjust
your driving accordingly. This message stays on for a
few seconds after the system stops limiting wheel spin.
SeeTraction Control System (TCS) on page 5-7and
Electronic Stability Control (ESC)/Traction Control
System (TCS) Indicator/Warning Light on page 4-32for
more information.
LOW WASHER FLUID
This message displays when the vehicle’s windshield
washer fluid is low. Fill the windshield washer fluid
reservoir to the proper level as soon as possible. See
Windshield Washer Fluid on page 6-32.
POWER STEERING
On some vehicles, this message displays if a problem
has been detected with the electric power steering. Have
your vehicle serviced by your dealer/retailer immediately.
PUSH PARK PEDAL
This message displays if the parking brake is left
engaged. SeeParking Brake on page 3-26for more
information.
SERVICE AIR BAG
This message displays when there is a problem with the
airbag system. Have your vehicle serviced by your
dealer/retailer immediately.
SERVICE ESC (ELECTRONIC STABILITY
CONTROL)
If your vehicle has Electronic Stability Control (ESC),
this message displays and a chime sounds if there has
been a problem detected with ESC. The ESC/TCS
light also appears on the instrument panel cluster. This
light stays on solid as long as the detected problem
remains present. When this message displays, the
system is not working. Adjust your driving accordingly.
SeeElectronic Stability Control (ESC) on page 5-5
andElectronic Stability Control (ESC)/Traction Control
System (TCS) Indicator/Warning Light on page 4-32
for more information.
If this message turns on while you are driving, pull off
the road as soon as possible and stop carefully.
Try resetting the system by turning the ignition off and
then back on. If this message still stays on or turns back
4-44
ProCarManuals.com
Page 206 of 428

¨SEEK:Press to seek or scan stations with a strong
signal in the selected band.
•To seek stations, press and release¨SEEK to go
to the next station and stay there.
•To scan stations, press and hold¨SEEK for a
few seconds until the radio beeps once. The
radio goes to a station, plays for a few seconds,
then goes to the next station. Press
¨SEEK again
to stop scanning.
•To scan preset stations in the selected band, press
and hold
¨SEEK for four seconds until a double
beep sounds. The radio goes to a stored preset,
plays for a few seconds, then goes to the next
stored preset. Press
¨SEEK again to stop
scanning preset stations.
4(Information):For vehicles with XM, MP3, WMA, or
RDS features, press
4to display additional text
information related to the current FM-RDS or XM station;
or CD, MP3, WMA song. Song title information will be
displayed on the top line of the display while the
artist information will be displayed on the bottom line, if
the information is available during XM, CD, MP3, or
WMA playback. When information is not available, “No
Info” displays.
Storing a Radio Station
Drivers are encouraged to set up radio station favorites
while the vehicle is in P (Park). Tune to favorite
stations using the softkeys, favorites button, and steering
wheel controls. SeeDefensive Driving on page 5-2.
FAV (Favorites):A maximum of 36 stations can
be stored as favorites using the six softkeys located
below the radio station frequency tabs and by using the
radio favorites page button (FAV button). Press FAV
to go through up to six pages of favorites, each having
six favorite stations available per page. Each page
of favorites can contain any combination of AM, FM, or
XM stations. The current balance/fade and tone
settings are also stored with the favorite stations.
To store a station as a favorite:
1. Tune to the desired radio station and set the
balance/fade and tone settings to the desired levels.
2. Press FAV to display the page where to store the
station.
3. Press and hold one of the six softkeys until a beep
sounds.
4. Repeat the steps for each radio station to be stored
as a favorite.
4-54
ProCarManuals.com