steering SATURN AURA 2010 Service Manual
[x] Cancel search | Manufacturer: SATURN, Model Year: 2010, Model line: AURA, Model: SATURN AURA 2010Pages: 428, PDF Size: 2.78 MB
Page 254 of 428

If Your Vehicle is Stuck in Sand,
Mud, Ice, or Snow
Slowly and cautiously spin the wheels to free the
vehicle when stuck in sand, mud, ice, or snow. See
Rocking Your Vehicle to Get It Out on page 5-18.
If the vehicle has a traction system, it can often help to
free a stuck vehicle. Refer to the vehicle’s traction
system in the Index. If stuck too severely for the traction
system to free the vehicle, turn the traction system off
and use the rocking method.
{WARNING:
If the vehicle’s tires spin at high speed, they can
explode, and you or others could be injured. The
vehicle can overheat, causing an engine
compartment fire or other damage. Spin the
wheels as little as possible and avoid going above
55 km/h (35 mph) as shown on the speedometer.
For information about using tire chains on the vehicle,
seeTire Chains on page 6-65.
Rocking Your Vehicle to Get It Out
Turn the steering wheel left and right to clear the
area around the front wheels. Turn off any traction or
stability system. Shift back and forth between
R (Reverse) and a forward gear, spinning the wheels as
little as possible. To prevent transmission wear, wait
until the wheels stop spinning before shifting gears.
Release the accelerator pedal while shifting, and press
lightly on the accelerator pedal when the transmission
is in gear. Slowly spinning the wheels in the forward and
reverse directions causes a rocking motion that could
free the vehicle. If that does not get the vehicle out after
a few tries, it might need to be towed out. If the
vehicle does need to be towed out, seeTowing Your
Vehicle on page 5-24.
5-18
ProCarManuals.com
Page 263 of 428

4. Clamp the steering wheel in a straight-ahead
position with a clamping device designed for towing.
5. Remove the key from the ignition.
6. Secure the vehicle to the dolly.
7. Release the parking brake.
Notice:Towing the vehicle from the rear could
damage it. Also, repairs would not be covered by the
vehicle warranty. Never have the vehicle towed
from the rear.Towing a Trailer
{WARNING:
The driver can lose control when pulling a trailer if
the correct equipment is not used or the vehicle is
not driven properly. For example, if the trailer is
too heavy, the brakes may not work well — or
even at all. The driver and passengers could be
seriously injured. The vehicle may also be
damaged; the resulting repairs would not be
covered by the vehicle warranty. Pull a trailer only
if all the steps in this section have been followed.
Ask your dealer/retailer for advice and information
about towing a trailer with the vehicle.
Notice:Pulling a trailer improperly can damage the
vehicle and result in costly repairs not covered
by the vehicle warranty. To pull a trailer correctly,
follow the advice in this section and see your
dealer/retailer for important information about
towing a trailer with the vehicle.
The vehicle can tow a trailer if it is equipped with the
proper trailer towing equipment. To identify the trailering
capacity of the vehicle, read the information in “Weight
5-27
ProCarManuals.com
Page 267 of 428

Driving with a Trailer
Towing a trailer requires a certain amount of experience.
Get to know the rig before setting out for the open
road. Get acquainted with the feel of handling and
braking with the added weight of the trailer. And always
keep in mind that the vehicle you are driving is now
longer and not as responsive as the vehicle is by itself.
Before starting, check all trailer hitch parts and
attachments, safety chains, electrical connectors, lamps,
tires and mirror adjustments. If the trailer has electric
brakes, start the vehicle and trailer moving and
then apply the trailer brake controller by hand to be sure
the brakes are working. This checks the electrical
connection at the same time.
During the trip, check occasionally to be sure that the
load is secure, and that the lamps and any trailer brakes
are still working.
Following Distance
Stay at least twice as far behind the vehicle ahead as
you would when driving the vehicle without a trailer. This
can help to avoid situations that require heavy braking
and sudden turns.
Passing
More passing distance is needed when towing a trailer.
Because the rig is longer, it is necessary to go much
farther beyond the passed vehicle before returning to
the lane.
Backing Up
Hold the bottom of the steering wheel with one hand.
Then, to move the trailer to the left, move that hand
to the left. To move the trailer to the right, move your
hand to the right. Always back up slowly and, if possible,
have someone guide you.
Making Turns
Notice:Making very sharp turns while trailering
could cause the trailer to come in contact with the
vehicle. The vehicle could be damaged. Avoid
making very sharp turns while trailering.
When turning with a trailer, make wider turns than
normal. Do this so the trailer will not strike soft
shoulders, curbs, road signs, trees or other objects.
Avoid jerky or sudden maneuvers. Signal well in
advance.
5-31
ProCarManuals.com
Page 271 of 428

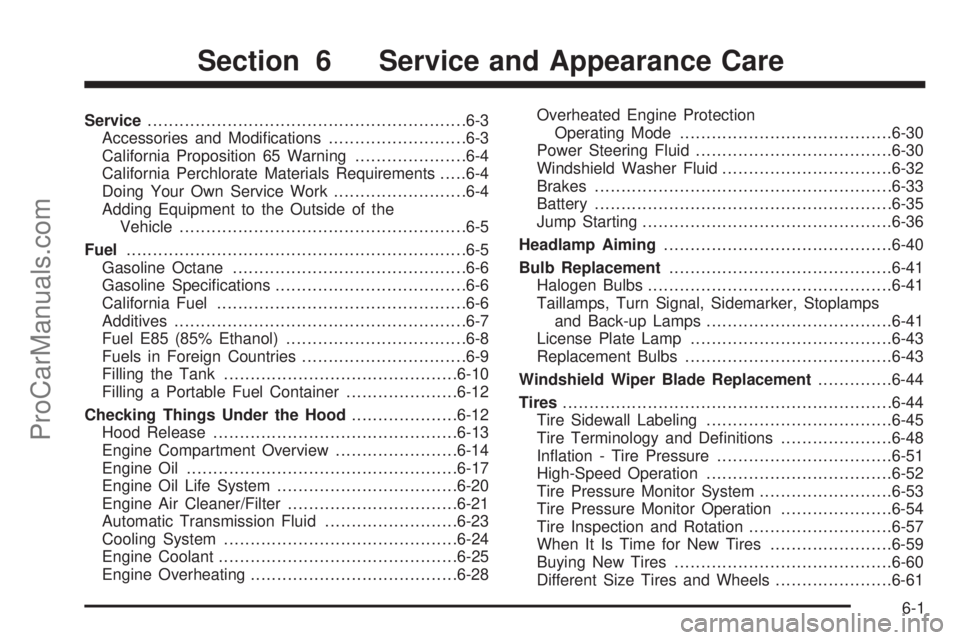
Service............................................................6-3
Accessories and Modifications..........................6-3
California Proposition 65 Warning.....................6-4
California Perchlorate Materials Requirements.....6-4
Doing Your Own Service Work.........................6-4
Adding Equipment to the Outside of the
Vehicle......................................................6-5
Fuel................................................................6-5
Gasoline Octane............................................6-6
Gasoline Specifications....................................6-6
California Fuel...............................................6-6
Additives.......................................................6-7
Fuel E85 (85% Ethanol)..................................6-8
Fuels in Foreign Countries...............................6-9
Filling the Tank............................................6-10
Filling a Portable Fuel Container.....................6-12
Checking Things Under the Hood....................6-12
Hood Release..............................................6-13
Engine Compartment Overview.......................6-14
Engine Oil...................................................6-17
Engine Oil Life System..................................6-20
Engine Air Cleaner/Filter................................6-21
Automatic Transmission Fluid.........................6-23
Cooling System............................................6-24
Engine Coolant.............................................6-25
Engine Overheating.......................................6-28Overheated Engine Protection
Operating Mode........................................6-30
Power Steering Fluid.....................................6-30
Windshield Washer Fluid................................6-32
Brakes........................................................6-33
Battery........................................................6-35
Jump Starting...............................................6-36
Headlamp Aiming...........................................6-40
Bulb Replacement..........................................6-41
Halogen Bulbs..............................................6-41
Taillamps, Turn Signal, Sidemarker, Stoplamps
and Back-up Lamps...................................6-41
License Plate Lamp......................................6-43
Replacement Bulbs.......................................6-43
Windshield Wiper Blade Replacement..............6-44
Tires..............................................................6-44
Tire Sidewall Labeling...................................6-45
Tire Terminology and Definitions.....................6-48
Inflation - Tire Pressure.................................6-51
High-Speed Operation...................................6-52
Tire Pressure Monitor System.........................6-53
Tire Pressure Monitor Operation.....................6-54
Tire Inspection and Rotation...........................6-57
When It Is Time for New Tires.......................6-59
Buying New Tires.........................................6-60
Different Size Tires and Wheels......................6-61
Section 6 Service and Appearance Care
6-1
ProCarManuals.com
Page 283 of 428

Hood Release
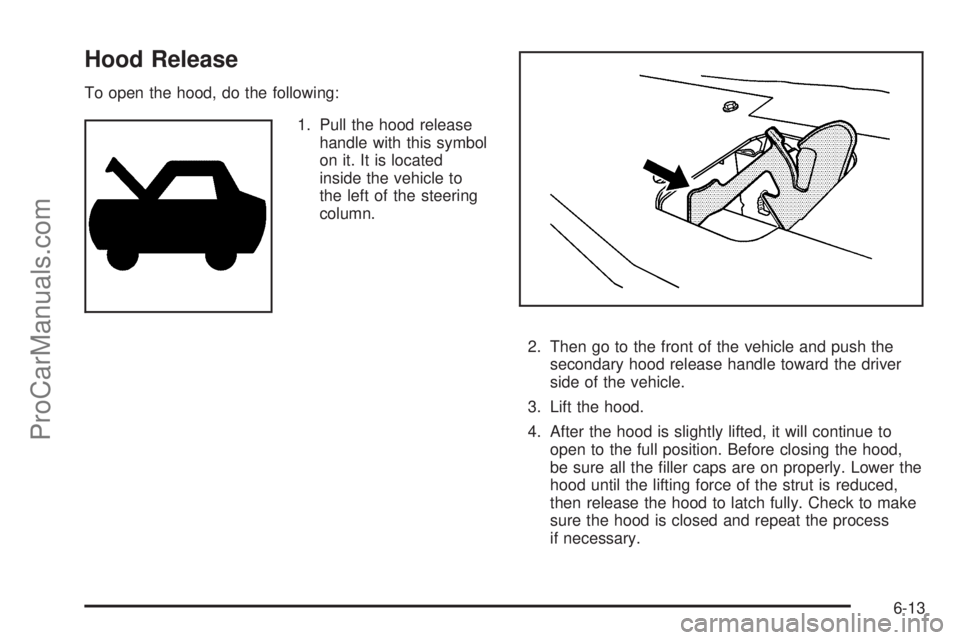
To open the hood, do the following:
1. Pull the hood release
handle with this symbol
on it. It is located
inside the vehicle to
the left of the steering
column.
2. Then go to the front of the vehicle and push the
secondary hood release handle toward the driver
side of the vehicle.
3. Lift the hood.
4. After the hood is slightly lifted, it will continue to
open to the full position. Before closing the hood,
be sure all the filler caps are on properly. Lower the
hood until the lifting force of the strut is reduced,
then release the hood to latch fully. Check to make
sure the hood is closed and repeat the process
if necessary.
6-13
ProCarManuals.com
Page 287 of 428

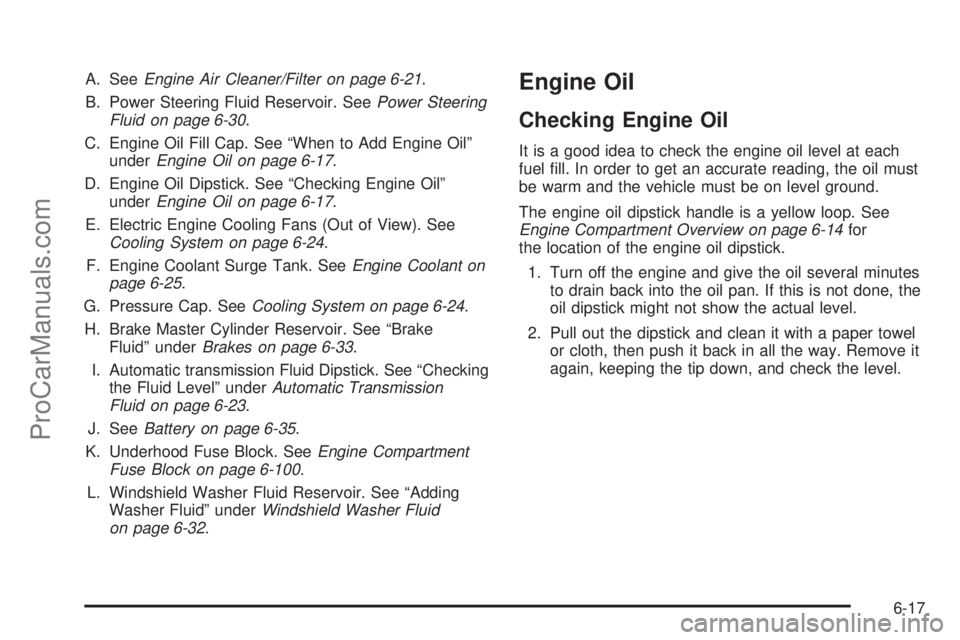
A. SeeEngine Air Cleaner/Filter on page 6-21.
B. Power Steering Fluid Reservoir. SeePower Steering
Fluid on page 6-30.
C. Engine Oil Fill Cap. See “When to Add Engine Oil”
underEngine Oil on page 6-17.
D. Engine Oil Dipstick. See “Checking Engine Oil”
underEngine Oil on page 6-17.
E. Electric Engine Cooling Fans (Out of View). See
Cooling System on page 6-24.
F. Engine Coolant Surge Tank. SeeEngine Coolant on
page 6-25.
G. Pressure Cap. SeeCooling System on page 6-24.
H. Brake Master Cylinder Reservoir. See “Brake
Fluid” underBrakes on page 6-33.
I. Automatic transmission Fluid Dipstick. See “Checking
the Fluid Level” underAutomatic Transmission
Fluid on page 6-23.
J. SeeBattery on page 6-35.
K. Underhood Fuse Block. SeeEngine Compartment
Fuse Block on page 6-100.
L. Windshield Washer Fluid Reservoir. See “Adding
Washer Fluid” underWindshield Washer Fluid
on page 6-32.Engine Oil
Checking Engine Oil
It is a good idea to check the engine oil level at each
fuel fill. In order to get an accurate reading, the oil must
be warm and the vehicle must be on level ground.
The engine oil dipstick handle is a yellow loop. See
Engine Compartment Overview on page 6-14for
the location of the engine oil dipstick.
1. Turn off the engine and give the oil several minutes
to drain back into the oil pan. If this is not done, the
oil dipstick might not show the actual level.
2. Pull out the dipstick and clean it with a paper towel
or cloth, then push it back in all the way. Remove it
again, keeping the tip down, and check the level.
6-17
ProCarManuals.com
Page 300 of 428

If the temperature overheat gage is no longer in the
overheat zone or an overheat warning no longer
displays, the vehicle can be driven. Continue to drive
the vehicle slow for about 10 minutes. Keep a safe
vehicle distance from the car in front of you. If the
warning does not come back on, continue to drive
normally.
If the warning continues, pull over, stop, and park the
vehicle right away.
If there is no sign of steam, idle the engine for three
minutes while parked. If the warning is still displayed,
turn off the engine until it cools down. Also, see
“Overheated Engine Protection Operating Mode”
following.
Overheated Engine Protection
Operating Mode
This emergency operating mode allows your vehicle to
be driven to a safe place in an emergency situation.
If an overheated engine condition exists, an overheat
protection mode which alternates firing groups of
cylinders helps prevent engine damage. In this mode,
you will notice a significant loss in power and engine
performance. The temperature gage will indicate
an overheat condition exists. Driving extended miles
(km) and/or towing a trailer in the overheat protection
mode should be avoided.Notice:After driving in the overheated engine
protection operating mode, to avoid engine damage,
allow the engine to cool before attempting any
repair. The engine oil will be severely degraded.
Repair the cause of coolant loss, change the oil and
reset the oil life system. SeeEngine Oil on
page 6-17.
Power Steering Fluid
SeeEngine Compartment
Overview on page 6-14for
reservoir location.
6-30
ProCarManuals.com
Page 301 of 428

When to Check Power Steering Fluid
Power steering fluid is used in all vehicles with
V6 engines. Vehicles with the 4-cylinder engine have
electric power steering and do not use power steering
fluid.
It is not necessary to regularly check power steering
fluid unless a leak is suspected in the system, or
an unusual noise is heard. A fluid loss in this system
could indicate a problem. Have the system inspected
and repaired.
How to Check Power Steering Fluid
To check the power steering fluid, do the following:
1. Turn the key off and let the engine compartment
cool down.
2. Wipe the cap and the top of the reservoir clean.
3. Unscrew the cap and wipe the dipstick with a
clean rag.
4. Replace the cap and completely tighten it.
5. Remove the cap again and look at the fluid level on
the dipstick.If the vehicle has the 3.6L V6 engine, the fluid level
should be between the MIN (Minimum) and MAX
(Maximum) marks when the engine is cold, and at the
MAX mark when the engine is hot. If the fluid is at
the MIN mark when the engine is cold or hot, power
steering fluid should be added.
The fluid level should be within the crosshatch area on
the dipstick.
If the fluid is at or below the ADD or MIN mark on the
dipstick, add just enough fluid to bring the level
within the crosshatch area.
What to Use
To determine what kind of fluid to use, see
Recommended Fluids and Lubricants on page 7-10.
Always use the proper fluid.
Notice:Use of the incorrect �uid may damage the
vehicle and the damages may not be covered by
the vehicle’s warranty. Always use the correct �uid
listed inRecommended Fluids and Lubricants
on page 7-10.
6-31
ProCarManuals.com
Page 318 of 428

(C) Aspect Ratio:A two-digit number that
indicates the tire height-to-width measurements.
For example, if the tire size aspect ratio is 60, as
shown in item C of the illustration, it would mean
that the tire’s sidewall is 60 percent as high as it
is wide.
(D) Construction Code
:A letter code is used to
indicate the type of ply construction in the tire.
The letter R means radial ply construction;
the letter D means diagonal or bias ply
construction; and the letter B means belted-bias
ply construction.
(E) Rim Diameter
:Diameter of the wheel in
inches.
(F) Service Description
:These characters
represent the load index and speed rating of the
tire. The load index represents the load carry
capacity a tire is certified to carry. The speed
rating is the maximum speed a tire is certified to
carry a load.
Tire Terminology and De�nitions
Air Pressure:The amount of air inside the
tire pressing outward on each square inch of the
tire. Air pressure is expressed in pounds per
square inch (psi) or kilopascal (kPa).
Accessory Weight
:This means the combined
weight of optional accessories. Some examples of
optional accessories are, automatic transmission,
power steering, power brakes, power windows,
power seats, and air conditioning.
Aspect Ratio
:The relationship of a tire’s height
to its width.
Belt
:A rubber coated layer of cords that is
located between the plies and the tread. Cords
may be made from steel or other reinforcing
materials.
Bead
:The tire bead contains steel wires wrapped
by steel cords that hold the tire onto the rim.
6-48
ProCarManuals.com
Page 336 of 428

If a Tire Goes Flat
It is unusual for a tire to blowout while you are driving,
especially if you maintain your vehicle’s tires properly.
If air goes out of a tire, it is much more likely to leak out
slowly. But if you should ever have a blowout, here
are a few tips about what to expect and what to do:
If a front tire fails, the flat tire creates a drag that pulls
the vehicle toward that side. Take your foot off the
accelerator pedal and grip the steering wheel firmly.
Steer to maintain lane position, and then gently brake to
a stop well out of the traffic lane.
A rear blowout, particularly on a curve, acts much like a
skid and may require the same correction you would
use in a skid. In any rear blowout remove your foot from
the accelerator pedal. Get the vehicle under control
by steering the way you want the vehicle to go. It may
be very bumpy and noisy, but you can still steer. Gently
brake to a stop, well off the road if possible.{WARNING:
Lifting a vehicle and getting under it to do
maintenance or repairs is dangerous without the
appropriate safety equipment and training. If a jack
is provided with the vehicle, it is designed only for
changing a flat tire. If it is used for anything else,
you or others could be badly injured or killed if the
vehicle slips off the jack. If a jack is provided with
the vehicle, only use it for changing a flat tire.
This vehicle may come with a jack and spare tire or a
tire sealant and compressor kit. To use the jack and
spare tire, follow the instructions below. To use the tire
sealant and compressor kit, seeTire Sealant and
Compressor Kit on page 6-67.
6-66
ProCarManuals.com