light SATURN ION 2007 Owner's Manual
[x] Cancel search | Manufacturer: SATURN, Model Year: 2007, Model line: ION, Model: SATURN ION 2007Pages: 440, PDF Size: 2.93 MB
Page 122 of 440
Mirrors
Automatic Dimming Rearview Mirror
with OnStar
®, Compass and
Temperature Display
The vehicle may have this feature. When on, an
automatic dimming mirror automatically dims to the
proper level to minimize glare from lights behind
you after dark.
The mirror also includes a dual display in the
upper right corner of the mirror face. The compass
reading and the outside temperature will both
appear in the display at the same time.
Y(On/Off):This is the on/off button.
Temperature and Compass Display
Press the on/off button, located to the far
left, brie�y to turn the comp/temp display on or off.
If the display reads CAL, the compass needs to
be calibrated. See the information following
on calibration.
To adjust between Fahrenheit and Celsius do the
following:
1. Press and hold the on/off button for
approximately four seconds until either a
�ashing °F, or °C appears.
2. Press the button again to change the display
to the desired unit of measurement. After
approximately four seconds of inactivity,
the new unit will be locked in and the
compass/temperature display will return.
122
ProCarManuals.com
Page 123 of 440
Automatic Dimming Mirror Operation
The automatic dimming mirror function is turned on
automatically each time the ignition is started.
To operate the automatic dimming mirror do the
following:
1. Make sure the green indicator light, located to
the left of the on/off button, is on. If it is not,
press and hold the on/off button for
approximately six seconds until the green light
comes on, indicating that the mirror is in
automatic dimming mode.
2. Turn off the automatic dimming mirror function
by pressing and holding the on/off button for
approximately six seconds until the green
indicator light turns off.
Compass Calibration
The compass may need calibration from time
to time.
In order to calibrate, CAL must be displayed in the
mirror compass windows. If CAL is not displayed,
push in the on/off button for approximately
nine seconds or until CAL is displayed.
The compass can be calibrated by driving the
vehicle in circles at 5 mph (8 km/h) or less until
the display reads a direction, or the word CAL
disappears.
123
ProCarManuals.com
Page 125 of 440

Cleaning the Mirror
When cleaning the mirror, use a paper towel or
similar material dampened with glass cleaner.
Do not spray glass cleaner directly on the mirror
as that may cause the liquid cleaner to enter
the mirror housing.
Automatic Dimming Rearview Mirror
with Compass and Temperature
Display
Your vehicle may be equipped with this mirror.
When on, an automatic dimming mirror will dim to
the proper level to minimize glare from lights
behind you after dark.
The mirror also includes a dual display in the
upper right corner of the mirror with the compass
reading and the outside temperature.
Yb:This is the compass/temperature button.
Brie�y press this button to turn the display
on or off.
Temperature Display
The temperature can be displayed by pressing the
compass/temperature button. Pressing the
compass/temperature button once brie�y,
will toggle the display reading on and off.
To alternate the temperature reading between
Fahrenheit and Celsius, press and hold the
compass/temperature button for approximately
three seconds until the display blinks F and
C. Press and release the compass/temperature
button to toggle between the Fahrenheit and
Celsius readings. After approximately �ve seconds
of inactivity, the display will stop blinking and
display the last selection made.
Press and release the compass/temperature
button to toggle the temperature display between
Fahrenheit or Celsius.
If an abnormal reading is displayed, please
consult your Saturn retailer.
125
ProCarManuals.com
Page 126 of 440

Automatic Dimming Mirror Operation
O
:Press this button to turn the automatic
dimming feature on or off. The indicator light to
the left of the button will turn on to indicate when
the feature is on. Once the mirror is turned off,
it will remain off until it is turned back on, or until
the vehicle is restarted.
Compass Operation
Press the compass/temperature button once
brie�y to turn the display on or off.
Compass Calibration
The compass may need calibration if one of the
following occurs:
If CAL is displayed while driving in the vehicle.
After approximately �ve seconds, the display
does not show a compass heading, N for
North, for example, there may be a strong
magnetic �eld interfering with the compass.
Such interference may be caused by a
magnetic antenna mount, magnetic note pad
holder, or a similar magnetic item.
The compass does not display the correct
heading and the compass zone variance
is set correctly.
In order to calibrate, CAL must be displayed in the
mirror compass windows. If CAL is not displayed,
push in the compass/temperature button for
approximately nine seconds or until CAL is
displayed.
The compass can be calibrated by driving the
vehicle in circles at 5 mph (8 km/h) or less until the
display reads a direction.
126
ProCarManuals.com
Page 133 of 440
Your Responsibility
You may need to increase the volume of your
radio to hear the OnStar®advisor. If the light next
to the OnStar®buttons is red, this means that
your system is not functioning properly and should
be checked by a dealer. If the light appears
clear (no light is appearing), your OnStar
®
subscription has expired. You can always press
the blue OnStar®button to con�rm that your
OnStar®equipment is active.
Storage Areas
Glove Box
Open the glove box by pulling back on the lever.
Close the glove box with a �rm push.
Cupholder(s)
Your vehicle may have cupholders between the
rear seats.
Center Console Storage Area
Your vehicle has a center console storage area
between the front seats. It contains a storage area
for small items.
The center console storage area can be used as
an armrest. Push the lid of the center console
forward for additional arm support.
133
ProCarManuals.com
Page 137 of 440
Instrument Panel Overview........................ 140
Hazard Warning Flashers.......................... 142
Other Warning Devices............................. 142
Horn.......................................................... 142
Tilt Wheel.................................................. 142
Turn Signal/Multifunction Lever.................. 143
Turn and Lane-Change Signals................. 144
Headlamp High/Low-Beam Changer.......... 145
Flash-to-Pass............................................ 145
Windshield Washer.................................... 145
Windshield Wiper Lever............................. 146
Cruise Control........................................... 147
Headlamps................................................ 150
Daytime Running Lamps (DRL)................. 151
Automatic Headlamp System..................... 151
Fog Lamps................................................ 152
Instrument Panel Brightness...................... 152
Dome Lamp.............................................. 153
Entry Lighting............................................ 153
Map Lamps............................................... 153
Battery Run-Down Protection..................... 153
Accessory Power Outlet(s)........................ 153
Ashtray(s) and Cigarette Lighter................ 154Climate Controls......................................... 155
Climate Control System
(Without Air Conditioning)....................... 155
Climate Control System
(With Air Conditioning)........................... 157
Outlet Adjustment...................................... 160
Passenger Compartment Air Filter............. 161
Warning Lights, Gages, and Indicators..... 163
Instrument Panel Cluster........................... 164
Speedometer and Odometer...................... 165
Trip Odometer........................................... 165
Tachometer............................................... 165
Safety Belt Reminder Light........................ 166
Passenger Safety Belt Reminder Light....... 166
Airbag Readiness Light............................. 167
Passenger Airbag Status Indicator............. 168
Battery Warning Light................................ 170
Up-Shift Light............................................ 170
Brake System Warning Light..................... 170
Anti-Lock Brake System Warning Light...... 172
Engine Coolant Temperature Gage............ 173
Malfunction Indicator Lamp........................ 174
Section 3 Instrument Panel
137
ProCarManuals.com
Page 138 of 440
Oil Pressure Light..................................... 177
Passlock®Warning Light............................ 178
Reduced Engine Power Light.................... 178
Highbeam On Light................................... 179
Fuel Gage................................................. 179
Boost Gage............................................... 180
Message Center.......................................... 182
Low Traction Message.............................. 182
Traction Off Message................................ 182
Cruise Control Message............................ 183
Transaxle Fluid Hot Message.................... 183
Change Engine Oil Message..................... 183
Check Gage Message............................... 184
Power Steering Message........................... 184
Trunk Ajar Warning Message.................... 184Check Gas Cap Message......................... 185
Low Fuel Warning Message...................... 185
Error Message........................................... 185
Audio System(s)......................................... 186
Setting the Time (Without Date Display).... 187
Setting the Time (With Date Display)......... 188
Radio with CD (Base)............................... 190
Radio with CD (MP3)................................ 195
Using an MP3........................................... 205
XM Radio Messages................................. 212
Radio Reception........................................ 214
Care of Your CDs..................................... 215
Care of the CD Player.............................. 215
Fixed Mast Antenna.................................. 215
XM™ Satellite Radio Antenna System....... 215
Section 3 Instrument Panel
138
ProCarManuals.com
Page 145 of 440
Headlamp High/Low-Beam Changer
Push the turn signal lever forward to change
the headlamps from low beam to high beam. Pull
the turn signal lever back and then release it
to change from high beam to low beam.
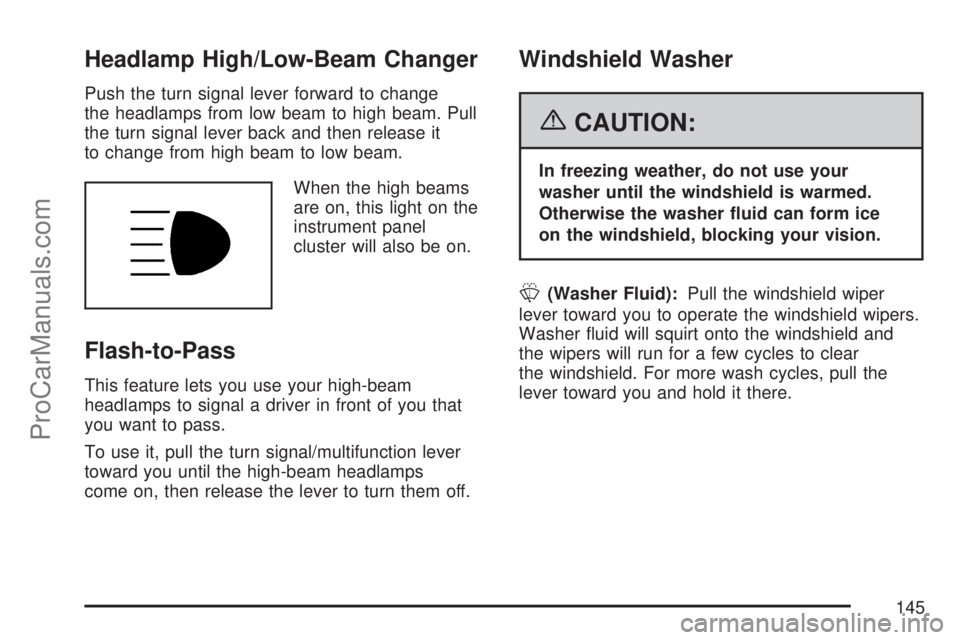
When the high beams
are on, this light on the
instrument panel
cluster will also be on.
Flash-to-Pass
This feature lets you use your high-beam
headlamps to signal a driver in front of you that
you want to pass.
To use it, pull the turn signal/multifunction lever
toward you until the high-beam headlamps
come on, then release the lever to turn them off.
Windshield Washer
{CAUTION:
In freezing weather, do not use your
washer until the windshield is warmed.
Otherwise the washer �uid can form ice
on the windshield, blocking your vision.
L(Washer Fluid):Pull the windshield wiper
lever toward you to operate the windshield wipers.
Washer �uid will squirt onto the windshield and
the wipers will run for a few cycles to clear
the windshield. For more wash cycles, pull the
lever toward you and hold it there.
145
ProCarManuals.com
Page 148 of 440
J(On/Off):Press this button to turn the cruise
control system on and off.
+RES (Resume):Press this part of the button to
resume a set speed and to accelerate the speed.
−SET (Set):Press this part of the button to set a
speed and to decrease the speed.
To set a speed do the following:
1. Press the on/off button to turn cruise control
on. The indicator light on the button will
come on.
2. Get to the speed you want.
3. Press the−SET part of the control button and
release it. The CRUISE message will display
in the instrument panel cluster to show the
system is engaged.
4. Take your foot off the accelerator pedal.
When the brakes are applied, the cruise control
shuts off.If the vehicle is in cruise control and the Enhanced
Traction System (ETS) begins to limit wheel
spin, the cruise control will automatically
disengage. SeeEnhanced Traction System (ETS)
on page 226. When road conditions allow, the
cruise control can be used again.
Resuming a Set Speed
Suppose you set your cruise control at a desired
speed and then you apply the brake. This, of
course, disengages the cruise control. The
CRUISE message in the instrument panel cluster
will also go out indicating cruise is no longer
engaged. To return to your previously set speed,
you do not need to go through the set process
again. Once you are going about 25 mph (40 km/h)
or more, you can press the +RES part of the
button brie�y.
This will take you back up to your previously
chosen speed and stay there.
148
ProCarManuals.com
Page 149 of 440
Increasing Speed While Using
Cruise Control
There are two ways to go to a higher speed.
Disengage the cruise control but do not turn it
off. Accelerate to a higher speed and reset
the cruise control.
If the cruise control system is already engaged,
press the +RES part of the button. Hold it there
until you get up to the speed you want, and
then release the button. To increase your
speed in very small amounts, press the +RES
part of the button brie�y and then release it.
Each time you do this, your vehicle will go
about 1 mph (1.6 km/h) faster.
Reducing Speed While Using
Cruise Control
If the cruise control system is already engaged,
Push and hold the−SET part of the button
until you reach the lower speed you want,
then release it.
To slow down in very small amounts, push the
−SET part of the button brie�y. Each time you
do this, you will go about 1 mph (1.6 km/h)
slower.
Passing Another Vehicle While Using
Cruise Control
Use the accelerator pedal to increase your speed.
When you take your foot off the pedal, your
vehicle will slow down to the cruise control speed
you set earlier.
Using Cruise Control on Hills
How well your cruise control will work on hills
depends upon your speed, load, and the
steepness of the hills. When going up steep hills,
you may have to step on the accelerator pedal
to maintain your speed. When going downhill, you
may have to brake or shift to a lower gear to
keep your speed down. Of course, applying the
brake takes you out of cruise control. Many drivers
�nd this to be too much trouble and do not use
cruise control on steep hills.
Ending Cruise Control
To end the cruise control session, step lightly on
the brake pedal or tap the clutch if your vehicle has
a manual transaxle.
Stepping on the brake pedal or clutch will only end
the current cruise control session. Press the
cruise control on/off button to turn the system
completely off.
149
ProCarManuals.com