clock SATURN L-SERIES 2005 User Guide

SATURN L-SERIES 2005 User Guide L-SERIES 2005 SATURN SATURN https://www.carmanualsonline.info/img/68/58577/w960_58577-0.png SATURN L-SERIES 2005 User Guide

Page 245 of 330

SATURN L-SERIES 2005 User Guide 5. Remove the bulb assembly and replace it with
the appropriate bulb.
6. Reverse the steps to reinstall the fog lamp
assembly.
Center High-Mounted Stoplamp
(CHMSL)
1. Remove the center high-mounted st

Page 246 of 330

SATURN L-SERIES 2005 User Guide 4. Remove the taillamp assembly.
5. Turn the bulb socket being replaced
counterclockwise one-quarter of a turn while
pressing the socket in firmly.
6. Pull the socket rearward until the bulb clears t

Page 265 of 330

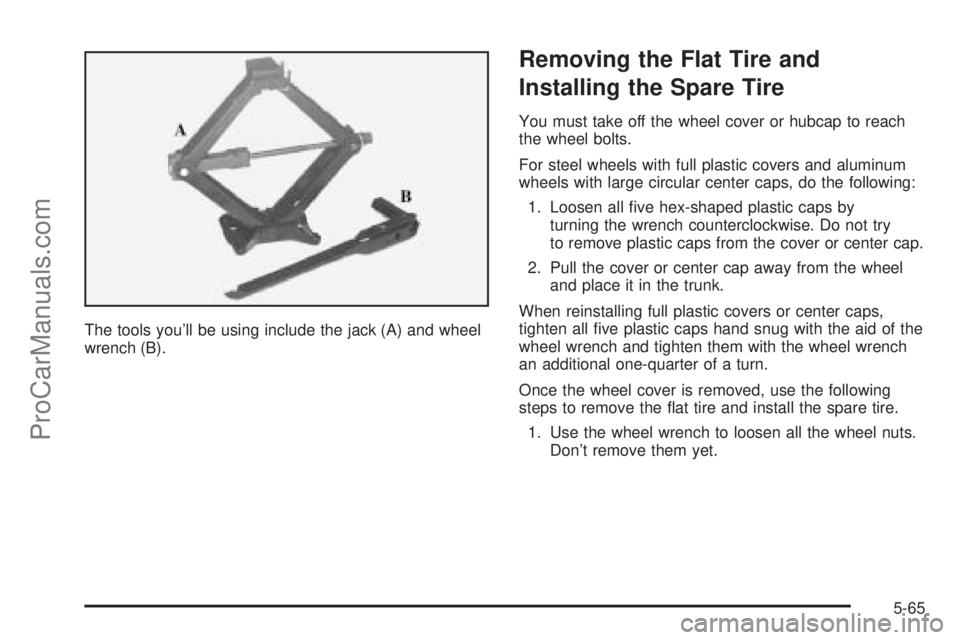
SATURN L-SERIES 2005 User Guide The tools you’ll be using include the jack (A) and wheel
wrench (B).
Removing the Flat Tire and
Installing the Spare Tire
You must take off the wheel cover or hubcap to reach
the wheel bolts.
For st

Page 266 of 330

SATURN L-SERIES 2005 User Guide 2. Attach the wheel wrench to the jack bolt head and
rotate the wheel wrench clockwise. That will raise
the lift head a little.3. Locate the jack notches (A and B) in the vehicle’s
frame.
4. Positio

Page 267 of 330

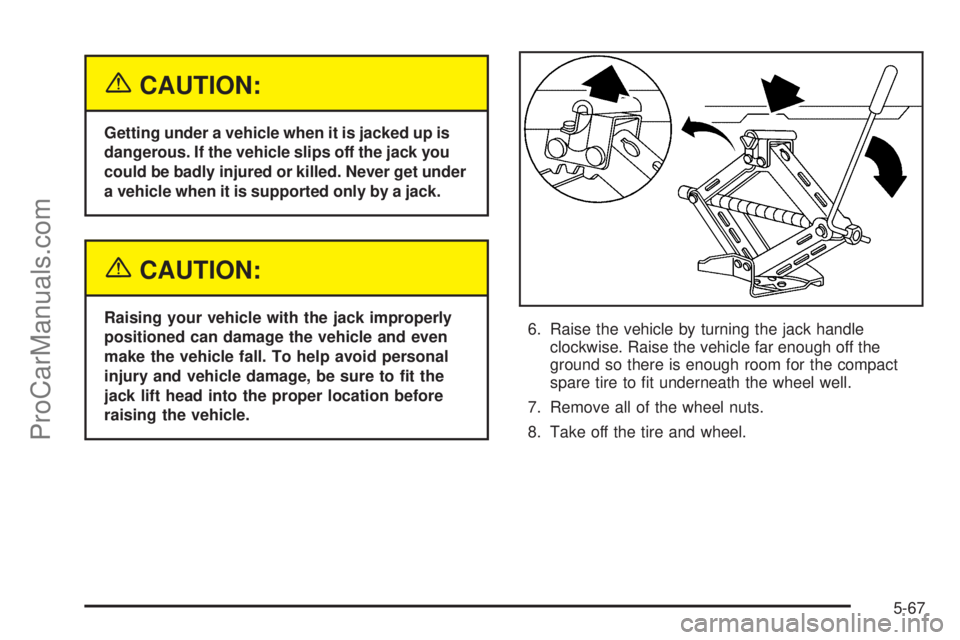
SATURN L-SERIES 2005 User Guide {CAUTION:
Getting under a vehicle when it is jacked up is
dangerous. If the vehicle slips off the jack you
could be badly injured or killed. Never get under
a vehicle when it is supported only by a ja

Page 269 of 330

SATURN L-SERIES 2005 User Guide 9. Remove any rust or dirt
from the wheel bolts,
mounting surfaces
and spare wheel.
10. Place the compact spare tire on the wheel-mounting
surface.
11. Reinstall the wheel nuts. Tighten each nut by ha
Page:   < prev 1-10 11-20