climate control SATURN OUTLOOK 2009 Owners Manual
[x] Cancel search | Manufacturer: SATURN, Model Year: 2009, Model line: OUTLOOK, Model: SATURN OUTLOOK 2009Pages: 432, PDF Size: 2.48 MB
Page 1 of 432

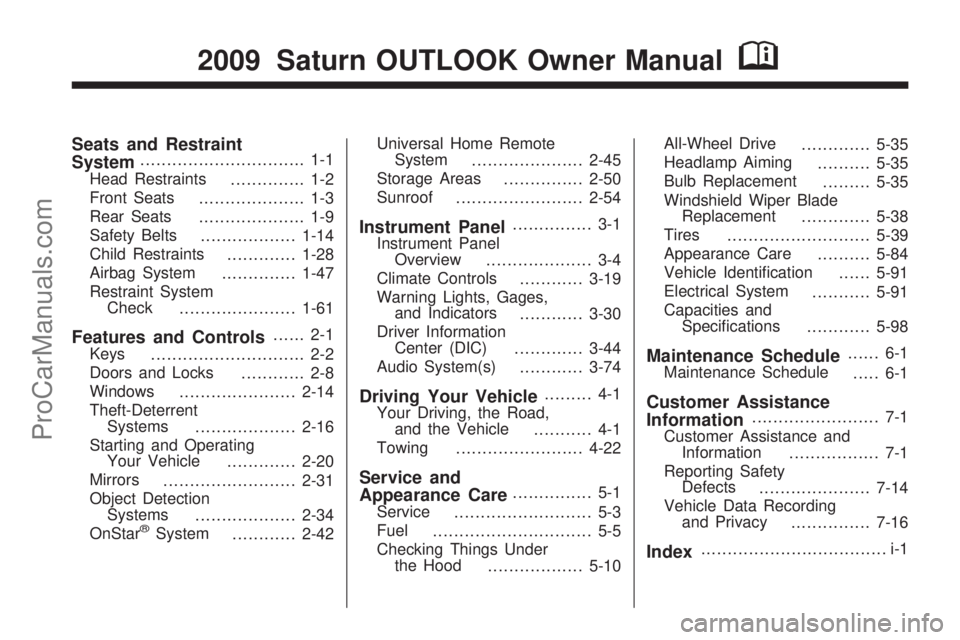
Seats and Restraint
System............................... 1-1
Head Restraints
.............. 1-2
Front Seats
.................... 1-3
Rear Seats
.................... 1-9
Safety Belts
..................1-14
Child Restraints
.............1-28
Airbag System
..............1-47
Restraint System
Check
......................1-61
Features and Controls...... 2-1
Keys
............................. 2-2
Doors and Locks
............ 2-8
Windows
......................2-14
Theft-Deterrent
Systems
...................2-16
Starting and Operating
Your Vehicle
.............2-20
Mirrors
.........................2-31
Object Detection
Systems
...................2-34
OnStar
®System
............2-42Universal Home Remote
System
.....................2-45
Storage Areas
...............2-50
Sunroof
........................2-54
Instrument Panel............... 3-1
Instrument Panel
Overview
.................... 3-4
Climate Controls
............3-19
Warning Lights, Gages,
and Indicators
............3-30
Driver Information
Center (DIC)
.............3-44
Audio System(s)
............3-74
Driving Your Vehicle......... 4-1
Your Driving, the Road,
and the Vehicle
........... 4-1
Towing
........................4-22
Service and
Appearance Care............... 5-1
Service
.......................... 5-3
Fuel
.............................. 5-5
Checking Things Under
the Hood
..................5-10All-Wheel Drive
.............5-35
Headlamp Aiming
..........5-35
Bulb Replacement
.........5-35
Windshield Wiper Blade
Replacement
.............5-38
Tires
...........................5-39
Appearance Care
..........5-84
Vehicle Identi�cation
......5-91
Electrical System
...........5-91
Capacities and
Speci�cations
............5-98
Maintenance Schedule...... 6-1
Maintenance Schedule
..... 6-1
Customer Assistance
Information........................ 7-1
Customer Assistance and
Information
................. 7-1
Reporting Safety
Defects
.....................7-14
Vehicle Data Recording
and Privacy
...............7-16
Index................................... i-1
2009 Saturn OUTLOOK Owner ManualM
ProCarManuals.com
Page 72 of 432

Remote Vehicle Start
This vehicle may have a remote
starting feature that starts the engine
from outside of the vehicle.
If the vehicle has an automatic
climate control system, the climate
control system defaults to a heating
or cooling mode depending on the
outside temperatures. If the vehicle
does not have an automatic climate
control system, the system turns on
at the setting the vehicle was set to
when the vehicle was last turned off.
If the vehicle has an automatic
climate control system and heated
seats, the heated seats turn on
during colder outside temperatures
and shut off when the key is turned to
ON/RUN. SeeHeated Seats on
page 1-5for more information.
The rear window defogger and
heated mirrors, if the vehicle
has them, turn on during colder
outside temperatures and turn off
when the key is turned to ON/RUN.Laws in some communities may
restrict the use of remote starters.
For example, some laws may
require a person using the remote
start to have the vehicle in view
when doing so. Check local
regulations for any requirements on
remote starting of vehicles.
Do not use the remote start
feature if the vehicle is low on fuel.
The vehicle could run out of fuel.
If the vehicle has the remote start
feature, the RKE transmitter
functions have an increased range of
operation. However, the range may
be less while the vehicle is running.
There are other conditions which
can affect the performance of
the transmitter, seeRemote Keyless
Entry (RKE) System on page 2-3
for additional information.
/(Remote Start):This button is
located on the RKE transmitter if the
vehicle has remote start.
To start the vehicle:
1. Aim the transmitter at the vehicle.
2. Press and release
Q, then
immediately press and hold
/
until the parking lamps �ash. If the
vehicle’s lights can not be seen,
press and hold
/for at least
four seconds. The vehicle’s doors
lock. When the vehicle starts, the
parking lamps turn on and remain
on while the vehicle is running.
Pressing
/again, after the
vehicle has started, shuts the
vehicle off.
3. If it is the �rst remote start since
the vehicle has been driven,
repeat these steps while the
engine is still running, to extend
the time by 10 minutes for the
engine to continue to run. Remote
start can be extended one time.
2-6 Features and Controls
ProCarManuals.com
Page 76 of 432

Liftgate
{CAUTION
Exhaust gases can enter the
vehicle if it is driven with the
liftgate, trunk/hatch open, or with
any objects that pass through
the seal between the body and
the trunk/hatch or liftgate.
Engine exhaust contains Carbon
Monoxide (CO) which cannot be
seen or smelled. It can cause
unconsciousness and even death.
If the vehicle must be driven with
the liftgate, or trunk/hatch open:
Close all of the windows.
Fully open the air outlets on or
under the instrument panel.
(Continued)
CAUTION (Continued)
Adjust the Climate Control
system to a setting that
brings in only outside air and
set the fan speed to the
highest setting. See Climate
Control System in the Index.
If the vehicle is equipped with
a power liftgate, disable the
power liftgate function.
For more information about
carbon monoxide, seeEngine
Exhaust on page 2-30.
If the vehicle has a power liftgate,
seePower Liftgate on page 2-11.
To unlock the liftgate, use the power
door lock switch or press the door
unlock button on the RKE transmitter
twice. SeeRemote Keyless Entry
(RKE) System Operation on
page 2-4.To open the liftgate, press the
touchpad on the underside of the
liftgate handle. The vehicle must be
in P (Park) to open the liftgate.
To close the liftgate, use the pull cup
or strap.
The liftgate has an electric latch.
If the battery is disconnected or has
low voltage, the liftgate will not
open. The liftgate will resume
operation when the battery is
reconnected and charged.
If the battery is properly connected
and has adequate voltage, and
the liftgate still will not function,
the vehicle should be taken
to a dealers/retailer for service.
2-10 Features and Controls
ProCarManuals.com
Page 77 of 432

Power Liftgate
Power Liftgate Operation
{CAUTION
Exhaust gases can enter the
vehicle if it is driven with the
liftgate, trunk/hatch open, or with
any objects that pass through the
seal between the body and the
trunk/hatch or liftgate. Engine
exhaust contains Carbon
Monoxide (CO) which cannot be
seen or smelled. It can cause
unconsciousness and even death.
If the vehicle must be driven with
the liftgate, or trunk/hatch open:
Close all of the windows.
Fully open the air outlets on or
under the instrument panel.
(Continued)
CAUTION (Continued)
Adjust the Climate Control
system to a setting that
brings in only outside air and
set the fan speed to the
highest setting. See Climate
Control System in the Index.
If the vehicle is equipped with
a power liftgate, disable the
power liftgate function.
For more information about
carbon monoxide, seeEngine
Exhaust on page 2-30.
The vehicle may have a power
liftgate. The vehicle must be
in P (Park) to use this feature.
The taillamps will �ash and a chime
will sound when the power liftgate
is used.
{CAUTION
You or others could be injured if
caught in the path of the power
liftgate. Make sure there is no one
in the way of the liftgate as it is
opening and closing.
Notice:If you open the liftgate
without checking for overhead
obstructions such as a garage
door, you could damage the
liftgate or the liftgate glass.
Always check to make sure the
area above and behind the liftgate
is clear before opening it.
The power liftgate can be power
opened and closed in the
following ways:
Press and hold the power liftgate
button on the RKE transmitter
until the liftgate starts moving.
Remote Keyless Entry (RKE)
System Operation on page 2-4
for more information.
Features and Controls 2-11
ProCarManuals.com
Page 92 of 432

Electronic Range Select
(ERS) Mode
ERS mode allows you to choose
the top-gear limit of the transmission
and the vehicle’s speed while
driving down hill or towing a trailer.
The vehicle has an electronic shift
position indicator within the
instrument panel cluster. When using
the ERS Mode a number will display
next to the L, indicating the current
gear that has been selected.
To use this feature:
1. Move the shift lever to L (Low).
2. Press the plus/minus button
located on the shift lever, to
increase or decrease the gear
range available.
When you shift from D (Drive) to
L (Low), the transmission will shift to
a pre-determined lower gear range.
The highest gear available for this
pre-determined range is displayed
next to the L in the DIC. SeeDriver
Information Center (DIC) on
page 3-44andDIC Operation andDisplays (With DIC Buttons) on
page 3-45orDIC Operation and
Displays (Without DIC Buttons) on
page 3-50for more information.
The number displayed in the DIC
is the highest gear that the
transmission will be allowed to
operate in. This means that all gears
below that number are available.
For example, when 4 (Fourth) is
shown next to the L, 1 (First)
through 4 (Fourth) gears are
automatically shifted by the vehicle.
The transmission will not shift into
5 (Fifth) until the + (Plus) button is
used or you shift back into D (Drive).
While in L (Low), the transmission
will prevent shifting to a lower
gear range if the engine speed is
too high. You have a brief period of
time to slow the vehicle. If vehicle
speed is not reduced within the time
allowed, the lower gear range shift
will not be completed. You must
further slow the vehicle, then press
the−(Minus) button to the desired
lower gear range.Automatic Engine Grade braking is
not available when the ERS is active.
It is available in D (Drive) for both
normal and Tow/Haul mode.
While using the ERS, cruise control
and the tow/haul mode can be used.
SeeTow/Haul Mode on page 2-26
for more information.
Tow/Haul Mode
_
(Tow/Haul):The vehicle may
have a Tow/Haul mode.
The button is located on the
instrument panel under the climate
controls.
Push the button to activate the
system. Push it again to deactivate
the system. You can use this
feature to assist when towing or
hauling a heavy load.
When Tow/Haul is activated the
Tow/Haul symbol will come on the
instrument panel cluster. See
“Tow/Haul Mode” underTowing a
Trailer on page 4-26for more
information.
2-26 Features and Controls
ProCarManuals.com
Page 100 of 432

Park Tilt Mirrors
If the vehicle has the memory
package, the outside mirrors have a
park tilt feature. This feature tilts
the outside mirrors to a preselected
position when the vehicle is in
R (Reverse). This allows the driver
to view the curb for parallel parking.
The passenger and/or driver
mirror returns to its original position
when the vehicle is shifted out of
R (Reverse), or the ignition is
turned off or to OFF/LOCK.
This feature can be turned on or off
through the Driver Information
Center (DIC). SeeDIC Vehicle
Customization (With DIC Buttons)
on page 3-65andMemory Seat
and Mirrors on page 1-6for more
information.
Outside Convex Mirror
{CAUTION
A convex mirror can make things
(like other vehicles) look farther
away than they really are. If you
cut too sharply into the right lane,
you could hit a vehicle on the
right. Check the inside mirror or
glance over your shoulder before
changing lanes.
The passenger side mirror is convex
shaped. A convex mirror’s surface
is curved so more can be seen from
the driver seat.
Outside Heated Mirrors
For vehicles with heated mirrors:
<(Rear Window Defogger):
Press to heat the mirrors.
See “Rear Window Defogger” under
Dual Automatic Climate Control
System on page 3-22for more
information.
Object Detection
Systems
Ultrasonic Rear Parking
Assist (URPA)
For vehicles with the Ultrasonic
Rear Parking Assist (URPA) system,
it operates at speeds less than
5 mph (8 km/h), and assists the
driver with parking and avoiding
objects while in R (Reverse).
The sensors on the rear bumper are
used to detect the distance to an
object up to 8 feet (2.5 m) behind
the vehicle, and at least 10 inches
(25.4 cm) off the ground.
2-34 Features and Controls
ProCarManuals.com
Page 123 of 432

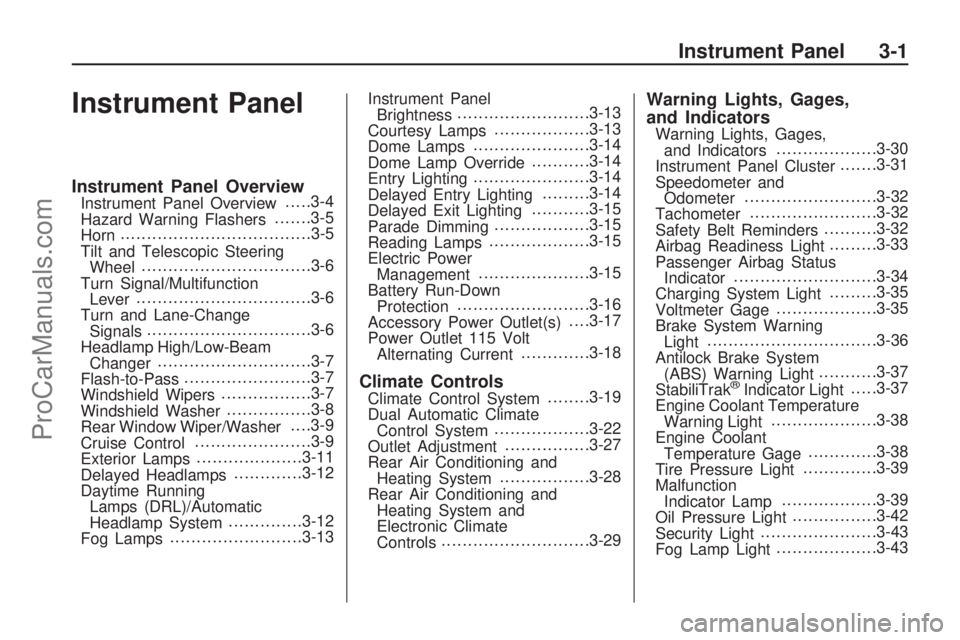
Instrument Panel
Instrument Panel OverviewInstrument Panel Overview.....3-4
Hazard Warning Flashers.......3-5
Horn....................................3-5
Tilt and Telescopic Steering
Wheel................................3-6
Turn Signal/Multifunction
Lever.................................3-6
Turn and Lane-Change
Signals...............................3-6
Headlamp High/Low-Beam
Changer.............................3-7
Flash-to-Pass........................3-7
Windshield Wipers.................3-7
Windshield Washer................3-8
Rear Window Wiper/Washer. . . .3-9
Cruise Control......................3-9
Exterior Lamps....................3-11
Delayed Headlamps.............3-12
Daytime Running
Lamps (DRL)/Automatic
Headlamp System..............3-12
Fog Lamps.........................3-13Instrument Panel
Brightness.........................3-13
Courtesy Lamps..................3-13
Dome Lamps......................3-14
Dome Lamp Override...........3-14
Entry Lighting......................3-14
Delayed Entry Lighting.........3-14
Delayed Exit Lighting...........3-15
Parade Dimming..................3-15
Reading Lamps...................3-15
Electric Power
Management.....................3-15
Battery Run-Down
Protection.........................3-16
Accessory Power Outlet(s). . . .3-17
Power Outlet 115 Volt
Alternating Current.............3-18
Climate ControlsClimate Control System........3-19
Dual Automatic Climate
Control System..................3-22
Outlet Adjustment................3-27
Rear Air Conditioning and
Heating System.................3-28
Rear Air Conditioning and
Heating System and
Electronic Climate
Controls............................3-29
Warning Lights, Gages,
and Indicators
Warning Lights, Gages,
and Indicators...................3-30
Instrument Panel Cluster.......3-31
Speedometer and
Odometer.........................3-32
Tachometer........................3-32
Safety Belt Reminders..........3-32
Airbag Readiness Light.........3-33
Passenger Airbag Status
Indicator...........................3-34
Charging System Light.........3-35
Voltmeter Gage...................3-35
Brake System Warning
Light................................3-36
Antilock Brake System
(ABS) Warning Light...........3-37
StabiliTrak
®Indicator Light.....3-37
Engine Coolant Temperature
Warning Light....................3-38
Engine Coolant
Temperature Gage.............3-38
Tire Pressure Light..............3-39
Malfunction
Indicator Lamp..................3-39
Oil Pressure Light................3-42
Security Light......................3-43
Fog Lamp Light...................3-43
Instrument Panel 3-1
ProCarManuals.com
Page 127 of 432

The main components of the
instrument panel are listed here:
A.Outlet Adjustment on page 3-27.
B.Turn Signal/Multifunction
Lever on page 3-6.
C.Instrument Panel Cluster on
page 3-31.
D.Driver Information Center (DIC)
on page 3-44.
E.Instrument Panel Storage on
page 2-50.
F.Audio System(s) on page 3-74.
Navigation/Radio System on
page 3-103(If Equipped).
G.Exterior Lamps on page 3-11.
H.Hood Release on page 5-11.
I.Dome Lamp Override on
page 3-14.Instrument Panel
Brightness on page 3-13.
J.Cruise Control on page 3-9.
K.Tilt and Telescopic Steering
Wheel on page 3-6.
L.Horn on page 3-5.M.Audio Steering Wheel Controls
on page 3-125.
N.Hazard Warning Flashers on
page 3-5.
O. Center Console Shift Lever.
See “Console Shift Lever” under
Shifting Into Park on page 2-28.
P.Rear Window Wiper/Washer
on page 3-9. Traction Control
System (TCS) Disable Button
(If Equipped). SeeStabiliTrak
®
System on page 4-5.Tow/Haul
Mode on page 2-26(If Equipped).
Power Liftgate on page 2-11
(If Equipped).
Q.Accessory Power Outlet(s) on
page 3-17.
R.Heated Seats on page 1-5.
S.Dual Automatic Climate Control
System on page 3-22.
T. Passenger Air Bag Status
Indicator. SeePassenger
Sensing System on page 1-55.
U.Glove Box on page 2-50.
Hazard Warning Flashers
|
Hazard Warning Flasher:Press
this button located on the instrument
panel below the audio system, to
make the front and rear turn signal
lamps �ash on and off. This warns
others that you are having trouble.
Press again to turn the �ashers off.
The turn signals do not work while
the hazard warning �ashers are on.
Horn
Press near or on the horn symbols
on the steering wheel pad to
sound the horn.
Instrument Panel 3-5
ProCarManuals.com
Page 131 of 432

Rear Window
Wiper/Washer
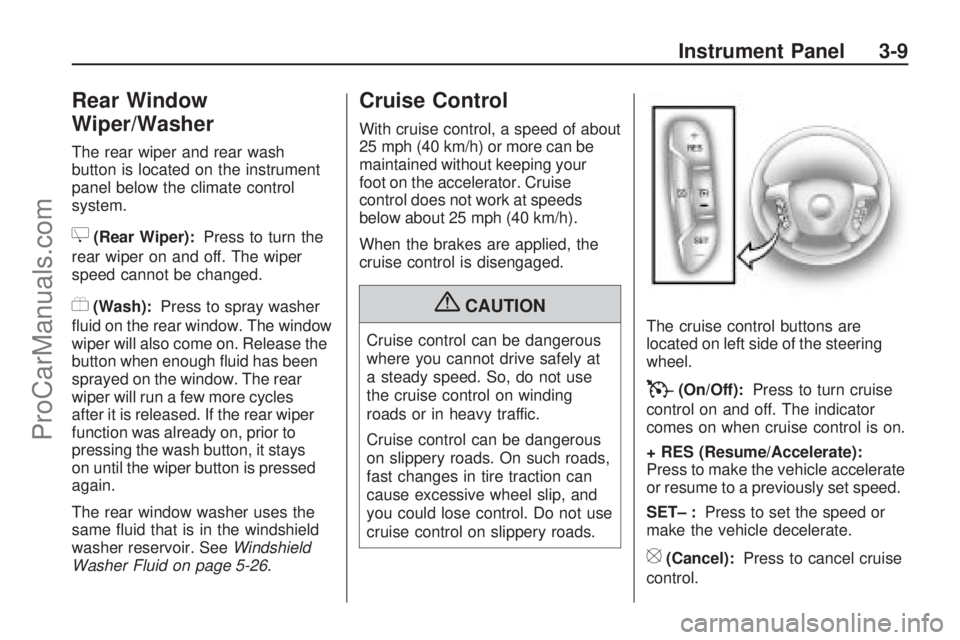
The rear wiper and rear wash
button is located on the instrument
panel below the climate control
system.
Z(Rear Wiper):Press to turn the
rear wiper on and off. The wiper
speed cannot be changed.
Y(Wash):Press to spray washer
�uid on the rear window. The window
wiper will also come on. Release the
button when enough �uid has been
sprayed on the window. The rear
wiper will run a few more cycles
after it is released. If the rear wiper
function was already on, prior to
pressing the wash button, it stays
on until the wiper button is pressed
again.
The rear window washer uses the
same �uid that is in the windshield
washer reservoir. SeeWindshield
Washer Fluid on page 5-26.
Cruise Control
With cruise control, a speed of about
25 mph (40 km/h) or more can be
maintained without keeping your
foot on the accelerator. Cruise
control does not work at speeds
below about 25 mph (40 km/h).
When the brakes are applied, the
cruise control is disengaged.
{CAUTION
Cruise control can be dangerous
where you cannot drive safely at
a steady speed. So, do not use
the cruise control on winding
roads or in heavy traffic.
Cruise control can be dangerous
on slippery roads. On such roads,
fast changes in tire traction can
cause excessive wheel slip, and
you could lose control. Do not use
cruise control on slippery roads.The cruise control buttons are
located on left side of the steering
wheel.
T(On/Off):Press to turn cruise
control on and off. The indicator
comes on when cruise control is on.
+ RES (Resume/Accelerate):
Press to make the vehicle accelerate
or resume to a previously set speed.
SET– :Press to set the speed or
make the vehicle decelerate.
[(Cancel):Press to cancel cruise
control.
Instrument Panel 3-9
ProCarManuals.com
Page 138 of 432

A high electrical load occurs when
several of the following are on,
such as: headlamps, high beams,
fog lamps, rear window defogger,
climate control fan at high speed,
heated seats, engine cooling fans,
trailer loads, and loads plugged into
accessory power outlets.
EPM works to prevent excessive
discharge of the battery. It does this
by balancing the generator’s output
and the vehicle’s electrical needs.
It can increase engine idle speed to
generate more power, whenever
needed. It can temporarily reduce
the power demands of some
accessories.Normally, these actions occur
in steps or levels, without being
noticeable. In rare cases at the
highest levels of corrective action,
this action may be noticeable to the
driver. If so, a Driver Information
Center (DIC) message might be
displayed, such as BATTERY
SAVER ACTIVE, BATTERY
VOLTAGE LOW, or LOW BATTERY.
If this message is displayed, it is
recommended that the driver reduce
the electrical loads as much as
possible. SeeDIC Warnings and
Messages on page 3-56.Battery Run-Down
Protection
This feature helps prevent the
battery from being drained, if the
interior courtesy lamps, reading/
map lamps, visor vanity lamps or
trunk lamp are accidentally left on.
If any of these lamps are left on,
they automatically turn off after
10 minutes, if the ignition is off.
The lamps will not come back on
again until one of the following
occurs:
The ignition is turned on.
The exterior lamps control is
turned off, then on again.
The headlamps will timeout after
10 minutes, if they are manually
turned on with the ignition on or off.
3-16 Instrument Panel
ProCarManuals.com