change time SATURN OUTLOOK 2010 Owners Manual
[x] Cancel search | Manufacturer: SATURN, Model Year: 2010, Model line: OUTLOOK, Model: SATURN OUTLOOK 2010Pages: 444, PDF Size: 4.43 MB
Page 20 of 444
1-14 In Brief
Vehicle Features
Radio(s)
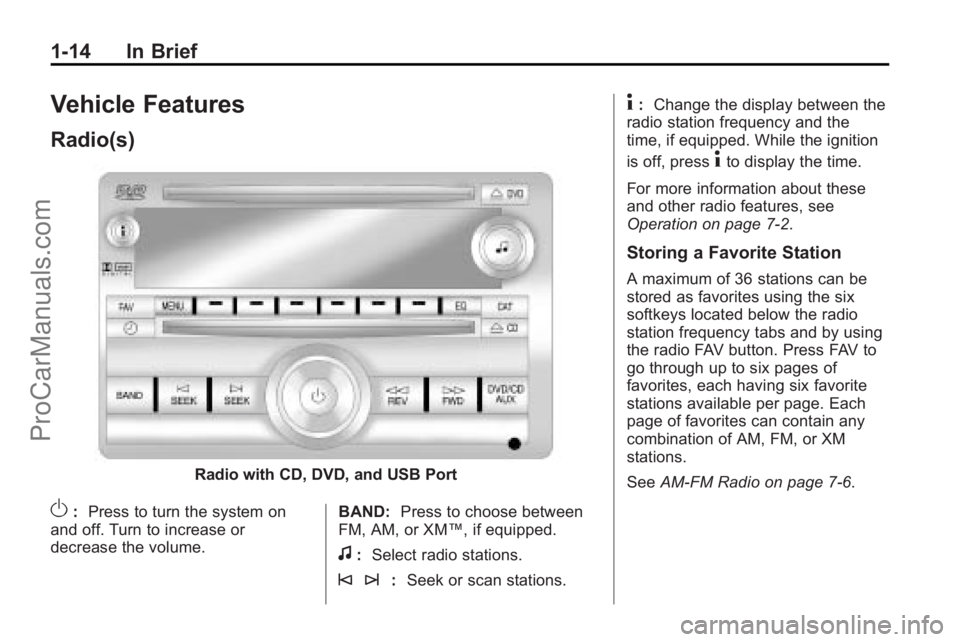
Radio with CD, DVD, and USB Port
O:Press to turn the system on
and off. Turn to increase or
decrease the volume. BAND:
Press to choose between
FM, AM, or XM™, if equipped.
f: Select radio stations.
© ¨: Seek or scan stations.
4:Change the display between the
radio station frequency and the
time, if equipped. While the ignition
is off, press
4to display the time.
For more information about these
and other radio features, see
Operation on page 7‑2.
Storing a Favorite Station
A maximum of 36 stations can be
stored as favorites using the six
softkeys located below the radio
station frequency tabs and by using
the radio FAV button. Press FAV to
go through up to six pages of
favorites, each having six favorite
stations available per page. Each
page of favorites can contain any
combination of AM, FM, or XM
stations.
See AM-FM Radio on page 7‑6.
ProCarManuals.com
Page 21 of 444
In Brief 1-15
Setting the Clock
To set the time and date for the
radio with CD, DVD, and USB Port:
1. Turn the ignition key to ACC/ACCESSORY or ON/RUN, then
press
O, to turn the radio on.
2. Press
Gto display HR, MIN,
MM, DD, YYYY (hour, minute,
month, day, and year).
3. Press the pushbutton located under any one of the labels to be
changed.
4. To increase or decrease the time or date, turn
fclockwise or
counter-clockwise.
For detailed instructions on setting
the clock for the vehicles specific
audio system, see Clock
on
page 5‑8.
Satellite Radio
Vehicles with an XM™ Satellite
Radio tuner and a valid XM Satellite
Radio subscription can receive XM
programming.
XM Satellite Radio Service
XM is a satellite radio service that is
based in the 48 contiguous United
States and 10 Canadian provinces.
XM Satellite Radio has a wide
variety of programming and
commercial-free music,
coast-to-coast, and in digital-quality
sound. A fee is required to receive
the XM service. For more
information, contact XM at in the
U.S. and Canada.
For more information refer to:
.www.xmradio.com or call
1-800-929-2100 (U.S.).
.www.xmradio.ca or call
1-877-438-9677 (Canada).
See Satellite Radio on page 7‑7.
Portable Audio Devices
This vehicle may have an auxiliary
input located on the radio faceplate
and a USB port located in the center
console. External devices such as
iPod
®, laptop computers, MP3
players, CD changers, USB storage
device, etc. can be connected to the
auxiliary port using a 3.5 mm (1/8 in)
input jack or the USB port
depending on the audio system.
See Auxiliary Devices
on
page 7‑33.
Bluetooth®
The in-vehicle Bluetooth system
allows users with a
Bluetooth-enabled cell phone to
make and receive hands-free calls
using the vehicle’ s audio system,
microphone and controls.
ProCarManuals.com
Page 26 of 444
1-20 In Brief
Engine Oil Life System
The engine oil life system calculates
engine oil life based on vehicle use
and displays the CHANGE ENGINE
OIL SOON message when it is time
to change the engine oil and filter.
The oil life system should be reset
to 100% only following an oil
change.
Resetting the Oil Life System
1. Turn the ignition to ON/RUN,with the engine off.
2. If the vehicle has Driver Information Center (DIC)
buttons: Press the vehicle
information button until OIL LIFE
REMAINING displays.
If the vehicle does not have
Driver Information Center (DIC)
buttons: The vehicle must be in
P (Park) to access this display.
Press the trip odometer reset
stem until OIL LIFE REMAINING
displays. 3. If the vehicle has Driver
Information Center (DIC)
buttons: Press and hold the set/
reset button until 100% is
displayed. Three chimes sound
and the CHANGE ENGINE OIL
SOON message goes off.
If the vehicle does not have
Driver Information Center (DIC)
buttons: Press and hold the trip
odometer reset stem until OIL
LIFE REMAINING shows 100%.
Three chimes sound and the
CHANGE ENGINE OIL SOON
message goes off.
4. Turn the key to LOCK/OFF.
See Engine Oil Life System
on
page 10‑10.
Driving for Better Fuel
Economy
Driving habits can affect fuel
mileage. Here are some driving tips
to get the best fuel economy
possible.
.Avoid fast starts and accelerate
smoothly.
.Brake gradually and avoid
abrupt stops.
.Avoid idling the engine for long
periods of time.
.When road and weather
conditions are appropriate, use
cruise control, if equipped.
.Always follow posted speed
limits or drive more slowly when
conditions require.
.Keep vehicle tires properly
inflated.
.Combine several trips into a
single trip.
ProCarManuals.com
Page 42 of 444

2-12 Keys, Doors and Windows
If the liftgate comes across more
obstacles on the same power cycle,
the power function deactivates, and
you must manually open or close
the liftgate. A message displays,
LIFTGATE OPEN, to indicate that
the liftgate is open. SeeDriver
Information Center (DIC) (With DIC
Buttons)
on page 5‑24or Driver
Information Center (DIC) (Without
DIC Buttons)
on page 5‑30for
more information. After removing
the obstructions, manually open the
liftgate to the full open position or
close the liftgate to the fully closed
and latched position. The liftgate
resumes normal power operation.
Pinch sensors are located on the
side edges of the liftgate. If an
object is caught between the liftgate
and the vehicle and presses against
this sensor, the liftgate will reverse
direction and open fully. The liftgate
will remain open until it is activated
again or closed manually. Do not
force the liftgate open or closed
during a power cycle.
Manual Operation of Power
Liftgate
To change the liftgate to manual
operation, press the switch on the
center console to OFF.
With the power liftgate disabled and
all of the doors unlocked, the liftgate
can be manually opened and
closed. To open the liftgate, press the
touchpad on the handle on the
outside of the liftgate and lift the
gate open. To close the liftgate, use
the pull cup to lower the liftgate and
close. The liftgate latch will power
close. Always close the liftgate
before driving.
If the RKE button or the power close
button on the liftgate is pressed
while power operation is disabled,
the lights will flash three times, but
the liftgate will not move.
It is not recommended that you
drive with the liftgate open.
However, if you must drive with the
liftgate open, the liftgate should be
set to manual operation by pressing
the OFF switch on the center
console.
ProCarManuals.com
Page 59 of 444

Seats and Restraints 3-5
There is no adjustment when the
position has not been changed by
another seating position or the easy
exit feature. See“MEMORY SEAT
RECALL” underVehicle
Personalization (With DIC Buttons)
on page 5‑42for more information.
To stop recall movement of the
memory feature at any time, press
one of the power seat controls,
memory buttons, or power mirror
buttons.
If something has blocked the driver
seat while recalling a memory
position, the driver seat recall may
stop working. If this happens, press
the appropriate control for the area
that is not recalling for two seconds,
after the obstruction is removed.
Then try recalling the memory
position again by pressing the
appropriate memory button. If the
memory position is still not being
recalled, see your dealer/retailer for
service.
Easy Exit Seat
The control for this feature is
located on the driver door panel
between buttons 1 and 2.
With the vehicle in P (Park), the exit
position can be recalled by pressing
the exit button. You will hear a
single beep. The driver seat will
move back.
If the easy exit seat feature is on in
the Driver Information Center (DIC),
automatic seat movement will occur
when the key is removed from the
ignition. See “EASY EXIT SEAT”
under Vehicle Personalization (With
DIC Buttons)
on page 5‑42for
more information.
Further programming for the
memory seat feature can be done
using the DIC. You can select or
cancel the following:
.The automatic easy exit seat
feature.
.The remote memory seat recall
feature. For programming information, see
Vehicle Personalization (With DIC
Buttons) on page 5‑42.
Lumbar Adjustment
Manual Lumbar
On vehicles with this feature, the
handle is located on the inboard
side of the seatback.
Move the handle forward or
rearward to increase or decrease
lumbar support.
ProCarManuals.com
Page 62 of 444
3-8 Seats and Restraints
Heated Front Seats
{WARNING
If you cannot feel temperature
change or pain to the skin, the
seat heater may cause burns
even at low temperatures. To
reduce the risk of burns, people
with such a condition should use
care when using the seat heater,
especially for long periods of
time. Do not place anything on
the seat that insulates against
heat, such as a blanket, cushion,
cover or similar item. This may
cause the seat heater to
overheat. An overheated seat
heater may cause a burn or may
damage the seat.
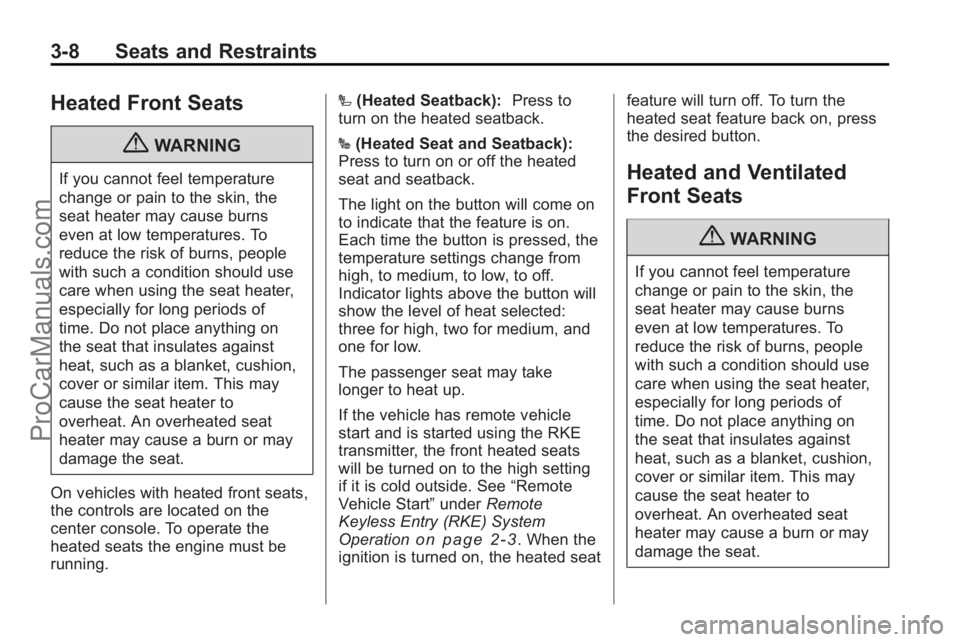
On vehicles with heated front seats,
the controls are located on the
center console. To operate the
heated seats the engine must be
running. I
(Heated Seatback): Press to
turn on the heated seatback.
J (Heated Seat and Seatback):
Press to turn on or off the heated
seat and seatback.
The light on the button will come on
to indicate that the feature is on.
Each time the button is pressed, the
temperature settings change from
high, to medium, to low, to off.
Indicator lights above the button will
show the level of heat selected:
three for high, two for medium, and
one for low.
The passenger seat may take
longer to heat up.
If the vehicle has remote vehicle
start and is started using the RKE
transmitter, the front heated seats
will be turned on to the high setting
if it is cold outside. See “Remote
Vehicle Start” underRemote
Keyless Entry (RKE) System
Operation
on page 2‑3. When the
ignition is turned on, the heated seat feature will turn off. To turn the
heated seat feature back on, press
the desired button.
Heated and Ventilated
Front Seats
{WARNING
If you cannot feel temperature
change or pain to the skin, the
seat heater may cause burns
even at low temperatures. To
reduce the risk of burns, people
with such a condition should use
care when using the seat heater,
especially for long periods of
time. Do not place anything on
the seat that insulates against
heat, such as a blanket, cushion,
cover or similar item. This may
cause the seat heater to
overheat. An overheated seat
heater may cause a burn or may
damage the seat.
ProCarManuals.com
Page 100 of 444
3-46 Seats and Restraints
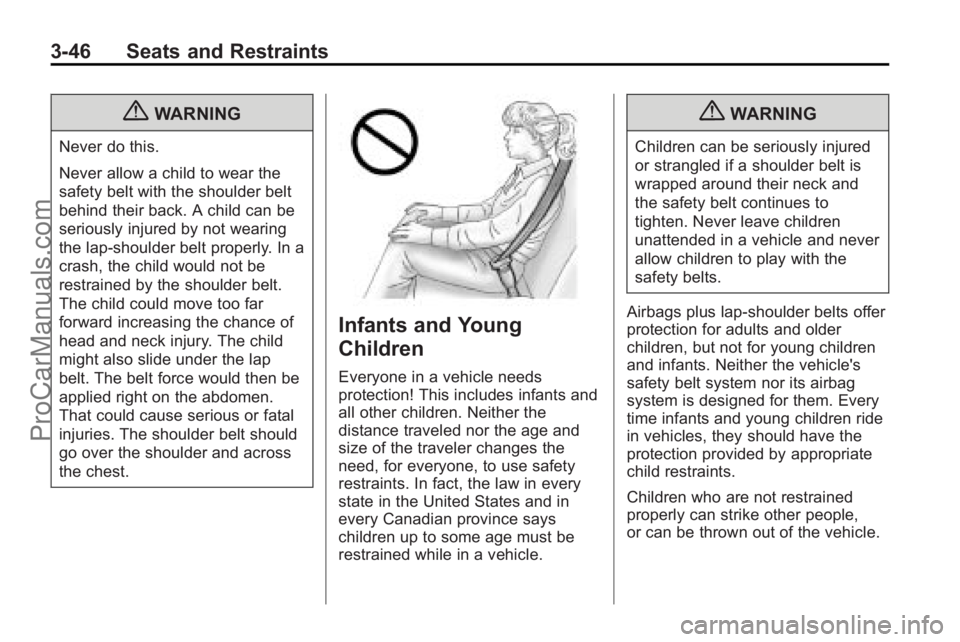
{WARNING
Never do this.
Never allow a child to wear the
safety belt with the shoulder belt
behind their back. A child can be
seriously injured by not wearing
the lap-shoulder belt properly. In a
crash, the child would not be
restrained by the shoulder belt.
The child could move too far
forward increasing the chance of
head and neck injury. The child
might also slide under the lap
belt. The belt force would then be
applied right on the abdomen.
That could cause serious or fatal
injuries. The shoulder belt should
go over the shoulder and across
the chest.
Infants and Young
Children
Everyone in a vehicle needs
protection! This includes infants and
all other children. Neither the
distance traveled nor the age and
size of the traveler changes the
need, for everyone, to use safety
restraints. In fact, the law in every
state in the United States and in
every Canadian province says
children up to some age must be
restrained while in a vehicle.
{WARNING
Children can be seriously injured
or strangled if a shoulder belt is
wrapped around their neck and
the safety belt continues to
tighten. Never leave children
unattended in a vehicle and never
allow children to play with the
safety belts.
Airbags plus lap-shoulder belts offer
protection for adults and older
children, but not for young children
and infants. Neither the vehicle's
safety belt system nor its airbag
system is designed for them. Every
time infants and young children ride
in vehicles, they should have the
protection provided by appropriate
child restraints.
Children who are not restrained
properly can strike other people,
or can be thrown out of the vehicle.
ProCarManuals.com
Page 130 of 444
5-8 Instruments and Controls
If the DIC display does not show a
heading, for example, N for North,
or the heading does not change
after making turns, there may be a
strong magnetic field interfering with
the compass. Such interference
may be caused by a magnetic CB or
cell phone antenna mount, a
magnetic emergency light, magnetic
note pad holder, or any other
magnetic item. Turn off the vehicle,
move the magnetic item, then turn
on the vehicle and calibrate the
compass.
To calibrate the compass, use the
following procedure:
Compass Calibration Procedure
1. Before calibrating the compass,make sure the compass zone is
set to the variance zone in which
the vehicle is located. See
“Compass Variance (Zone)
Procedure” earlier in this
section. Do not operate any switches
such as window, sunroof,
climate controls, seats, etc.
during the calibration procedure.
2. Press the vehicle information button until PRESS
VTO
CALIBRATE COMPASS
displays.
3. Press the set/reset button to start the compass calibration.
4. The DIC will display CALIBRATING: DRIVE IN
CIRCLES. Drive the vehicle in
tight circles at less than 5 mph
(8 km/h) to complete the
calibration. The DIC will display
CALIBRATION COMPLETE for a
few seconds when the
calibration is complete. The DIC
display will then return to the
previous menu.
Clock
To adjust the time and date:
1. Turn the ignition key to ACC/ACCESSORY or ON/RUN, then
press
O, to turn the radio on.
2. Press
Gto display HR, MIN,
MM, DD, YYYY (hour, minute,
month, day, and year).
3. Press the pushbutton located under any one of the labels to be
changed.
4. To increase the time or date, do one of the following:
.Press the pushbutton below
the selected label.
.Press¨SEEK.
.Press\FWD.
.Turnfclockwise.
ProCarManuals.com
Page 131 of 444
Instruments and Controls 5-9
5. To decrease the time or date, doone of the following:
.Press©SEEK.
.PresssREV.
.Turnfcounter-clockwise.
To change the time default setting
from 12 hour to 24 hour or to
change the date default setting from
month/day/year to day/month/year:
1. Press
Gand then the
pushbutton located under the
forward arrow that displays on
the radio screen until the time
12H (hour) and 24H (hour), and
the date MM/DD (month and
day) and DD/MM (day and
month) displays.
2. Press the pushbutton located under the desired option.
3. Press
Gagain to apply the
selected default, or let the
screen time out.
Power Outlets
The vehicle has three 12-volt outlets
which can be used to plug in
electrical equipment, such as a
cellular telephone, a compact disc
player, etc.
The power outlets are located on
the instrument panel below the
climate controls, at the rear of the
center console, and in the rear
cargo area. Lift the cover to access
the outlet. Close the cover when not
using the outlet.
Notice: Leaving electrical
equipment plugged in for an
extended period of time while the
vehicle is off will drain the
battery. Power is always supplied
to the outlets. Always unplug
electrical equipment when not in
use and do not plug in equipment
that exceeds the maximum
20 ampere rating. Certain accessory plugs may not be
compatible to the accessory power
outlet and could result in blown
vehicle and adapter fuses. If a
problem is experienced, see your
dealer/retailer for additional
information on the power accessory
outlets.
Notice:
Adding any electrical
equipment to the vehicle can
damage it or keep other
components from working as
they should. The repairs would
not be covered by the vehicle
warranty. Do not use equipment
exceeding maximum amperage
rating of 20 amperes. Check with
your dealer/retailer before adding
electrical equipment.
ProCarManuals.com
Page 148 of 444

5-26 Instruments and Controls
will alert you to change the oil on a
schedule consistent with your
driving conditions.
When the remaining oil life is low,
the CHANGE ENGINE OIL SOON
message will appear on the display.
See“CHANGE ENGINE OIL SOON”
under Engine Oil Messages
on
page 5‑36. You should change the
oil as soon as you can. See Engine
Oil
on page 10‑8. In addition to the
engine oil life system monitoring the
oil life, additional maintenance is
recommended in the Maintenance
Schedule in this manual. See
Scheduled Maintenance
on
page 11‑2for more information.
Remember, you must reset the OIL
LIFE display yourself after each oil
change. It will not reset itself. Also,
be careful not to reset the OIL LIFE
display accidentally at any time
other than when the oil has just
been changed. It cannot be reset
accurately until the next oil change.
To reset the engine oil life system,
see Engine Oil Life System
on
page 10‑10. PARK ASSIST
If your vehicle has the Ultrasonic
Rear Parking Assist (URPA) system,
press the vehicle information button
until PARK ASSIST displays. This
display allows the system to be
turned on or off. Once in this
display, press the set/reset button to
select between ON or OFF. If you
choose ON, the system will be
turned on. If you choose OFF, the
system will be turned off. The URPA
system automatically turns back on
after each vehicle start. When the
URPA system is turned off and the
vehicle is shifted out of P (Park), the
DIC will display the PARK ASSIST
OFF message as a reminder that
the system has been turned off. See
Object Detection System Messages
on page 5‑37and
Ultrasonic
Parking Assiston page 9‑32for
more information. UNITS
Press the vehicle information button
until UNITS displays. This display
allows you to select between
English or Metric units of
measurement. Once in this display,
press the set/reset button to select
between ENGLISH or METRIC
units. All of the vehicle information
will then be displayed in the unit of
measurement selected.
FRONT TIRES or REAR TIRES
On vehicles with the Tire Pressure
Monitor System (TPMS), the
pressure for each tire can be viewed
in the DIC. The tire pressure will be
shown in either pounds per square
inch (psi) or kilopascals (kPa).
Press the vehicle information button
until the DIC displays FRONT
TIRES PSI (kPa) LEFT ##
RIGHT ##. Press the vehicle
information button again until the
DIC displays REAR TIRES
PSI (kPa) LEFT ## RIGHT ##.
ProCarManuals.com