door lock SATURN RELAY 2005 Owners Manual
[x] Cancel search | Manufacturer: SATURN, Model Year: 2005, Model line: RELAY, Model: SATURN RELAY 2005Pages: 446, PDF Size: 3.03 MB
Page 1 of 446
Seats and Restraint Systems........................... 1-1
Front Seats
............................................... 1-2
Rear Seats
............................................... 1-6
Safety Belts
.............................................1-22
Child Restraints
.......................................1-43
Airbag System
.........................................1-64
Restraint System Check
............................1-79
Features and Controls..................................... 2-1
Keys
........................................................ 2-3
Doors and Locks
......................................2-10
Windows
.................................................2-23
Theft-Deterrent Systems
............................2-25
Starting and Operating Your Vehicle
...........2-30
Mirrors
....................................................2-41
OnStar
®System
......................................2-43
HomeLink®Wireless Control System
...........2-44
Storage Areas
.........................................2-49
Instrument Panel............................................. 3-1
Instrument Panel Overview
.......................... 3-4
Climate Controls
......................................3-24
Warning Lights, Gages, and Indicators
........3-29
Driver Information Center (DIC)
..................3-43
Audio System(s)
.......................................3-72Driving Your Vehicle....................................... 4-1
Your Driving, the Road, and Your Vehicle
..... 4-2
Towing
...................................................4-36
Service and Appearance Care.......................... 5-1
Service
..................................................... 5-3
Fuel
......................................................... 5-5
Checking Things Under the Hood
...............5-10
All-Wheel Drive
........................................5-45
Bulb Replacement
....................................5-47
Windshield Wiper Blade Replacement
.........5-51
Tires
......................................................5-52
Appearance Care
.....................................5-87
Vehicle Identi�cation
.................................5-96
Electrical System
......................................5-97
Capacities and Speci�cations
...................5-103
Maintenance Schedule..................................... 6-1
Maintenance Schedule
................................ 6-2
Customer Assistance and Information.............. 7-1
Customer Assistance and Information
........... 7-2
Reporting Safety Defects
............................ 7-8
Index................................................................ 1
2005 Saturn RELAY Owner ManualM
ProCarManuals.com
Page 25 of 446

Returning the Seatback to an Upright
Position
{CAUTION:
If the seatback is not locked, it could move
forward in a sudden stop or crash. That could
cause injury to the person sitting there. Always
press rearward on the seatback to be sure it is
locked.
To raise the seatback, do the following:
1. Move the second row seat completely forward by
using the manual adjustment bar under either the
front or rear of the seat cushion.
2. From the passenger’s or driver’s side sliding door,
pull up on the lever to release the seatback, then
push up on the seatback to raise the seat.
3. Push and pull on the seatback to make sure that it
is locked into the upright position.
Removing the Third Row Seat
1. Remove the hideaway rear storage bins, if
equipped. SeeHideaway Rear Storage Bins
on page 2-54for more information.
2. Make sure all items are off the seat.
3. Put the seatback in its folded position before
removing the seat. See “Folding the Seatback”
previously.
1-19
ProCarManuals.com
Page 34 of 446

Driver Position
Lap-Shoulder Belt
The driver has a lap-shoulder belt. Here is how to wear
it properly.
1. Close and lock the door.
2. Adjust the seat so you can sit up straight. To see
how, see “Seats” in the Index.
3. Pick up the latch plate and pull the belt across you.
Do not let it get twisted.The shoulder belt may lock if you pull the belt
across you very quickly. If this happens, let the belt
go back slightly to unlock it. Then pull the belt
across you more slowly.
4. Push the latch plate into the buckle until it clicks.
Pull up on the latch plate to make sure it is secure.
If the belt is not long enough, seeSafety Belt
Extender on page 1-42.
Make sure the release button on the buckle is
positioned so you would be able to unbuckle the
safety belt quickly if you ever had to.
5. To make the lap part tight, pull down on the buckle
end of the belt as you pull up on the shoulder belt.
1-28
ProCarManuals.com
Page 41 of 446

To unlatch the belt, just push the button on the buckle.
The belt should go back out of the way.
Before you close the door, be sure the belt is out of the
way. If you slam the door on it, you can damage
both the belt and your vehicle.
Shoulder Belt Height Adjustment
Before you begin to drive, move the shoulder belt height
adjuster to the height that is right for you.
Adjust the height so that the shoulder portion of the belt
is centered on your shoulder. The belt should be
away from your face and neck, but not falling off your
shoulder.
To move it down, push
down on the button (A)
and move the height
adjuster to the desired
position. You can move the
height adjuster up by
pushing up on the shoulder
belt guide.
After you move the height adjuster to where you want it,
try to move it down without pushing the button down
to make sure it has locked into position.
1-35
ProCarManuals.com
Page 87 of 446
Keys...............................................................2-3
Remote Keyless Entry System.........................2-4
Remote Keyless Entry System Operation...........2-5
Doors and Locks............................................2-10
Door Locks..................................................2-10
Power Door Locks........................................2-11
Delayed Locking...........................................2-12
Automatic Door Locks...................................2-13
Programmable Automatic Door Unlock.............2-13
Lockout Protection........................................2-13
Dual Sliding Doors........................................2-13
Power Sliding Door (PSD)..............................2-16
Liftgate........................................................2-21
Windows........................................................2-23
Power Windows............................................2-24
Manual Rear Quarter Windows.......................2-24
Power Rear Quarter Windows........................2-25
Sun Visors...................................................2-25
Theft-Deterrent Systems..................................2-25
Content Theft-Deterrent.................................2-26
PASS-Key
®III ..............................................2-28
PASS-Key®III Operation...............................2-28Starting and Operating Your Vehicle................2-30
New Vehicle Break-In....................................2-30
Ignition Positions..........................................2-30
Retained Accessory Power (RAP)...................2-31
Starting the Engine.......................................2-31
Engine Coolant Heater..................................2-32
Automatic Transaxle Operation.......................2-33
All-Wheel Drive............................................2-36
Parking Brake..............................................2-37
Shifting Into Park (P).....................................2-38
Shifting Out of Park (P).................................2-39
Parking Over Things That Burn.......................2-39
Engine Exhaust............................................2-40
Running the Engine While Parked...................2-40
Mirrors...........................................................2-41
Manual Rearview Mirror.................................2-41
Outside Power Mirrors...................................2-42
Outside Convex Mirror...................................2-42
Outside Heated Mirrors..................................2-42
OnStar
®System.............................................2-43
HomeLink®Wireless Control System...............2-44
HomeLink®Wireless Control System
Operation.................................................2-45
Section 2 Features and Controls
2-1
ProCarManuals.com
Page 89 of 446
Keys
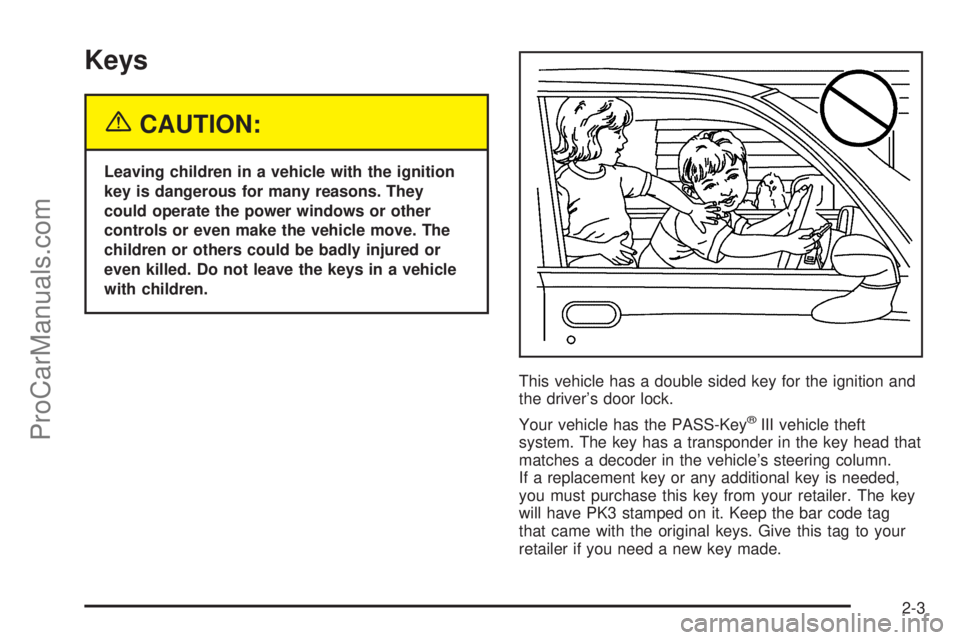
{CAUTION:
Leaving children in a vehicle with the ignition
key is dangerous for many reasons. They
could operate the power windows or other
controls or even make the vehicle move. The
children or others could be badly injured or
even killed. Do not leave the keys in a vehicle
with children.
This vehicle has a double sided key for the ignition and
the driver’s door lock.
Your vehicle has the PASS-Key
®III vehicle theft
system. The key has a transponder in the key head that
matches a decoder in the vehicle’s steering column.
If a replacement key or any additional key is needed,
you must purchase this key from your retailer. The key
will have PK3 stamped on it. Keep the bar code tag
that came with the original keys. Give this tag to your
retailer if you need a new key made.
2-3
ProCarManuals.com
Page 91 of 446
Remote Keyless Entry System
Operation
You can lock and unlock the vehicle’s doors and the
liftgate using the remote keyless entry transmitter
supplied with your vehicle.
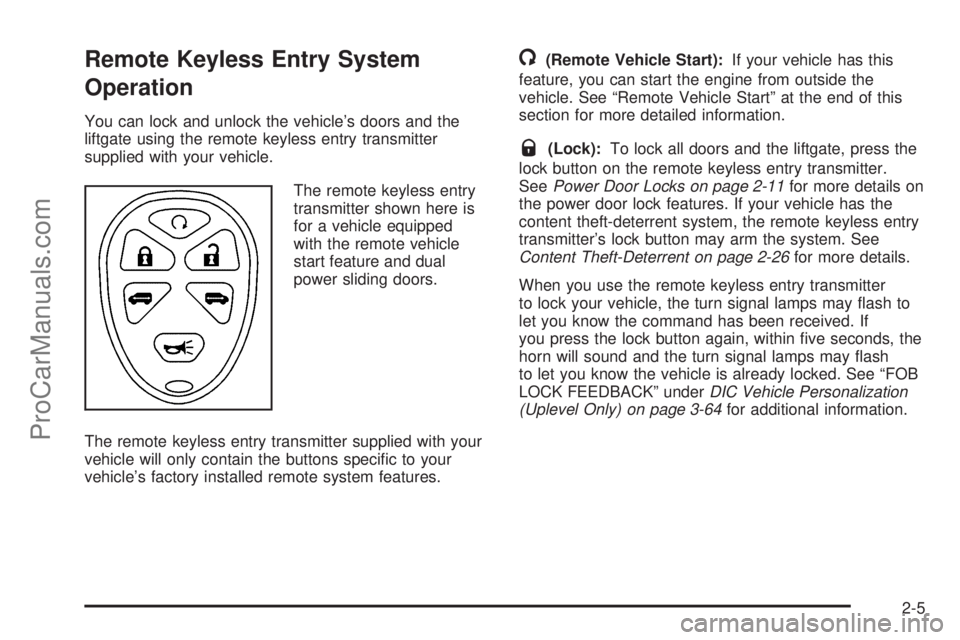
The remote keyless entry
transmitter shown here is
for a vehicle equipped
with the remote vehicle
start feature and dual
power sliding doors.
The remote keyless entry transmitter supplied with your
vehicle will only contain the buttons speci�c to your
vehicle’s factory installed remote system features.
/(Remote Vehicle Start):If your vehicle has this
feature, you can start the engine from outside the
vehicle. See “Remote Vehicle Start” at the end of this
section for more detailed information.
Q(Lock):To lock all doors and the liftgate, press the
lock button on the remote keyless entry transmitter.
SeePower Door Locks on page 2-11for more details on
the power door lock features. If your vehicle has the
content theft-deterrent system, the remote keyless entry
transmitter’s lock button may arm the system. See
Content Theft-Deterrent on page 2-26for more details.
When you use the remote keyless entry transmitter
to lock your vehicle, the turn signal lamps may �ash to
let you know the command has been received. If
you press the lock button again, within �ve seconds, the
horn will sound and the turn signal lamps may �ash
to let you know the vehicle is already locked. See “FOB
LOCK FEEDBACK” underDIC Vehicle Personalization
(Uplevel Only) on page 3-64for additional information.
2-5
ProCarManuals.com
Page 92 of 446
"(Unlock):When you press unlock on the remote
keyless entry transmitter, only the driver’s door
will unlock. If you press unlock again within �ve seconds,
all the doors and the liftgate will unlock. If you would
like all the doors to unlock the �rst time you press
unlock, see “FOB UNLOCK ON 1ST PRESS” underDIC
Vehicle Personalization (Uplevel Only) on page 3-64.
If your vehicle has the content theft-deterrent system,
the unlock button on the remote keyless entry
transmitter will disarm the system. SeeContent
Theft-Deterrent on page 2-26for more details.
When you use your remote keyless entry transmitter to
unlock your vehicle the turn signal lamps will �ash to
let you know the command was received.
L(Remote Alarm):When you press the horn button
on the remote keyless entry transmitter, the turn
signal lamps will �ash and the horn will sound. This will
allow you to attract attention, if needed.
Press this button again to stop the alarm from sounding.
Remote Power Sliding Door Operation
+
(Power Sliding Door):If your vehicle has one
power sliding door, the remote keyless entry transmitter
will have a button with a van symbol on it. Press and hold
this button to open or close the power sliding door. See
Power Sliding Door (PSD) on page 2-16.
*+(Dual Power Sliding Doors):If your vehicle
has dual power sliding doors, your remote keyless entry
transmitter will have two buttons that have a van symbol
on them. The van symbol on the left is for the driver’s side
sliding door and the van symbol on the right is for the
passenger’s side sliding door. Press and hold the
passenger’s or driver’s side button, with the van symbol
on it, to open or close the selected power sliding door.
SeePower Sliding Door (PSD) on page 2-16.
You can operate the power sliding door(s) with the
remote keyless entry transmitter even if the power
sliding door override switch(es), on the overhead
console, are active or inactive. SeePower Sliding
Door (PSD) on page 2-16for additional information.
If the sliding door is closed and the power sliding door
button on the transmitter is pressed and held, the
vehicle’s doors will unlock and then the power sliding
door will open. If the power sliding door has been locked
using the manual door lock lever, you will need to
unlock the power sliding door before it can be opened
with the keyless entry transmitter sliding door button.
If your vehicle’s fuel �ller door is opened, the driver’s side
power sliding door will not open completely. Do not try to
force the door. Once the fuel �ller door is closed, the
driver’s side sliding door can be opened normally.
2-6
ProCarManuals.com
Page 94 of 446

Remote Vehicle Start
This feature allows you to start the engine from outside
the vehicle. It may also turn the rear window defogger
if the outside temperature is below 45°F (7°C).
Laws in some local communities may restrict the use of
remote starters. For example, some laws may require
a person using remote start to have the vehicle in view
when doing so. Check local regulations for any
requirements on remote starting of vehicles.
/(Remote Vehicle Start):If your vehicle has the
remote vehicle start feature, the remote keyless entry
transmitter will have a button with this symbol on it.
An increased range of operation is provided with the
remote keyless entry transmitter that has the remote
vehicle start button.
Do not use the remote start feature if your vehicle is low
on fuel. Your vehicle may run out of fuel.To start the engine using the remote start feature, do the
following:
1. Aim the remote keyless entry transmitter, if
equipped with the remote vehicle start button,
at the vehicle.
2. Press and release the transmitter’s lock button,
then immediately press and hold the remote
vehicle start button until the vehicle’s turn signal
lamps �ash, or for at least two seconds, if the
vehicle’s lights are not visible. The vehicle’s doors
will be locked.
3. When the vehicle’s engine starts, the parking lamps
will turn on and remain on while the engine is
running.
After a remote start, the engine will automatically shut
off after 10 minutes unless a time extension has
been done or the vehicle’s key is inserted into the
ignition switch and turned to RUN.
The maximum number of remote starts or remote start
attempts between ignition cycles with the key is two.
If it is the vehicle’s �rst remote start, and the engine is
still running, repeat Steps 1 and 2 for a 10 minute time
extension. Ten minutes will be added to the remaining
minutes of the �rst remote start. The 10 minute time
extension is considered a second remote start.
2-8
ProCarManuals.com
Page 95 of 446
After two remote starts have been provided, the
vehicle’s ignition switch must be turned to RUN and
then back to LOCK using the key before the remote start
procedure can be used again.
If you enter the vehicle after a remote start, and the
engine is running, insert the key into the ignition switch
and turn it to the RUN position to drive the vehicle.
To manually shut off the engine after a remote start, do
any of the following:
Aim the remote keyless entry transmitter at the
vehicle and press the remote start button until
the parking lamps turn off.
Turn on the hazard warning �ashers.
Insert the vehicle’s key into the ignition switch and
turn the switch to RUN and then back to LOCK.The remote vehicle start feature will not operate if:
The remote start system is disabled. See “REMOTE
START” underDIC Vehicle Personalization (Uplevel
Only) on page 3-64.
The vehicle’s key is in the ignition.
The vehicle’s hood, liftgate or doors are not closed.
The hazard warning �ashers are on.
There is an emission control system malfunction.
The engine coolant temperature is too high.
The oil pressure is low.
Two remote vehicle starts have already been
provided. The maximum number of remote starts or
remote start attempts between ignition cycles
with the key is two.
2-9
ProCarManuals.com