lock SATURN RELAY 2006 Owners Manual
[x] Cancel search | Manufacturer: SATURN, Model Year: 2006, Model line: RELAY, Model: SATURN RELAY 2006Pages: 462, PDF Size: 3.06 MB
Page 317 of 462

Service
Your Saturn retailer knows your vehicle best and wants
you to be happy with it. We hope you will go to your
retailer for all your service needs. You will get genuine
Saturn parts and Saturn-trained and supported
service people.
We hope you will want to keep your Saturn vehicle all
Saturn.
Genuine Saturn parts have one of these marks.
Accessories and Modi�cations
When you add non-Saturn accessories to your vehicle
they can affect your vehicle’s performance and
safety, including such things as, braking, stability, ride
and handling, emissions systems, aerodynamics,
durability, and electronic systems like antilock brakes,
traction control and stability control. Some of these
accessories may even cause malfunction or damage not
covered by warranty.
Saturn Accessories are designed to complement and
function with other systems on your vehicle. Your Saturn
retailer can accessorize your vehicle using genuine
Saturn Accessories. When you go to your Saturn retailer
and ask for Saturn Accessories, you will know that
Saturn-trained and supported service technicians will
perform the work using genuine Saturn Accessories.
California Proposition 65 Warning
Most motor vehicles, including this one, contain and/or
emit chemicals known to the State of California to
cause cancer and birth defects or other reproductive
harm. Engine exhaust, many parts and systems
(including some inside the vehicle), many �uids, and
some component wear by-products contain and/or emit
these chemicals.
5-3
ProCarManuals.com
Page 322 of 462

When replacing the fuel cap, turn it clockwise until it
clicks. Make sure the cap is fully installed. The
diagnostic system can determine if the fuel cap has
been left off or improperly installed. This would allow fuel
to evaporate into the atmosphere. SeeMalfunction
Indicator Lamp on page 3-43.
The CHECK GAS CAP message will be displayed in the
Driver Information Center (DIC) if the fuel cap is not
properly installed. SeeDIC Warnings and Messages on
page 3-56for more information.
{CAUTION:
If a �re starts while you are refueling, do not
remove the nozzle. Shut off the �ow of fuel by
shutting off the pump or by notifying the
station attendant. Leave the area immediately.
Notice:If you need a new fuel cap, be sure to get
the right type. Your dealer can get one for you.
If you get the wrong type, it may not �t properly.
This may cause your malfunction indicator lamp to
light and may damage your fuel tank and emissions
system. SeeMalfunction Indicator Lamp on
page 3-43.
5-8
ProCarManuals.com
Page 327 of 462

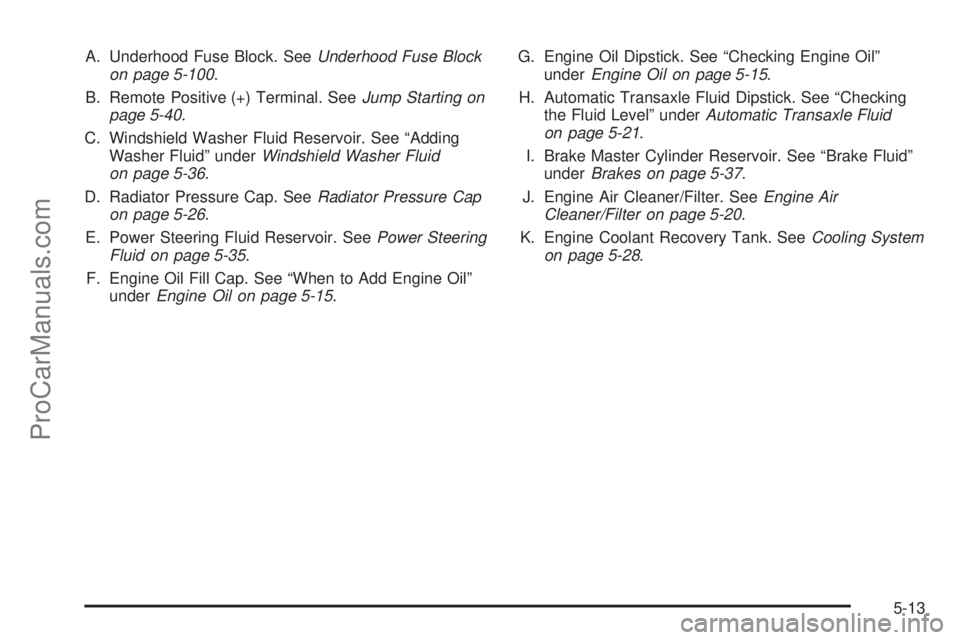
A. Underhood Fuse Block. SeeUnderhood Fuse Block
on page 5-100.
B. Remote Positive (+) Terminal. SeeJump Starting on
page 5-40.
C. Windshield Washer Fluid Reservoir. See “Adding
Washer Fluid” underWindshield Washer Fluid
on page 5-36.
D. Radiator Pressure Cap. SeeRadiator Pressure Cap
on page 5-26.
E. Power Steering Fluid Reservoir. SeePower Steering
Fluid on page 5-35.
F. Engine Oil Fill Cap. See “When to Add Engine Oil”
underEngine Oil on page 5-15.G. Engine Oil Dipstick. See “Checking Engine Oil”
underEngine Oil on page 5-15.
H. Automatic Transaxle Fluid Dipstick. See “Checking
the Fluid Level” underAutomatic Transaxle Fluid
on page 5-21.
I. Brake Master Cylinder Reservoir. See “Brake Fluid”
underBrakes on page 5-37.
J. Engine Air Cleaner/Filter. SeeEngine Air
Cleaner/Filter on page 5-20.
K. Engine Coolant Recovery Tank. SeeCooling System
on page 5-28.
5-13
ProCarManuals.com
Page 329 of 462

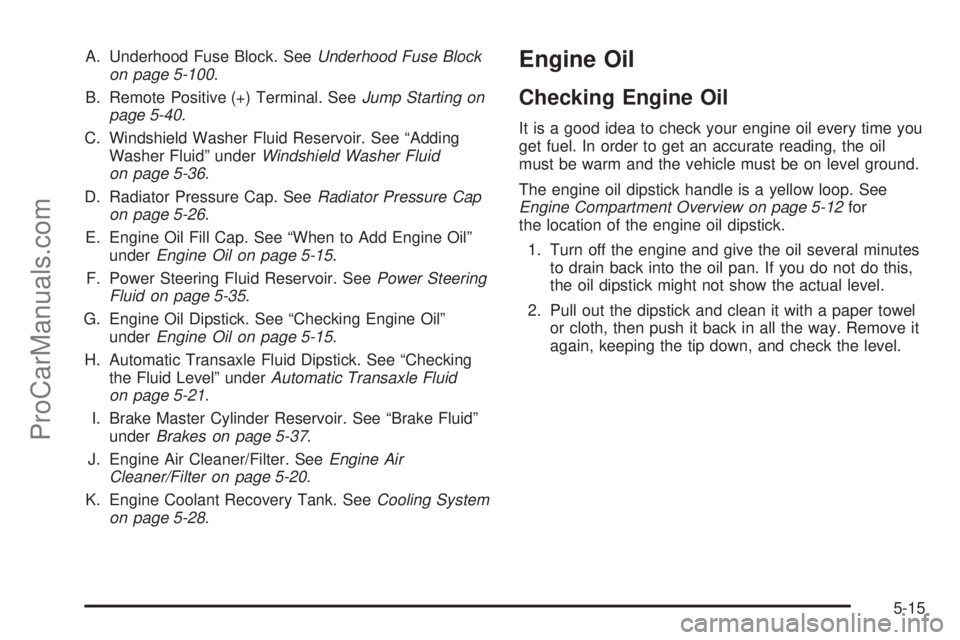
A. Underhood Fuse Block. SeeUnderhood Fuse Block
on page 5-100.
B. Remote Positive (+) Terminal. SeeJump Starting on
page 5-40.
C. Windshield Washer Fluid Reservoir. See “Adding
Washer Fluid” underWindshield Washer Fluid
on page 5-36.
D. Radiator Pressure Cap. SeeRadiator Pressure Cap
on page 5-26.
E. Engine Oil Fill Cap. See “When to Add Engine Oil”
underEngine Oil on page 5-15.
F. Power Steering Fluid Reservoir. SeePower Steering
Fluid on page 5-35.
G. Engine Oil Dipstick. See “Checking Engine Oil”
underEngine Oil on page 5-15.
H. Automatic Transaxle Fluid Dipstick. See “Checking
the Fluid Level” underAutomatic Transaxle Fluid
on page 5-21.
I. Brake Master Cylinder Reservoir. See “Brake Fluid”
underBrakes on page 5-37.
J. Engine Air Cleaner/Filter. SeeEngine Air
Cleaner/Filter on page 5-20.
K. Engine Coolant Recovery Tank. SeeCooling System
on page 5-28.Engine Oil
Checking Engine Oil
It is a good idea to check your engine oil every time you
get fuel. In order to get an accurate reading, the oil
must be warm and the vehicle must be on level ground.
The engine oil dipstick handle is a yellow loop. See
Engine Compartment Overview on page 5-12for
the location of the engine oil dipstick.
1. Turn off the engine and give the oil several minutes
to drain back into the oil pan. If you do not do this,
the oil dipstick might not show the actual level.
2. Pull out the dipstick and clean it with a paper towel
or cloth, then push it back in all the way. Remove it
again, keeping the tip down, and check the level.
5-15
ProCarManuals.com
Page 333 of 462

How to Reset the Engine Oil Life
System
The Engine Oil Life System calculates when to change
your engine oil and �lter based on vehicle use.
Anytime your oil is changed, reset the system so it can
calculate when the next oil change is required. If a
situation occurs where you change your oil prior to a
CHANGE OIL SOON message being turned on,
reset the system.
1. With the ignition key in RUN but the engine off,
repeatedly push the set/reset button until OIL is
displayed on the Driver Information Center (DIC).
2. Once OIL is displayed, push and hold the set/reset
button for �ve seconds. The number will disappear
and be replaced by 100 (indicating 100% oil life
remaining).
3. Turn the key to LOCK.
If the CHANGE OIL SOON message comes back on
when you start your vehicle, the engine oil life system
has not reset. Repeat the procedure.
What to Do with Used Oil
Used engine oil contains certain elements that may be
unhealthy for your skin and could even cause cancer.
Do not let used oil stay on your skin for very long. Clean
your skin and nails with soap and water, or a good
hand cleaner. Wash or properly dispose of clothing or
rags containing used engine oil. See the manufacturer’s
warnings about the use and disposal of oil products.
Used oil can be a threat to the environment. If you
change your own oil, be sure to drain all the oil from the
�lter before disposal. Never dispose of oil by putting it
in the trash, pouring it on the ground, into sewers, or into
streams or bodies of water. Instead, recycle it by
taking it to a place that collects used oil. If you have a
problem properly disposing of your used oil, ask
your retailer, a service station, or a local recycling center
for help.
5-19
ProCarManuals.com
Page 346 of 462

How to Add Coolant to the Radiator
Notice:Your engine has a speci�c radiator
�ll procedure. Failure to follow this procedure could
cause your engine to overheat and be severely
damaged.
1. You can remove the radiator pressure cap when
the cooling system, including the radiator pressure
cap and upper radiator hose, is no longer hot.
Turn the pressure cap slowly counterclockwise until
it �rst stops. Do not press down while turning the
pressure cap.
If you hear a hiss, wait for that to stop. A hiss
means there is still some pressure left.
2. Then keep turning the pressure cap, but now push
down as you turn it. Remove the pressure cap. 3.5L V6 Engine
3.9L V6 Engine
5-32
ProCarManuals.com
Page 356 of 462

If your vehicle has the
3.5L V6 engine, the
terminal is located under a
tethered cap at the front
of the underhood fuse
block. Squeeze the tabs
and swing the cap out
of the way to access the
remote positive (+)
terminal.
If your vehicle has the
3.9L V6 engine, the
terminal is located under
the fuse block cover.
Remove the cover
to access the remote
positive (+) terminal.SeeEngine Compartment Overview on page 5-12
for more information on the location of the
remote positive (+) terminals. You should always
use the remote positive (+) terminal instead of
the positive (+) terminal on your battery.
{CAUTION:
An electric fan can start up even when the
engine is not running and can injure you. Keep
hands, clothing and tools away from any
underhood electric fan. 3.5L V6 Engine
3.9L V6 Engine
5-42
ProCarManuals.com
Page 359 of 462

Notice:If the jumper cables are connected or
removed in the wrong order, electrical shorting may
occur and damage the vehicle. The repairs would
not be covered by your warranty. Always connect
and remove the jumper cables in the correct
order, making sure that the cables do not touch
each other or other metal.
A. Heavy, Unpainted Metal Engine Part or Remote
Negative (−) Terminal
B. Good Battery or Remote Positive (+) Terminal and
Remote Negative (−) Terminals
C. Dead Battery or Remote Positive (+) TerminalTo disconnect the jumper cables from both vehicles, do
the following:
1. Disconnect the black negative (−) cable from the
vehicle that had the dead battery.
2. Disconnect the black negative (−) cable from the
vehicle with the good battery.
3. Disconnect the red positive (+) cable from the
vehicle with the good battery.
4. Disconnect the red positive (+) cable from the other
vehicle.
5. Return the remote positive (+) terminal cover or
underhood fuse block cover to its original position.
Jumper Cable Removal
5-45
ProCarManuals.com
Page 363 of 462

To replace one of these bulbs, do the following:
1. Open the hood. SeeHood Release on page 5-11
for more information.
2. Remove the headlamp retainer pin (A) by turning it
towards the headlamp assembly and pulling it
straight out.
3. Remove the screw (B) from the top of the headlamp
assembly.
4. Pull the assembly away from the vehicle.5. Disconnect the socket wiring harness connector
from the headlamp assembly.
6. Turn the bulb socket counterclockwise to remove
from the assembly.
7. To replace a headlamp bulb, disconnect the bulb
socket wiring harness and connect to the new bulb
socket.
To replace a sidemarker bulb, pull the old bulb out
and push a new bulb in.
8. Reinstall the bulb socket by inserting into the bulb
assembly and turning it clockwise to secure.
9. Reverse the steps to reinstall the headlamp
assembly.
5-49
ProCarManuals.com
Page 364 of 462

Front Turn Signal, Parking and
Daytime Running Lamps (DRL)
To replace one of these bulbs (A), do the following:
1. Follow the Steps 1 through 4 to remove the
headlamp assembly. SeeHeadlamps and
Sidemarker Lamps on page 5-48for more
information.
2. Turn the bulb socket counterclockwise to remove
from the assembly.
3. Pull the old bulb out from the bulb socket.
4. Replace with a new bulb.5. Reinstall the bulb socket by inserting into the bulb
assembly and turning it clockwise to secure.
6. Reverse the steps to reinstall the headlamp
assembly.
Taillamps, Turn Signal, Stoplamps
and Back-up Lamps
To change a stoplamp/taillamp, turn signal or back-up
lamp bulb, do the following:
1. Open the liftgate. SeeLiftgate on page 2-24for
more information.
2. Remove the
two screws from
the taillamp housing
on the inboard side.
3. Pull out the taillamp housing.
5-50
ProCarManuals.com