ECO mode SATURN RELAY 2006 Owners Manual
[x] Cancel search | Manufacturer: SATURN, Model Year: 2006, Model line: RELAY, Model: SATURN RELAY 2006Pages: 462, PDF Size: 3.06 MB
Page 133 of 462
Universal Home Remote System
Operation
Do not use the Universal Home Remote with any
garage door opener that does not have the “stop and
reverse” feature. This includes any garage door opener
model manufactured before April 1, 1982. If you
have a newer garage door opener with rolling codes,
please be sure to follow Steps 6 through 8 to complete
the programming of your Universal Home Remote
Transmitter.
Read the instructions completely before attempting to
program the Universal Home Remote. Because of
the steps involved, it may be helpful to have another
person available to assist you in the programming steps.
Keep the original hand-held transmitter for use in
other vehicles as well as for future Universal Home
Remote programming. It is also recommended that upon
the sale of the vehicle, the programmed Universal
Home Remote buttons should be erased for security
purposes. See “Erasing Universal Home Remote
Buttons” later in this section or, for assistance, see
Customer Satisfaction Procedure on page 7-2.
Be sure that people and objects are clear of the garage
door or gate operator you are programming. When
programming a garage door, it is advised to park outside
of the garage.It is recommended that a new battery be installed in
your hand-held transmitter for quicker and more
accurate transmission of the radio-frequency signal.Programming Universal Home Remote
Follow these steps to program up to three channels:
1. Press and hold down the two outside Universal
Home Remote buttons, releasing only when the
Universal Home Remote indicator light begins
to �ash, after 20 seconds. Do not hold down the
buttons for longer than 30 seconds and do not
repeat this step to program a second and/or third
hand-held transmitter to the remaining two Universal
Home Remote buttons.
2. Position the end of your hand-held transmitter
about 1 to 3 inches (3 to 8 cm) away from the
Universal Home Remote buttons while keeping the
indicator light in view.
3. Simultaneously press and hold both the desired
Universal Home Remote button and the hand-held
transmitter button. Do not release the buttons
until Step 4 has been completed.
Some entry gates and garage door openers may
require you to substitute Step 3 with the procedure
noted in “Gate Operator and Canadian
Programming” later in this section.
2-47
ProCarManuals.com
Page 135 of 462
Gate Operator and Canadian
Programming
Canadian radio-frequency laws require transmitter
signals to time out or quit after several seconds of
transmission. This may not be long enough for Universal
Home Remote to pick up the signal during programming.
Similarly, some U.S. gate operators are manufactured
to time out in the same manner.
If you live in Canada, or you are having difficulty
programming a gate operator or garage door opener
by using the “Programming Universal Home Remote”
procedures, regardless of where you live, replace Step 3
under “Programming Universal Home Remote” with
the following:
Continue to press and hold the Universal Home Remote
button while you press and release every two seconds
(cycle) the hand-held transmitter button until the
frequency signal has been successfully accepted by the
Universal Home Remote. The Universal Home Remote
indicator light will �ash slowly at �rst and then rapidly.
Proceed with Step 4 under “Programming Universal
Home Remote” to complete.
Using Universal Home Remote
Press and hold the appropriate Universal Home Remote
button for at least half of a second. The indicator light
will come on while the signal is being transmitted.
Erasing Universal Home Remote
Buttons
To erase programming from the three Universal Home
Remote buttons do the following:
1. Press and hold down the two outside buttons until
the indicator light begins to �ash, after 20 seconds.
Do not hold the two outside buttons for longer
than 30 seconds.
2. Release both buttons.
The Universal Home Remote is now in the train
(learning) mode and can be programmed at any time
beginning with Step 2 under “Programming Universal
Home Remote” shown earlier in this section.
Individual buttons cannot be erased, but they can be
reprogrammed. See “Reprogramming a Single Universal
Home Remote Button” following this section.
2-49
ProCarManuals.com
Page 171 of 462
Temperature Control:Turn the center knob clockwise
or counterclockwise to increase or decrease the air
temperature inside your vehicle.
#(Air Conditioning):Press this button to turn the
air-conditioning system on or off. When it is pressed, an
indicator light in the button will come on to let you
know that air conditioning is activated.
You may notice a slight change in engine performance
when the air conditioning compressor shuts off and
turns on again. This is normal. The system is designed
to make adjustments to help with fuel economy while
still maintaining the selected temperature.
On hot days, open the windows to let hot inside air
escape; then close them. This helps to reduce the time
it takes for your vehicle to cool down. It also helps
the system to operate more efficiently.
The air conditioning system removes moisture from the
air, so you may sometimes notice a small amount of
water dripping underneath your vehicle while idling
or after turning off the engine. This is normal.
#MAX (Maximum Air Conditioning):Turn the right
knob to this position for maximum air conditioning.
This will select air conditioning and recirculation
for maximum cooling of your vehicle. This mode directs
air to the instrument panel outlets.Recirculation:This mode keeps outside air from coming
in the vehicle. It can be used to prevent outside air and
odors from entering your vehicle or help heat or cool the
air inside your vehicle more quickly. This mode will
automatically be selected when you select maximum air
conditioning.
((Heated Seats):Press this button to turn on the
heated seats. The button on the left controls the driver’s
seat and the button on the right controls the passenger’s
seat. SeeHeated Seats on page 1-3for additional
information.
Defogging and Defrosting
Fog on the inside of windows is a result of high humidity,
or moisture, condensing on the cool window glass.
This can be minimized if the climate control system is
used properly. There are two modes to clear fog or frost
from your windshield. Use the defog mode to clear
the windows of fog or moisture and warm the
passengers. Use the defrost mode to remove fog or
frost from the windshield more quickly.
Turn the right knob to select the defog or defrost mode.
-(Defog):This mode directs air to the windshield and
the �oor outlets. When you select this mode, the system
runs the air-conditioning compressor unless the outside
temperature is at or below freezing. The recirculation
mode cannot be selected while in the defog mode.
3-27
ProCarManuals.com
Page 194 of 462
DIC Operation and Displays
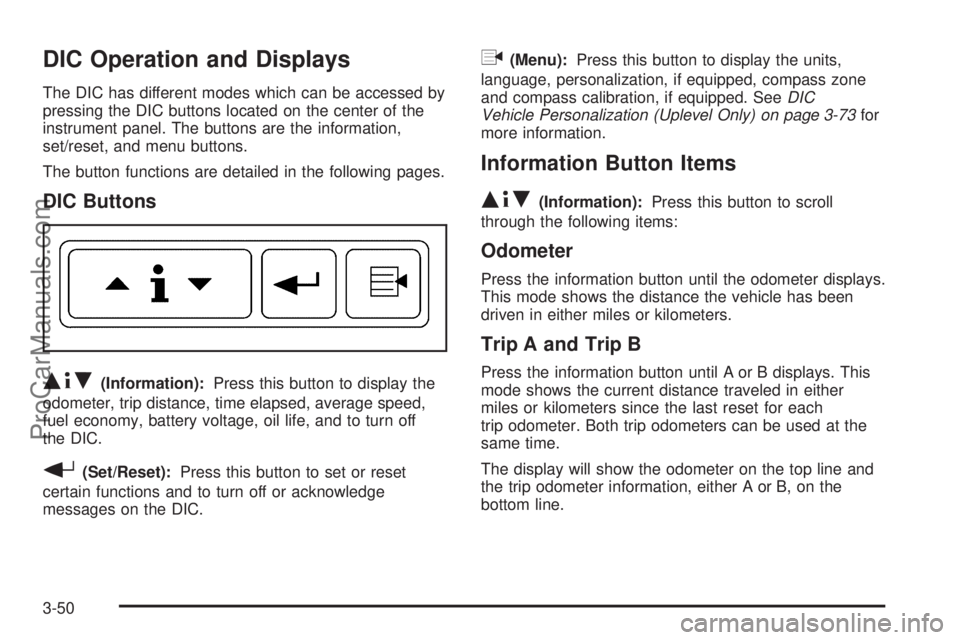
The DIC has different modes which can be accessed by
pressing the DIC buttons located on the center of the
instrument panel. The buttons are the information,
set/reset, and menu buttons.
The button functions are detailed in the following pages.
DIC Buttons
Q4R(Information):Press this button to display the
odometer, trip distance, time elapsed, average speed,
fuel economy, battery voltage, oil life, and to turn off
the DIC.
r(Set/Reset):Press this button to set or reset
certain functions and to turn off or acknowledge
messages on the DIC.
q(Menu):Press this button to display the units,
language, personalization, if equipped, compass zone
and compass calibration, if equipped. SeeDIC
Vehicle Personalization (Uplevel Only) on page 3-73for
more information.
Information Button Items
Q4R
(Information):Press this button to scroll
through the following items:
Odometer
Press the information button until the odometer displays.
This mode shows the distance the vehicle has been
driven in either miles or kilometers.
Trip A and Trip B
Press the information button until A or B displays. This
mode shows the current distance traveled in either
miles or kilometers since the last reset for each
trip odometer. Both trip odometers can be used at the
same time.
The display will show the odometer on the top line and
the trip odometer information, either A or B, on the
bottom line.
3-50
ProCarManuals.com
Page 195 of 462
Each trip odometer can be reset to zero separately by
pressing the set/reset button while the desired trip
odometer is displayed.
There is also a retroactive trip odometer function that
performs the following for each trip odometer:
If the vehicle’s speed has exceeded 3 mph (5 km/h)
during the current ignition cycle, this function will
set the trip odometer to the distance driven
during the current ignition cycle.
If the vehicle’s speed has not exceeded 3 mph
(5 km/h), this function will set the trip odometer
to the distance driven during the previous ignition
cycle plus the distance driven during the current
ignition cycle.
Press and hold the set/reset button for three seconds,
then release the button. The retroactive trip odometer
value will be set into the currently displayed trip
odometer.
Time Elapsed
Press the information button until TIME ELAPSED :00
displays. This mode is like a stopwatch, in that you can
clock the time it takes to get from one point to another.
Each of the �elds for the hours, minutes, and seconds
are two numeric digits.
Once TIME ELAPSED :00 is displayed, press the
set/reset button to start the timing feature. Press the
set/reset button again to stop it. If you will be starting
and stopping your vehicle, during a trip for instance, the
TIME ELAPSED feature will automatically start timing
where it left off when you last stopped. To reset it, press
and hold the set/reset button for approximately
1.5 seconds. The display will return to zero.
Average Speed
Press the information button until AVERAGE SPEED
displays. This mode shows the average speed of the
vehicle in miles per hour (mph) or kilometers per hour
(km/h). This average is calculated based on the various
vehicle speed recorded since the last reset of this value.
To reset the value, press the information button to display
AVERAGE SPEED, then press and hold the set/reset
button. The display will return to zero.
3-51
ProCarManuals.com
Page 196 of 462
Fuel Range
Press the information button until FUEL RANGE
displays. This mode shows the approximate number
of remaining miles or kilometers the vehicle can
be driven without refueling.
Fuel range is based on several factors, including
distance travelled, fuel used, fuel capacity, etc. This
estimate will change if driving conditions change.
For example, if driving in traffic and making frequent
stops, this mode may read one number, but if the vehicle
is driven on a freeway, the number may change even
though the same amount of fuel is in the fuel tank. This
is because different driving conditions produce
different fuel economies. Generally, freeway driving
produces better fuel economy than city driving.
Fuel range cannot be reset.
If your vehicle is low on fuel, FUEL RANGE LOW will
display followed by the LOW FUEL message. See “LOW
FUEL” underDIC Warnings and Messages on
page 3-56for more information.
Average Fuel Economy
Press the information button until AVG ECONOMY
displays. This mode shows the approximate average
miles per gallon (mpg) or liters per 100 kilometers
(L/100 km). This number is calculated based on the
number of mpg (L/100 km) recorded since the last time
this menu item was reset. To reset AVG ECONOMY,
press and hold the set/reset button. The display
will return to zero.
Instantaneous Fuel Economy
Press the information button until INST ECONOMY
displays. This mode shows the current fuel economy at
a particular moment and will change frequently as
driving conditions change. This mode shows the
instantaneous fuel economy in miles per gallon (mpg) or
liters per 100 kilometers (L/100 km). Unlike average
fuel economy, this screen cannot be reset.
3-52
ProCarManuals.com
Page 197 of 462
Battery
Press the information button until BATTERY displays.
This mode shows the current battery voltage.
If there is a problem with the battery charging system, a
DIC message will display. SeeDIC Warnings and
Messages on page 3-56for more information.
Your vehicle’s charging system regulates voltage based
on the state of the battery. The battery voltage may
�uctuate when viewing this information on the DIC. This
is normal.
Oil Life
Press the information button until OIL LIFE displays.
This mode shows an estimate of the oil’s remaining
useful life. If you see OIL LIFE 99% on the display, that
means 99% of the current oil life remains. The engine
oil life system will alert you to change your oil on a
schedule consistent with your driving conditions.When the remaining oil life is low, the LOW OIL
PRESSURE message will appear on the display. You
should change your oil as soon as possible. SeeEngine
Oil on page 5-15. In addition to the engine oil life
system monitoring the oil life, additional maintenance is
recommended in the Maintenance Schedule in this
manual. SeeScheduled Maintenance on page 6-4for
more information.
Remember, you must reset the OIL LIFE yourself after
each oil change. It will not reset itself. Also, be
careful not to reset the OIL LIFE accidentally at any
time other than when the oil has just been changed. It
cannot be reset accurately until the next oil change.
To reset the engine oil life system, seeEngine Oil Life
System on page 5-18. The display will show 100%
when the system is reset.
3-53
ProCarManuals.com
Page 200 of 462
6. Drive the vehicle slowly in a circle two times to
activate the compass.
When the calibration is complete, the DIC will
display CALIBRATION FINISHED.
7. If the message CAL appears in the DIC, you must
manually put the compass into the calibration mode
again. Repeat Steps 1 through 6.
DIC Warnings and Messages
Messages are displayed on the DIC to notify the driver
that the status of the vehicle has changed and that some
action may be needed by the driver to correct the
condition. Multiple messages may appear one after
another.
Some messages may not require immediate action, but
you can press any of the DIC buttons to acknowledge
that you received the message and clear it from the DIC
display.
Some messages cannot be cleared from the DIC
display because they are more urgent. These messages
require action before they can be cleared.If there are any active warning messages when the
vehicle is turned off, two chimes will sound and the DIC
will go into a reminder mode. The reminder mode
displays any active message. If there are multiple
messages, the DIC will display each message for
�ve seconds. After each active message is displayed
once, the reminder mode will turn off.
You should take any messages that appear on the
display seriously and remember that clearing the
messages will only make the messages disappear, not
correct the problem.
The following are the possible messages that can be
displayed and some information about them.
A/C OFF FOR ENGINE PROTECTION
This message will display when the engine coolant
becomes hotter than the normal operating temperature.
SeeEngine Coolant Temperature Gage on page 3-42.
To avoid added strain on a hot engine, the air
conditioning compressor is automatically turned off.
When the coolant temperature returns to normal, the air
conditioning compressor will turn back on. You can
continue to drive your vehicle.
3-56
ProCarManuals.com
Page 210 of 462
REDUCED POWER STOP WHEN SAFE
This message will display when your vehicle is in an
overheated engine operating mode. This operating mode
allows your vehicle to be driven to a safe place in an
emergency. In this mode, you will notice a signi�cant
loss in power and engine performance. SeeOverheated
Engine Protection Operating Mode on page 5-28for
more information. Anytime this message is on, the
vehicle should be taken to your retailer for service as
soon as possible.
This message will display and a chime will sound only
when the ignition is in RUN. Press any of the DIC
buttons to acknowledge this message and to clear it
from the screen.
This message will continue to display for two seconds if
it has not been acknowledged when the engine is
turned off. It will also re-display for two seconds if the
message has been acknowledged, but the condition still
exists when the engine is turned off.
If the condition still exists, the message will re-appear
when the engine is turned on.
REMOTE START DISABLED
This warning message will come on if a remote start
attempt is unsuccessful. This may be caused if any of
the following conditions are true when a remote
start attempt is made:
The remote start system is disabled through
the DIC.
The key is in the ignition.
The hood or the doors are not closed.
There is an emission control system malfunction.
The engine coolant temperature is too high.
The oil pressure is low.
The hazard warning �ashers are turned on.
The maximum number of remote starts or remote
start attempts between ignition cycles has been
reached.
The content theft-deterrent alarm is on while
attempting to remote start the vehicle.
See “REMOTE START” underDIC Vehicle
Personalization (Uplevel Only) on page 3-73and
“Remote Vehicle Start” underRemote Keyless Entry
System Operation on page 2-5for more information.
3-66
ProCarManuals.com
Page 218 of 462
Entering the Personal Program Menu
1. Turn the ignition on and place the vehicle in
PARK (P).
2. Press the menu button until PERSONAL
PROGRAM displays.
If the vehicle is not in PARK (P), PERSONAL
PROGRAM ONLY IN PARK will display.
If the vehicle is not able to enter the personal
program menu, PERSONAL PROGRAM NOT
AVAILABLE will display.
3. Press the set/reset button to begin.
4. The DIC will then display an instruction screen.
Press the menu button to display the modes that
are available to program.
Press the set/reset button to change the setting of
each mode.
Customization Menu Items
The following are customization features that allow you
to program settings to the vehicle:
FACTORY DEFAULTS
This feature allows you to set all of the customization
and personalization features back to their factory default
settings.
Press the menu button until FACTORY DEFAULTS
appears on the DIC display. Press the set/reset button
to scroll through the following choices:
NO (default):The customization and personalization
features will not be set to their factory default settings.
YES:The customization and personalization features
will be set to their factory default settings.
If YES is selected, the keys will need to be personalized
again to be recognized as key 1 or 2. See
“PERSONALIZE KEY” later in this section for more
information.
Choose one of the available settings and press the
menu button while it is displayed on the DIC to select it
and move on to the next feature.
3-74
ProCarManuals.com