lock SATURN VUE 2006 Repair Manual
[x] Cancel search | Manufacturer: SATURN, Model Year: 2006, Model line: VUE, Model: SATURN VUE 2006Pages: 412, PDF Size: 2.89 MB
Page 173 of 412
Radio Data System (RDS)
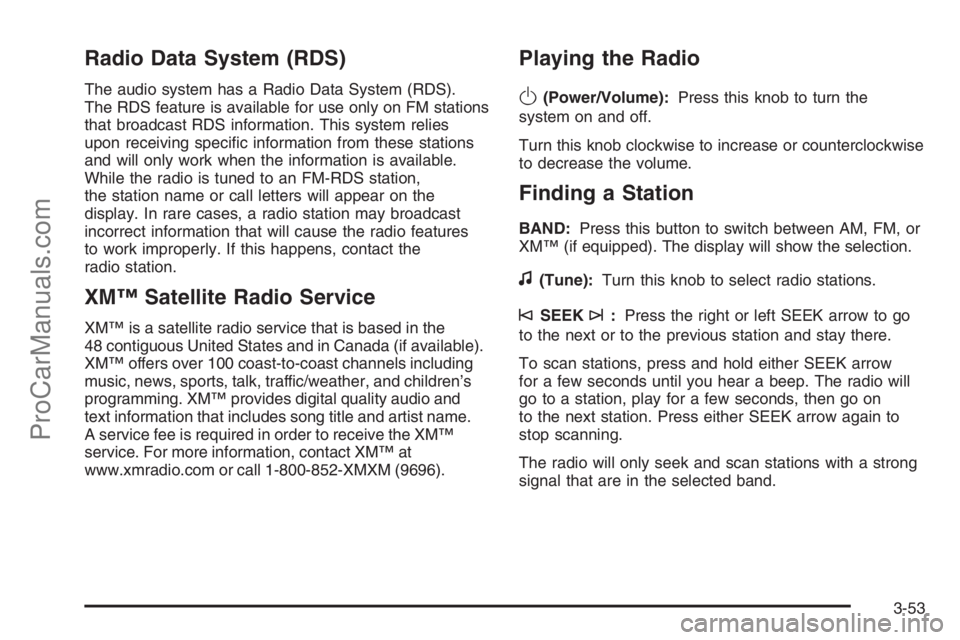
The audio system has a Radio Data System (RDS).
The RDS feature is available for use only on FM stations
that broadcast RDS information. This system relies
upon receiving speci�c information from these stations
and will only work when the information is available.
While the radio is tuned to an FM-RDS station,
the station name or call letters will appear on the
display. In rare cases, a radio station may broadcast
incorrect information that will cause the radio features
to work improperly. If this happens, contact the
radio station.
XM™ Satellite Radio Service
XM™ is a satellite radio service that is based in the
48 contiguous United States and in Canada (if available).
XM™ offers over 100 coast-to-coast channels including
music, news, sports, talk, traffic/weather, and children’s
programming. XM™ provides digital quality audio and
text information that includes song title and artist name.
A service fee is required in order to receive the XM™
service. For more information, contact XM™ at
www.xmradio.com or call 1-800-852-XMXM (9696).
Playing the Radio
O
(Power/Volume):Press this knob to turn the
system on and off.
Turn this knob clockwise to increase or counterclockwise
to decrease the volume.
Finding a Station
BAND:Press this button to switch between AM, FM, or
XM™ (if equipped). The display will show the selection.
f(Tune):Turn this knob to select radio stations.
©SEEK¨:Press the right or left SEEK arrow to go
to the next or to the previous station and stay there.
To scan stations, press and hold either SEEK arrow
for a few seconds until you hear a beep. The radio will
go to a station, play for a few seconds, then go on
to the next station. Press either SEEK arrow again to
stop scanning.
The radio will only seek and scan stations with a strong
signal that are in the selected band.
3-53
ProCarManuals.com
Page 175 of 412
Setting the Tone (Bass/Treble)
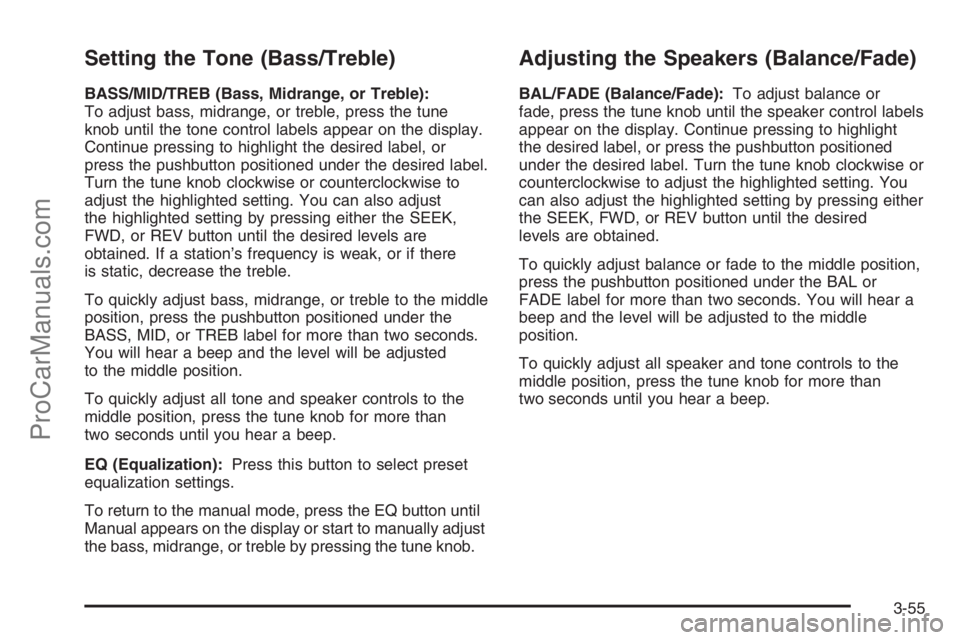
BASS/MID/TREB (Bass, Midrange, or Treble):
To adjust bass, midrange, or treble, press the tune
knob until the tone control labels appear on the display.
Continue pressing to highlight the desired label, or
press the pushbutton positioned under the desired label.
Turn the tune knob clockwise or counterclockwise to
adjust the highlighted setting. You can also adjust
the highlighted setting by pressing either the SEEK,
FWD, or REV button until the desired levels are
obtained. If a station’s frequency is weak, or if there
is static, decrease the treble.
To quickly adjust bass, midrange, or treble to the middle
position, press the pushbutton positioned under the
BASS, MID, or TREB label for more than two seconds.
You will hear a beep and the level will be adjusted
to the middle position.
To quickly adjust all tone and speaker controls to the
middle position, press the tune knob for more than
two seconds until you hear a beep.
EQ (Equalization):Press this button to select preset
equalization settings.
To return to the manual mode, press the EQ button until
Manual appears on the display or start to manually adjust
the bass, midrange, or treble by pressing the tune knob.
Adjusting the Speakers (Balance/Fade)
BAL/FADE (Balance/Fade):To adjust balance or
fade, press the tune knob until the speaker control labels
appear on the display. Continue pressing to highlight
the desired label, or press the pushbutton positioned
under the desired label. Turn the tune knob clockwise or
counterclockwise to adjust the highlighted setting. You
can also adjust the highlighted setting by pressing either
the SEEK, FWD, or REV button until the desired
levels are obtained.
To quickly adjust balance or fade to the middle position,
press the pushbutton positioned under the BAL or
FADE label for more than two seconds. You will hear a
beep and the level will be adjusted to the middle
position.
To quickly adjust all speaker and tone controls to the
middle position, press the tune knob for more than
two seconds until you hear a beep.
3-55
ProCarManuals.com
Page 177 of 412

XM™ Radio Messages
Radio Display
MessageCondition Action Required
XL (Explicit Language
Channels)XL on the radio display,
after the channel name,
indicates content with
explicit language.These channels, or any others, can be blocked at a
customer’s request, by calling 1-800-852-XMXM (9696).
XM Updating Updating encryption code The encryption code in the receiver is being updated,
and no action is required. This process should take no
longer than 30 seconds.
No XM Signal Loss of signal The system is functioning correctly, but the vehicle is in
a location that is blocking the XM™ signal. When you
move into an open area, the signal should return.
Loading XM Acquiring channel audio
(after 4 second delay)The audio system is acquiring and processing audio and
text data. No action is needed. This message should
disappear shortly.
Channel Off Air Channel not in service This channel is not currently in service. Tune to another
channel.
Channel Unavail Channel no longer available This previously assigned channel is no longer assigned.
Tune to another station. If this station was one of the
presets, choose another station for that preset button.
No Artist Info Artist Name/Feature
not availableNo artist information is available at this time on this
channel. The system is working properly.
No Title Info Song/Program Title
not availableNo song title information is available at this time on this
channel. The system is working properly.
3-57
ProCarManuals.com
Page 178 of 412
XM™ Radio Messages (cont’d)
Radio Display
MessageCondition Action Required
No CAT Info Category Name
not availableNo category information is available at this time on this
channel. The system is working properly.
No Information No Text/Informational
message availableNo text or informational messages are available at this
time on this channel. The system is working properly.
CAT Not Found No channel available for
the chosen categoryThere are no channels available for the selected
category. The system is working properly.
XM Theftlocked Theft lock active The XM™ receiver in the vehicle may have previously
been in another vehicle. For security purposes, XM™
receivers cannot be swapped between vehicles. If this
message appears after having your vehicle serviced,
check with your retailer.
XM Radio ID Radio ID label (channel 0) If tuned to channel 0, this message will alternate with
the XM™ Radio eight digit radio ID label. This label is
needed to activate the service.
Unknown Radio ID not known (should
only be if hardware failure)If this message is received when tuned to channel 0,
there may be a receiver fault. Consult with your retailer.
Check XM Receivr Hardware failure If this message does not clear within a short period of
time, the receiver may have a fault. Consult with your
retailer.
XM Not Available XM Not Available If this message does not clear within a short period of
time, the receiver may have a fault. Consult with your
retailer.
3-58
ProCarManuals.com
Page 187 of 412
CD Messages
CHECK DISC:If this message appears on the display
and/or the CD comes out, it could be for one of the
following reasons:
It is very hot. When the temperature returns to
normal, the CD should play.
You are driving on a very rough road. When the
road becomes smoother, the CD should play.
The CD is dirty, scratched, wet, or upside down.
The air is very humid. If so, wait about an hour
and try again.
There may have been a problem while burning
the CD.
The label may be caught in the CD player.
If the CD is not playing correctly, for any other reason,
try a known good CD.
If any error occurs repeatedly or if an error cannot be
corrected, contact your retailer. If the radio displays
an error message, write it down and provide it to your
retailer when reporting the problem.
Using the Auxiliary Input Jack
Your radio system has an auxiliary input jack located
on the lower right side of the faceplate. This is not
an audio output; do not plug the headphone set into the
front auxiliary input jack. You can however, connect
an external audio device such as an iPod, laptop
computer, MP3 player, CD changer, or cassette tape
player, etc. to the auxiliary input jack for use as another
source for audio listening.
To use a portable audio player, connect a 3.5 mm
(1/8 inch) cable to the radio’s front auxiliary input jack.
When a device is connected, press the radio CD/AUX
button to begin playing audio from the device over
the car speakers.
O(Power/Volume):Turn this knob clockwise to
increase or counterclockwise to decrease the volume
of the portable player. You may need to do additional
volume adjustments from the portable device if the
volume does not go loud or soft enough.
BAND:Press this button to listen to the radio when a
portable audio device is playing. The portable audio
device will continue playing, so you may want to stop
it or power it off.
3-67
ProCarManuals.com
Page 191 of 412
Video Screen
The video screen is located in the overhead console.
To use the video screen, do the following:
1. Push forward on the release button located on the
DVD display console.
2. Pull the screen down, away from you, and adjust
its position as desired.
When the video screen is not in use, push it up into
its locked position.
If a DVD is playing and the screen is raised to its locked
position, the screen will shut off, but the DVD will
continue to play through the previous audio or video
source.
The video screen contains the transmitters for the
wireless headphones and the receivers for the remote
control. If the screen is in the closed position, the signals
will not be available for the operation of the headphones
or the remote control.
Notice:Avoid directly touching the video screen,
as damage may occur. See “Cleaning the Video
Screen” later in this section for more information.
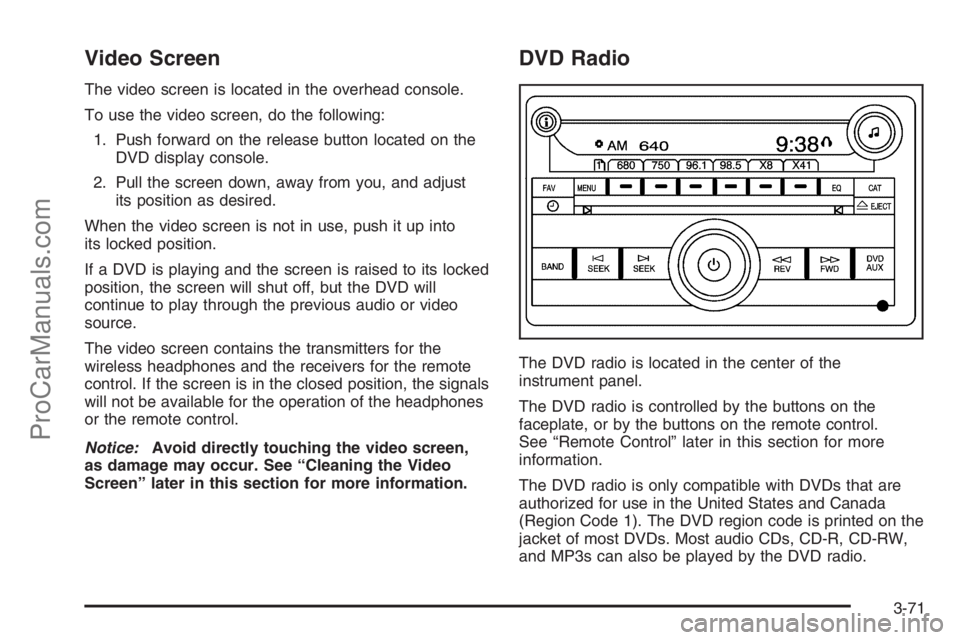
DVD Radio
The DVD radio is located in the center of the
instrument panel.
The DVD radio is controlled by the buttons on the
faceplate, or by the buttons on the remote control.
See “Remote Control” later in this section for more
information.
The DVD radio is only compatible with DVDs that are
authorized for use in the United States and Canada
(Region Code 1). The DVD region code is printed on the
jacket of most DVDs. Most audio CDs, CD-R, CD-RW,
and MP3s can also be played by the DVD radio.
3-71
ProCarManuals.com
Page 192 of 412

If an error message appears on the video screen or
the radio, see “DVD Radio Error Messages” later in
this section.
Auxiliary Input Jack
Your radio system has an auxiliary input jack located
on the lower right side of the faceplate. You can connect
an external audio device such as an iPod, MP3 player,
or cassette player, to the auxiliary input jack for use
as another source for audio listening.
DVD Radio Buttons
To use the radio, see Radio with CD (Base) or (MP3)
underRadio with CD (Base) on page 3-47orRadio
with CD (MP3) on page 3-52for more information.
DVD/AUX (Auxiliary):When a DVD is playing, press
this button to switch between front auxiliary and RSE.
To listen to a DVD through the headphones, press
this button.
When a CD is playing, press this button to switch
between playing a CD or the front auxiliary, if not in
RSE mode. If the system is in RSE mode, press
the power button on the remote control �rst, to listen
to the CD through the headphones, while the front
passengers listen to the front auxiliary.
O(Power):Press this knob to turn the radio/DVD
player on. Turn this knob clockwise to increase
the volume or counterclockwise to decrease the volume.
A single press turns the radio off, a quick double
press turns off the entire radio and rear seat
entertainment system.
f(Tune):Turn this knob to change tracks on a CD or
DVD, to manually tune a radio station, or to change
clock or date settings, while in the clock or date setting
mode. SeeAudio System(s) on page 3-44for more
information.
©SEEK (Previous Track/Chapter):Press this button
to return to the start of the current track or chapter.
Press this button again to go to the previous track or
chapter. This button may not work when the DVD
is playing the copyright information or the previews.
¨SEEK (Next Track/Chapter):Press this button to
advance to the beginning of the next track or chapter.
This button may not work when the DVD is playing
the copyright information or the previews.
sREV (Reverse):Press this button to fast reverse
the DVD or CD, �ve times the normal speed. The radio
will display the elapsed time while in fast reverse. To
stop fast reversing, press this button again. This button
may not work when the DVD is playing the copyright
information or the previews.
3-72
ProCarManuals.com
Page 195 of 412

To stop playing a DVD without turning off the system,
press the stop button on the remote control, or press the
pushbutton located under the stop or the play/pause
symbol tags displayed on the radio.
To resume DVD playback, press the play/pause
button on the remote control, or press the pushbutton
located under the play/pause symbol tag displayed
on the radio. The DVD should resume play from
where it last stopped if the disc has not been ejected
and the stop button has not been pressed twice on
the remote control. If the disc has been ejected or the
stop button has been pressed twice on the remote
control, the disc will resume playing at the beginning
of the disc.
Ejecting a Disc
Press the eject button on the radio to eject the disc.
If a disc is ejected from the radio, but not removed, the
radio will reload the disc after a short period of time.
The disc will be stored in the radio. The radio will
not resume play of the disc automatically.
Remote Control
To use the remote control, aim it at the transmitter
window below the video screen and press the desired
button. Direct sunlight or very bright light may affect the
ability of the RSE transmitter to receive signals from
the remote control. If the remote control does not seem
to be working, the batteries may need to be replaced.
See “Battery Replacement” later in this section. Objects
blocking the line of sight may also affect the function
of the remote control.
The DVD player can only be turned on by pressing the
RSE button on the radio.
Notice:Storing the remote control in a hot area
or in direct sunlight may damage it, and the repairs
will not be covered by your warranty. Keep the
remote control stored in a cool, dry place.
3-75
ProCarManuals.com
Page 203 of 412

Your Driving, the Road, and Your Vehicle..........4-2
Driver Behavior..............................................4-2
Driving Environment........................................4-2
Vehicle Design...............................................4-3
Defensive Driving...........................................4-3
Drunken Driving.............................................4-4
Control of a Vehicle........................................4-6
Braking.........................................................4-7
Anti-Lock Brake System (ABS).........................4-8
Braking in Emergencies.................................4-10
Traction Control System (TCS).......................4-10
All-Wheel Drive (AWD) System.......................4-11
Steering......................................................4-11
Off-Road Recovery.......................................4-14
Passing.......................................................4-14
Loss of Control.............................................4-15
Off-Road Driving...........................................4-17
Driving at Night............................................4-30Driving in Rain and on Wet Roads..................4-31
City Driving..................................................4-33
Freeway Driving...........................................4-34
Before Leaving on a Long Trip.......................4-35
Highway Hypnosis........................................4-35
Hill and Mountain Roads................................4-36
Winter Driving..............................................4-38
If Your Vehicle is Stuck in Sand, Mud,
Ice, or Snow.............................................4-42
Rocking Your Vehicle to Get It Out.................4-42
Recovery Hook.............................................4-43
Loading Your Vehicle....................................4-44
Towing..........................................................4-48
Towing Your Vehicle.....................................4-48
Recreational Vehicle Towing...........................4-48
Towing a Trailer...........................................4-52
Section 4 Driving Your Vehicle
4-1
ProCarManuals.com
Page 210 of 412

Anti-Lock Brake System (ABS)
Your vehicle may have the Anti-Lock Brake System
(ABS), an advanced electronic braking system that will
help prevent a braking skid.
If your vehicle has ABS,
this warning light on the
instrument panel will
come on brie�y when
you start your vehicle.
When you start your engine, or when you begin to
drive away, your ABS will check itself. You may hear
a momentary motor or clicking noise while this test
is going on, and you may even notice that your brake
pedal moves or pulses a little. This is normal.Let us say the road is wet and you are driving safely.
Suddenly, an animal jumps out in front of you. You
slam on the brakes and continue braking. Here is what
happens with ABS:
A computer senses that wheels are slowing down.
If one of the wheels is about to stop rolling, the computer
will separately work the brakes at each wheel.
4-8
ProCarManuals.com