oil SATURN VUE 2008 Owners Manual
[x] Cancel search | Manufacturer: SATURN, Model Year: 2008, Model line: VUE, Model: SATURN VUE 2008Pages: 412, PDF Size: 2.78 MB
Page 86 of 412
If the vehicle is left running it will automatically shut
off after 10 minutes unless a time extension has
been done.
To manually shut off a remote start:
Aim the RKE transmitter at the vehicle and press
the remote start button until the parking lamps
turn off.
Turn on the hazard warning �ashers.
Turn the ignition switch on and then off.
The vehicle can be remote started two separate times
between driving sequences. The engine will run for
10 minutes after each remote start.
Or, you can extend the engine run time by another
10 minutes within the �rst 10 minute remote start time
frame, and before the engine stops.
For example, if the lock button and then the remote
start buttons are pressed again after the vehicle
has been running for �ve minutes, 10 minutes are
added, allowing the engine to run for 15 minutes.
The additional ten minutes are considered a
second remote vehicle start.Once two remote starts, or a single remote start with
one time extension has been done, the vehicle must be
started with the key.
After the key is removed from the ignition, the vehicle
can be remote started again.
The vehicle cannot be remote started if the key is in
the ignition, the hood is not closed, or if there is
an emission control system malfunction.
Also, the engine will turn off during a remote vehicle
start if the coolant temperature gets too high or if
the oil pressure gets low.
Remote Start Ready
If your vehicle does not have the remote vehicle start
feature, it may have the remote start ready feature.
This feature allows your dealer/retailer to add the
manufacturer’s remote vehicle start feature.
See your dealer/retailer if you would like to add the
manufacturer’s remote vehicle start feature to your
vehicle.
2-8
ProCarManuals.com
Page 98 of 412
Starting the Engine
Move your shift lever to PARK (P) or NEUTRAL (N).
Your engine will not start in any other position – this
is a safety feature. To restart when you are already
moving, use NEUTRAL (N) only.
Notice:Do not try to shift to PARK (P) if your
vehicle is moving. If you do, you could damage
the transmission. Shift to PARK (P) only when
your vehicle is stopped.
Starting Procedure
1. With your foot off the accelerator pedal, turn the
ignition key to START. When the engine starts,
let go of the key. The idle speed will go down as
your engine gets warm. Do not race the engine
immediately after starting it. Operate the engine
and transmission gently to allow the oil to warm up
and lubricate all moving parts.
Your vehicle has a Computer-Controlled Cranking
System. This feature assists in starting the engine
and protects components. If the ignition key is turned
to the START position, and then released when the
engine begins cranking, the engine will continue
cranking for a few seconds or until the vehicle starts.
If the engine does not start and the key is held in
START for many seconds, cranking will be stopped
after 15 seconds to prevent cranking motor damage.To prevent gear damage, this system also prevents
cranking if the engine is already running. Engine
cranking can be stopped by turning the ignition
switch to the ACC/ACCESSORY or LOCK/OFF
position.
Notice:Cranking the engine for long periods of
time, by returning the key to the START position
immediately after cranking has ended, can overheat
and damage the cranking motor, and drain the
battery. Wait at least 15 seconds between each try,
to let the cranking motor cool down.
2. If the engine does not start after 5-10 seconds,
especially in very cold weather (below 0°F or−18°C),
it could be �ooded with too much gasoline Try
pushing the accelerator pedal all the way to the �oor
and holding it there as you hold the key in START
for up to a maximum of 15 seconds. Wait at least
15 seconds between each try, to allow the cranking
motor to cool down. When the engine starts, let go of
the key and accelerator. If the vehicle starts brie�y
but then stops again, do the same thing. This clears
the extra gasoline from the engine. Do not race the
engine immediately after starting it. Operate the
engine and transmission gently until the oil warms up
and lubricates all moving parts.
2-20
ProCarManuals.com
Page 99 of 412
Notice:The engine is designed to work with the
electronics in your vehicle. If you add electrical parts
or accessories, you could change the way the engine
operates. Before adding electrical equipment, check
with your dealer/retailer. If you do not, your engine
might not perform properly. Any resulting damage
would not be covered by your vehicle’s warranty.
Engine Coolant Heater
The engine coolant heater, if available, can help in cold
weather conditions at or below 0°F (−18°C) for easier
starting and better fuel economy during engine warm-up.
Plug in the coolant heater at least four hours before
starting your vehicle. An internal thermostat in the
plug-end of the cord may exist which will prevent
engine coolant heater operation at temperatures
above 0° F (−18° C).
To Use the Engine Coolant Heater
1. Turn off the engine.
2. Open the hood and unwrap the electrical cord. The
engine coolant heater cord is located near the air
cleaner box on the passenger side of the engine
compartment. SeeEngine Compartment Overview
on page 5-12for more information on location.
3. Plug the cord into a normal, grounded 110-volt
AC outlet.
{CAUTION:
Plugging the cord into an ungrounded outlet
could cause an electrical shock. Also, the
wrong kind of extension cord could overheat
and cause a �re. You could be seriously
injured. Plug the cord into a properly grounded
three-prong 110-volt AC outlet. If the cord
will not reach, use a heavy-duty three-prong
extension cord rated for at least 15 amps.
4. Before starting the engine, be sure to unplug and
store the cord as it was before to keep it away
from moving engine parts. If you do not, it could
be damaged.
How long should you keep the coolant heater plugged
in? The answer depends on the outside temperature,
the kind of oil you have, and some other things.
Instead of trying to list everything here, we ask that
you contact your dealer/retailer in the area where you
will be parking your vehicle. The dealer/retailer can
give you the best advice for that particular area.
2-21
ProCarManuals.com
Page 129 of 412
Instrument Panel Overview...............................3-4
Hazard Warning Flashers................................3-6
Horn .............................................................3-6
Tilt Wheel.....................................................3-6
Turn Signal/Multifunction Lever.........................3-7
Turn and Lane-Change Signals........................3-7
Headlamp High/Low-Beam Changer..................3-8
Flash-to-Pass.................................................3-8
Windshield Wipers..........................................3-8
Rainsense™ II Wipers.....................................3-9
Windshield Washer.......................................3-10
Rear Window Wiper/Washer...........................3-11
Cruise Control..............................................3-11
Exterior Lamps.............................................3-14
Wiper Activated Headlamps............................3-14
Daytime Running Lamps (DRL).......................3-15
Automatic Headlamp System..........................3-15
Fog Lamps ..................................................3-16
Instrument Panel Brightness...........................3-16
Dome Lamp .................................................3-17
Entry Lighting...............................................3-17
Reading Lamps............................................3-17
Battery Run-Down Protection..........................3-17
Accessory Power Outlet(s).............................3-18Climate Controls............................................3-19
Climate Control System.................................3-19
Automatic Climate Control System...................3-23
Outlet Adjustment.........................................3-28
Passenger Compartment Air Filter...................3-28
Warning Lights, Gages, and Indicators............3-30
Instrument Panel Cluster................................3-31
Speedometer and Odometer...........................3-32
Trip Odometer..............................................3-32
Tachometer.................................................3-32
Safety Belt Reminders...................................3-32
Airbag Readiness Light..................................3-33
Passenger Airbag Status Indicator...................3-34
Charging System Light..................................3-36
Brake System Warning Light..........................3-37
Anti-lock Brake System (ABS) Warning Light. . . .3-37
Speed Sensitive Power Steering (SSPS)
Warning Light...........................................3-38
Traction Control System (TCS) Warning Light. . . .3-39
Electronic Stability Program Indicator Light.......3-39
Engine Coolant Temperature Warning Light......3-40
Tire Pressure Light.......................................3-40
Malfunction Indicator Lamp.............................3-41
Oil Pressure Light.........................................3-43
Section 3 Instrument Panel
3-1
ProCarManuals.com
Page 130 of 412
Low Oil Level Light.......................................3-44
Change Engine Oil Light................................3-44
Security Light...............................................3-44
Fog Lamp Light............................................3-45
Cruise Control Light......................................3-45
Reduced Engine Power Light.........................3-45
Highbeam On Light.......................................3-46
Low Washer Fluid Warning Light.....................3-46
All-Wheel Drive Disabled Light........................3-46
Gate Ajar Light.............................................3-46
Door Ajar Light.............................................3-47
Service Vehicle Soon Light............................3-47
Fuel Gage...................................................3-47
Low Fuel Warning Light.................................3-48Driver Information Center (DIC).......................3-49
DIC Operation and Displays...........................3-49
DIC Compass..............................................3-50
Audio System(s).............................................3-52
Setting the Clock..........................................3-53
Radio(s)......................................................3-55
Using an MP3..............................................3-64
XM Radio Messages.....................................3-68
Navigation/Radio System...............................3-69
Audio Steering Wheel Controls.......................3-70
Radio Reception...........................................3-70
Fixed Mast Antenna......................................3-71
XM™ Satellite Radio Antenna System.............3-71
Section 3 Instrument Panel
3-2
ProCarManuals.com
Page 171 of 412
Emissions Inspection and Maintenance
Programs
Some state/provincial and local governments have or
might begin programs to inspect the emission control
equipment on your vehicle. Failure to pass this
inspection could prevent you from getting a vehicle
registration.
Here are some things you need to know to help your
vehicle pass an inspection:
Your vehicle will not pass this inspection if the check
engine light is on or not working properly.
Your vehicle will not pass this inspection if the OBD
(on-board diagnostic) system determines that critical
emission control systems have not been completely
diagnosed by the system. The vehicle would be
considered not ready for inspection. This can happen if
you have recently replaced the battery or if the battery
has run down. The diagnostic system is designed to
evaluate critical emission control systems during normal
driving. This can take several days of routine driving.
If you have done this and your vehicle still does not pass
the inspection for lack of OBD system readiness, your
dealer/retailer can prepare the vehicle for inspection.
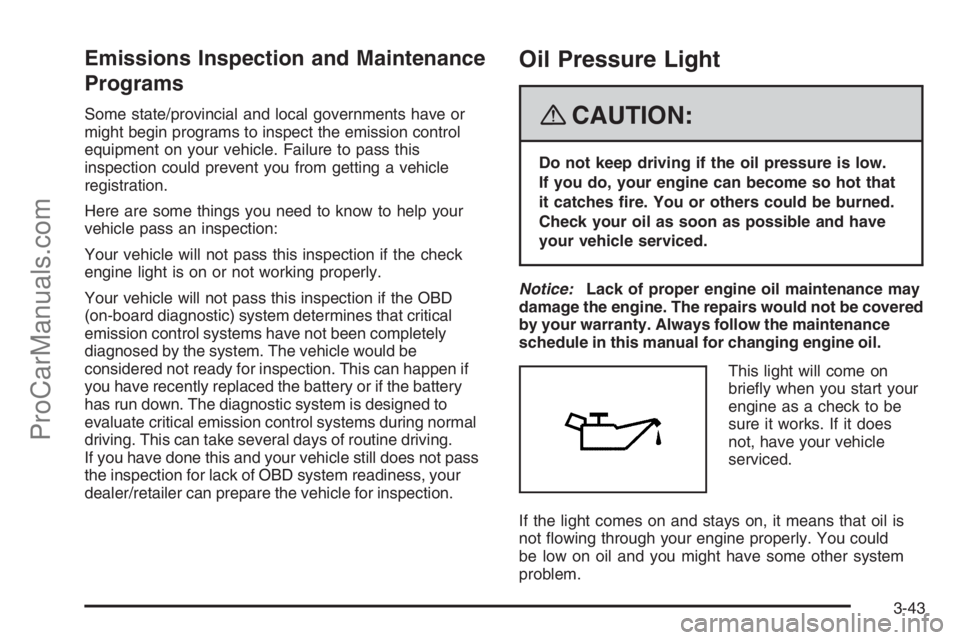
Oil Pressure Light
{CAUTION:
Do not keep driving if the oil pressure is low.
If you do, your engine can become so hot that
it catches �re. You or others could be burned.
Check your oil as soon as possible and have
your vehicle serviced.
Notice:Lack of proper engine oil maintenance may
damage the engine. The repairs would not be covered
by your warranty. Always follow the maintenance
schedule in this manual for changing engine oil.
This light will come on
brie�y when you start your
engine as a check to be
sure it works. If it does
not, have your vehicle
serviced.
If the light comes on and stays on, it means that oil is
not �owing through your engine properly. You could
be low on oil and you might have some other system
problem.
3-43
ProCarManuals.com
Page 172 of 412
Low Oil Level Light
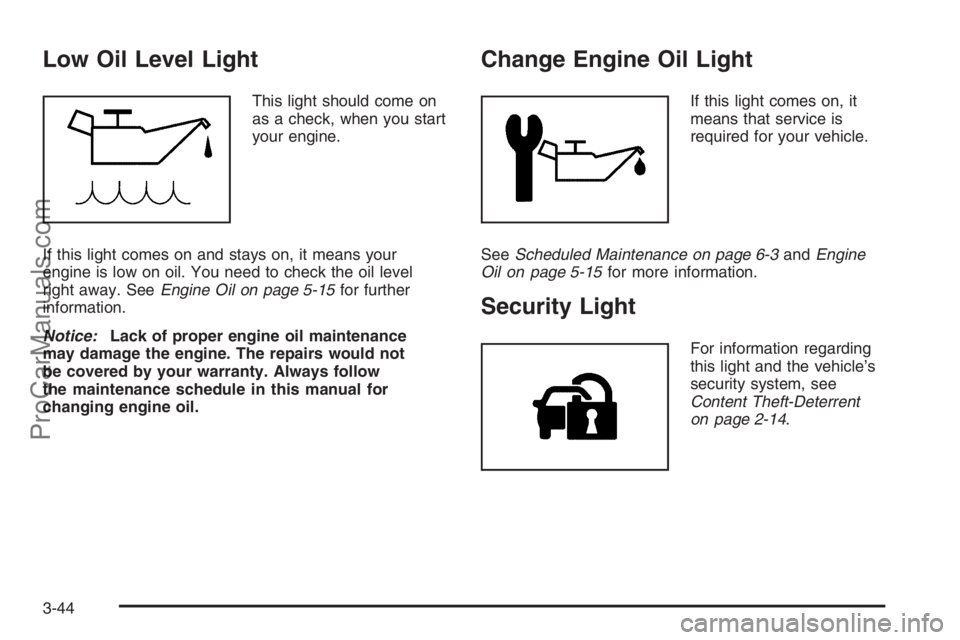
This light should come on
as a check, when you start
your engine.
If this light comes on and stays on, it means your
engine is low on oil. You need to check the oil level
right away. SeeEngine Oil on page 5-15for further
information.
Notice:Lack of proper engine oil maintenance
may damage the engine. The repairs would not
be covered by your warranty. Always follow
the maintenance schedule in this manual for
changing engine oil.
Change Engine Oil Light
If this light comes on, it
means that service is
required for your vehicle.
SeeScheduled Maintenance on page 6-3andEngine
Oil on page 5-15for more information.
Security Light
For information regarding
this light and the vehicle’s
security system, see
Content Theft-Deterrent
on page 2-14.
3-44
ProCarManuals.com
Page 189 of 412

Care of Your CDs
If playing a CD-R, the sound quality can be reduced due
to CD-R quality, the method of recording, the quality of
the music that has been recorded, and the way the CD-R
has been handled. Handle them carefully. Store CD-R(s)
in their original cases or other protective cases and away
from direct sunlight and dust. The CD player scans the
bottom surface of the disc. If the surface of a CD is
damaged, such as cracked, broken, or scratched, the CD
does not play properly or not at all. Do not touch the
bottom side of a CD while handling it; this could damage
the surface. Pick up CDs by grasping the outer edges or
the edge of the hole and the outer edge.
If the surface of a CD is soiled, take a soft, lint free
cloth or dampen a clean, soft cloth in a mild, neutral
detergent solution mixed with water, and clean it.
Make sure the wiping process starts from the center
to the edge.
Care of Your CD Player
Do not add any label to a CD, it could get caught in the
CD player. If a CD is recorded on a personal computer
and a description label is needed, try labeling the top of
the recorded CD with a marking pen.
To prevent contaminating the lens of the disc optics with
lubricants internal to the player mechanism the use of
disc lens cleaners is not advised.
Notice:If a label is added to a CD, or more than
one CD is inserted into the slot at a time, or an
attempt is made to play scratched or damaged CDs,
the CD player could be damaged. While using the
CD player, use only CDs in good condition without
any label, load one CD at a time, and keep the
CD player and the loading slot free of foreign
materials, liquids, and debris.
If an error displays, see “CD Messages” later in this
section.
3-61
ProCarManuals.com
Page 229 of 412
Other Rainy Weather Tips
Besides slowing down, other wet weather driving tips
include:
Allow extra following distance.
Pass with caution.
Keep windshield wiping equipment in good shape.
Keep the windshield washer �uid reservoir �lled.
Have good tires with proper tread depth. SeeTires
on page 5-51.
Before Leaving on a Long Trip
To prepare your vehicle for a long trip, consider having
it serviced by your dealer/retailer before departing.
Things to check on your own include:
Windshield Washer Fluid:Reservoir full? Windows
clean — inside and outside?
Wiper Blades:In good shape?
Fuel, Engine Oil, Other Fluids:All levels checked?
Lamps:Do they all work and are lenses clean?
Tires:Are treads good? Are tires in�ated to
recommended pressure?
Weather and Maps:Safe to travel? Have
up-to-date maps?
Highway Hypnosis
Always be alert and pay attention to your surroundings
while driving. If you become tired or sleepy, �nd a
safe place to park your vehicle and rest.
Other driving tips include:
Keep the vehicle well ventilated.
Keep interior temperature cool.
Keep your eyes moving — scan the road ahead
and to the sides.
Check the rearview mirror and vehicle instruments
often.
4-29
ProCarManuals.com
Page 253 of 412
When You Are Ready to Leave After
Parking on a Hill
1. Apply your regular brakes and hold the pedal down
while you:
start your engine,
shift into a gear, and
release the parking brake.
2. Let up on the brake pedal.
3. Drive slowly until the trailer is clear of the chocks.
4. Stop and have someone pick up and store the
chocks.
Maintenance When Trailer Towing
Your vehicle will need service more often when you are
pulling a trailer. SeeScheduled Maintenance on page 6-3
for more information. Things that are especially important
in trailer operation are automatic transmission �uid (do
not over�ll), engine oil, axle lubricant, drive belt, cooling
system and brake system. Each of these is covered in
this manual, and the Index will help you �nd them quickly.
If you are trailering, it is a good idea to review this
information before you start your trip.
Check periodically to see that all hitch nuts and
bolts are tight.
Trailer Wiring
If the vehicle has a trailer hitch, a four wire harness
with connector is attached to a bracket on the hitch
platform.
The connector contains the following trailer circuits:
Brown: Park Lamp
Dark Green: Right Stop/Turn Signal
Yellow: Left Stop/Turn Signal
White: Ground
Engine Cooling When Trailer Towing
Your cooling system may temporarily overheat during
severe operating conditions. SeeEngine Overheating on
page 5-25.
Changing a Tire When Trailer Towing
If you get a �at tire while towing a trailer, be sure
to secure the trailer and disconnect it from the vehicle
before changing the tire.
4-53
ProCarManuals.com