door lock SATURN VUE 2009 User Guide
[x] Cancel search | Manufacturer: SATURN, Model Year: 2009, Model line: VUE, Model: SATURN VUE 2009Pages: 386, PDF Size: 2.3 MB
Page 76 of 386

Theft-Deterrent
Systems
Vehicle theft is big business,
especially in some cities.
This vehicle has theft-deterrent
features, however, they do not
make it impossible to steal.
Content Theft-Deterrent
Your vehicle may have a content
theft-deterrent alarm system.
The security light is located near the
center of the instrument panel.To arm the theft-deterrent system,
press
Qon the RKE transmitter
when all doors and the hood
(vehicles started with the remote
start feature only) are closed.
The security light will come on solid
for approximately 30 seconds and
then �ashes slowly. If
Qon the RKE
transmitter is pressed a second time,
the theft-deterrent system will
activate immediately, bypassing the
30 second delay. The content theft
deterrent alarm is not armed until
the security light �ashes slowly.
If any door, liftgate or the hood
(vehicles started with the remote
start feature only) are opened
without using the key or pressing
K
on the RKE transmitter, the exterior
lamps �ash and the horn will sound
for about 30 seconds. If
QorKonthe RKE transmitter is not pressed,
the alarm sounds and periodically
repeats. If the system does not
operate as described above, see
your dealer/retailer for service.
The theft-deterrent system also
activates if you lock the doors
with a key.
To avoid setting off the alarm by
accident, always unlock a door
with the RKE transmitter or a key.
Unlocking a door any other way
will set off the alarm if the system
has been armed.
If you set off the alarm by accident,
turn off the alarm by pressing
QorK
on the RKE transmitter or by placing
the key in the ignition and turning it to
START.
United States shown,
Canada similar
2-12 Features and Controls
ProCarManuals.com
Page 77 of 386

Testing the Alarm
To test the alarm:
1. From inside the vehicle, lower
the driver window and open
the driver door.
2. Get out of the vehicle, close the
door and activate the system by
locking the doors with the RKE
transmitter.
3. Wait for the security light to �ash
slowly.
4. Then reach in through the
window, unlock the door with
the manual door lock and open
the door. This should set off the
alarm.
If the alarm does not sound when it
should, but the vehicle’s headlamps
�ash, check to see if the horn works.
The horn fuse may be blown.
To replace the fuse, seeFuses and
Circuit Breakers on page 5-80.
If the alarm does not sound or the
vehicle’s headlamps do not �ash,
see your dealer/retailer for service.
PASS-Key®III+ Electronic
Immobilizer
The PASS-Key III+ system
operates on a radio frequency
subject to Federal Communications
Commission (FCC) Rules and with
Industry Canada.
This device complies with Part 15 of
the FCC Rules. Operation is subject
to the following two conditions:
1. This device may not cause
harmful interference.
2. This device must accept any
interference received, including
interference that may cause
undesired operation.This device complies with RSS-210
of Industry Canada. Operation is
subject to the following two
conditions:
1. This device may not cause
interference.
2. This device must accept any
interference received, including
interference that may cause
undesired operation of the
device.
Changes or modi�cations to this
system by other than an authorized
service facility could void
authorization to use this equipment.
PASS-Key III+ uses a radio
frequency transponder in the key
that matches a decoder in the
vehicle.
Features and Controls 2-13
ProCarManuals.com
Page 80 of 386

Ignition Positions
The ignition switch has four different
positions.
To shift out of P (Park), turn the
ignition to ON/RUN and apply
the regular brake pedal.
Notice:Using a tool to force the
key to turn in the ignition could
cause damage to the switch or
break the key. Use the correct key,
make sure it is all the way in, and
turn it only with your hand. If the
key cannot be turned by hand,
see your dealer/retailer.LOCK/OFF:This position locks the
ignition. It also locks the steering
wheel and the transmission. The key
can only be removed in LOCK/OFF.
The shift lever must be in P (Park)
to turn the ignition switch to
LOCK/OFF.
The steering can bind with the
wheels turned off center. If this
happens, move the steering wheel
from right to left while turning the key
to ACC/ACCESSORY. If this doesn’t
work, the vehicle needs service.
ACC (ACC/ACCESSORY):This is
the position in which you can operate
the electrical accessories or items
plugged into the accessory power
outlets.
Use this position if the vehicle must
be pushed or towed.ON/RUN:This position can be used
to operate the electrical accessories
and to display some instrument
panel cluster warning and indicator
lights. The switch stays in this
position when the engine is running.
The transmission is also unlocked in
this position. If you leave the key in
the ACC/ACCESSORY or ON/RUN
positions with the engine off, the
battery could be drained. You may
not be able to start the vehicle if the
battery is allowed to drain for an
extended period of time.
START:This is the position that
starts the engine. When the engine
starts, release the key. The ignition
switch returns to ON/RUN for driving.
A warning tone will sound when the
driver door is opened, the ignition is
in ACC/ACCESSORY or LOCK/OFF
and the key is in the ignition.
2-16 Features and Controls
ProCarManuals.com
Page 81 of 386

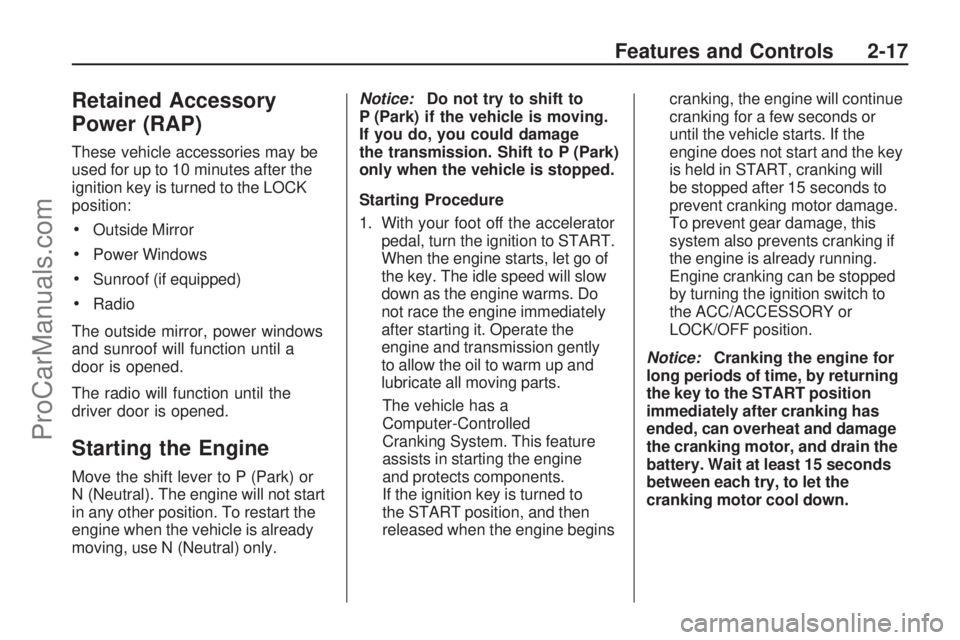
Retained Accessory
Power (RAP)
These vehicle accessories may be
used for up to 10 minutes after the
ignition key is turned to the LOCK
position:
Outside Mirror
Power Windows
Sunroof (if equipped)
Radio
The outside mirror, power windows
and sunroof will function until a
door is opened.
The radio will function until the
driver door is opened.
Starting the Engine
Move the shift lever to P (Park) or
N (Neutral). The engine will not start
in any other position. To restart the
engine when the vehicle is already
moving, use N (Neutral) only.Notice:Do not try to shift to
P (Park) if the vehicle is moving.
If you do, you could damage
the transmission. Shift to P (Park)
only when the vehicle is stopped.
Starting Procedure
1. With your foot off the accelerator
pedal, turn the ignition to START.
When the engine starts, let go of
the key. The idle speed will slow
down as the engine warms. Do
not race the engine immediately
after starting it. Operate the
engine and transmission gently
to allow the oil to warm up and
lubricate all moving parts.
The vehicle has a
Computer-Controlled
Cranking System. This feature
assists in starting the engine
and protects components.
If the ignition key is turned to
the START position, and then
released when the engine beginscranking, the engine will continue
cranking for a few seconds or
until the vehicle starts. If the
engine does not start and the key
is held in START, cranking will
be stopped after 15 seconds to
prevent cranking motor damage.
To prevent gear damage, this
system also prevents cranking if
the engine is already running.
Engine cranking can be stopped
by turning the ignition switch to
the ACC/ACCESSORY or
LOCK/OFF position.
Notice:Cranking the engine for
long periods of time, by returning
the key to the START position
immediately after cranking has
ended, can overheat and damage
the cranking motor, and drain the
battery. Wait at least 15 seconds
between each try, to let the
cranking motor cool down.
Features and Controls 2-17
ProCarManuals.com
Page 97 of 386

The back of the vehicle is in
an accident, the position and
mounting angle of the camera
can change or the camera can
be affected. Be sure to have the
camera and its position and
mounting angle checked at your
dealer/retailer.
There are extreme temperature
changes.
The rear vision camera system
display in the rearview mirror may
turn off or not appear as expected
due to one of the following
conditions. If this occurs the left
indicator light on the mirror will �ash.
A slow �ash may indicate a loss of
video signal, or no video signal
present during the reverse cycle.
A fast �ash may indicate that
the display has been on for the
maximum allowable time during a
reverse cycle, or the display has
reached an Over Temperature
limit.
The fast �ash conditions are used
to protect the video device from
high temperature conditions.
Once conditions return to normal
the device will reset and the green
indicator will stop �ashing.
During any of these fault conditions,
the display will be blank and the
indicator will continue to �ash as long
as the vehicle is in R (Reverse) or
until the conditions return to normal.
Pressing and holding
zwhen the
left indicator light is �ashing will turn
off the video display along with
the left indicator light.
OnStar®System
OnStar uses several innovative
technologies and live advisors to
provide a wide range of safety,
security, information, and
convenience services. If the airbags
deploy, the system is designed to
make an automatic call to OnStar
Emergency advisors who can
request emergency services be sent
to your location. If the keys are
locked in the vehicle, call OnStar at
1-888-4-ONSTAR to have a signal
sent to unlock the doors. OnStar
Hands-Free Calling, including
30 trial minutes good for 60 days, is
available on most vehicles. OnStar
Turn-by-Turn Navigation service,
with one trial route, is available on
most vehicles. Press the OnStar
button to have an OnStar advisor
contact Roadside Service.
Features and Controls 2-33
ProCarManuals.com
Page 98 of 386

OnStar service is provided subject
to the OnStar Terms and Conditions
included in the OnStar Subscriber
glove box literature.
Some services such as Remote
Door Unlock or Stolen Vehicle
Location Assistance may not be
available until the owner of the
vehicle registers with OnStar.
After the �rst prepaid year, contact
OnStar to select a monthly or
annual subscription payment plan.
If a payment plan is not selected,
the OnStar system and all services,
including airbag noti�cation and
emergency services, may be
deactivated and no longer available.
For more information visit onstar.com
(U.S.) or onstar.ca (Canada), or
press the OnStar button to speak
with an advisor.Not all OnStar services are
available on all vehicles. To check
if this vehicle is able to provide the
services described below, or for a full
description of OnStar services and
system limitations, see the OnStar
Owner’s Guide in the glove box or
visit onstar.com (U.S.) or onstar.ca
(Canada), contact OnStar at
1-888-4-ONSTAR (1-888-466-7827)
or TTY 1-877-248-2080, or press
the OnStar button to speak with
an OnStar advisor 24 hours a day,
7 days a week.OnStar Services Available
with the Safe & Sound Plan
Automatic Noti�cation of
Airbag Deployment
Advanced Automatic Crash
Noti�cation (AACN) (If equipped)
Link to Emergency Services
Roadside Assistance
Stolen Vehicle Location
Assistance
Remote Door Unlock/Vehicle
Alert
OnStar Vehicle Diagnostic Email
GM Goodwrench On Demand
Diagnostics
OnStar Hands-Free Calling with
30 trial minutes
OnStar Virtual Advisor
(U.S. Only)
2-34 Features and Controls
ProCarManuals.com
Page 112 of 386

Engine Coolant Temperature
Warning Light....................3-34
Tire Pressure Light..............3-34
Malfunction
Indicator Lamp..................3-35
Oil Pressure Light................3-37
Change Engine Oil Light.......3-38
Security Light......................3-38
Fog Lamp Light...................3-38
Cruise Control Light.............3-38
Reduced Engine
Power Light......................3-39
Highbeam On Light..............3-39
Daytime Running Lamps
(DRL) Indicator Light..........3-39
Low Washer Fluid
Warning Light....................3-40
All-Wheel Drive
Disabled Light...................3-40
Gate Ajar Light....................3-40
Door Ajar Light....................3-40
Service Vehicle Soon Light.....3-40
Fuel Gage..........................3-41
Low Fuel Warning Light........3-41Driver Information
Center (DIC)
Driver Information
Center (DIC).....................3-42
DIC Operation and Displays. . .3-42
DIC Compass.....................3-47
DIC Warnings and
Messages.........................3-49
DIC Vehicle Customization.....3-57
Audio System(s)Audio System(s)..................3-64
Setting the Clock.................3-65
Radio(s).............................3-67
Using an MP3.....................3-75
XM Radio Messages............3-79
Navigation/Radio System......3-81
Bluetooth
®..........................3-81
Theft-Deterrent Feature........3-91
Audio Steering Wheel
Controls............................3-92
Radio Reception..................3-92
Fixed Mast Antenna.............3-93
XM™ Satellite Radio
Antenna System................3-93
Chime Level Adjustment.......3-93
3-2 Instrument Panel
ProCarManuals.com
Page 124 of 386

Fog Lamps
For vehicles with fog lamps, the
button is located on the instrument
panel next to the exterior lamps
switch.
#:Press to turn the fog lamps on
or off.
The fog lamp indicator in the
instrument panel comes on when
the fog lamps are in use.
The parking lamps or low-beam
headlamps must be on, before the
fog lamps can be turned on.
If the exterior lamp control is set
to AUTO mode, the parking lamps
and low-beam headlamps come on
simultaneously when the fog lamps
are turned on.
When the high-beam headlamps
are turned on, the fog lamps turn off
automatically. When the high-beam
headlamps are turned off, the fog
lamps come on again.
Some localities have laws that
require the headlamps to be
on along with the fog lamps.
Instrument Panel
Brightness
This feature controls the brightness
of the instrument panel lights.
The thumbwheel for this feature
is located on the left side of
the steering wheel next to the
exterior lamps control.
Turn the thumbwheel to the right or
left to brighten or dim the lights.
Dome Lamp
*
(Dome Lamp Override):Press
this button to keep the dome lamps
and other interior lamps turned off
while any door is open. Press this
button again to return it to the out
position and the lamps automatically
come on when any door is opened.
+(On/Off):Press this button
to turn the dome lamps on and off
while the doors are closed.
Entry Lighting
If the dome lamp override button is
in the out position, the lamps inside
the vehicle automatically come on
when any door is opened or when
the Remote Keyless Entry (RKE)
unlock button is pressed. After the
door is opened the lights remain on
and stay on for 20 seconds after the
doors are closed, or until the key is
put into the ignition and turned to
the ACC/ACCESSORY position.
The lights will then gradually dim
until they are no longer lit.
3-14 Instrument Panel
ProCarManuals.com
Page 168 of 386

DISPLAY LANGUAGE
This feature allows you to select the
language in which the DIC messages
will appear.
Press the customization button until
the PRESS
VTO SET DISPLAY
LANGUAGE screen appears on
the DIC display. Press the set/reset
button once to access the settings
for this feature. Then press the
customization button to scroll
through the following settings:
ENGLISH (default):All messages
will appear in English.
FRANCAIS:All messages will
appear in French.
ESPANOL:All messages will
appear in Spanish.PORTUGUESE:All messages will
appear in Portuguese.
NO CHANGE:No change will be
made to this feature. The current
setting will remain.
To select a setting, press the
set/reset button while the desired
setting is displayed on the DIC.
AUTO DOOR LOCK
This feature allows you to select
when the vehicle’s doors will
automatically lock. SeeAutomatic
Door Lock on page 2-8for more
information.
Press the customization button until
PRESS
VTO SET AUTO DOOR
LOCK appears on the DIC display.
Press the set/reset button onceto access the settings for
this feature. Then press the
customization button to scroll
through the following settings:
SHIFT OUT OF PARK (default):
The doors will automatically lock
when the vehicle is shifted out of
P (Park).
AT VEHICLE SPEED:The doors
will automatically lock when the
vehicle speed is above 8 mph
(13 km/h) for three seconds.
NO CHANGE:No change will be
made to this feature. The current
setting will remain.
To select a setting, press the
set/reset button while the desired
setting is displayed on the DIC.
3-58 Instrument Panel
ProCarManuals.com
Page 169 of 386

AUTO DOOR UNLOCK
This feature allows you to select
whether or not to turn off the
automatic door unlocking feature.
It also allows you to select which
doors and when the doors will
automatically unlock. SeeAutomatic
Door Unlock on page 2-8for more
information.
Press the customization button until
PRESS
VTO SET AUTO DOOR
UNLOCK appears on the DIC
display. Press the set/reset button
once to access the settings for
this feature. Then press the
customization button to scroll
through the following settings:
OFF:None of the doors will
automatically unlock.DRIVER DOOR AT KEY OUT:Only
the driver’s door will unlock when
the key is taken out of the ignition.
DRIVER DOOR IN PARK:Only the
driver’s door will unlock when the
vehicle is shifted into P (Park).
ALL DOORS AT KEY OUT:All of
the doors will unlock when the key is
taken out of the ignition.
ALL DOORS IN PARK (default):
All of the doors will unlock when the
vehicle is shifted into P (Park).
NO CHANGE:No change will be
made to this feature. The current
setting will remain.
To select a setting, press the
set/reset button while the desired
setting is displayed on the DIC.REMOTE DOOR LOCK
This feature allows you to select
the type of feedback you will receive
when locking the vehicle with the
Remote Keyless Entry (RKE)
transmitter. You will not receive
feedback when locking the vehicle
with the RKE transmitter if the doors
are open. SeeRemote Keyless
Entry (RKE) System Operation
on page 2-4for more information.
Press the customization button until
PRESS
VTO SET REMOTE DOOR
LOCK appears on the DIC display.
Press the set/reset button once to
access the settings for this feature.
Then press the customization button
to scroll through the following
settings:
VERIFICATION OFF:There will be
no feedback when you press the
lock button on the RKE transmitter.
Instrument Panel 3-59
ProCarManuals.com