door lock SATURN VUE 2010 Owner's Manual
[x] Cancel search | Manufacturer: SATURN, Model Year: 2010, Model line: VUE, Model: SATURN VUE 2010Pages: 398, PDF Size: 4.02 MB
Page 72 of 398

3-28 Seats and Restraints
Driver Side shown, PassengerSide similar
The seat-mounted side impact
airbags for the driver and right front
passenger are in the side of the
seatbacks closest to the door.Driver Side shown, Passenger Side similar
The roof-rail airbags for the driver,
right front passenger, and second
row outboard passengers are in the
ceiling above the side windows.
{WARNING
If something is between an
occupant and an airbag, the
airbag might not inflate properly
or it might force the object into
that person causing severe injury
or even death. The path of an
inflating airbag must be kept
clear. Do not put anything
between an occupant and an
airbag, and do not attach or put
anything on the steering wheel
hub or on or near any other
airbag covering.
Do not use seat accessories that
block the inflation path of a
seat-mounted side impact airbag.
Never secure anything to the roof
of a vehicle with roof-rail airbags
by routing a rope or tie down
through any door or window
opening. If you do, the path of an
inflating roof-rail airbag will be
blocked.
ProCarManuals.com
Page 76 of 398

3-32 Seats and Restraints
What Will You See After
an Airbag Inflates?
After the frontal airbags and
seat-mounted side impact airbags
inflate, they quickly deflate, so
quickly that some people may not
even realize an airbag inflated.
Roof-rail airbags may still be at least
partially inflated for some time after
they deploy. Some components of
the airbag module may be hot for
several minutes. For location of the
airbag modules, seeWhat Makes
an Airbag Inflate? on page 3‑31. The parts of the airbag that come
into contact with you may be warm,
but not too hot to touch. There may
be some smoke and dust coming
from the vents in the deflated
airbags. Airbag inflation does not
prevent the driver from seeing out of
the windshield or being able to steer
the vehicle, nor does it prevent
people from leaving the vehicle.
{WARNING
When an airbag inflates, there
may be dust in the air. This dust
could cause breathing problems
for people with a history of
asthma or other breathing trouble.
To avoid this, everyone in the
vehicle should get out as soon as
it is safe to do so. If you have
breathing problems but cannot
get out of the vehicle after an
(Continued)
WARNING (Continued)
airbag inflates, then get fresh air
by opening a window or a door.
If you experience breathing
problems following an airbag
deployment, you should seek
medical attention.
The vehicle has a feature that may
automatically unlock the doors, turn
on the interior lamps and hazard
warning flashers, and shut off the
fuel system after the airbags inflate.
ProCarManuals.com
Page 77 of 398

Seats and Restraints 3-33
You can lock the doors, turn off the
interior lamps and hazard warning
flashers by using the controls for
those features. You must first,
however, turn the ignition key to the
following ignition switch positions:
1. Turn the ignition key toLOCK/OFF.
2. Turn the ignition key to ON/RUN.
{WARNING
A crash severe enough to inflate
the airbags may have also
damaged important functions in
the vehicle, such as the fuel
system, brake and steering
systems, etc. Even if the vehicle
appears to be drivable after a
moderate crash, there may be
concealed damage that could
make it difficult to safely operate
the vehicle.
Use caution if you should attempt
to restart the engine after a crash
has occurred. In many crashes severe enough to
inflate the airbag, windshields are
broken by vehicle deformation.
Additional windshield breakage may
also occur from the right front
passenger airbag.
.Airbags are designed to inflate
only once. After an airbag
inflates, you will need some new
parts for the airbag system.
If you do not get them, the
airbag system will not be there
to help protect you in another
crash. A new system will include
airbag modules and possibly
other parts. The service manual
for your vehicle covers the need
to replace other parts.
.The vehicle has a crash sensing
and diagnostic module which
records information after a
crash. See
Vehicle Data
Recording and Privacy
on
page 13‑15and Event Data
Recorders on page 13‑15.
.Let only qualified technicians
work on the airbag systems.
Improper service can mean that
an airbag system will not work
properly. See your dealer/retailer
for service.
ProCarManuals.com
Page 111 of 398

Instruments and Controls 5-1
Instruments and
Controls
Controls
Steering Wheel Adjustment . . . 5-2
Steering Wheel Controls . . . . . . 5-3
Horn . . . . . . . . . . . . . . . . . . . . . . . . . . 5-3
Windshield Wiper/Washer . . . . . 5-3
Rear Window Wiper/Washer . . . . . . . . . . . . . . . . . . . . . . 5-5
Compass . . . . . . . . . . . . . . . . . . . . . 5-5
Clock . . . . . . . . . . . . . . . . . . . . . . . . . 5-8
Power Outlets . . . . . . . . . . . . . . . . . 5-8
Warning Lights, Gages, and
Indicators
Warning Lights, Gages, and Indicators . . . . . . . . . . . . . . . . . . . . 5-9
Instrument Cluster . . . . . . . . . . . 5-10
Speedometer . . . . . . . . . . . . . . . . 5-11
Odometer . . . . . . . . . . . . . . . . . . . . 5-11
Trip Odometer . . . . . . . . . . . . . . . 5-11
Tachometer . . . . . . . . . . . . . . . . . . 5-11
Fuel Gage . . . . . . . . . . . . . . . . . . . 5-11
Safety Belt Reminders . . . . . . . 5-12
Airbag Readiness Light . . . . . . 5-13 Passenger Airbag Status
Indicator . . . . . . . . . . . . . . . . . . . . 5-14
Charging System Light . . . . . . 5-15
Malfunction Indicator Lamp . . . . . . . . . . . . . 5-15
Service Vehicle Soon Light . . . . . . . . . . . . . . . . . . . . . . . 5-18
Brake System Warning Light . . . . . . . . . . . . . . . . . . . . . . . 5-18
Antilock Brake System (ABS) Warning Light . . . . . . . . . . . . . . 5-19
All-Wheel-Drive Light . . . . . . . . 5-19
Power Steering Warning Light . . . . . . . . . . . . . . . . . . . . . . . 5-20
StabiliTrak
®Indicator Light . . . 5-20
Traction Control System (TCS) Warning Light . . . . . . . 5-20
Engine Coolant Temperature Warning Light . . . . . . . . . . . . . . 5-21
Tire Pressure Light . . . . . . . . . . 5-21
Engine Oil Pressure Light . . . . 5-22
Change Engine Oil Light . . . . . 5-22
Low Fuel Warning Light . . . . . . 5-23
Security Light . . . . . . . . . . . . . . . . 5-23
Reduced Engine Power Light . . . . . . . . . . . . . . . . . . . . . . . 5-23
High-Beam on Light . . . . . . . . . 5-24
Fog Lamp Light . . . . . . . . . . . . . . 5-24 Low Washer Fluid Warning
Light . . . . . . . . . . . . . . . . . . . . . . . 5-24
Cruise Control Light . . . . . . . . . 5-25
Door Ajar Light . . . . . . . . . . . . . . 5-25
Gate Ajar Light . . . . . . . . . . . . . . 5-25
Information Displays
Driver Information Center (DIC) . . . . . . . . . . . . . . . 5-25
Vehicle Messages
Vehicle Messages . . . . . . . . . . . 5-31
Battery Voltage and ChargingMessages . . . . . . . . . . . . . . . . . . 5-31
Brake System Messages . . . . 5-31
Compass Messages . . . . . . . . . 5-31
Cruise Control Messages . . . . 5-32
Door Ajar Messages . . . . . . . . . 5-32
Engine Cooling System Messages . . . . . . . . . . . . . . . . . . 5-32
Engine Oil Messages . . . . . . . . 5-33
Engine Power Messages . . . . 5-34
Fuel System Messages . . . . . . 5-34
Key and Lock Messages . . . . . 5-35
Ride Control System Messages . . . . . . . . . . . . . . . . . . 5-35
Airbag System Messages . . . . 5-36
Service Vehicle Messages . . . 5-37
ProCarManuals.com
Page 150 of 398

5-40 Instruments and Controls
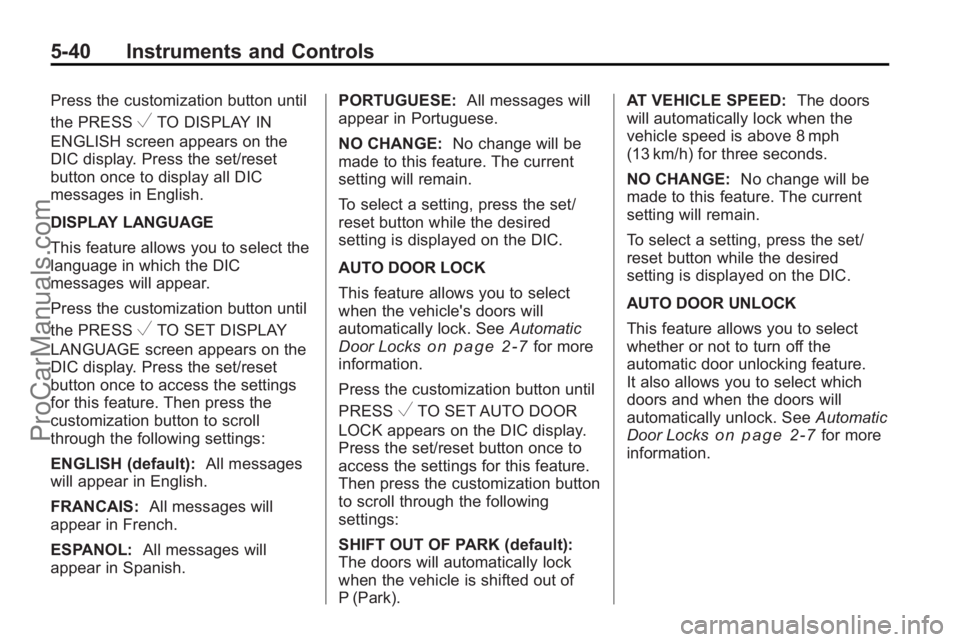
Press the customization button until
the PRESS
VTO DISPLAY IN
ENGLISH screen appears on the
DIC display. Press the set/reset
button once to display all DIC
messages in English.
DISPLAY LANGUAGE
This feature allows you to select the
language in which the DIC
messages will appear.
Press the customization button until
the PRESS
VTO SET DISPLAY
LANGUAGE screen appears on the
DIC display. Press the set/reset
button once to access the settings
for this feature. Then press the
customization button to scroll
through the following settings:
ENGLISH (default): All messages
will appear in English.
FRANCAIS: All messages will
appear in French.
ESPANOL: All messages will
appear in Spanish. PORTUGUESE:
All messages will
appear in Portuguese.
NO CHANGE: No change will be
made to this feature. The current
setting will remain.
To select a setting, press the set/
reset button while the desired
setting is displayed on the DIC.
AUTO DOOR LOCK
This feature allows you to select
when the vehicle's doors will
automatically lock. See Automatic
Door Lockson page 2‑7for more
information.
Press the customization button until
PRESS
VTO SET AUTO DOOR
LOCK appears on the DIC display.
Press the set/reset button once to
access the settings for this feature.
Then press the customization button
to scroll through the following
settings:
SHIFT OUT OF PARK (default):
The doors will automatically lock
when the vehicle is shifted out of
P (Park). AT VEHICLE SPEED:
The doors
will automatically lock when the
vehicle speed is above 8 mph
(13 km/h) for three seconds.
NO CHANGE: No change will be
made to this feature. The current
setting will remain.
To select a setting, press the set/
reset button while the desired
setting is displayed on the DIC.
AUTO DOOR UNLOCK
This feature allows you to select
whether or not to turn off the
automatic door unlocking feature.
It also allows you to select which
doors and when the doors will
automatically unlock. See Automatic
Door Locks
on page 2‑7for more
information.
ProCarManuals.com
Page 151 of 398

Instruments and Controls 5-41
Press the customization button until
PRESS
VTO SET AUTO DOOR
UNLOCK appears on the DIC
display. Press the set/reset button
once to access the settings for this
feature. Then press the
customization button to scroll
through the following settings:
OFF: None of the doors will
automatically unlock.
DRIVER DOOR AT KEY OUT:
Only the driver's door will unlock
when the key is taken out of the
ignition.
DRIVER DOOR IN PARK: Only the
driver's door will unlock when the
vehicle is shifted into P (Park) .
ALL DOORS AT KEY OUT: All of
the doors will unlock when the key
is taken out of the ignition.
ALL DOORS IN PARK (default):
All of the doors will unlock when the
vehicle is shifted into P (Park).
NO CHANGE: No change will be
made to this feature. The current
setting will remain. To select a setting, press the set/
reset button while the desired
setting is displayed on the DIC.
REMOTE DOOR LOCK
This feature allows you to select the
type of feedback you will receive
when locking the vehicle with the
Remote Keyless Entry (RKE)
transmitter. You will not receive
feedback when locking the vehicle
with the RKE transmitter if the doors
are open. See
Remote Keyless
Entry (RKE) System Operation
on
page 2‑3for more information.
Press the customization button until
PRESS
VTO SET REMOTE
DOOR LOCK appears on the DIC
display. Press the set/reset button
once to access the settings for this
feature. Then press the
customization button to scroll
through the following settings:
VERIFICATION OFF: There will be
no feedback when you press the
lock button on the RKE transmitter. VERIFICATION LIGHTS ONLY:
The exterior lamps will flash when
you press the lock button on the
RKE transmitter.
VERIFICATION HORN ONLY:
The
horn will sound on the second press
of the lock button on the RKE
transmitter.
VERIFICATION HORN & LIGHTS
(default): The exterior lamps will
flash when you press the lock
button on the RKE transmitter, and
the horn will sound when the lock
button is pressed again within
five seconds of the previous
command.
VERIFICATION NO CHANGE: No
change will be made to this feature.
The current setting will remain.
To select a setting, press the set/
reset button while the desired
setting is displayed on the DIC.
ProCarManuals.com
Page 152 of 398

5-42 Instruments and Controls
REMOTE DOOR UNLOCK
This feature allows you to select the
type of feedback you will receive
when unlocking the vehicle with the
Remote Keyless Entry (RKE)
transmitter. You will not receive
feedback when unlocking the
vehicle with the RKE transmitter if
the doors are open. SeeRemote
Keyless Entry (RKE) System
Operation
on page 2‑3for more
information.
Press the customization button until
PRESS
VTO SET REMOTE
DOOR UNLOCK appears on the
DIC display. Press the set/reset
button once to access the settings
for this feature. Then press the
customization button to scroll
through the following settings:
VERIF LIGHTS OFF: The exterior
lamps will not flash when you press
the unlock button on the RKE
transmitter. VERIF LIGHTS ON (default):
The
exterior lamps will flash when you
press the unlock button on the RKE
transmitter.
VERIF NO CHANGE: No change
will be made to this feature. The
current setting will remain.
To select a setting, press the set/
reset button while the desired
setting is displayed on the DIC.
DELAY DOOR LOCK
This feature allows you to select
whether or not the locking of the
vehicle's doors will be delayed.
When locking the doors with the
power door lock switch and a door
is open, this feature will delay
locking the doors until five seconds
after the last door is closed. You will
hear three chimes to signal that the
delayed locking feature is in use.
The key must be out of the ignition
for this feature to work. You can
temporarily override delayed locking
by pressing the power door lock
switch twice or the lock button on the RKE transmitter twice. See
Delayed Locking
on page 2‑7for
more information.
Press the customization button until
PRESS
VTO SET DELAY DOOR
LOCK appears on the DIC display.
Press the set/reset button once to
access the settings for this feature.
Then press the customization button
to scroll through the following
settings:
OFF: There will be no delayed
locking of the vehicle's doors.
ON (default): The doors will not
lock until five seconds after the last
door is closed.
NO CHANGE: No change will be
made to this feature. The current
setting will remain.
To select a setting, press the set/
reset button while the desired
setting is displayed on the DIC.
ProCarManuals.com
Page 165 of 398

Lighting 6-5
Interior Lighting
Instrument Panel
Illumination Control
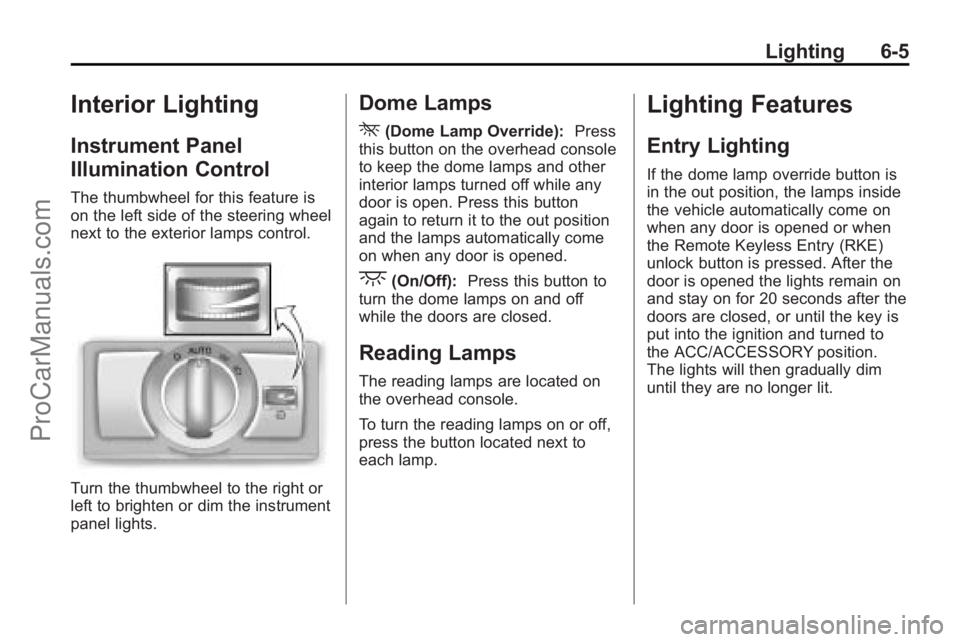
The thumbwheel for this feature is
on the left side of the steering wheel
next to the exterior lamps control.
Turn the thumbwheel to the right or
left to brighten or dim the instrument
panel lights.
Dome Lamps
*
(Dome Lamp Override):Press
this button on the overhead console
to keep the dome lamps and other
interior lamps turned off while any
door is open. Press this button
again to return it to the out position
and the lamps automatically come
on when any door is opened.
+(On/Off): Press this button to
turn the dome lamps on and off
while the doors are closed.
Reading Lamps
The reading lamps are located on
the overhead console.
To turn the reading lamps on or off,
press the button located next to
each lamp.
Lighting Features
Entry Lighting
If the dome lamp override button is
in the out position, the lamps inside
the vehicle automatically come on
when any door is opened or when
the Remote Keyless Entry (RKE)
unlock button is pressed. After the
door is opened the lights remain on
and stay on for 20 seconds after the
doors are closed, or until the key is
put into the ignition and turned to
the ACC/ACCESSORY position.
The lights will then gradually dim
until they are no longer lit.
ProCarManuals.com
Page 227 of 398

Driving and Operating 9-23
{WARNING
Do not load the vehicle any
heavier than the Gross
Vehicle Weight Rating
(GVWR), or either the
maximum front or rear Gross
Axle Weight Rating (GAWR).
If you do, parts on the vehicle
can break, and it can change
the way your vehicle handles.
These could cause you to lose
control and crash. Also,
overloading can shorten the
life of the vehicle. Tire and Loading Information
Label
Label Example
A vehicle specific Tire and
Loading Information label is
attached to the vehicle's center
pillar (B-pillar). With the driver's
door open, you will find the label
attached near the door lock
post. The Tire and Loading
Information label shows the
number of occupant seating positions (A), and the maximum
vehicle capacity weight (B) in
kilograms and pounds.
The Tire and Loading
Information label also shows the
tire size of the original
equipment tires (C) and the
recommended cold tire inflation
pressures (D). For more
information on tires and inflation
see
Tires
on page 10‑43and Tire
Pressure
on page 10‑50.
There is also important loading
information on the Certification
label. It tells you the Gross
Vehicle Weight Rating (GVWR)
and the Gross Axle Weight
Rating (GAWR) for the front and
rear axle. See “Certification
Label” later in this section.
ProCarManuals.com
Page 232 of 398

9-28 Driving and Operating
Ignition Positions
The ignition switch has four different
positions.
To shift out of P (Park), turn the
ignition to ON/RUN and apply the
regular brake pedal.
Notice:Using a tool to force the
key to turn in the ignition could
cause damage to the switch or
break the key. Use the correct
key, make sure it is all the way in,
and turn it only with your hand.
If the key cannot be turned by
hand, see your dealer/retailer. LOCK/OFF:
This position locks the
ignition. It also locks the steering
wheel and the transmission. The
key can only be removed in LOCK/
OFF. The shift lever must be in
P (Park) to turn the ignition switch to
LOCK/OFF.
The steering can bind with the
wheels turned off center. If this
happens, move the steering wheel
from right to left while turning the
key to ACC/ACCESSORY. If this
doesn't work, the vehicle needs
service.
ACC (ACC/ACCESSORY): This is
the position in which you can
operate the electrical accessories or
items plugged into the accessory
power outlets.
Use this position if the vehicle must
be pushed or towed. ON/RUN:
This position can be
used to operate the electrical
accessories and to display some
instrument panel cluster warning
and indicator lights. The switch
stays in this position when the
engine is running. The transmission
is also unlocked in this position.
If you leave the key in the ACC/
ACCESSORY or ON/RUN positions
with the engine off, the battery could
be drained. You may not be able to
start the vehicle if the battery is
allowed to drain for an extended
period of time.
START: This is the position that
starts the engine. When the engine
starts, release the key. The ignition
switch returns to ON/RUN for
driving.
A warning tone will sound when the
driver door is opened, the ignition is
in ACC/ACCESSORY or LOCK/OFF
and the key is in the ignition.
ProCarManuals.com