manual transmission SATURN VUE 2010 Owners Manual
[x] Cancel search | Manufacturer: SATURN, Model Year: 2010, Model line: VUE, Model: SATURN VUE 2010Pages: 398, PDF Size: 4.02 MB
Page 1 of 398
2010 Saturn VUE Owner ManualM
In Brief. . . . . . . . . . . . . . . . . . . . . . . . 1-1
Instrument Panel . . . . . . . . . . . . . . 1-2
Initial Drive Information . . . . . . . . 1-3
Vehicle Features . . . . . . . . . . . . . 1-14
Performance and Maintenance . . . . . . . . . . . . . . . . 1-17
Keys, Doors and Windows . . . 2-1
Keys and Locks . . . . . . . . . . . . . . . 2-2
Doors . . . . . . . . . . . . . . . . . . . . . . . . . . 2-8
Vehicle Security . . . . . . . . . . . . . . . . 2-9
Exterior Mirrors . . . . . . . . . . . . . . . 2-12
Interior Mirrors . . . . . . . . . . . . . . . . 2-13
Windows . . . . . . . . . . . . . . . . . . . . . 2-13
Roof . . . . . . . . . . . . . . . . . . . . . . . . . . 2-15
Seats and Restraints . . . . . . . . . 3-1
Head Restraints . . . . . . . . . . . . . . . 3-2
Front Seats . . . . . . . . . . . . . . . . . . . . 3-3
Rear Seats . . . . . . . . . . . . . . . . . . . . 3-9
Safety Belts . . . . . . . . . . . . . . . . . . 3-10
Airbag System . . . . . . . . . . . . . . . . 3-25
Child Restraints . . . . . . . . . . . . . . 3-42 Storage
. . . . . . . . . . . . . . . . . . . . . . . 4-1
Storage Compartments . . . . . . . . 4-1
Additional Storage Features . . . 4-3
Roof Rack System . . . . . . . . . . . . . 4-4
Instruments and Controls . . . . 5-1
Controls . . . . . . . . . . . . . . . . . . . . . . . 5-2
Warning Lights, Gages, and
Indicators . . . . . . . . . . . . . . . . . . . . 5-9
Information Displays . . . . . . . . . . 5-25
Vehicle Messages . . . . . . . . . . . . 5-31
Vehicle Personalization . . . . . . . 5-39
Universal Remote System . . . . 5-45
Lighting . . . . . . . . . . . . . . . . . . . . . . . 6-1
Exterior Lighting . . . . . . . . . . . . . . . 6-1
Interior Lighting . . . . . . . . . . . . . . . . 6-5
Lighting Features . . . . . . . . . . . . . . 6-5
Infotainment System . . . . . . . . . 7-1
Introduction . . . . . . . . . . . . . . . . . . . . 7-1
Radio . . . . . . . . . . . . . . . . . . . . . . . . . . 7-4
Audio Players . . . . . . . . . . . . . . . . 7-11
Phone . . . . . . . . . . . . . . . . . . . . . . . . 7-18 Climate Controls
. . . . . . . . . . . . . 8-1
Climate Control Systems . . . . . . 8-1
Air Vents . . . . . . . . . . . . . . . . . . . . . . . 8-9
Maintenance . . . . . . . . . . . . . . . . . . . 8-9
Driving and Operating . . . . . . . . 9-1
Driving Information . . . . . . . . . . . . . 9-2
Starting and Operating . . . . . . . 9-27
Engine Exhaust . . . . . . . . . . . . . . 9-34
Automatic Transmission . . . . . . 9-35
Drive Systems . . . . . . . . . . . . . . . . 9-38
Brakes . . . . . . . . . . . . . . . . . . . . . . . 9-38
Ride Control Systems . . . . . . . . 9-40
Cruise Control . . . . . . . . . . . . . . . . 9-42
Object Detection Systems . . . . 9-44
Fuel . . . . . . . . . . . . . . . . . . . . . . . . . . 9-47
Towing . . . . . . . . . . . . . . . . . . . . . . . 9-52
Conversions and Add-Ons . . . 9-61
ProCarManuals.com
Page 9 of 398
In Brief 1-3
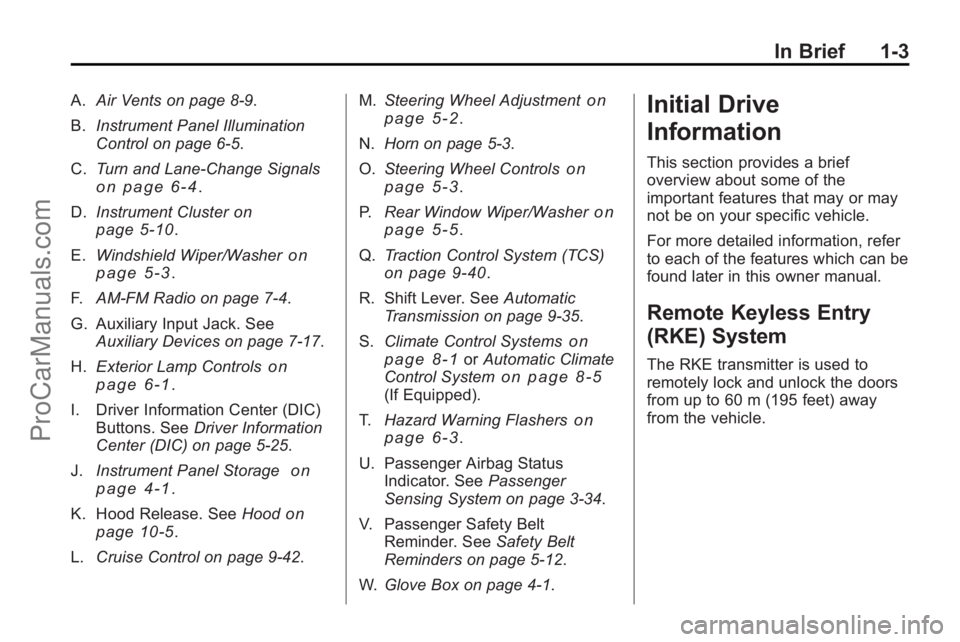
A.Air Vents on page 8‑9.
B. Instrument Panel Illumination
Control on page 6‑5.
C. Turn and Lane-Change Signals
on page 6‑4.
D. Instrument Cluster
on
page 5‑10.
E. Windshield Wiper/Washer
on
page 5‑3.
F. AM-FM Radio on page 7‑4.
G. Auxiliary Input Jack. See Auxiliary Devices on page 7‑17.
H. Exterior Lamp Controls
on
page 6‑1.
I. Driver Information Center (DIC) Buttons. See Driver Information
Center (DIC) on page 5‑25.
J. Instrument Panel Storage
on
page 4‑1.
K. Hood Release. See Hood
on
page 10‑5.
L. Cruise Control on page 9‑42. M.
Steering Wheel Adjustment
on
page 5‑2.
N. Horn on page 5‑3.
O. Steering Wheel Controls
on
page 5‑3.
P. Rear Window Wiper/Washer
on
page 5‑5.
Q. Traction Control System (TCS)
on page 9‑40.
R. Shift Lever. See Automatic
Transmission on page 9‑35.
S. Climate Control Systems
on
page 8‑1or Automatic Climate
Control Systemon page 8‑5(If Equipped).
T. Hazard Warning Flashers
on
page 6‑3.
U. Passenger Airbag Status Indicator. See Passenger
Sensing System on page 3‑34.
V. Passenger Safety Belt Reminder. See Safety Belt
Reminders on page 5‑12.
W. Glove Box on page 4‑1.
Initial Drive
Information
This section provides a brief
overview about some of the
important features that may or may
not be on your specific vehicle.
For more detailed information, refer
to each of the features which can be
found later in this owner manual.
Remote Keyless Entry
(RKE) System
The RKE transmitter is used to
remotely lock and unlock the doors
from up to 60 m (195 feet) away
from the vehicle.
ProCarManuals.com
Page 112 of 398
5-2 Instruments and Controls
Tire Messages . . . . . . . . . . . . . . . 5-37
Transmission Messages . . . . . 5-38
Vehicle ReminderMessages . . . . . . . . . . . . . . . . . . 5-39
Vehicle Personalization
Vehicle Personalization . . . . . . 5-39
Universal Remote System
Universal Remote System . . . 5-45
Universal Remote SystemProgramming . . . . . . . . . . . . . . . 5-46
Universal Remote System Operation . . . . . . . . . . . . . . . . . . 5-49
Controls
Steering Wheel
Adjustment
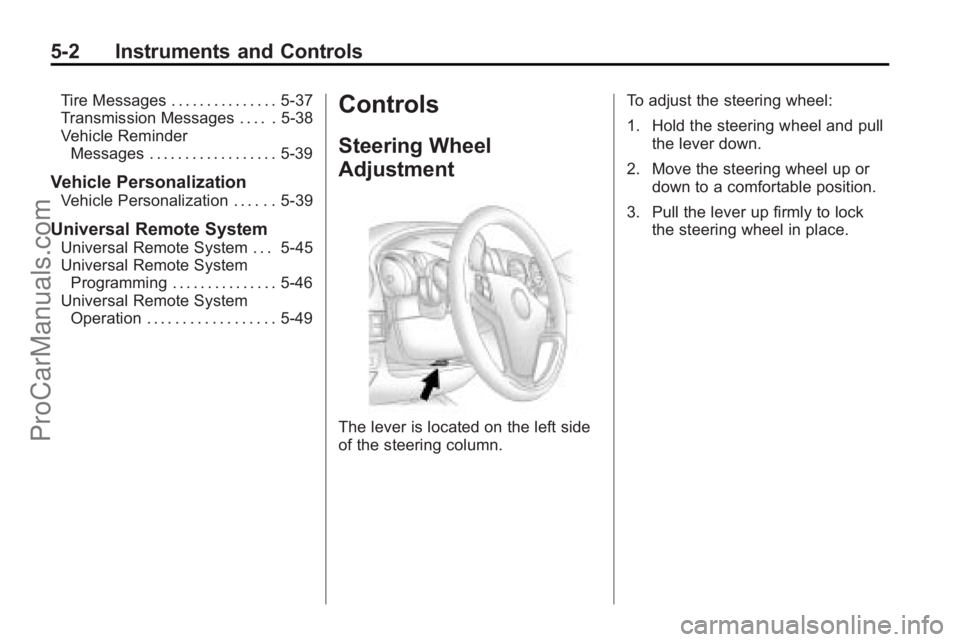
The lever is located on the left side
of the steering column. To adjust the steering wheel:
1. Hold the steering wheel and pull
the lever down.
2. Move the steering wheel up or down to a comfortable position.
3. Pull the lever up firmly to lock the steering wheel in place.
ProCarManuals.com
Page 126 of 398

5-16 Instruments and Controls
If the check engine light comes on
and stays on, while the engine is
running, this indicates that there is
an OBD II problem and service is
required.
Malfunctions often are indicated by
the system before any problem is
apparent. Being aware of the light
can prevent more serious damage
to the vehicle. This system assists
the service technician in correctly
diagnosing any malfunction.
Notice:If the vehicle is
continually driven with this light
on, after a while, the emission
controls might not work as well,
the vehicle's fuel economy might
not be as good, and the engine
might not run as smoothly. This
could lead to costly repairs that
might not be covered by the
vehicle warranty. Notice:
Modifications made to the
engine, transmission, exhaust,
intake, or fuel system of the
vehicle or the replacement of the
original tires with other than
those of the same Tire
Performance Criteria (TPC) can
affect the vehicle's emission
controls and can cause this light
to come on. Modifications to
these systems could lead to
costly repairs not covered by the
vehicle warranty. This could also
result in a failure to pass a
required Emission Inspection/
Maintenance test. See
Accessories and Modifications
on
page 10‑3.
This light comes on during a
malfunction in one of two ways:
Light Flashing: A misfire condition
has been detected. A misfire
increases vehicle emissions and
could damage the emission control
system on the vehicle. Diagnosis
and service might be required. The following can prevent more
serious damage to the vehicle:
.Reduce vehicle speed.
.Avoid hard accelerations.
.Avoid steep uphill grades.
.If towing a trailer, reduce the
amount of cargo being hauled as
soon as it is possible.
If the light continues to flash, when
it is safe to do so, stop the vehicle.
Find a safe place to park the
vehicle. Turn the key off, wait at
least 10 seconds, and restart the
engine. If the light is still flashing,
follow the previous steps and see
your dealer/retailer for service as
soon as possible.
ProCarManuals.com
Page 136 of 398
5-26 Instruments and Controls
dashes. If this occurs, have the
vehicle serviced by your dealer/
retailer. If an abnormal temperature
reading is displayed for an extended
period of time, consult your
dealer/retailer. Under certain
circumstances, especially when the
engine is idling, a delay updating
the temperature display is normal.
SeeCompass
on page 5‑5and
Automatic Transmissionon
page 9‑35for more information.
The DIC has different displays
which can be accessed by pressing
the DIC buttons located on the
instrument panel, below the
headlamp switch.
The DIC displays trip, fuel, and
vehicle system information, and
warning messages if a system
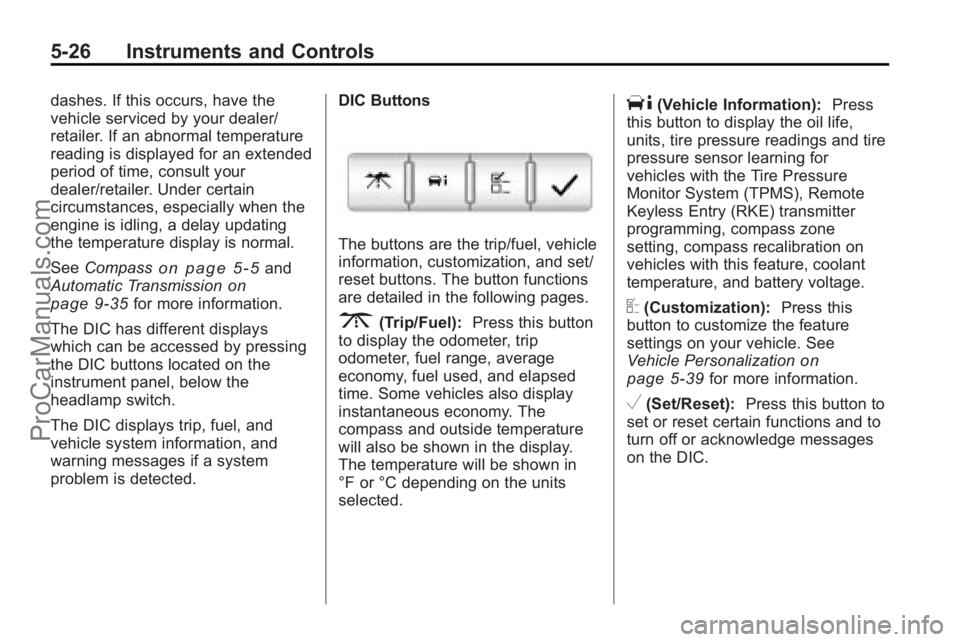
problem is detected. DIC Buttons
The buttons are the trip/fuel, vehicle
information, customization, and set/
reset buttons. The button functions
are detailed in the following pages.
3(Trip/Fuel):
Press this button
to display the odometer, trip
odometer, fuel range, average
economy, fuel used, and elapsed
time. Some vehicles also display
instantaneous economy. The
compass and outside temperature
will also be shown in the display.
The temperature will be shown in
°F or °C depending on the units
selected.
T(Vehicle Information): Press
this button to display the oil life,
units, tire pressure readings and tire
pressure sensor learning for
vehicles with the Tire Pressure
Monitor System (TPMS), Remote
Keyless Entry (RKE) transmitter
programming, compass zone
setting, compass recalibration on
vehicles with this feature, coolant
temperature, and battery voltage.
U(Customization): Press this
button to customize the feature
settings on your vehicle. See
Vehicle Personalization
on
page 5‑39for more information.
V(Set/Reset): Press this button to
set or reset certain functions and to
turn off or acknowledge messages
on the DIC.
ProCarManuals.com
Page 148 of 398

5-38 Instruments and Controls
TIRE LEARNING ACTIVE
On vehicles with the Tire Pressure
Monitor System (TPMS), this
message displays when the TPMS
is re-learning the tire positions on
your vehicle. The tire positions must
be re-learned after rotating the tires
or after replacing a tire or sensor.
SeeTire Rotation
on page 10‑57,
Tire Pressure Monitor Systemon
page 10‑52, and Tire Pressureon
page 10‑50for more information.
Transmission Messages
CHANGE TRANSMISSION
FLUID
Notice: Use of the incorrect
automatic transmission fluid may
damage the vehicle, and the
damages may not be covered by
the vehicle's warranty. Always
use the automatic transmission
fluid listed in Recommended
Fluids and Lubricants
on
page 11‑7.
This message displays when the life
of the transmission fluid has expired
and it should be changed. See
Scheduled Maintenance
on
page 11‑2and Recommended
Fluids and Lubricantson page 11‑7for the proper fluid and change
intervals.
SERVICE TRANSMISSION
This message displays when there
is a problem with the transmission.
See your dealer/retailer for service.
TRANSMISSION HOT IDLE
ENGINE
Notice: If you drive your vehicle
while the transmission fluid is
overheating and the transmission
temperature warning is displayed
on the instrument panel cluster
and/or DIC, you can damage the
transmission. This could lead to
costly repairs that would not be
covered by your warranty. Do not
drive your vehicle with
overheated transmission fluid or
while the transmission
temperature warning is displayed.
This message displays along with a
chime if the transmission fluid in the
vehicle gets hot. Driving with the
transmission fluid temperature high
can cause damage to the vehicle.
Stop the vehicle and let it idle to
allow the transmission to cool. This
message clears and the chime
stops when the fluid temperature
reaches a safe level.
ProCarManuals.com
Page 156 of 398
5-46 Instruments and Controls
Universal Remote System
Programming
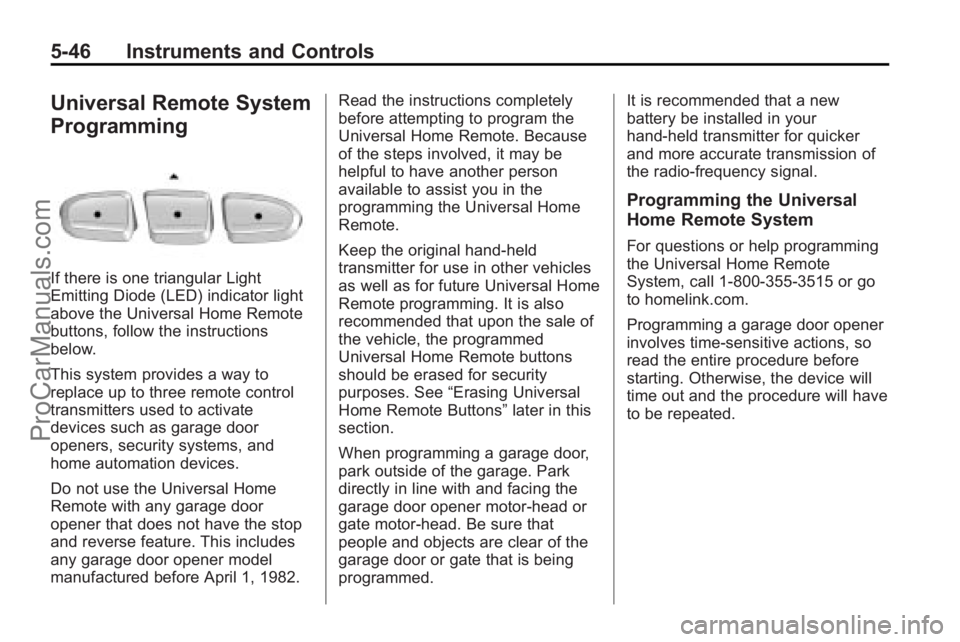
If there is one triangular Light
Emitting Diode (LED) indicator light
above the Universal Home Remote
buttons, follow the instructions
below.
This system provides a way to
replace up to three remote control
transmitters used to activate
devices such as garage door
openers, security systems, and
home automation devices.
Do not use the Universal Home
Remote with any garage door
opener that does not have the stop
and reverse feature. This includes
any garage door opener model
manufactured before April 1, 1982.Read the instructions completely
before attempting to program the
Universal Home Remote. Because
of the steps involved, it may be
helpful to have another person
available to assist you in the
programming the Universal Home
Remote.
Keep the original hand-held
transmitter for use in other vehicles
as well as for future Universal Home
Remote programming. It is also
recommended that upon the sale of
the vehicle, the programmed
Universal Home Remote buttons
should be erased for security
purposes. See
“Erasing Universal
Home Remote Buttons” later in this
section.
When programming a garage door,
park outside of the garage. Park
directly in line with and facing the
garage door opener motor-head or
gate motor-head. Be sure that
people and objects are clear of the
garage door or gate that is being
programmed. It is recommended that a new
battery be installed in your
hand-held transmitter for quicker
and more accurate transmission of
the radio-frequency signal.
Programming the Universal
Home Remote System
For questions or help programming
the Universal Home Remote
System, call 1‐800‐355‐3515 or go
to homelink.com.
Programming a garage door opener
involves time-sensitive actions, so
read the entire procedure before
starting. Otherwise, the device will
time out and the procedure will have
to be repeated.
ProCarManuals.com
Page 158 of 398

5-48 Instruments and Controls
6. After Steps 1 through 5 havebeen completed, locate inside
the garage the garage door
opener receiver (motor-head
unit). Locate the “Learn”or
“Smart” button. The name and
color of the button may vary by
manufacturer.
7. Firmly press and release the “Learn” or“Smart” button. After
you press this button, you will
have 30 seconds to complete
Step 8. 8. Immediately return to the
vehicle. Firmly press and hold
the Universal Home Remote
button, chosen in Step 3 to
control the garage door, for
two seconds, and then release
it. If the garage door does not
move, press and hold the same
button a second time for
two seconds, and then release
it. Again, if the door does not
move, press and hold the same
button a third time for
two seconds, and then release.
The Universal Home Remote
should now activate the
garage door.
To program the remaining two
Universal Home Remote buttons,
begin with Step 2 of “Programming
the Universal Home Remote
System.” Do not repeat Step 1, as
this will erase all previous
programming from the Universal
Home Remote buttons.
Gate Operator and Canadian
Programming
If you have questions or need help
programming the Universal Home
Remote System, call 1‐800‐355‐
3515 or go to homelink.com.
Canadian radio-frequency laws
require transmitter signals to time
out or quit after several seconds of
transmission. This may not be long
enough for Universal Home Remote
to pick up the signal during
programming. Similarly, some U.S.
gate operators are manufactured to
time out in the same manner.
If you live in Canada, or you are
having difficulty programming a gate
operator or garage door opener by
using the “Programming Universal
Home Remote” procedures,
regardless of where you live,
replace Step 3 under “Programming
Universal Home Remote” with the
following:
Continue to press and hold the
Universal Home Remote button
while you press and release every
ProCarManuals.com
Page 205 of 398
Driving and Operating 9-1
Driving and
Operating
Driving Information
Driver Behavior . . . . . . . . . . . . . . . 9-2
Driving Environment . . . . . . . . . . 9-2
Vehicle Design . . . . . . . . . . . . . . . . 9-2
Defensive Driving . . . . . . . . . . . . . 9-3
Drunk Driving . . . . . . . . . . . . . . . . . 9-3
Control of a Vehicle . . . . . . . . . . . 9-4
Braking . . . . . . . . . . . . . . . . . . . . . . . 9-4
Steering . . . . . . . . . . . . . . . . . . . . . . . 9-5
Off-Road Recovery . . . . . . . . . . . . 9-6
Loss of Control . . . . . . . . . . . . . . . . 9-7
Off-Road Driving . . . . . . . . . . . . . . 9-8
Driving on Wet Roads . . . . . . . 9-18
Highway Hypnosis . . . . . . . . . . . 9-18
Hill and Mountain Roads . . . . . 9-19
Winter Driving . . . . . . . . . . . . . . . 9-20
If the Vehicle is Stuck . . . . . . . . 9-22
Vehicle Load Limits . . . . . . . . . . 9-22
Starting and Operating
New Vehicle Break-In . . . . . . . . 9-27
Ignition Positions . . . . . . . . . . . . 9-28
Retained AccessoryPower (RAP) . . . . . . . . . . . . . . . 9-29 Starting the Engine . . . . . . . . . . 9-29
Engine Coolant Heater . . . . . . . 9-30
Shifting Into Park . . . . . . . . . . . . 9-31
Shifting Out of Park . . . . . . . . . . 9-33
Parking Over Things
That Burn . . . . . . . . . . . . . . . . . . 9-33
Engine Exhaust
Engine Exhaust . . . . . . . . . . . . . . 9-34
Running the Vehicle WhileParked . . . . . . . . . . . . . . . . . . . . . 9-34
Automatic Transmission
Automatic Transmission . . . . . 9-35
Manual Mode . . . . . . . . . . . . . . . . 9-37
Drive Systems
All-Wheel Drive . . . . . . . . . . . . . . 9-38
Brakes
Antilock BrakeSystem (ABS) . . . . . . . . . . . . . . 9-38
Parking Brake . . . . . . . . . . . . . . . 9-39
Ride Control Systems
Traction Control System (TCS) . . . . . . . . . . . . . . 9-40
StabiliTrak System . . . . . . . . . . . 9-41
Cruise Control
Cruise Control . . . . . . . . . . . . . . . 9-42
Object Detection Systems
Rear Vision Camera (RVC) . . . . . . . . . . . . . 9-44
Fuel
Fuel . . . . . . . . . . . . . . . . . . . . . . . . . 9-47
Recommended Fuel . . . . . . . . . 9-48
Gasoline Specifications . . . . . . 9-48
California FuelRequirements . . . . . . . . . . . . . . 9-48
Fuels in Foreign Countries . . . 9-49
Fuel Additives . . . . . . . . . . . . . . . 9-49
Filling the Tank . . . . . . . . . . . . . . 9-50
Filling a Portable Fuel Container . . . . . . . . . . . . . . . . . . . 9-52
Towing
General TowingInformation . . . . . . . . . . . . . . . . . 9-52
Driving Characteristics and Towing Tips . . . . . . . . . . . . . . . . 9-53
Trailer Towing . . . . . . . . . . . . . . . . 9-56
Towing Equipment . . . . . . . . . . . 9-60
Trailer Sway Control (TSC) . . . . . . . . . . . . . . 9-60
Conversions and Add-Ons
Add-On ElectricalEquipment . . . . . . . . . . . . . . . . . 9-61
ProCarManuals.com
Page 217 of 398
Driving and Operating 9-13
{WARNING
Turning or driving across steep
hills can be dangerous. You could
lose traction, slide sideways, and
possibly roll over. You could be
seriously injured or killed. When
driving up hills, always try to go
straight up.
.Try to drive straight up the hill if
at all possible. If the path twists
and turns, you might want to find
another route.
.Ease up on the speed as you
approach the top of the hill.
.Attach a flag to the vehicle to be
more visible to approaching
traffic on trails or hills.
.Sound the horn as you approach
the top of the hill to let opposing
traffic know you are there.
.Use headlamps even during the
day to make the vehicle more
visible to oncoming traffic.
{WARNING
Driving to the top (crest) of a hill
at full speed can cause an
accident. There could be a
drop-off, embankment, cliff,
or even another vehicle. You
could be seriously injured or
killed. As you near the top of a
hill, slow down and stay alert.
If the vehicle stalls, or is about to
stall, and you cannot make it up
the hill:
.Push the brake pedal to stop the
vehicle and keep it from rolling
backwards and apply the
parking brake.
.If the engine is still running, shift
the transmission to R (Reverse),
release the parking brake, and
slowly back down the hill in
R (Reverse).
.If the engine has stopped
running, you need to restart it.
With the brake pedal pressed
and the parking brake still
applied, shift the transmission to
P (Park) and restart the engine.
Then, shift to R (Reverse),
release the parking brake, and
slowly back down the hill as
straight as possible in
R (Reverse).
.While backing down the hill, put
your left hand on the steering
wheel at the 12 o'clock position
so you can tell if the wheels are
straight and can maneuver as
you back down. It is best to back
down the hill with the wheels
straight rather than in the left or
right direction. Turning the wheel
too far to the left or right will
increase the possibility of a
rollover.
ProCarManuals.com