warning light SATURN VUE 2010 Owners Manual
[x] Cancel search | Manufacturer: SATURN, Model Year: 2010, Model line: VUE, Model: SATURN VUE 2010Pages: 398, PDF Size: 4.02 MB
Page 1 of 398

2010 Saturn VUE Owner ManualM
In Brief. . . . . . . . . . . . . . . . . . . . . . . . 1-1
Instrument Panel . . . . . . . . . . . . . . 1-2
Initial Drive Information . . . . . . . . 1-3
Vehicle Features . . . . . . . . . . . . . 1-14
Performance and Maintenance . . . . . . . . . . . . . . . . 1-17
Keys, Doors and Windows . . . 2-1
Keys and Locks . . . . . . . . . . . . . . . 2-2
Doors . . . . . . . . . . . . . . . . . . . . . . . . . . 2-8
Vehicle Security . . . . . . . . . . . . . . . . 2-9
Exterior Mirrors . . . . . . . . . . . . . . . 2-12
Interior Mirrors . . . . . . . . . . . . . . . . 2-13
Windows . . . . . . . . . . . . . . . . . . . . . 2-13
Roof . . . . . . . . . . . . . . . . . . . . . . . . . . 2-15
Seats and Restraints . . . . . . . . . 3-1
Head Restraints . . . . . . . . . . . . . . . 3-2
Front Seats . . . . . . . . . . . . . . . . . . . . 3-3
Rear Seats . . . . . . . . . . . . . . . . . . . . 3-9
Safety Belts . . . . . . . . . . . . . . . . . . 3-10
Airbag System . . . . . . . . . . . . . . . . 3-25
Child Restraints . . . . . . . . . . . . . . 3-42 Storage
. . . . . . . . . . . . . . . . . . . . . . . 4-1
Storage Compartments . . . . . . . . 4-1
Additional Storage Features . . . 4-3
Roof Rack System . . . . . . . . . . . . . 4-4
Instruments and Controls . . . . 5-1
Controls . . . . . . . . . . . . . . . . . . . . . . . 5-2
Warning Lights, Gages, and
Indicators . . . . . . . . . . . . . . . . . . . . 5-9
Information Displays . . . . . . . . . . 5-25
Vehicle Messages . . . . . . . . . . . . 5-31
Vehicle Personalization . . . . . . . 5-39
Universal Remote System . . . . 5-45
Lighting . . . . . . . . . . . . . . . . . . . . . . . 6-1
Exterior Lighting . . . . . . . . . . . . . . . 6-1
Interior Lighting . . . . . . . . . . . . . . . . 6-5
Lighting Features . . . . . . . . . . . . . . 6-5
Infotainment System . . . . . . . . . 7-1
Introduction . . . . . . . . . . . . . . . . . . . . 7-1
Radio . . . . . . . . . . . . . . . . . . . . . . . . . . 7-4
Audio Players . . . . . . . . . . . . . . . . 7-11
Phone . . . . . . . . . . . . . . . . . . . . . . . . 7-18 Climate Controls
. . . . . . . . . . . . . 8-1
Climate Control Systems . . . . . . 8-1
Air Vents . . . . . . . . . . . . . . . . . . . . . . . 8-9
Maintenance . . . . . . . . . . . . . . . . . . . 8-9
Driving and Operating . . . . . . . . 9-1
Driving Information . . . . . . . . . . . . . 9-2
Starting and Operating . . . . . . . 9-27
Engine Exhaust . . . . . . . . . . . . . . 9-34
Automatic Transmission . . . . . . 9-35
Drive Systems . . . . . . . . . . . . . . . . 9-38
Brakes . . . . . . . . . . . . . . . . . . . . . . . 9-38
Ride Control Systems . . . . . . . . 9-40
Cruise Control . . . . . . . . . . . . . . . . 9-42
Object Detection Systems . . . . 9-44
Fuel . . . . . . . . . . . . . . . . . . . . . . . . . . 9-47
Towing . . . . . . . . . . . . . . . . . . . . . . . 9-52
Conversions and Add-Ons . . . 9-61
ProCarManuals.com
Page 5 of 398

Introduction v
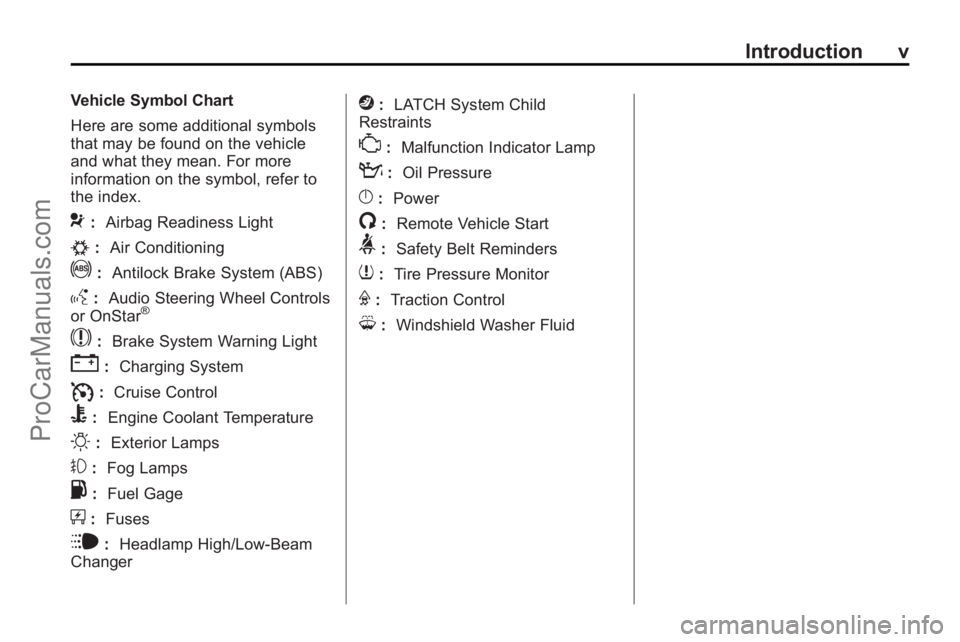
Vehicle Symbol Chart
Here are some additional symbols
that may be found on the vehicle
and what they mean. For more
information on the symbol, refer to
the index.
9:Airbag Readiness Light
#:Air Conditioning
!:Antilock Brake System (ABS)
g:Audio Steering Wheel Controls
or OnStar®
$: Brake System Warning Light
":Charging System
I:Cruise Control
B: Engine Coolant Temperature
O:Exterior Lamps
#:Fog Lamps
.: Fuel Gage
+:Fuses
i: Headlamp High/Low-Beam
Changer
j: LATCH System Child
Restraints
*: Malfunction Indicator Lamp
::Oil Pressure
}:Power
/:Remote Vehicle Start
>:Safety Belt Reminders
7:Tire Pressure Monitor
F:Traction Control
M:Windshield Washer Fluid
ProCarManuals.com
Page 24 of 398

1-18 In Brief
StabiliTrak®
The StabiliTrak system assists
with directional control of the
vehicle in difficult driving conditions.
The system turns on automatically
every time the vehicle is started.
.To turn off both Traction Control
and StabiliTrak, press and hold
5untilFilluminates and the
appropriate DIC message
displays. See Vehicle Messages
on page 5‑31.
.Press the button again to turn on
both systems.
For more information, see
StabiliTrak System on page 9‑41.
Tire Pressure Monitor
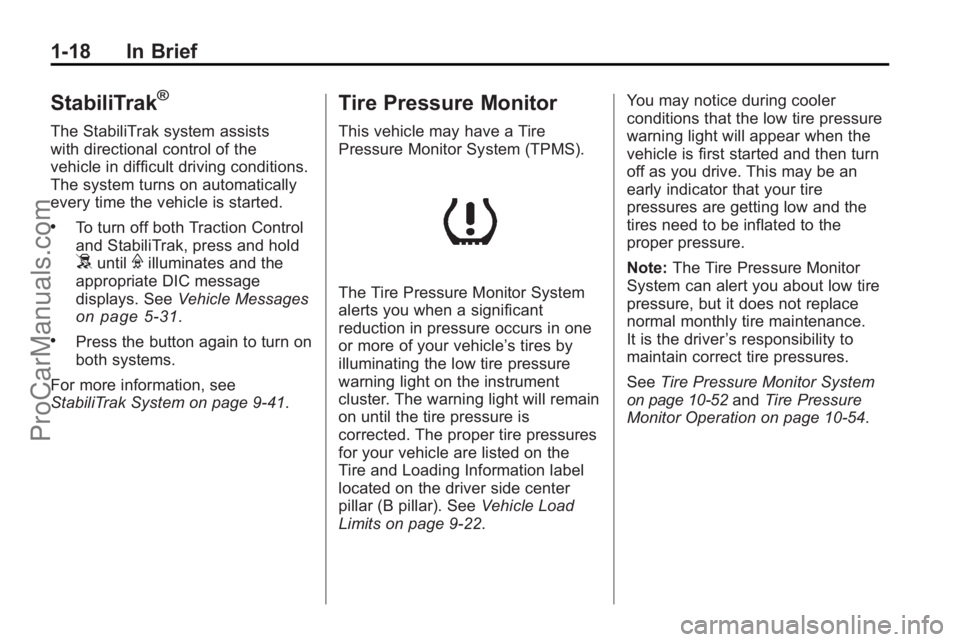
This vehicle may have a Tire
Pressure Monitor System (TPMS).
The Tire Pressure Monitor System
alerts you when a significant
reduction in pressure occurs in one
or more of your vehicle’s tires by
illuminating the low tire pressure
warning light on the instrument
cluster. The warning light will remain
on until the tire pressure is
corrected. The proper tire pressures
for your vehicle are listed on the
Tire and Loading Information label
located on the driver side center
pillar (B pillar). See Vehicle Load
Limits on page 9‑22. You may notice during cooler
conditions that the low tire pressure
warning light will appear when the
vehicle is first started and then turn
off as you drive. This may be an
early indicator that your tire
pressures are getting low and the
tires need to be inflated to the
proper pressure.
Note:
The Tire Pressure Monitor
System can alert you about low tire
pressure, but it does not replace
normal monthly tire maintenance.
It is the driver ’s responsibility to
maintain correct tire pressures.
See Tire Pressure Monitor System
on page 10‑52andTire Pressure
Monitor Operation on page 10‑54.
ProCarManuals.com
Page 51 of 398

Seats and Restraints 3-7
WARNING (Continued)
The lap belt cannot do its job
either. In a crash the belt could go
up over your abdomen. The belt
forces would be there, not at your
pelvic bones. This could cause
serious internal injuries.
For proper protection when the
vehicle is in motion, have the
seatback upright. Then sit well
back in the seat and wear your
safety belt properly.
Do not have a seatback reclined if
the vehicle is moving.
Heated Front Seats
On vehicles with heated front seats,
the controls are located on the
center console. The engine must be
running to operate the heated seats.
M(Heated Seat):Press this button
to turn on the heated seat.
Continue to press the button to
cycle through the temperature
settings.
.High = three indicator lights.
.Medium = two indicator lights.
.Low = one indicator light.
.Off = no indicator lights.
The passenger seat may take
longer to heat up.
ProCarManuals.com
Page 68 of 398

3-24 Seats and Restraints
Safety Belt Care
Keep belts clean and dry.
{WARNING
Do not bleach or dye safety belts.
It may severely weaken them. In
a crash, they might not be able to
provide adequate protection.
Clean safety belts only with mild
soap and lukewarm water.
Replacing Safety Belt
System Parts After a
Crash
{WARNING
A crash can damage the safety
belt system in the vehicle.
A damaged safety belt system
may not properly protect the
person using it, resulting in
serious injury or even death in a
crash. To help make sure the
safety belt systems are working
properly after a crash, have them
inspected and any necessary
replacements made as soon as
possible.After a minor crash, replacement of
safety belts may not be necessary.
But the safety belt assemblies that
were used during any crash may
have been stressed or damaged.
See your dealer/retailer to have the
safety belt assemblies inspected or
replaced.
New parts and repairs may be
necessary even if the safety belt
system was not being used at the
time of the crash.
Have the safety belt pretensioners
checked if the vehicle has been in a
crash, or if the airbag readiness light
stays on after you start the vehicle
or while you are driving. See
Airbag
Readiness Light on page 5‑13.
ProCarManuals.com
Page 80 of 398

3-36 Seats and Restraints
The passenger sensing system is
designed to turn off the right front
passenger airbag and seat‐mounted
side impact airbag if:
.The right front passenger seat is
unoccupied.
.The system determines that an
infant is present in a rear-facing
infant seat.
.The system determines that a
small child is present in a child
restraint.
.The system determines that a
small child is present in a
booster seat.
.A right front passenger takes
his/her weight off of the seat for
a period of time.
.The right front passenger seat is
occupied by a smaller person,
such as a child who has
outgrown child restraints.
.Or, if there is a critical problem
with the airbag system or the
passenger sensing system.When the passenger sensing
system has turned off the right front
passenger frontal airbag and
seat‐mounted side impact airbag,
the off indicator will light and stay lit
to remind you that the airbags are
off. See
Passenger Airbag Status
Indicator on page 5‑14.
The passenger sensing system is
designed to turn on (may inflate) the
right front passenger frontal airbag
and seat‐mounted side impact
airbag anytime the system senses
that a person of adult size is sitting
properly in the right front
passenger seat.
When the passenger sensing
system has allowed the airbags to
be enabled, the on indicator will light
and stay lit to remind you that the
airbags are active.
For some children who have
outgrown child restraints, and for
very small adults, the passenger
sensing system may or may not turn
off the right front passenger frontal
airbag and seat-mounted side impact airbag, depending upon the
person’
s seating posture and body
build. Everyone in the vehicle
who has outgrown child restraints
should wear a safety belt
properly —whether or not there is
an airbag for that person.
{WARNING
If the airbag readiness light ever
comes on and stays on, it means
that something may be wrong
with the airbag system. To help
avoid injury to yourself or others,
have the vehicle serviced right
away. See Airbag Readiness
Light
on page 5‑13for more
information, including important
safety information.
ProCarManuals.com
Page 85 of 398

Seats and Restraints 3-41
Airbag System Check
The airbag system does not need
regularly scheduled maintenance or
replacement. Make sure the airbag
readiness light is working. See
Airbag Readiness Light
on
page 5‑13for more information.
Notice: If an airbag covering is
damaged, opened, or broken, the
airbag may not work properly. Do
not open or break the airbag
coverings. If there are any
opened or broken airbag covers,
have the airbag covering and/or
airbag module replaced. For the
location of the airbag modules,
see What Makes an Airbag
Inflate?
on page 3‑31. See your
dealer/retailer for service.
Replacing Airbag System
Parts After a Crash
{WARNING
A crash can damage the airbag
systems in your vehicle.
A damaged airbag system may
not work properly and may not
protect you and your
passenger(s) in a crash, resulting
in serious injury or even death. To
help make sure your airbag
systems are working properly
after a crash, have them
inspected and any necessary
replacements made as soon as
possible. If an airbag inflates, you will need to
replace airbag system parts. See
your dealer/retailer for service.
If the airbag readiness light stays on
after the vehicle is started or comes
on when you are driving, the airbag
system may not work properly. Have
the vehicle serviced right away. See
Airbag Readiness Light
on
page 5‑13for more information.
ProCarManuals.com
Page 111 of 398

Instruments and Controls 5-1
Instruments and
Controls
Controls
Steering Wheel Adjustment . . . 5-2
Steering Wheel Controls . . . . . . 5-3
Horn . . . . . . . . . . . . . . . . . . . . . . . . . . 5-3
Windshield Wiper/Washer . . . . . 5-3
Rear Window Wiper/Washer . . . . . . . . . . . . . . . . . . . . . . 5-5
Compass . . . . . . . . . . . . . . . . . . . . . 5-5
Clock . . . . . . . . . . . . . . . . . . . . . . . . . 5-8
Power Outlets . . . . . . . . . . . . . . . . . 5-8
Warning Lights, Gages, and
Indicators
Warning Lights, Gages, and Indicators . . . . . . . . . . . . . . . . . . . . 5-9
Instrument Cluster . . . . . . . . . . . 5-10
Speedometer . . . . . . . . . . . . . . . . 5-11
Odometer . . . . . . . . . . . . . . . . . . . . 5-11
Trip Odometer . . . . . . . . . . . . . . . 5-11
Tachometer . . . . . . . . . . . . . . . . . . 5-11
Fuel Gage . . . . . . . . . . . . . . . . . . . 5-11
Safety Belt Reminders . . . . . . . 5-12
Airbag Readiness Light . . . . . . 5-13 Passenger Airbag Status
Indicator . . . . . . . . . . . . . . . . . . . . 5-14
Charging System Light . . . . . . 5-15
Malfunction Indicator Lamp . . . . . . . . . . . . . 5-15
Service Vehicle Soon Light . . . . . . . . . . . . . . . . . . . . . . . 5-18
Brake System Warning Light . . . . . . . . . . . . . . . . . . . . . . . 5-18
Antilock Brake System (ABS) Warning Light . . . . . . . . . . . . . . 5-19
All-Wheel-Drive Light . . . . . . . . 5-19
Power Steering Warning Light . . . . . . . . . . . . . . . . . . . . . . . 5-20
StabiliTrak
®Indicator Light . . . 5-20
Traction Control System (TCS) Warning Light . . . . . . . 5-20
Engine Coolant Temperature Warning Light . . . . . . . . . . . . . . 5-21
Tire Pressure Light . . . . . . . . . . 5-21
Engine Oil Pressure Light . . . . 5-22
Change Engine Oil Light . . . . . 5-22
Low Fuel Warning Light . . . . . . 5-23
Security Light . . . . . . . . . . . . . . . . 5-23
Reduced Engine Power Light . . . . . . . . . . . . . . . . . . . . . . . 5-23
High-Beam on Light . . . . . . . . . 5-24
Fog Lamp Light . . . . . . . . . . . . . . 5-24 Low Washer Fluid Warning
Light . . . . . . . . . . . . . . . . . . . . . . . 5-24
Cruise Control Light . . . . . . . . . 5-25
Door Ajar Light . . . . . . . . . . . . . . 5-25
Gate Ajar Light . . . . . . . . . . . . . . 5-25
Information Displays
Driver Information Center (DIC) . . . . . . . . . . . . . . . 5-25
Vehicle Messages
Vehicle Messages . . . . . . . . . . . 5-31
Battery Voltage and ChargingMessages . . . . . . . . . . . . . . . . . . 5-31
Brake System Messages . . . . 5-31
Compass Messages . . . . . . . . . 5-31
Cruise Control Messages . . . . 5-32
Door Ajar Messages . . . . . . . . . 5-32
Engine Cooling System Messages . . . . . . . . . . . . . . . . . . 5-32
Engine Oil Messages . . . . . . . . 5-33
Engine Power Messages . . . . 5-34
Fuel System Messages . . . . . . 5-34
Key and Lock Messages . . . . . 5-35
Ride Control System Messages . . . . . . . . . . . . . . . . . . 5-35
Airbag System Messages . . . . 5-36
Service Vehicle Messages . . . 5-37
ProCarManuals.com
Page 119 of 398

Instruments and Controls 5-9
Notice:Leaving electrical
equipment on for extended
periods will drain the battery.
Always turn off electrical
equipment when not in use and
do not plug in equipment that
exceeds the maximum 20 ampere
rating.
Certain electrical accessories may
not be compatible with the
accessory power outlet and could
result in blown vehicle or adapter
fuses. If you experience a problem,
see your dealer/retailer for
additional information on the
accessory power outlet. Notice:
Adding any electrical
equipment to your vehicle may
damage it or keep other
components from working as
they should. The repairs would
not be covered by your warranty.
Check with your dealer/retailer
before adding electrical
equipment.
When adding electrical equipment,
be sure to follow the installation
instructions included with the
equipment.
Notice: Improper use of the
power outlet can cause damage
not covered by the vehicle
warranty. Do not hang any type of
accessory or accessory bracket
from the plug because the power
outlets are designed for
accessory power plugs only.Warning Lights,
Gages, and Indicators
Warning lights come on when there
could be a problem with a vehicle
function. Some warning lights come
on briefly when the engine is started
to indicate they are working.
Gages can indicate when there
could be a problem with a vehicle
function. Often gages and warning
lights work together to indicate a
problem with the vehicle.
When one of the warning lights
comes on and stays on while
driving, or when one of the gages
shows there may be a problem,
check the section that explains what
to do. Follow this manual's advice.
Waiting to do repairs can be costly
and even dangerous.
ProCarManuals.com
Page 121 of 398

Instruments and Controls 5-11
Speedometer
The speedometer shows the
vehicle's speed in both kilometers
per hour (km/h) and miles per
hour (mph).
Odometer
The odometer shows how far the
vehicle has been driven, in either
kilometers or miles.
This vehicle has a tamper-resistant
odometer. If the vehicle needs a
new odometer installed, the new
one is set to the mileage of the old
odometer. If this is not possible, it is
set at zero and a label is put on the
driver's door to show the old
mileage reading.
Trip Odometer
The trip odometer can record the
number of miles, used in the United
States, or kilometers, used in
Canada, traveled for up to two trips.Cycle between the odometer and
trip odometers A and B by pressing
the reset button located in the lower
right area of the speedometer. Press
the reset button to tell how many
miles or kilometers have been
recorded on either Trip A or Trip B
since the trip odometer was last set
back to zero.
To reset each trip odometer to zero,
press and hold the reset button. The
reset button resets only the trip
odometer that is being displayed.
Each trip odometer must be reset
individually.
Tachometer
The tachometer displays the engine
speed in revolutions per
minute (rpm).
Fuel Gage
United StatesCanada
When the ignition is on, the fuel
gage indicates how much fuel is left
in the tank.
When the indicator nears empty, the
low fuel light comes on. There is still
a little fuel left, but the fuel tank
should be refilled soon. See Low
Fuel Warning Light
on page 5‑23for more information.
An arrow on the fuel gage indicates
the side of the vehicle the fuel door
is on.
ProCarManuals.com