radio Seat Alhambra 2009 Owner's Manual
[x] Cancel search | Manufacturer: SEAT, Model Year: 2009, Model line: Alhambra, Model: Seat Alhambra 2009Pages: 285, PDF Size: 7.62 MB
Page 6 of 285
Contents
4Accessories, parts replacement and
modifications
. . . . . . . . . . . . . . . . . . . . . . . . . . . .
Accessories and parts . . . . . . . . . . . . . . . . . . . . .
Modifications . . . . . . . . . . . . . . . . . . . . . . . . . . . .
Roof aerial* . . . . . . . . . . . . . . . . . . . . . . . . . . . . .
Mobile telephones and two-way radios . . . . . . .
Retrofitting a towing bracket . . . . . . . . . . . . . . .
Checking and refilling levels
. . . . . . . . . . . . . .
Refilling . . . . . . . . . . . . . . . . . . . . . . . . . . . . . . . .
Petrol types . . . . . . . . . . . . . . . . . . . . . . . . . . . . .
Diesel . . . . . . . . . . . . . . . . . . . . . . . . . . . . . . . . . .
Working in the engine compartment . . . . . . . . .
Engine oil . . . . . . . . . . . . . . . . . . . . . . . . . . . . . . .
Coolant . . . . . . . . . . . . . . . . . . . . . . . . . . . . . . . . .
Washer fluid and windscreen wiper blades . . . .
Brake fluid . . . . . . . . . . . . . . . . . . . . . . . . . . . . . .
Battery . . . . . . . . . . . . . . . . . . . . . . . . . . . . . . . . .
Wheels . . . . . . . . . . . . . . . . . . . . . . . . . . . . . . . . .
If and when
. . . . . . . . . . . . . . . . . . . . . . . . . . . . . .
Vehicle tools*, spare wheel*, breakdown set* and
towing bracket . . . . . . . . . . . . . . . . . . . . . . . . . . .
Breakdown set* . . . . . . . . . . . . . . . . . . . . . . . . . .
Components . . . . . . . . . . . . . . . . . . . . . . . . . . . .
Preparation of anti-puncture kit . . . . . . . . . . . . .
Sealing and inflating tyres . . . . . . . . . . . . . . . . .
Changing a wheel . . . . . . . . . . . . . . . . . . . . . . . .
Fuses . . . . . . . . . . . . . . . . . . . . . . . . . . . . . . . . . .
Changing a light . . . . . . . . . . . . . . . . . . . . . . . . .
Jump-starting . . . . . . . . . . . . . . . . . . . . . . . . . . . .
Towing and tow-starting . . . . . . . . . . . . . . . . . . .
Lifting the vehicle . . . . . . . . . . . . . . . . . . . . . . . .
Te c h n i c a l D a t a
. . . . . . . . . . . . . . . . . . . . . . .
General notes on the technical data
. . . . . . .
What you should be aware of . . . . . . . . . . . . . . .
How are the figures measured? . . . . . . . . . . . . .
Towing a trailer . . . . . . . . . . . . . . . . . . . . . . . . . .
Wheels . . . . . . . . . . . . . . . . . . . . . . . . . . . . . . . . .
Te ch n ica l D ata
. . . . . . . . . . . . . . . . . . . . . . . . . . . .
Checking fluid levels . . . . . . . . . . . . . . . . . . . . . .
Petrol engine 1.8l 110 kW (150 bhp) 6 gear . . .
Diesel engine 1.9l TDI 85 kW (115 bhp) 6 gears
four-wheel drive . . . . . . . . . . . . . . . . . . . . . . . . .
Diesel engine 1.9l TDI 85 kW (115 bhp) 6 gears
Diesel engine 1.9 TDI 85 kW (115 bhp).
Automatic . . . . . . . . . . . . . . . . . . . . . . . . . . . . . .
Diesel engine 2.0l TDI 103 kW (140 bhp) 6 gears
Diesel engine 2.0 TDI 103 kW (140 bhp) 6 gears.
Ecomotive . . . . . . . . . . . . . . . . . . . . . . . . . . . . . .
Dimensions and capacities . . . . . . . . . . . . . . . .
Index
. . . . . . . . . . . . . . . . . . . . . . . . . . . . . . . . . .
204
204
204
205
205
206
208
208
209
209
211
214
218
220
223
225
227
233
233
235
236
236
237
238
243
245
250
252
255 257
257
257
259
260
260
262
262
263
264
266
267
269
270
272
273
alhambra_aleman.book Seite 4 Montag, 23. M‰
rz 2009 1:12 13
Page 65 of 285
Overview63
Safety First
Operating instructions
Tips and Maintenance
Te c h n i c a l D a t a
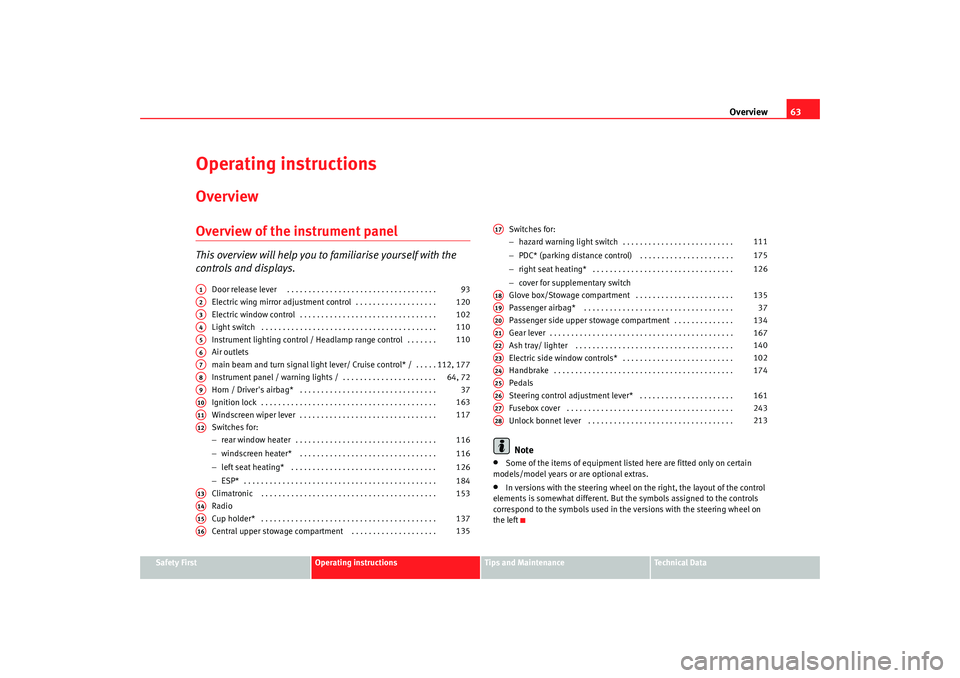
Operating instructionsOverviewOverview of the instrument panelThis overview will help you to familiarise yourself with the
controls and displays.
Door release lever . . . . . . . . . . . . . . . . . . . . . . . . . . . . . . . . . . .
Electric wing mirror adjustment control . . . . . . . . . . . . . . . . . . .
Electric window control . . . . . . . . . . . . . . . . . . . . . . . . . . . . . . . .
Light switch . . . . . . . . . . . . . . . . . . . . . . . . . . . . . . . . . . . . . . . . .
Instrument lighting control / Headlamp range control . . . . . . .
Air outlets
main beam and turn signal light lever/ Cruise control* / . . . . .
Instrument panel / warning lights / . . . . . . . . . . . . . . . . . . . . . .
Horn / Driver's airbag* . . . . . . . . . . . . . . . . . . . . . . . . . . . . . . . .
Ignition lock . . . . . . . . . . . . . . . . . . . . . . . . . . . . . . . . . . . . . . . . .
Windscreen wiper lever . . . . . . . . . . . . . . . . . . . . . . . . . . . . . . . .
Switches for:
−rear window heater . . . . . . . . . . . . . . . . . . . . . . . . . . . . . . . . .
− windscreen heater* . . . . . . . . . . . . . . . . . . . . . . . . . . . . . . . .
− left seat heating* . . . . . . . . . . . . . . . . . . . . . . . . . . . . . . . . . .
− ESP* . . . . . . . . . . . . . . . . . . . . . . . . . . . . . . . . . . . . . . . . . . . . .
Climatronic . . . . . . . . . . . . . . . . . . . . . . . . . . . . . . . . . . . . . . . . .
Radio
Cup holder* . . . . . . . . . . . . . . . . . . . . . . . . . . . . . . . . . . . . . . . . .
Central upper stowage compartment . . . . . . . . . . . . . . . . . . . . Switches for:
−
hazard warning light switch . . . . . . . . . . . . . . . . . . . . . . . . . .
− PDC* (parking distance control) . . . . . . . . . . . . . . . . . . . . . .
− right seat heating* . . . . . . . . . . . . . . . . . . . . . . . . . . . . . . . . .
− cover for supplementary switch
Glove box/Stowage compartment . . . . . . . . . . . . . . . . . . . . . . .
Passenger airbag* . . . . . . . . . . . . . . . . . . . . . . . . . . . . . . . . . . .
Passenger side upper stowage compartment . . . . . . . . . . . . . .
Gear lever . . . . . . . . . . . . . . . . . . . . . . . . . . . . . . . . . . . . . . . . . . .
Ash tray/ lighter . . . . . . . . . . . . . . . . . . . . . . . . . . . . . . . . . . . . .
Electric side window controls* . . . . . . . . . . . . . . . . . . . . . . . . . .
Handbrake . . . . . . . . . . . . . . . . . . . . . . . . . . . . . . . . . . . . . . . . . .
Pedals
Steering control adjustment lever* . . . . . . . . . . . . . . . . . . . . . .
Fusebox cover . . . . . . . . . . . . . . . . . . . . . . . . . . . . . . . . . . . . . . .
Unlock bonnet lever . . . . . . . . . . . . . . . . . . . . . . . . . . . . . . . . . .
Note
•
Some of the items of equipment listed here are fitted only on certain
models/model years or are optional extras.
•
In versions with the steering wheel on the right, the layout of the control
elements is somewhat different. But the symbols assigned to the controls
correspond to the symbols used in the versions with the steering wheel on
the left
A1
93
A2
120
A3
102
A4
110
A5
110
A6A7
112, 177
A8
64, 72
A9
37
A10
163
A11
117
A12
116
116
126
184
A13
153
A14A15
137
A16
135
A17
111
175
126
A18
135
A19
37
A20
134
A21
167
A22
140
A23
102
A24
174
A25A26
161
A27
243
A28
213
alhambra_aleman.book Seite 63 Montag, 23. M‰ rz 2009 1:12 13
Page 88 of 285
Overview
86Steering wheel controlsMultifunction steering wheel*
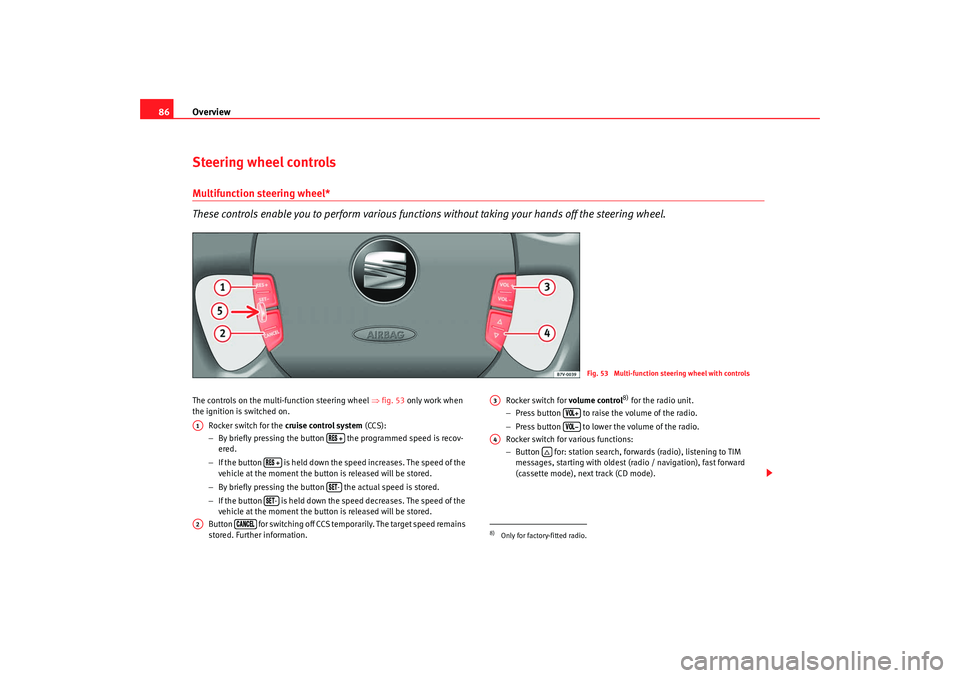
These controls enable you to perform various functions without taking your hands off the steering wheel.The controls on the multi-function steering wheel ⇒fig. 53 only work when
the ignition is switched on.
Rocker switch for the cruise control system (CCS):
− By briefly pressing the button the programmed speed is recov-
ered.
− If the button is held down the speed increases. The speed of the
vehicle at the moment the button is released will be stored.
− By briefly pressing the button the actual speed is stored.
− If the button is held down the speed decreases. The speed of the
vehicle at the moment the button is released will be stored.
Button for switching off CCS temporarily. The target speed remains
stored. Further information. Rocker switch for volume control
8) for the radio unit.
− Press button to raise the volume of the radio.
− Press button to lower the volume of the radio.
Rocker switch for various functions:
− Button for: station search, forwards (radio), listening to TIM
messages, starting with oldest (radio / navigation), fast forward
(cassette mode), next track (CD mode).
Fig. 53 Multi-function steering wheel with controls
A1
-
-
A2
8)Only for factory-fitted radio.A3
A4
alhambra_aleman.book Seite 86 Montag, 23. M‰ rz 2009 1:12 13
Page 89 of 285
Overview87
Safety First
Operating instructions
Tips and Maintenance
Te c h n i c a l D a t a
−
Button for: station search, backwards (radio), listening to TIM
messages, starting with latest (radio / navigation), fast rewind
(cassette mode), last track (CD mode).
Pushbutton for switching lighting on and off on the controls on the multi-
function steering wheel (on the side of the steering wheel).
Note
The cruise control system is switched on and off using the button on the turn-
signal / main beam lever.Te l e p h o n e *Handsfree system for mobile telephones*Using the hands-free unit you can telephone without having to hold the
mobile telephone in your hand.
The voice of the person you are talking to will be relayed via the loudspeakers
of the radio system. You do not have to do anything in particular to respond -
simply behave as if you were talking to the front seat passenger.
The microphone is located on the left-hand side of the drink holder.
The required volume for the conversation can be set via the radio controls.
Note
•
P l e as e n o t e t h a t y o u w i l l b e a b l e t o h o l d a p h o n e c o n v e r sa t i o n t h r o u g h t h e
handsfree system only when the key is in the ignition. If the key is removed,
the conversation will only be possible through the telephone, since the
handsfree system is disconnected.
•
When leaving the vehicle, either take the mobile telephone with you or
switch the automatic call acceptance off as incoming calls will be passed on
even if the radio is switched off.
Telephone preinstallation*The telephone preinstallation consists of:•
a microphone (on the left of the drinks holder),
•
an interface box,
•
the automatic loudspeaker switch in the radio system to relay telephone
conversations,
•
a support incorporated in the dash panel,
•
and a telephone roof aerial.
In order to use the telephone together with the vehicle system, a mobile tele-
phone holder adapted to the dash panel is also required. Next, the mobile
telephone holder will then have to be connected to the dash panel telephone
console.
For any queries concerning its use, please contact your SEAT Dealer.
Declaration of conformityNOKIA CORPORATION declares under its sole responsibility that the product
HT-1 conforms to the provisions in 1995/5/EC of the European Union Council.
A copy of the Declaration of Conformity can be requested from the Customer
Service Department for this brand.
A5
alhambra_aleman.book Seite 87 Montag, 23. M‰ rz 2009 1:12 13
Page 95 of 285
Unlocking and locking93
Safety First
Operating instructions
Tips and Maintenance
Te c h n i c a l D a t a
– press once the locking button on the remote control
12)
. A red
warning lamp in the driver door flashes to indicate the deadlock
is working.
Deactivating deadlock when the vehicle is locked
–Turn the key twice in the driver's door lock to lock or
– press twice the locking button on the remote control12)
. The
vehicle is locked without activating the deadlock.
The doors can be unlocked from the inside if the deadlock mechanism has not
been activated. You will have to pull the door release lever once. The door will
be opened by pulling the door release lever again. When the deadlock is
deactivated, the anti-theft alarm
12) ⇒ page 97 and the interior monitoring
system are also deactivated
12).
WARNING
Nobody should remain in the vehicle if the deadlock mechanism has been
activated. It is not possible to open the doors from the inside. Locked doors
could delay assistance in an emergency. People could become trapped
inside in an emergency.
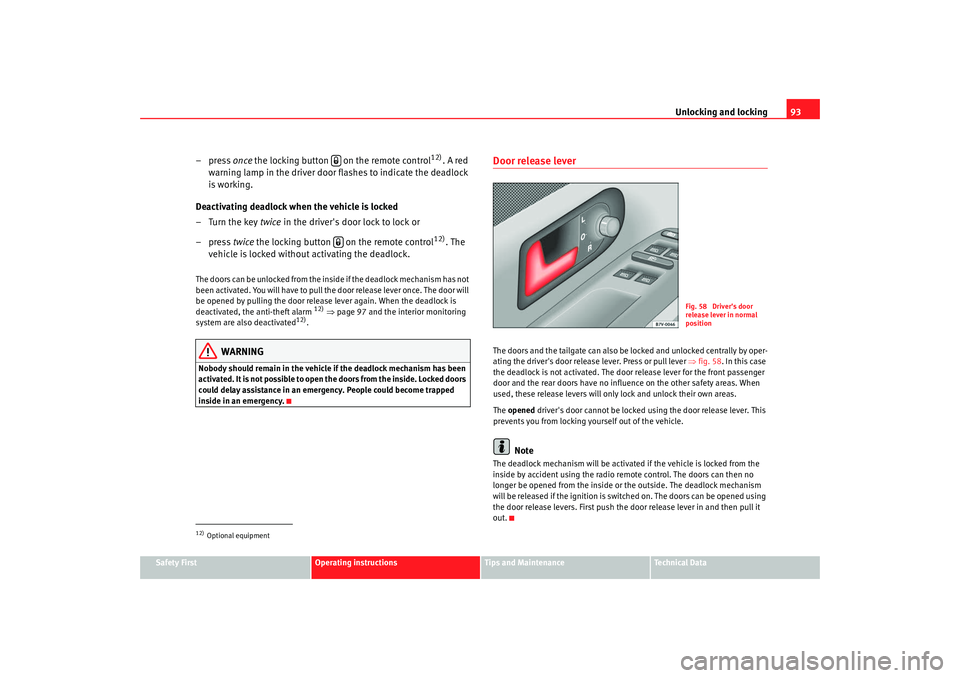
Door release lever The doors and the tailgate can also be locked and unlocked centrally by oper-
ating the driver's door release lever. Press or pull lever ⇒fig. 58 . In this case
the deadlock is not activated. The door release lever for the front passenger
door and the rear doors have no influence on the other safety areas. When
used, these release levers will only lock and unlock their own areas.
The opened driver's door cannot be locked using the door release lever. This
prevents you from locking yourself out of the vehicle.
Note
The deadlock mechanism will be activated if the vehicle is locked from the
inside by accident using the radio remote control. The doors can then no
longer be opened from the inside or the outside. The deadlock mechanism
will be released if the ignition is switched on. The doors can be opened using
the door release levers. First push the door release lever in and then pull it
out.
12)Optional equipment
Fig. 58 Driver's door
release lever in normal
position
alhambra_aleman.book Seite 93 Montag, 23. M‰ rz 2009 1:12 13
Page 98 of 285
Unlocking and locking
96
WARNING
•
Never leave children or disabled persons in the vehicle; in case of emer-
gency they may not be able to leave the vehicle or look after themselves.
•
Always take you car keys with you when you leave the vehicle. Misuse
of the keys, for example, by children, may result in serious damage and
accident.
−The engine may accidentally be started and be out of control.
− If the ignition is switched on, the electric equipment could be acti-
vated with risk of injury, for example, in the electric windows.
− The doors can be locked using the remote control key. This could
result in people being trapped in the vehicle in an emergency.
− Always take the key with you when you leave the vehicle.
•
Never remove the key from the ignition if the vehicle is in motion. Risk
of accident. The steering lock could engage suddenly, and you would not be
able to steer the vehicle.Note
•
An Authorised SEAT Service Centre can programme the individual
opening of doors. In this case, when the unlock button on the remote
control is pressed once, only the driver's door is unlocked ⇒page 90. When
the button is pressed once more, all doors and the tailgate will be unlocked.
Seat Service will be happy to provide more information on the activation of
this function.
•
The remote control transmitter and the batteries are integrated in the
remote control. The receiver is in the interior of the vehicle. Obstacles
between the remote control and the vehicle, bad weather conditions and
discharged batteries can considerably reduce the range of the remote control.
•
The remote control only locks and unlocks the vehicle when it is used
within range.
•
The vehicle will be locked again automatically if you do not open one of
the doors or the tailgate 30 seconds after unlocking the car. This function prevents the vehicle from remaining unlocked if the unlocking button is
pressed by mistake.
•
If it is not possible to open or close the vehicle using the remote control,
this should be re-synchronised ⇒page 96 or change the battery ⇒page 96.
•
The working of the remote control may be momentarily affected if there is
transmitter using the same waveband (e.g. radiotelephone, mobile tele-
phone, etc) in the vicinity of the vehicle.
Synchronising the remote control keySynchronising the remote control key
– Briefly press the open button ⇒page 95, fig. 61 once.
– Then open or close the vehicle using the key bit within one minute ⇒page 90.The vehicle can no longer be opened and closed with the remote control if you
press button ⇒page 95, fig. 61 a long way outside the effective range
of the radio wave remote control. The remote control key will have to be resyn-
chronised.
Spare remote control keys are available from SEAT Service. They must be
matched to the locking system.
Up to four remote control keys can be used.Replacing the batteryIf the battery indicator on the remote control ⇒page 95, fig. 61 does not
flash when the buttons are pushed, the battery must be replaced.
A1
A1
A4
alhambra_aleman.book Seite 96 Montag, 23. M‰ rz 2009 1:12 13
Page 137 of 285
Seats and stowage135
Safety First
Operating instructions
Tips and Maintenance
Te c h n i c a l D a t a
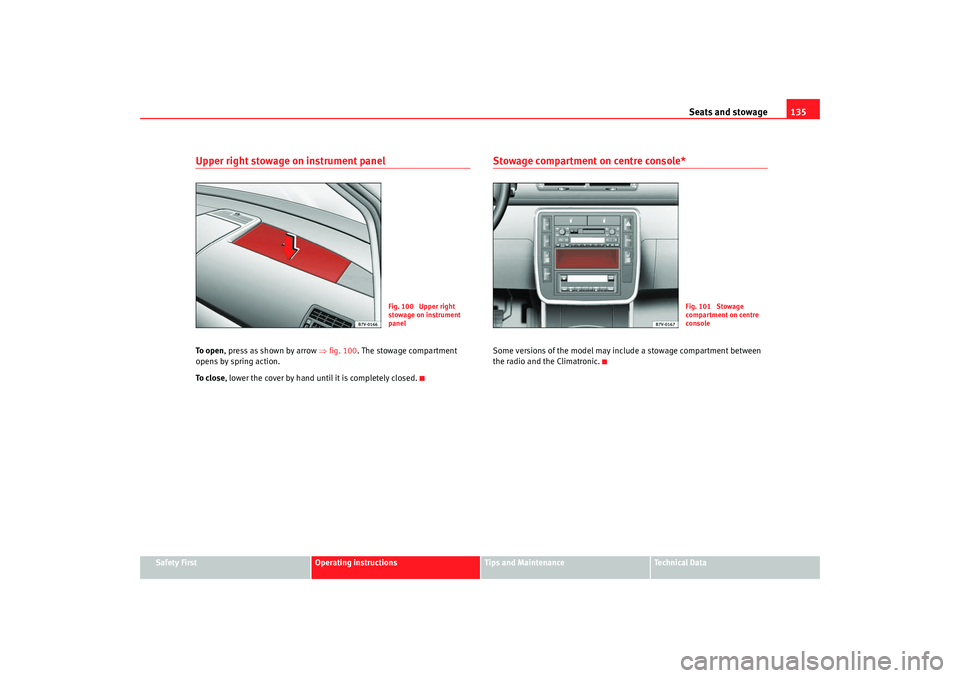
Upper right stowage on instrument panelTo o p e n, press as shown by arrow ⇒fig. 100 . The stowage compartment
opens by spring action.
To c l o s e , lower the cover by hand until it is completely closed.
Stowage compartment on centre console*Some versions of the model may include a stowage compartment between
the radio and the Climatronic.
Fig. 100 Upper right
stowage on instrument
panel
Fig. 101 Stowage
compartment on centre
console
alhambra_aleman.book Seite 135 Montag, 23. M‰ rz 2009 1:12 13
Page 145 of 285
Seats and stowage143
Safety First
Operating instructions
Tips and Maintenance
Te c h n i c a l D a t a
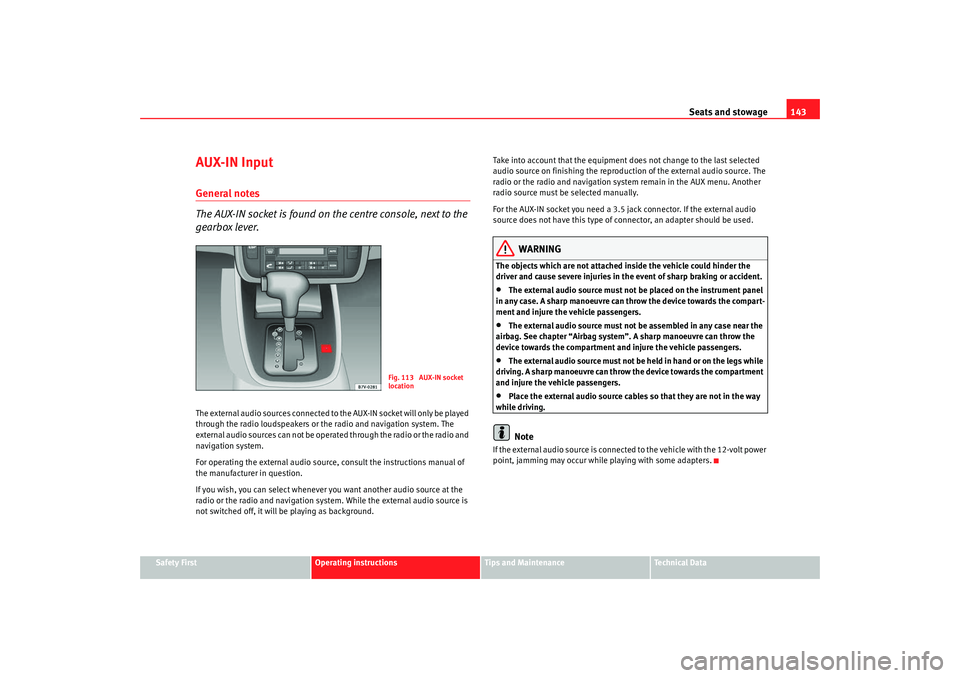
AUX-IN InputGeneral notes
The AUX-IN socket is found on the centre console, next to the
gearbox lever.The external audio sources connected to the AUX-IN socket will only be played
through the radio loudspeakers or the radio and navigation system. The
external audio sources can not be operated through the radio or the radio and
navigation system.
For operating the external audio source, consult the instructions manual of
the manufacturer in question.
If you wish, you can select whenever you want another audio source at the
radio or the radio and navigation system. While the external audio source is
not switched off, it will be playing as background. Take into account that the equipment does not change to the last selected
audio source on finishing the reproduction of the external audio source. The
radio or the radio and navigation system remain in the AUX menu. Another
radio source must be selected manually.
For the AUX-IN socket you need a 3.5 jack connector. If the external audio
source does not have this type of connector, an adapter should be used.
WARNING
The objects which are not attached inside the vehicle could hinder the
driver and cause severe injuries in the event of sharp braking or accident.•
The external audio source must not be placed on the instrument panel
in any case. A sharp manoeuvre can throw the device towards the compart-
ment and injure the vehicle passengers.
•
The external audio source must not be assembled in any case near the
airbag. See chapter “Airbag system”. A sharp manoeuvre can throw the
device towards the compartment and injure the vehicle passengers.
•
The external audio source must not be held in hand or on the legs while
driving. A sharp manoeuvre can throw the device towards the compartment
and injure the vehicle passengers.
•
Place the external audio source cables so that they are not in the way
while driving.Note
If the external audio source is connected to the vehicle with the 12-volt power
point, jamming may occur while playing with some adapters.
Fig. 113 AUX-IN socket
location
alhambra_aleman.book Seite 143 Montag, 23. M‰ rz 2009 1:12 13
Page 207 of 285
Accessories, parts replacement and modifications205
Safety First
Operating instructions
Tips and Maintenance
Te c h n i c a l D a t a
WARNING
Incorrectly performed modifications or other work on your vehicle can lead
to malfunctions and cause accidents.Roof aerial*The vehicle may be fitted with a collapsible roof aerial* with antitheft
system*, which can be folded backwards, when, for example, going through
an automatic carwash.
To f o l d
Unscrew the aerial rod, tilting it backwards into a horizontal position and then
screw in again.
To return to working position
Continue in the reverse order to that given in the previous instruction.Mobile telephones and two-way radiosYou will require an external aerial for mobile phones and two-
way radios. SEAT has approved your vehicle for use with mobile telephones and two-way
radios providing the following conditions are observed:•
The correct installation of an external aerial,
•
transmitting power of maximum 10 watts.
An external aerial is needed to give the equipment its optimal range. First consult your Authorised Service Centre if you wish to use a mobile tele-
phone or a two-way radio with a transmitting power in excess of 10 watts.
Here you will receive information concerning the technical possibilities for
retrofitting this equipment.
Mobile telephones and two-way radios should be fitted only by a qualified
workshop, for example an Authorised Service Centre.
WARNING
•
Always concentrate primarily on driving. If you are distracted while
driving you could have an accident.
•
Never attach the telephone mountings to the surfaces covering the
airbag units or within the range of the airbags, danger of injury if the airbag
is triggered.
•
If you use mobile telephones or two-way radios in the vehicle without
an external aerial, electromagnetic radiation in the vehicle could exceed
authorised limits. This also applies to external aerials that have not been
correctly installed.Caution
Failure to observe the above conditions could cause the electronics to
malfunction. The most common causes of faults are:•
no external aerial,
•
external aerial incorrectly installed,
•
transmitting power in excess of 10 watts.Note
Please observe the operating instructions of your mobile telephone / two-way
radio.
alhambra_aleman.book Seite 205 Montag, 23. M‰ rz 2009 1:12 13
Page 247 of 285

If and when245
Safety First
Operating instructions
Tips and Maintenance
Te c h n i c a l D a t a
Changing a lightBulbs, changing
Bulbs should be changed by a professional mechanic only.Technical knowledge is required to change bulbs. This is because, in certain
cases, access can be gained only by removing other vehicle components.
This applies in particular to bulbs which can be accessed only from the
engine compartment.
We recommend bulbs are changed by a qualified dealership or, if this is not
possible, by a qualified person.
However, if you wish to change the bulb, please observe the following:
Before changing a bulb, you must switch off the light (light switch in O posi-
tion), and the turn signal lever must be in the neutral position.
Always replace damaged bulbs with identical bulbs with the same designa-
tion. The type is inscribed on the bulb, either on the glass or on the base.
You should store spare light bulbs in the vehicle for safety-relevant lights.
Bulbs can be obtained from SEAT Service Centres.
WARNING
•
The high voltage element of gas discharge lamps must be handled
correctly. Failure to comply could result in fatal injuries.
•
H7* bulbs are pressurised and could explode when they are being
changed. Risk of injury.
•
In vehicles fitted with gas discharge lamps*, there is a mortal danger if
the high voltage section of the lamp is incorrectly handled.
•
When working in the engine compartment, always observe the safety
warnings ⇒page 211.
Hazard warning light switch
Instrument panel lighting
Climate control
Heating
Radio, navigation system
/
Rear light
-
Registration plate light
Windscreen washers
Windscreen washer system
Sliding sunroof
Seat heating
Mirror adjustment
Heating the exterior mirrors
Side lights
Socket (luggage compartment)
Central locking.
-
Electrical consumer
Symbol
alhambra_aleman.book Seite 245 Montag, 23. M‰ rz 2009 1:12 13