tow Seat Alhambra 2009 Owner's Manual
[x] Cancel search | Manufacturer: SEAT, Model Year: 2009, Model line: Alhambra, Model: Seat Alhambra 2009Pages: 285, PDF Size: 7.62 MB
Page 5 of 285
Contents3
ContentsThe structure of this manual
. . . . .
Content
. . . . . . . . . . . . . . . . . . . . . . . . . . . . . . . .
Safety First
. . . . . . . . . . . . . . . . . . . . . . . . . . .
Safe Driving
. . . . . . . . . . . . . . . . . . . . . . . . . . . . . .
Brief introduction . . . . . . . . . . . . . . . . . . . . . . . .
Proper sitting position for occupants . . . . . . . . .
Pedal area . . . . . . . . . . . . . . . . . . . . . . . . . . . . . .
Stowing luggage . . . . . . . . . . . . . . . . . . . . . . . . .
Seat belts
. . . . . . . . . . . . . . . . . . . . . . . . . . . . . . . .
Introduction . . . . . . . . . . . . . . . . . . . . . . . . . . . . .
Why wear seat belts? . . . . . . . . . . . . . . . . . . . . . .
Seat belts . . . . . . . . . . . . . . . . . . . . . . . . . . . . . . .
Belt tension devices . . . . . . . . . . . . . . . . . . . . . .
Airbag system
. . . . . . . . . . . . . . . . . . . . . . . . . . . .
Brief introduction . . . . . . . . . . . . . . . . . . . . . . . .
Front airbags . . . . . . . . . . . . . . . . . . . . . . . . . . . .
Side airbags . . . . . . . . . . . . . . . . . . . . . . . . . . . . .
Curtain airbags . . . . . . . . . . . . . . . . . . . . . . . . . .
Deactivating airbags* . . . . . . . . . . . . . . . . . . . . .
Child safety
. . . . . . . . . . . . . . . . . . . . . . . . . . . . . .
Brief introduction . . . . . . . . . . . . . . . . . . . . . . . .
Child seats . . . . . . . . . . . . . . . . . . . . . . . . . . . . . .
Installation of child seats in vehicle seats . . . . .
Integrated child seat . . . . . . . . . . . . . . . . . . . . . .
Operating instructions
. . . . . . . . . . . .
Overview
. . . . . . . . . . . . . . . . . . . . . . . . . . . . . . . . .
Overview of the instrument panel . . . . . . . . . . .
Instruments . . . . . . . . . . . . . . . . . . . . . . . . . . . . .
Display in the instrument panel . . . . . . . . . . . . .
Warning lamps . . . . . . . . . . . . . . . . . . . . . . . . . . .
On board computer with multifunction display .
Steering wheel controls . . . . . . . . . . . . . . . . . . .
Telephone* . . . . . . . . . . . . . . . . . . . . . . . . . . . . .
Unlocking and locking
. . . . . . . . . . . . . . . . . . . .
Keys . . . . . . . . . . . . . . . . . . . . . . . . . . . . . . . . . . .
Central locking . . . . . . . . . . . . . . . . . . . . . . . . . . .
Key with remote control . . . . . . . . . . . . . . . . . . .
Anti-theft alarm system . . . . . . . . . . . . . . . . . . . .
Tailgate . . . . . . . . . . . . . . . . . . . . . . . . . . . . . . . . .
Windows . . . . . . . . . . . . . . . . . . . . . . . . . . . . . . .
Sliding/tilting sun roof . . . . . . . . . . . . . . . . . . . .
Lights and visibility
. . . . . . . . . . . . . . . . . . . . . . .
Lights . . . . . . . . . . . . . . . . . . . . . . . . . . . . . . . . . .
Visibility . . . . . . . . . . . . . . . . . . . . . . . . . . . . . . . .
Windscreen washers . . . . . . . . . . . . . . . . . . . . . .
Mirrors . . . . . . . . . . . . . . . . . . . . . . . . . . . . . . . . .
Seats and stowage
. . . . . . . . . . . . . . . . . . . . . . .
The importance of correct seat adjustment . . . .
Head restraints . . . . . . . . . . . . . . . . . . . . . . . . . .
Front seats . . . . . . . . . . . . . . . . . . . . . . . . . . . . . .
Rear seats . . . . . . . . . . . . . . . . . . . . . . . . . . . . . .
Stowage compartments . . . . . . . . . . . . . . . . . . .
Ashtrays, cigarette lighter and electrical sockets
AUX-IN Input . . . . . . . . . . . . . . . . . . . . . . . . . . . . .
Hazard warning triangles and first aid kit . . . . .
Luggage compartment . . . . . . . . . . . . . . . . . . . . Roof carrier . . . . . . . . . . . . . . . . . . . . . . . . . . . . . .
Cooling and heating box* . . . . . . . . . . . . . . . . . .
Heating, Ventilation and Air conditioning
. .
Climatronic . . . . . . . . . . . . . . . . . . . . . . . . . . . . . .
Driving
. . . . . . . . . . . . . . . . . . . . . . . . . . . . . . . . . . .
Address . . . . . . . . . . . . . . . . . . . . . . . . . . . . . . . .
Safety . . . . . . . . . . . . . . . . . . . . . . . . . . . . . . . . . .
Ignition lock . . . . . . . . . . . . . . . . . . . . . . . . . . . . .
Starting and stopping the engine . . . . . . . . . . .
Manual gearbox . . . . . . . . . . . . . . . . . . . . . . . . . .
Automatic gearbox . . . . . . . . . . . . . . . . . . . . . . .
Handbrake . . . . . . . . . . . . . . . . . . . . . . . . . . . . . .
Parking distance warning system* . . . . . . . . . . .
Cruise control system (CCS) . . . . . . . . . . . . . . . .
Tips and Maintenance
. . . . . . . . . . . . .
Intelligent technology
. . . . . . . . . . . . . . . . . . . . .
Brakes . . . . . . . . . . . . . . . . . . . . . . . . . . . . . . . . .
Driving and the environment
. . . . . . . . . . . . . .
Running-in . . . . . . . . . . . . . . . . . . . . . . . . . . . . . .
Exhaust gas emission control system . . . . . . . .
Economical and environmentally friendly driving
Driving abroad . . . . . . . . . . . . . . . . . . . . . . . . . . .
Trailer towing . . . . . . . . . . . . . . . . . . . . . . . . . . . .
Cleaning and caring for your vehicle
. . . . . . .
General notes . . . . . . . . . . . . . . . . . . . . . . . . . . .
Care of the vehicle exterior . . . . . . . . . . . . . . . . .
Care of the vehicle interior . . . . . . . . . . . . . . . . .
5
6
7
7
7
10
15
16
18
18
20
23
31
33
33
37
40
42
44
46
46
48
51
54 63
63
63
64
69
72
81
86
87
88
88
89
95
97
99
102
105
109
109
115
117
119
122
122
123
125
127
134
140
143
144
144 149
150
153
153
161
161
162
163
165
167
168
174
175
177
181
181
181
187
187
188
189
191
192
195
195
196
201
alhambra_aleman.book Seite 3 Montag, 23. M‰
rz 2009 1:12 13
Page 6 of 285
Contents
4Accessories, parts replacement and
modifications
. . . . . . . . . . . . . . . . . . . . . . . . . . . .
Accessories and parts . . . . . . . . . . . . . . . . . . . . .
Modifications . . . . . . . . . . . . . . . . . . . . . . . . . . . .
Roof aerial* . . . . . . . . . . . . . . . . . . . . . . . . . . . . .
Mobile telephones and two-way radios . . . . . . .
Retrofitting a towing bracket . . . . . . . . . . . . . . .
Checking and refilling levels
. . . . . . . . . . . . . .
Refilling . . . . . . . . . . . . . . . . . . . . . . . . . . . . . . . .
Petrol types . . . . . . . . . . . . . . . . . . . . . . . . . . . . .
Diesel . . . . . . . . . . . . . . . . . . . . . . . . . . . . . . . . . .
Working in the engine compartment . . . . . . . . .
Engine oil . . . . . . . . . . . . . . . . . . . . . . . . . . . . . . .
Coolant . . . . . . . . . . . . . . . . . . . . . . . . . . . . . . . . .
Washer fluid and windscreen wiper blades . . . .
Brake fluid . . . . . . . . . . . . . . . . . . . . . . . . . . . . . .
Battery . . . . . . . . . . . . . . . . . . . . . . . . . . . . . . . . .
Wheels . . . . . . . . . . . . . . . . . . . . . . . . . . . . . . . . .
If and when
. . . . . . . . . . . . . . . . . . . . . . . . . . . . . .
Vehicle tools*, spare wheel*, breakdown set* and
towing bracket . . . . . . . . . . . . . . . . . . . . . . . . . . .
Breakdown set* . . . . . . . . . . . . . . . . . . . . . . . . . .
Components . . . . . . . . . . . . . . . . . . . . . . . . . . . .
Preparation of anti-puncture kit . . . . . . . . . . . . .
Sealing and inflating tyres . . . . . . . . . . . . . . . . .
Changing a wheel . . . . . . . . . . . . . . . . . . . . . . . .
Fuses . . . . . . . . . . . . . . . . . . . . . . . . . . . . . . . . . .
Changing a light . . . . . . . . . . . . . . . . . . . . . . . . .
Jump-starting . . . . . . . . . . . . . . . . . . . . . . . . . . . .
Towing and tow-starting . . . . . . . . . . . . . . . . . . .
Lifting the vehicle . . . . . . . . . . . . . . . . . . . . . . . .
Te c h n i c a l D a t a
. . . . . . . . . . . . . . . . . . . . . . .
General notes on the technical data
. . . . . . .
What you should be aware of . . . . . . . . . . . . . . .
How are the figures measured? . . . . . . . . . . . . .
Towing a trailer . . . . . . . . . . . . . . . . . . . . . . . . . .
Wheels . . . . . . . . . . . . . . . . . . . . . . . . . . . . . . . . .
Te ch n ica l D ata
. . . . . . . . . . . . . . . . . . . . . . . . . . . .
Checking fluid levels . . . . . . . . . . . . . . . . . . . . . .
Petrol engine 1.8l 110 kW (150 bhp) 6 gear . . .
Diesel engine 1.9l TDI 85 kW (115 bhp) 6 gears
four-wheel drive . . . . . . . . . . . . . . . . . . . . . . . . .
Diesel engine 1.9l TDI 85 kW (115 bhp) 6 gears
Diesel engine 1.9 TDI 85 kW (115 bhp).
Automatic . . . . . . . . . . . . . . . . . . . . . . . . . . . . . .
Diesel engine 2.0l TDI 103 kW (140 bhp) 6 gears
Diesel engine 2.0 TDI 103 kW (140 bhp) 6 gears.
Ecomotive . . . . . . . . . . . . . . . . . . . . . . . . . . . . . .
Dimensions and capacities . . . . . . . . . . . . . . . .
Index
. . . . . . . . . . . . . . . . . . . . . . . . . . . . . . . . . .
204
204
204
205
205
206
208
208
209
209
211
214
218
220
223
225
227
233
233
235
236
236
237
238
243
245
250
252
255 257
257
257
259
260
260
262
262
263
264
266
267
269
270
272
273
alhambra_aleman.book Seite 4 Montag, 23. M‰
rz 2009 1:12 13
Page 18 of 285
Safe Driving
16Floor mats on the driver side
Only floor mats may be used which can be securely fastened
in the foot well and do not impair operation of the pedals.– Ensure that the floor mats are securely fastened during the trip
and do not obstruct the pedals ⇒.Only use floor mats which leave the pedals clear and which are secured to
prevent them from slipping. You can obtain suitable floor mats from a quali-
fied dealership.
WARNING
•
If the pedals are obstructed, you could cause an accident. Risk of
serious injuries.
•
Ensure that the floor mats are always securely attached.
•
Never lay or fit floor mats or other floor coverings over the original floor
mats. This would reduce the pedal area and could obstruct the pedals. Risk
of accident.
Stowing luggageLoading the luggage compartment
All luggage and other loose objects must be safely secured in
the luggage compartment.Unsecured objects which shift back and forth could impair the
driving safety or driving characteristics of the vehicle by shifting the
centre of gravity. – Distribute the load evenly in the luggage compartment.
– Lay and stow heavy luggage as far forward as possible in the
luggage compartment.
– Stow heavy luggage as low as possible in the luggage compart- ment.
– Secure heavy objects to the fitted fastening rings ⇒page 17.
WARNING
•
Loose luggage and other objects in the luggage compartment can
cause serious injuries.
•
Always stow objects in the luggage compartment and secure them on
the fastening rings.
•
Use suitable specialist straps to secure heavy objects.
•
During sudden manoeuvres or accidents, loose objects can be thrown
forward, injuring vehicle occupants or passers-by. This increased risk of
injury will be further increased if a l oose object is struck by an inflating
airbag. If this happens, objects can be transformed into “missiles”. Risk of
fatal injury.
•
Please note that the centre of gravity may shift when transporting
heavy objects; this may affect the vehicle's handling and lead to an acci-
dent. Therefore, it is essential to adjust your speed and driving style
accordingly, to avoid accidents.
•
Never exceed the allowed axle loads or allowed maximum weight. If the
allowed axle load or the allowed total weight is exceeded, the driving char-
acteristics of the vehicle may change, leading to accidents, injuries and
damage to the vehicle.
•
Never leave your vehicle unattended, especially when the tailgate is
open. Children could climb into the luggage compartment closing the door
alhambra_aleman.book Seite 16 Montag, 23. M‰ rz 2009 1:12 13
Page 25 of 285
Seat belts23
Safety First
Operating instructions
Tips and Maintenance
Te c h n i c a l D a t a
•
Faste n you r sea t be lt be fore ev e r y t rip - e ve n w hen d riv in g in tow n. Tha t
applies also to your front and rear passengers – danger of injury!
•
The seat belt cannot offer its full protection if the belt web is not posi-
tioned correctly.
•
Never allow two passengers (even children) to share the same seat belt.
•
Keep both feet in the foot-well in front of your seat as long as the
vehicle is in motion.
•
Never unbuckle a seat belt while the vehicle is in motion. Risk of fatal
injury.
•
The belt webbing must never be twisted while it is being worn.
•
The belt webbing should never lie on hard or fragile objects (such as
glasses or pens, etc.) because this can cause injuries.
•
Do not allow the seat belt to be damaged or jammed, or to rub on any
sharp edges.
•
Never wear the seat belt under the arm or in any other incorrect posi-
tion.
•
Loose, bulky clothing (such as an overcoat over a jacket) impairs the
proper fit and function of the belts, reducing their capacity to protect.
•
The slot in the seat belt buckle must not be blocked with paper or other
objects, as this can prevent the latch plate from engaging securely.
•
Never use seat belt clips, retaining rings or similar instruments to alter
the position of the belt webbing.
•
Frayed or torn seat belts or damage to the connections, belt retractors
or parts of the buckle could cause seve re injuries in the event of an acci-
dent. Therefore, you must check the condition of all seat belts at regular
intervals.
•
Seat belts which have been worn in an accident and stretched must be
replaced by a qualified workshop. Renewal may be necessary even if there
is no apparent damage. The belt anchorage should also be checked.
•
Do not attempt to repair a damaged seat belt yourself. The seat belts
must not be removed or modified in any way.
•
The belts must be kept clean, otherwise the retractors may not work
properly.
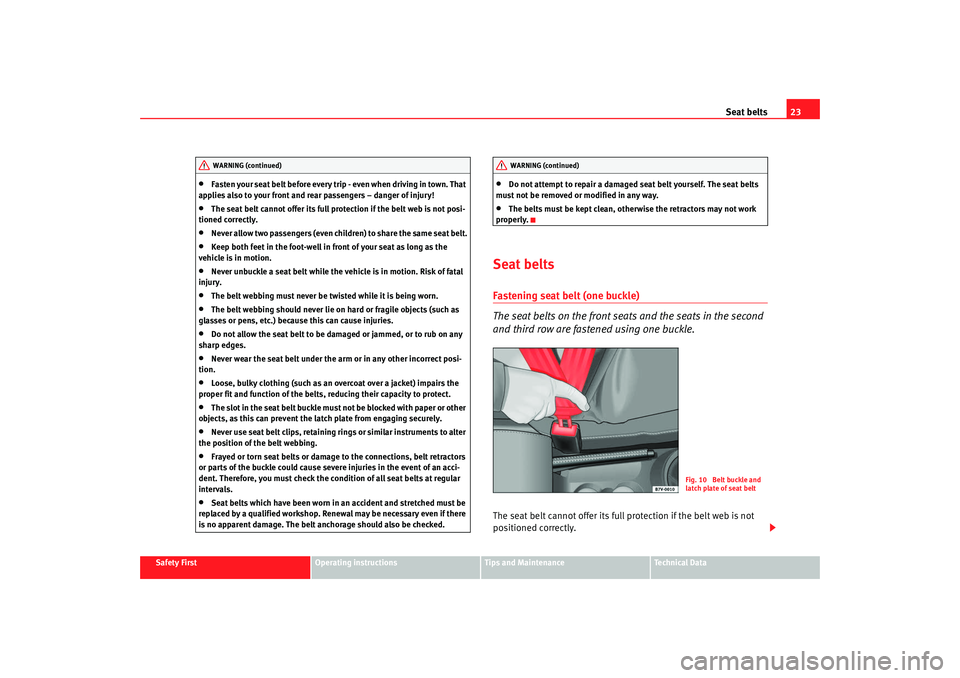
Seat beltsFastening seat belt (one buckle)
The seat belts on the front seats and the seats in the second
and third row are fastened using one buckle.The seat belt cannot offer its full protection if the belt web is not
positioned correctly.
WARNING (continued)
WARNING (continued)
Fig. 10 Belt buckle and
latch plate of seat belt
alhambra_aleman.book Seite 23 Montag, 23. M‰ rz 2009 1:12 13
Page 65 of 285
Overview63
Safety First
Operating instructions
Tips and Maintenance
Te c h n i c a l D a t a
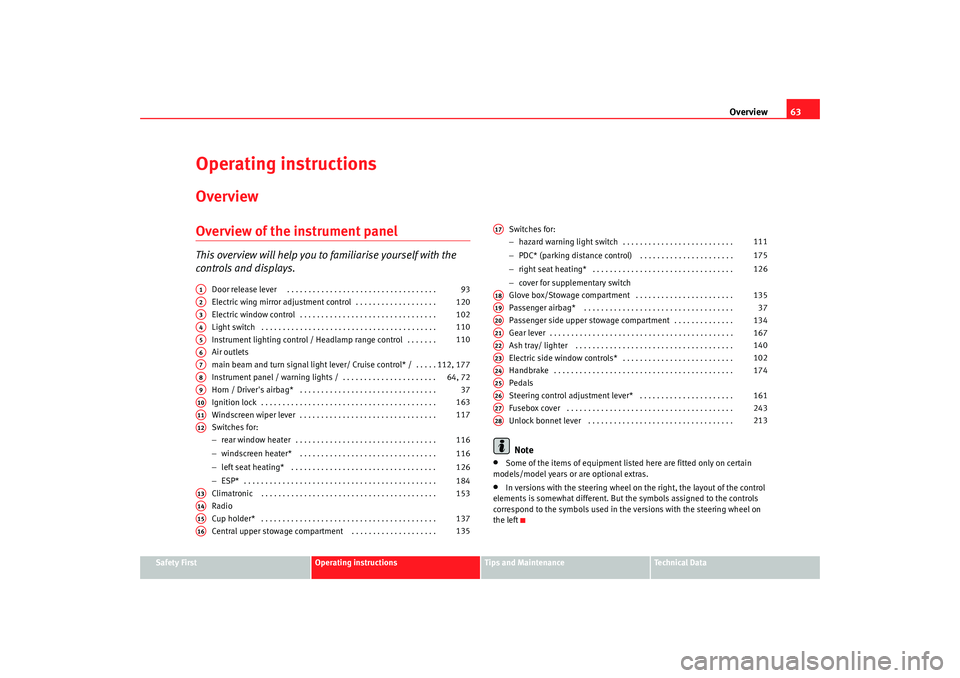
Operating instructionsOverviewOverview of the instrument panelThis overview will help you to familiarise yourself with the
controls and displays.
Door release lever . . . . . . . . . . . . . . . . . . . . . . . . . . . . . . . . . . .
Electric wing mirror adjustment control . . . . . . . . . . . . . . . . . . .
Electric window control . . . . . . . . . . . . . . . . . . . . . . . . . . . . . . . .
Light switch . . . . . . . . . . . . . . . . . . . . . . . . . . . . . . . . . . . . . . . . .
Instrument lighting control / Headlamp range control . . . . . . .
Air outlets
main beam and turn signal light lever/ Cruise control* / . . . . .
Instrument panel / warning lights / . . . . . . . . . . . . . . . . . . . . . .
Horn / Driver's airbag* . . . . . . . . . . . . . . . . . . . . . . . . . . . . . . . .
Ignition lock . . . . . . . . . . . . . . . . . . . . . . . . . . . . . . . . . . . . . . . . .
Windscreen wiper lever . . . . . . . . . . . . . . . . . . . . . . . . . . . . . . . .
Switches for:
−rear window heater . . . . . . . . . . . . . . . . . . . . . . . . . . . . . . . . .
− windscreen heater* . . . . . . . . . . . . . . . . . . . . . . . . . . . . . . . .
− left seat heating* . . . . . . . . . . . . . . . . . . . . . . . . . . . . . . . . . .
− ESP* . . . . . . . . . . . . . . . . . . . . . . . . . . . . . . . . . . . . . . . . . . . . .
Climatronic . . . . . . . . . . . . . . . . . . . . . . . . . . . . . . . . . . . . . . . . .
Radio
Cup holder* . . . . . . . . . . . . . . . . . . . . . . . . . . . . . . . . . . . . . . . . .
Central upper stowage compartment . . . . . . . . . . . . . . . . . . . . Switches for:
−
hazard warning light switch . . . . . . . . . . . . . . . . . . . . . . . . . .
− PDC* (parking distance control) . . . . . . . . . . . . . . . . . . . . . .
− right seat heating* . . . . . . . . . . . . . . . . . . . . . . . . . . . . . . . . .
− cover for supplementary switch
Glove box/Stowage compartment . . . . . . . . . . . . . . . . . . . . . . .
Passenger airbag* . . . . . . . . . . . . . . . . . . . . . . . . . . . . . . . . . . .
Passenger side upper stowage compartment . . . . . . . . . . . . . .
Gear lever . . . . . . . . . . . . . . . . . . . . . . . . . . . . . . . . . . . . . . . . . . .
Ash tray/ lighter . . . . . . . . . . . . . . . . . . . . . . . . . . . . . . . . . . . . .
Electric side window controls* . . . . . . . . . . . . . . . . . . . . . . . . . .
Handbrake . . . . . . . . . . . . . . . . . . . . . . . . . . . . . . . . . . . . . . . . . .
Pedals
Steering control adjustment lever* . . . . . . . . . . . . . . . . . . . . . .
Fusebox cover . . . . . . . . . . . . . . . . . . . . . . . . . . . . . . . . . . . . . . .
Unlock bonnet lever . . . . . . . . . . . . . . . . . . . . . . . . . . . . . . . . . .
Note
•
Some of the items of equipment listed here are fitted only on certain
models/model years or are optional extras.
•
In versions with the steering wheel on the right, the layout of the control
elements is somewhat different. But the symbols assigned to the controls
correspond to the symbols used in the versions with the steering wheel on
the left
A1
93
A2
120
A3
102
A4
110
A5
110
A6A7
112, 177
A8
64, 72
A9
37
A10
163
A11
117
A12
116
116
126
184
A13
153
A14A15
137
A16
135
A17
111
175
126
A18
135
A19
37
A20
134
A21
167
A22
140
A23
102
A24
174
A25A26
161
A27
243
A28
213
alhambra_aleman.book Seite 63 Montag, 23. M‰ rz 2009 1:12 13
Page 76 of 285
Overview
74
WARNING
•
Failure to observe warning lamps and warning messages can result in
serious personal injury or damage to your vehicle.
•
The risk of an accident increases if your vehicle breaks down. Use a
warning triangle to draw the attention of other road users to your
stationary vehicle so that it does not represent a danger.
•
The engine compartment of any motor vehicle is a dangerous area!
Before you open the bonnet to work on the engine or in the engine compart-
ment, you must switch off the engine and allow it to cool to reduce the risk
of scalding or other injuries. Read and observe the relevant warnings
⇒ page 211.Note
•
The appropriate warning lamp for a fault will light up in vehicles without
warning or information texts in the display.
•
In vehicles with warning or information texts in the display, the appro-
priate warning lamp for a fault will light up and a warning or information text
will also appear in the display.
Trailer turn signals
This warning lamp also flashes when the turn signals are
operated while towing a caravan or trailer.The warning lamp
flashes when the turn signals are operated, provided a
trailer is correctly attached and connected to the vehicle.
The warning lamp will not flash if one of the turn signals on the trailer fails.
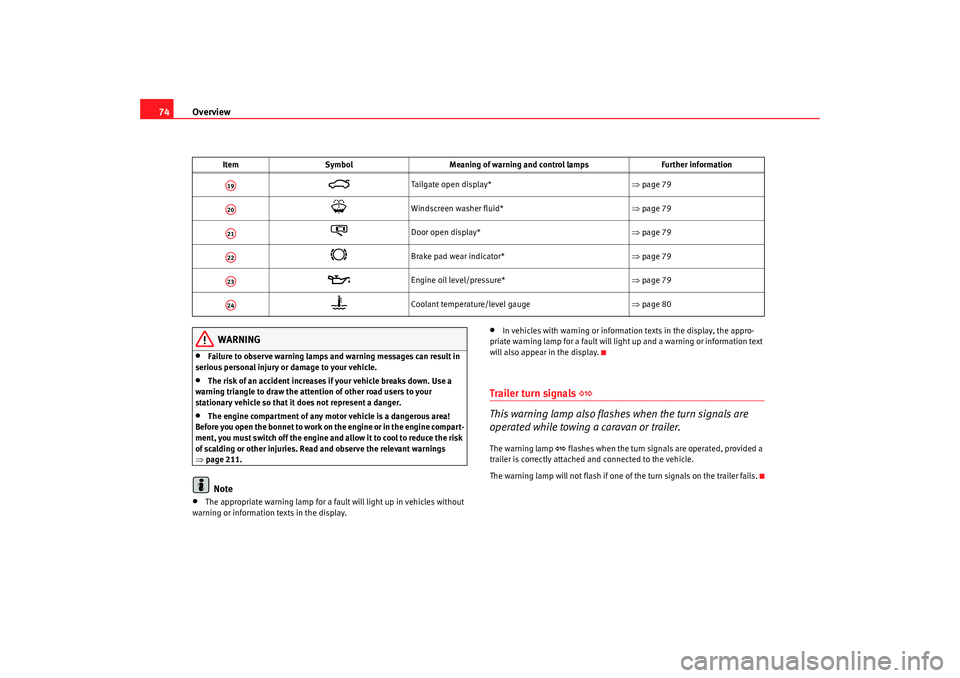
Ta ilg ate o p e n d isp lay * ⇒page 79
Windscreen washer fluid* ⇒page 79
Door open display* ⇒page 79
Brake pad wear indicator* ⇒page 79
Engine oil level/pressure* ⇒page 79
Coolant temperature/level gauge ⇒page 80
Item
Symbol Meaning of warning and control lamps Further information
A19A20A21A22A23A24
alhambra_aleman.book Seite 74 Montag, 23. M‰rz 2009 1:12 13
Page 112 of 285

Lights and visibility
110If you are towing a trailer equipped with a rear fog light on a vehicle with a
factory-fitted towing bracket
17), the rear fog light on the car will automatically
be switched off.
WARNING
•
Never drive with just the side lights on. Risk of accident. The side lights
are not bright enough to illuminate the road ahead and to ensure that other
road users are able to see you. Always use your dipped headlights if it is
dark or if visibility is poor.Note
•
If the lights are left on after the key has been taken out of the ignition lock,
a buzzer sounds when the driver door is opened. This is a reminder to switch
off the lights.
•
The rear fog light is so bright that it can dazzle drivers behind you. You
should use the rear fog light only when visibility is very poor.
•
If you are towing a trailer equipped with a rear fog light on a vehicle with
a factory-fitted towing bracket , the rear fog light on the car will automatically
be switched off.
•
The use of the lighting described here is subject to the relevant statutory
requirements.
Coming Home function (guide lights)
The Coming Home function (guide lights) allows the vehicle
lights to stay on for approximately 3 minutes after the ignition
is switched off.To activate the Coming Home function the vehicle lights should have
already been switched on. – Switch off vehicle lights.
– Switch off ignition.
– Keep all doors closed.
– Briefly pull the turn signal lever towards the steering wheel
within a maximum of 2 minutes after switching off the lights.
– Open the driver door.
When the driver's door is opened, the vehicle lights automatically light up for
approx. 3 minutes. If the door is closed within 3 minutes, the guide lights will
stay on for approximately. 30 seconds. If the door is closed after 3 minutes,
the vehicle lights switch off and the guide lights are not activated.Illumination of instruments and switches
and headlight
range control
F i g . 7 1 I n s t r u m e n t p a n e l :
headlight range control and illumination of
instruments and switches A1A2
alhambra_aleman.book Seite 110 Montag, 23. M‰ rz 2009 1:12 13
Page 114 of 285
Lights and visibility
112
3. Switch the engine off.
4. Apply the handbrake firmly.
5. On a manual gearbox engage 1st gear. On an automatic move the selector lever to P.
6. Use the warning triangle to draw the attention of other road users to your vehicle.
7. Always take the key with you when you leave the vehicle.You should switch on the hazard warning lights to warn other road users, for
instance when:•
reaching the tail end of a traffic jam
•
there is an emergency
•
your vehicle breaks down due to a technical defect
•
you are towing another vehicle or your vehicle is being towed.
All turn signals flash simultaneously when the hazard warning lights are
switched on. The turn signal lights
and the button warning light
will
also flash. The hazard warning lights also work when the ignition is switched
off.
WARNING
•
The risk of an accident increases if your vehicle breaks down. Always
use the hazard warning lights and a warning triangle to draw the attention
of other road users to your stationary vehicle.
•
Never park where the catalytic converter could come into contact with
inflammable materials under the vehicle, for example dry grass or spilt
petrol. This could start a fire!
Note
•
The battery will run down if the hazard warning lights are left on for a long
time - even if the ignition is switched off.
•
If the hazard warning lights are not working, you must use an alternative
method of drawing attention to your vehicle. This method must comply with
traffic legislation.
•
The use of the hazard warning lights described here is subject to the rele-
vant statutory requirements.
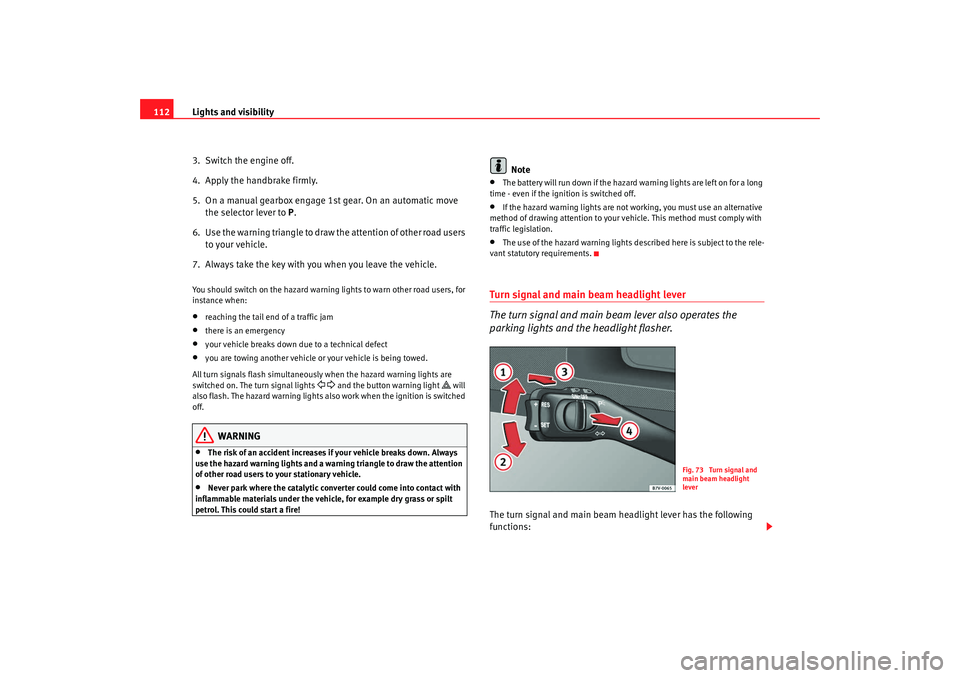
Turn signal and main beam headlight lever
The turn signal and main beam lever also operates the
parking lights and the headlight flasher.The turn signal and main beam headlight lever has the following
functions:
Fig. 73 Turn signal and
main beam headlight
lever
alhambra_aleman.book Seite 112 Montag, 23. M‰ rz 2009 1:12 13
Page 115 of 285
Lights and visibility113
Safety First
Operating instructions
Tips and Maintenance
Te c h n i c a l D a t a
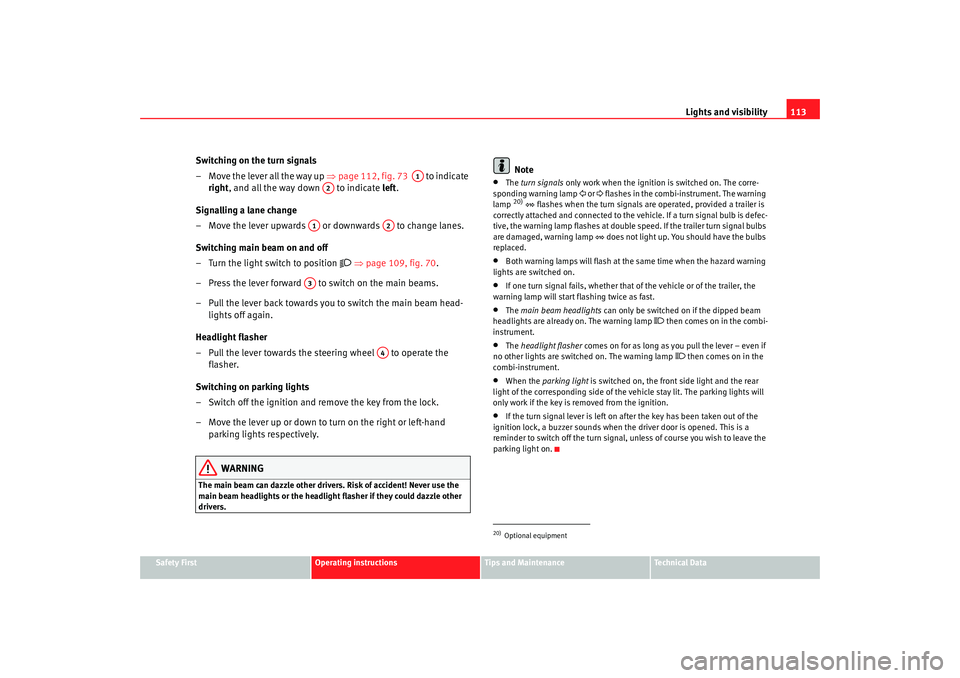
Switching on the turn signals
– Move the lever all the way up ⇒page 112, fig. 73 to indicate
right , and all the way down to indicate left .
Signalling a lane change
– Move the lever upwards or downwards to change lanes.
Switching main beam on and off
– Turn the light switch to position
⇒ page 109, fig. 70 .
– Press the lever forward to switch on the main beams.
– Pull the lever back towards you to switch the main beam head- lights off again.
Headlight flasher
– Pull the lever towards the steering wheel to operate the flasher.
Switching on parking lights
– Switch off the ignition and remove the key from the lock.
– Move the lever up or down to turn on the right or left-hand parking lights respectively.
WARNING
The main beam can dazzle other drivers. Risk of accident! Never use the
main beam headlights or the headlight flasher if they could dazzle other
drivers.
Note
•
The turn signals only work when the ignition is switched on. The corre-
sponding warning lamp or flashes in the combi-instrument. The warning
lamp 20) flashes when the turn signals are operated, provided a trailer is
correctly attached and connected to the vehicle. If a turn signal bulb is defec-
tive, the warning lamp flashes at dou ble speed. I f the trailer turn signal bulbs
are damaged, warning lamp does not light up. You should have the bulbs
replaced.
•
Both warning lamps will flash at the same time when the hazard warning
lights are switched on.
•
If one turn signal fails, whether that of the vehicle or of the trailer, the
warning lamp will start flashing twice as fast.
•
The main beam headlights can only be switched on if the dipped beam
headlights are already on. The warning lamp
then comes on in the combi-
instrument.
•
The headlight flasher comes on for as long as you pull the lever – even if
no other lights are switched on. The warning lamp
then comes on in the
combi-instrument.
•
When the parking light is switched on, the front side light and the rear
light of the corresponding side of the vehicle stay lit. The parking lights will
only work if the key is removed from the ignition.
•
If the turn signal lever is left on after the key has been taken out of the
ignition lock, a buzzer sounds when the driver door is opened. This is a
reminder to switch off the turn signal, unless of course you wish to leave the
parking light on.
A1
A2
A1
A2
A3
A4
20)Optional equipment
alhambra_aleman.book Seite 113 Montag, 23. M‰ rz 2009 1:12 13
Page 117 of 285
Lights and visibility115
Safety First
Operating instructions
Tips and Maintenance
Te c h n i c a l D a t a
Note
•
If not all the vehicle doors are closed, the interior lights will be switched
off after approx. 10 minutes, providing the key has been removed and the
courtesy light position selected. This prevents the battery discharging.
•
Reading lights function independently of the interior lights and must be
switched off manually to prevent the battery being drained when the engine
is switched off.
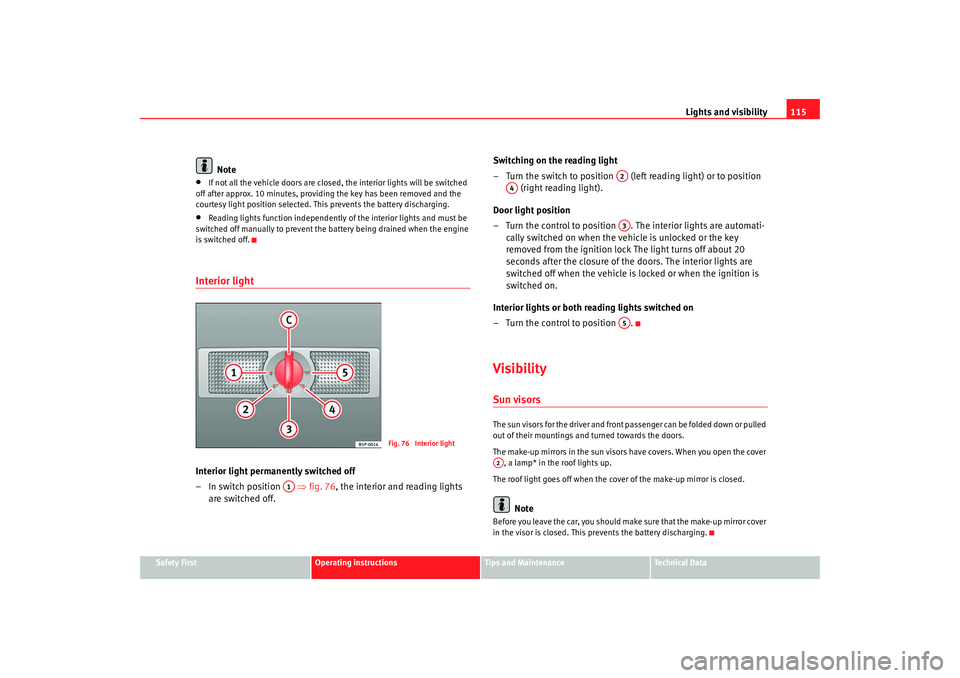
Interior light Interior light permanently switched off
–In switch position ⇒fig. 76 , the interior and reading lights
are switched off. Switching on the reading light
– Turn the switch to position (left reading light) or to position
(right reading light).
Door light position
– Turn the control to position . The interior lights are automati- cally switched on when the vehicle is unlocked or the key
removed from the ignition lock The light turns off about 20
seconds after the closure of the doors. The interior lights are
switched off when the vehicle is locked or when the ignition is
switched on.
Interior lights or both reading lights switched on
– Turn the control to position .
VisibilitySun visorsThe sun visors for the driver and front passenger can be folded down or pulled
out of their mountings and turned towards the doors.
The make-up mirrors in the sun visors have covers. When you open the cover , a lamp* in the roof lights up.
The roof light goes off when the cover of the make-up mirror is closed.
Note
Before you leave the car, you should make sure that the make-up mirror cover
in the visor is closed. This prevents the battery discharging.
Fig. 76 Interior light
A1
A2
A4
A3A5
A2
alhambra_aleman.book Seite 115 Montag, 23. M‰ rz 2009 1:12 13