technical data Seat Alhambra 2011 Owner's Manual
[x] Cancel search | Manufacturer: SEAT, Model Year: 2011, Model line: Alhambra, Model: Seat Alhambra 2011Pages: 385, PDF Size: 7.92 MB
Page 279 of 385
277
Checking and refilling levels WARNING (Continued)
● Nev er pour service fluids over the engine. These fluid may ignite hot
en gine p
arts and cause injuries.
● If it is necessary to work on the fuel system or the electrical system,
ple
ase follow the instructions below:
– Always disconnect the vehicle battery. When disconnecting the
batter
y, ensure that the vehicle is unlocked otherwise the antitheft
alarm will be triggered.
– Never work close to heaters, heat sources or places exposed to
flames
or sparks.
● Always keep a recently serviced and perfectly working fire extin-
guisher clo
se by. CAUTION
When refilling or changing service liquids, ensure that you put the liquids
into the right t
ank. Making a mistake when refilling could cause serious
malfunctions and damage the engine! For the sake of the environment
Service fluids leaks are harmful to the environment. For this reason you
shoul d m
ake regular checks on the ground underneath your vehicle. Take
the vehicle to a specialist workshop to be checked if you see stains, oil or
other fluids on the ground. Collect any spilt service fluids and allow a pro-
fessional to dispose of them.
Preparing the vehicle for work in the engine compartment Checklist
Carr
y
out the operations below in the order indicated before starting work in
the engine compartment ⇒ : ●
Park the vehicle on an even and solid surface.
● Pre
ss and hold the brake pedal until the vehicle comes to a standstill.
● Connect the electronic parking brake ⇒ page 183.
● Mo
ve the selector lever to its intermediate position or to P ⇒ page 174.
● St
op the engine and remove the key from the ignition ⇒ page 170.
● W
ait for the engine to cool down.
● Always keep children and other people far from the engine compart-
ment.
● Ens
ure that the vehicle can not move off unexpectedly. WARNING
Ignoring this checklist, drawn up for your own safety, could result in seri-
ous injur
y.
● Always complete the operations given in the checklist and observe
the genera
l rules of safety.
Safety First Operating instructions Practical tips Technical Data
Page 281 of 385
279
Checking and refilling levels CAUTION
● To avoid damage to the bonnet and to the windscreen wiper arms, only
open the bonnet when the w
indscreen wipers are in place against the wind-
screen.
● Before driving, always lower the wiper arms.
Engine oil Introduction Additional information and warnings:
●
⇒ Book l
et Maintenance Programme
● W
orking in the engine compartment ⇒ page 275
● A
ccessories, parts replacement, repairs and modifications ⇒ page 257WARNING
Incorrectly handling engine oil can cause injury and serious burns.
● Always protect your eyes when handling engine oil.
● Oil is toxic and must be kept out of the reach of children.
● Engine oil must only be kept closed in its original container. The same
app lie
s to use oil until it has been disposed of.
● Never store engine oil in empty food containers or bottles as other
people m
ay accidentally drink it.
● Regular contact with engine oil can be bad for the skin. If you come
into cont
act with engine oil, wash your skin with soap and water.
● With the engine running, the engine oil gets extremely hot and can
cause sev
ere skin burns. Always wait until the engine has fully cooled. For the sake of the environment
Similar to the other service liquids, spilled engine oil can be bad for the en-
vir onment
. Collect any spilt fluids in suitable containers and dispose of in
accordance with legislation and with the utmost respect for the environ-
ment.
Warning and control lamps lights up Possible cause Solution
Insufficient engine oil. Switch the engine off. Check the
engine oi
l
level ⇒ page 281. flashes Possible cause Solution
Engine oil pressure too low.
Stop the vehicle!
Sw it
ch off the engine. Check the
engine oil level.
- If the warning indicator flashes
although the oil level is correct,
do not continue driving or leave
the engine running. Otherwise,
the engine could be damaged.
You should obtain professional
assistance. Engine oil sensor faulty. Contact a specialist workshop.
Have the en
gine oi
l sensor
checked. Safety First Operating instructions Practical tips Technical Data
Page 283 of 385
281
Checking and refilling levels
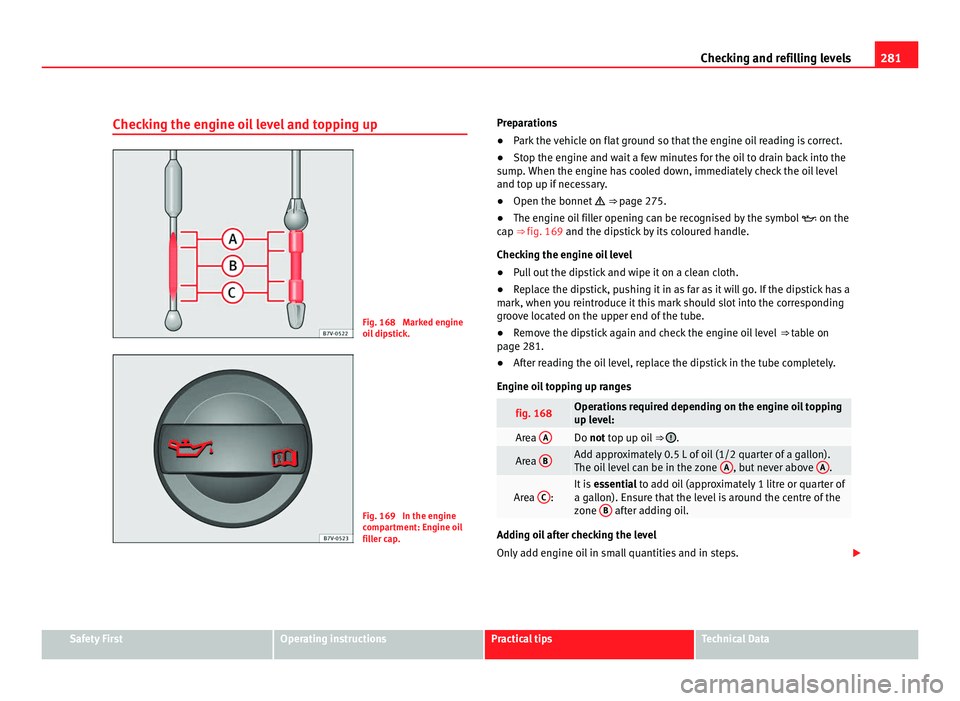
Checking the engine oil level and topping up Fig. 168 Marked engine
oil
dip
stick. Fig. 169 In the engine
comp
ar
tment: Engine oil
filler cap. Preparations
●
Park the vehicle on flat ground so that the engine oil reading is correct.
● Stop the engine and wait a few minutes for the oil to drain back into the
sump.
When the engine has cooled down, immediately check the oil level
and top up if necessary.
● Open the bonnet ⇒ p
age 275.
● The engine oil filler opening can be recognised by the symbol on the
cap ⇒
fig. 169 and the dipstick by its coloured handle.
Checking the engine oil level
● Pull out the dipstick and wipe it on a clean cloth.
● Replace the dipstick, pushing it in as far as it will go. If the dipstick has a
mark, when y
ou reintroduce it this mark should slot into the corresponding
groove located on the upper end of the tube.
● Remove the dipstick again and check the engine oil level ⇒ tabl
e on
page 281.
● After reading the oil level, replace the dipstick in the tube completely.
Engine oil
topping up ranges fig. 168 Operations required depending on the engine oil topping
up lev
el: Area
A Do not top up oil
⇒ .
Area
B Add approximately 0.5 L of oil (1/2 quarter of a gallon).
The oil
l
evel can be in the zone A , but never above
A .
Area
C : It is
essential to add oil (approximately 1 litre or quarter of
a g al
lon). Ensure that the level is around the centre of the
zone B after adding oil.
Adding oil after checking the level
Only
a
dd engine oil in small quantities and in steps. Safety First Operating instructions Practical tips Technical Data
Page 285 of 385
283
Checking and refilling levels
Engine oil additives make new oil darker after the engine has been running
for a shor t
period. This is normal and does not mean more frequent oil
changes are required. WARNING
If, in exceptional circumstances, you must change the engine oil yourself,
pl e
ase note the following:
● Wear eye protection.
● Always wait until the engine has completely cooled to avoid being
burned.
● Alw
ays keep your arms horizontal when unscrewing the oil drainage
bolt so th
at the oil does not run down your arms when it begins to drain.
● Use a suitable and large enough container to collect all of the used oil
in the engine.
● Never c
ollect engine oil in empty food containers, cans, bottles and
other container
s as not all people are able to identify engine oil.
● Oil is toxic and must be kept out of the reach of children. For the sake of the environment
Before changing the engine oil, find a suitable location or service for proper
dis po
sal. For the sake of the environment
Always dispose of engine oil with the utmost respect for the environment.
Never di s
pose of used engine oil in places such as a garden, woods, drains,
roads, paths, rivers and drainage systems. Engine coolant
Introduction Never work on the engine cooling system or if you are not familiar with the
operation
s
to be carried out, the applicable safety standards and especially
if you do not have the instruments, liquids and tools necessary ⇒ ! Have
the work c
arried out by a Technical Service if you are uncertain. SEAT recom-
mends visiting a Technical Service.
Negligent work can cause serious injury.
Additional information and warnings:
● Towing mode ⇒ page 233
● W
orking in the engine compartment ⇒ page 275
● A
ccessories, parts replacement, repairs and modifications ⇒ page 257 WARNING
Engine coolant is toxic!
● Only keep engine coolant in its original container, tightly shut and in
a saf e p
lace.
● Never store engine coolant in empty food containers or bottles as
other people m
ay accidentally drink it.
● Always keep engine coolant out of reach of children.
● Ensure that the proportion of engine coolant additive corresponds to
the lowe
st outside temperature to which the vehicle will be exposed.
● If the outside temperature is extremely low, the engine coolant could
freeze c
ausing the vehicle to stop. As this would also cause the heating
to stop working, passengers without sufficient clothing could freeze. Safety First Operating instructions Practical tips Technical Data
Page 287 of 385
285
Checking and refilling levels WARNING
If the warning lamps and messages are ignored, the vehicle may stall in
traffic, or m a
y cause accidents and severe injuries.
● Always observe any lit warning lamps and text messages.
● Never ignore the warning lamps or text messages.
● Stop the vehicle safely as soon as possible. CAUTION
Failure to heed the warning lamps and text messages when they appear
ma y
result in faults in the vehicle.
Engine coolant specifications The engine cooling system comes with a special mixture of water and at
le
a
st 40% G 12 plus-plus (TL-VW 774 G) or G 12 plus (TL-VW 774 F) engine
coolant additive. Both are easily recognisable because they are purple in
colour.
This mixture gives the necessary frost protection down to -25°C (-13°F) and
protects the alloy parts of the cooling system against corrosion. It also pre-
vents scaling and raises the boiling point of the coolant.
To protect the engine cooling system, the proportion of additive must al-
ways be at least 40%, even if frost protection is not required in countries
with a warm climate.
If greater frost protection is required in very cold climates, the proportion of
additive can be increased. However, the percentage of additive should not
exceed 60 %, as this would reduce the frost protection and, in turn, de-
crease the cooling capacity. When adding coolant, a mixture of
disti
lled water and at least 40 % of the
additive G 12 plus-plus must be use to ensure optimum rust protection
⇒ .
WARNING
In the event of insufficient antifreeze protection in the engine cooling
sys t
em, the engine could be damaged and severe injuries caused.
● Ensure that the proportion of engine coolant additive corresponds to
the lowe
st outside temperature to which the vehicle will be exposed.
● If the outside temperature is extremely low, the engine coolant could
freeze c
ausing the vehicle to stop. As this would also cause the heating
to stop working, passengers without sufficient clothing could freeze. CAUTION
Never mix genuine additives with other additives that are not approved by
SEA T
. Otherwise, you run the risk of causing severe damage to the engine
and the engine cooling system.
● The engine coolant G 12 plus-plus can be mixed with G 12 plus and
G 11.
● If the fluid in the expansion reservoir is not purple but, for example,
brown, thi
s means that you have mixed G 12 plus-plus or G 12 plus with an-
other coolant. The coolant must be changed as soon as possible if this is
the case! Failure to observe this point will result in serious malfunctions and
engine damage! For the sake of the environment
Coolants and additives can contaminate the environment. Collect any spilt
fluids in s
uitable containers and dispose of in accordance with legislation
and with the utmost respect for the environment. Safety First Operating instructions Practical tips Technical Data
Page 289 of 385
287
Checking and refilling levels WARNING
Hot vapours and coolant can cause serious burns.
● Never open the coolant expansion tank if steam or coolant is coming
from the en gine c
ompartment. Wait until you cannot see or hear any
steam or coolant escaping.
● Always wait until the engine has completely cooled before very care-
ful
ly opening the expansion tank cap. Contact with hot elements of the
engine can cause skin burns.
● Once the engine has cooled, follow the instructions below before
opening the bonnet:
–Turn on the el
ectronic parking brake and place the gear selector
lever in P or the g
ear stick in neutral.
– Remove the key from the ignition.
– Keep children away from the engine compartment and never leave
them uns
upervised.
● When the engine is warm or hot, the cooling system is pressurised!
Do not un
screw the cap on the expansion tank when the engine is hot.
Otherwise, coolant may spray out under pressure causing burns and seri-
ous injury.
–Carefully and slowly unscrew the cap anticlockwise, gently press-
ing down on it
.
– Always protect your face, hands and arms from hot coolant and
ste
am using a large, thick cloth.
● When refilling liquids, avoid spilling them on parts of the engine and
the exhau
st system. Spilled liquids could cause a fire. Under specific cir-
cumstances, the ethylene glycol can catch fire. CAUTION
● Top up with distilled water only. Any other type of water may lead to con-
s ider
able rusting in the engine due to its chemical components. This could
consequently damage the engine. If you have not used distilled water but
another type of water to top up the coolant, a specialist workshop must im-
mediately replace all of the fluid in the engine cooling system.
● Only top up coolant to the top level of the marked area ⇒ fig. 171. Other-
wi
se the excess coolant will be forced out of the cooling system when the
engine is hot, causing damage.
● If a lot of liquid coolant has been lost, wait for the engine to cool do
wn
completely before adding coolant. Extensive coolant loss is an indication of
leaks in the engine cooling system. Have the engine cooling system inspec-
ted immediately by a Technical Service. Otherwise you may damage the en-
gine.
● When refilling or changing service liquids, ensure that you put the liq-
uids int
o the right tank. Making a mistake when refilling could cause seri-
ous malfunctions and damage the engine! Safety First Operating instructions Practical tips Technical Data
Page 291 of 385
289
Checking and refilling levels CAUTION
● Never disconnect the battery if the ignition is switched on or if the en-
gine i s
running. This could damage the electrical system or electronic com-
ponents.
● Do not expose the battery to direct sunlight over a long period of time,
as the int
ense ultraviolet radiation can damage the battery housing.
● If the car is left standing for long periods, protect the battery from ex-
treme co
ld temperature so that it does not “freeze up” and become dam-
aged.
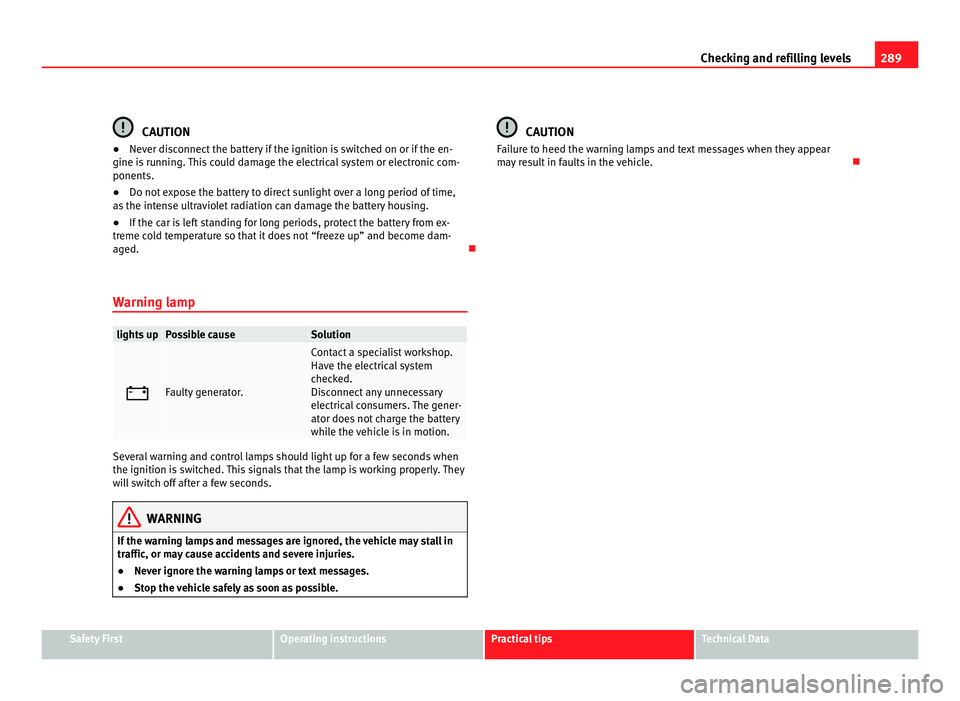
Warning lamp lights up Possible cause Solution
Faulty generator. Contact a specialist workshop.
Have the el
ectric
al system
checked.
Disconnect any unnecessary
electrical consumers. The gener-
ator does not charge the battery
while the vehicle is in motion. Several warning and control lamps should light up for a few seconds when
the ignition is
sw
itched. This signals that the lamp is working properly. They
will switch off after a few seconds. WARNING
If the warning lamps and messages are ignored, the vehicle may stall in
traffic, or m a
y cause accidents and severe injuries.
● Never ignore the warning lamps or text messages.
● Stop the vehicle safely as soon as possible. CAUTION
Failure to heed the warning lamps and text messages when they appear
ma y
result in faults in the vehicle. Safety First Operating instructions Practical tips Technical Data
Page 293 of 385
291
Checking and refilling levels WARNING (Continued)
● Battery acid is very corrosive and caustic. It can burn skin and cause
b lindne
ss. When handling the battery, protect yourself from splashes of
acids, above all your hands, arms and face.
● Never tilt the vehicle battery. Battery acid could spill out of the open-
ings
to release gases and cause corrosion damage.
● Never open the vehicle battery.
● If battery acid splashes on you, immediately rinse your eyes and skin
abund
antly with water for several minutes. Then seek medical care imme-
diately.
● If acid is swallowed by mistake, consult a doctor immediately.
Charging, replacing and connecting or disconnecting the
batt er
y Charging the battery
The v
ehic
le battery should be charged by a specialist workshop only, as bat-
teries using special technology have been installed and they must be charg-
ed in a controlled environment ⇒ . SEAT recommends visiting a Technical
Serv ic
e.
Replacing a vehicle battery
The battery has been developed to suit the conditions of its location and
has special safety features. If the battery must be replaced, consult a quali-
fied SEAT workshop for information on electromagnetic compatibility, the
size and maintenance, performance and safety requirements of the new bat-
tery in your vehicle before you purchase one. SEAT recommends you have
the battery replaced by a qualified SEAT workshop.
Use only maintenance-free genuine batteries conforming to TL 825 06 and
VW 7 50 73 Standards. These standards must be dated April 2008 or later. Start-Stop systems (
⇒ page 196) ar
e equipped with a special battery. There-
fore, it must only be replaced with a battery of the same specifications.
Disconnecting the vehicle's battery
If you must disconnect the battery from the electrical system, please note
the following:
● Switch off the ignition and all electrical equipment.
● The vehicle must be unlocked before disconnecting the battery, other-
wise the al
arm will be triggered.
● First disconnect the negative cable and then the positive ⇒ .
Connectin g the
vehicle's battery
● Before reconnecting the battery, switch off the engine, the ignition and
electric dev
ices.
● First reconnect the positive cable and then the negative ⇒ .
Differ ent
control lamps may light up after connecting the battery and switch-
ing the ignition on. They will be turned off after a short trip at a speed of
between 15 - 20 km/h (10 - 12 mph). If the warning indicators remain lit,
please visit a specialised workshop to have the vehicle checked.
If the battery has been disconnected for a long time, it is possible that the
next service date is not displayed or calculated correctly ⇒ page 57. Respect
the maximum service intervals permitted ⇒ Booklet Maintenance Pro-
gramme.
Automatic consumer disconnection
The intelligent vehicle electrical system automatically implements a range
of measures to prevent the battery from discharging when high demands
are made on it: Safety First Operating instructions Practical tips Technical Data
Page 295 of 385
293
Wheels and tyres
Wheels and tyres
Wheels
Introduction The SEAT Alhambra is equipped as standard with anti-puncture technology
tyr
e
s (Conti-Seal). In the event of a puncture or air leak of up to 5 mm, the
tyre seals the hole with a protective layer inside the tread.
SEAT recommend that all work on tyres and wheels is carried out by a Tech-
nical Service. They have the necessary special tools and replacement parts,
trained personnel and facilities for disposing of the old tyres. SEAT recom-
mends visiting a Technical Service.
Additional information and warnings:
● Transporting ⇒ page 13
● T
owing mode ⇒ page 233
● Br
aking, stopping and parking ⇒ page 183
● P
ark assist system ⇒ page 202
● T
yre control systems ⇒ page 221
● C
aring for and cleaning the vehicle exterior ⇒ page 242
● Wheel
trims ⇒ page 304
● Ch
ange wheel ⇒ page 305
● Not
es for the user ⇒ page 255 WARNING
The vehicle cannot be totally controlled or braked if the tyres (new or
used) ar e w
orn or damaged.
● Incorrect use of wheels and tyres could make driving more dangerous
and res
ult in serious accidents and damage.
● All four wheels must be fitted with radial tyres of the same type, size
(rol
ling circumference) and the same tread pattern.
● New tyres do not give maximum grip and will not have reached their
maximum br
aking capacity to start with, and therefore need running in.
To prevent accidents and major damage, extreme caution should be tak-
en for the first 600 km (370 miles).
● Check tyre pressures regularly and ensure they are maintained at the
pres
sures indicated. If the tyre pressure is too low, the tyres could over-
heat, resulting in tread detachment or even burst tyres.
● Never drive on damaged (punctured, cut, cracked or dented) or worn
tyre
s. Driving on damaged or worn tyres could result in burst tyres, seri-
ous accidents or damage. Worn or damaged tyres must be replaced im-
mediately.
● Never exceed the maximum permitted speed or loads specified for the
type of ty
re fitted on your vehicle.
● The efficiency of driver and brake assist systems also depends on the
grip of the tyr
es.
● If you notice unusual vibration or if the vehicle pulls to one side when
driving, s
top the car immediately and check the tyres and wheels for
damage.
● To minimise the risk of losing control of the vehicle or causing a seri-
ous ac
cident, never undo the bolted joints of beadlock wheels. Safety First Operating instructions Practical tips Technical Data
Page 297 of 385
295
Wheels and tyres
● Replace damaged or worn tyres as soon as possible ⇒ p age 299.
● Regularly check tyres for non-visible damage ⇒ page 299.
● Nev
er exceed the maximum permitted speed or loads specified for the
type of tyr
e fitted on your vehicle ⇒ page 302.
● Do not allow tyres to come into contact with aggressive substances,
grea
se, oil, fuel or brake fluid ⇒ .
● Lost valve caps should be replaced immediately.
Ty r
es with directional tread pattern
Tyres with directional tread pattern have been designed to operate best
when rotating in only one direction. An arrow on the tyre sidewall indicates
the direction of rotation on tyres with directional tread ⇒ page 302. Always
observe the direction of rotation indicated when mounting the wheel. This
guarantees optimum grip and helps to avoid aquaplaning, excessive noise
and wear.
If the tyre is mounted in the opposite direction of rotation, drive with ex-
treme caution, as the tyre is no longer being used correctly. This is of partic-
ular importance when the road surface is wet. Change the tyre as soon as
possible or remount it with the correct direction of rotation.
Interchanging tyres
To ensure that the wear is equal on all tyres the wheels should be changed
round from time to time according to the system ⇒ fig. 175. All the tyres will
then last for about the same time.
SEAT recommends you take the vehicle to a Technical Service to have the
tyres changed.
Tyres that are over 6 years old
Tyres are subject to an ageing process as a result of physical and chemical
processes. This may affect their performance. Tyres which are stored for
long periods of time without being used, harden and become more fragile
than tyres which are in constant use.
SEAT recommends that tyres over six years old are replaced with new tyres.
This also applies to tyres which appear to be in perfect condition on the out- side and which have a tread depth within the values stipulated by the Law
⇒ .
The dat e of
manufacture, part of the tyre identification number (TIN), indi-
cates the age of the tyre ⇒ page 302.
Storing tyres
Mark tyres when you remove them to indicate the direction of rotation (left,
right, forwards, backwards). This ensures you will be able to mount them
correctly when you replace them. When removed, the wheels and/or tyres
should be stored in a cool, dry and preferably dark location. Do not place
tyres mounted on the wheel in a vertical position.
Protect tyres not mounted on wheels from dirt by storing them in suitable
bags and standing them on the ground on their tread. WARNING
Aggressive fluids or substances could result in visible or invisible dam-
age w ith the c
onsequent risks.
● Always ensure that tyres do not come into contact with chemical
products, oi
l, grease, fuel, brake fluid or other aggressive substances. WARNING
Old tyres, even if they have never been used, may lose air or burst unex-
pectedly whi
le driving, resulting in serious accident or damage.
● If tyres are over six years old, they should only be used in an emer-
gency and w
ith extreme caution. For the sake of the environment
Old tyres must be disposed of by qualified personnel according to the laws
in the cou ntr
y concerned. Safety First Operating instructions Practical tips Technical Data