auxiliary battery Seat Alhambra 2011 Owner's Manual
[x] Cancel search | Manufacturer: SEAT, Model Year: 2011, Model line: Alhambra, Model: Seat Alhambra 2011Pages: 385, PDF Size: 7.92 MB
Page 5 of 385
Table of Contents
Manual structure
. . . . . . . . . . . . . . . . . . . . 5
Content . . . . . . . . . . . . . . . . . . . . . . . . . . . . . . . . 6
Safety First . . . . . . . . . . . . . . . . . . . . . . . . . . . . 7
Safe driving . . . . . . . . . . . . . . . . . . . . . . . . . . . . . . . 7
Dear SEAT Driver . . . . . . . . . . . . . . . . . . . . . . . . . . 7
Tips for driving . . . . . . . . . . . . . . . . . . . . . . . . . . . 7
Adjusting the seat position . . . . . . . . . . . . . . . . . 10
Transporting objects . . . . . . . . . . . . . . . . . . . . . . . 13
Seat belts . . . . . . . . . . . . . . . . . . . . . . . . . . . . . . . . . 16
Brief introduction . . . . . . . . . . . . . . . . . . . . . . . . . 16
Why wear seat belts? . . . . . . . . . . . . . . . . . . . . . . 19
Seat belts . . . . . . . . . . . . . . . . . . . . . . . . . . . . . . . 21
Seat belt tensioners . . . . . . . . . . . . . . . . . . . . . . . 26
Airbag system . . . . . . . . . . . . . . . . . . . . . . . . . . . . . 28
Brief introduction . . . . . . . . . . . . . . . . . . . . . . . . . 28
Airbag system . . . . . . . . . . . . . . . . . . . . . . . . . . . . 31
Child safety . . . . . . . . . . . . . . . . . . . . . . . . . . . . . . . 39
Child seats (accessories) . . . . . . . . . . . . . . . . . . . 39
Integrated child seat . . . . . . . . . . . . . . . . . . . . . . . 46
Operating instructions . . . . . . . . . . . . . 53
Cockpit . . . . . . . . . . . . . . . . . . . . . . . . . . . . . . . . . . . 53
Overview . . . . . . . . . . . . . . . . . . . . . . . . . . . . . . . . 53
Instrument panel . . . . . . . . . . . . . . . . . . . . . . . . . . 54
Instruments . . . . . . . . . . . . . . . . . . . . . . . . . . . . . . 57
SEAT information system . . . . . . . . . . . . . . . . . . . 62 Unlocking and locking
. . . . . . . . . . . . . . . . . . . . . 71
Vehicle key set . . . . . . . . . . . . . . . . . . . . . . . . . . . 71
Central locking and locking system . . . . . . . . . . . 74
Doors . . . . . . . . . . . . . . . . . . . . . . . . . . . . . . . . . . . 80
Sliding doors . . . . . . . . . . . . . . . . . . . . . . . . . . . . . 81
Tailgate . . . . . . . . . . . . . . . . . . . . . . . . . . . . . . . . . 84
Electric windows . . . . . . . . . . . . . . . . . . . . . . . . . . 89
Panorama sliding sunroof* . . . . . . . . . . . . . . . . . 92
Lights and visibility . . . . . . . . . . . . . . . . . . . . . . . . 95
Lights . . . . . . . . . . . . . . . . . . . . . . . . . . . . . . . . . . . 95
Sun blind . . . . . . . . . . . . . . . . . . . . . . . . . . . . . . . . 103
Windscreen wiper and washer . . . . . . . . . . . . . . . 105
Rear vision mirror . . . . . . . . . . . . . . . . . . . . . . . . . 110
Seats and storage compartments . . . . . . . . . . 114
Seat adjustment . . . . . . . . . . . . . . . . . . . . . . . . . . 114
Seat functions . . . . . . . . . . . . . . . . . . . . . . . . . . . . 117
Head restraints . . . . . . . . . . . . . . . . . . . . . . . . . . . 123
Centre armrest . . . . . . . . . . . . . . . . . . . . . . . . . . . . 125
Loading luggage compartment . . . . . . . . . . . . . . 125
Roof carrier system* . . . . . . . . . . . . . . . . . . . . . . . 138
Storage compartments . . . . . . . . . . . . . . . . . . . . . 141
Cup holders . . . . . . . . . . . . . . . . . . . . . . . . . . . . . . 148
Ashtray and cigarette lighter* . . . . . . . . . . . . . . . 150
Sockets . . . . . . . . . . . . . . . . . . . . . . . . . . . . . . . . . 151
Heating, Ventilation and Air conditioning . . . 155
Climate Control . . . . . . . . . . . . . . . . . . . . . . . . . . . 155
Auxiliary heater* (additional heater) . . . . . . . . . . 163
Driving . . . . . . . . . . . . . . . . . . . . . . . . . . . . . . . . . . . . 167
Steering . . . . . . . . . . . . . . . . . . . . . . . . . . . . . . . . . 167
Stopping and starting the engine . . . . . . . . . . . . 170
Changing gear . . . . . . . . . . . . . . . . . . . . . . . . . . . . 174
Braking, stopping and parking . . . . . . . . . . . . . . 183
Start assist systems . . . . . . . . . . . . . . . . . . . . . . . 194
Parking sensor system* . . . . . . . . . . . . . . . . . . . . 198 Park Assist system* . . . . . . . . . . . . . . . . . . . . . . . 202
Rear Assist system* . . . . . . . . . . . . . . . . . . . . . . . 207
Cruise control system* . . . . . . . . . . . . . . . . . . . . . 212
Lane Assist system* . . . . . . . . . . . . . . . . . . . . . . . 215
Sign Assist* . . . . . . . . . . . . . . . . . . . . . . . . . . . . . . 218
Tyre monitoring systems . . . . . . . . . . . . . . . . . . . . 221
Practical tips . . . . . . . . . . . . . . . . . . . . . . . . . . 225
Driving and the environment . . . . . . . . . . . . . . . 225
Running-in . . . . . . . . . . . . . . . . . . . . . . . . . . . . . . . 225
Ecological driving . . . . . . . . . . . . . . . . . . . . . . . . . 225
Engine management and exhaust gas
purific ation sy
stem . . . . . . . . . . . . . . . . . . . . . . . . 228
Trailer towing . . . . . . . . . . . . . . . . . . . . . . . . . . . . . . 231
Introduction . . . . . . . . . . . . . . . . . . . . . . . . . . . . . . 231
Driving with a trailer . . . . . . . . . . . . . . . . . . . . . . . 233
Vehicle maintenance and cleaning . . . . . . . . . 242
Care and cleaning the vehicle exterior . . . . . . . . 242
Caring for and cleaning the vehicle interior . . . . 249
Notes for the user . . . . . . . . . . . . . . . . . . . . . . . . . 255
Accessories, parts replacement and
modifications . . . . . . . . . . . . . . . . . . . . . . . . . . . . .
257
Accessories, replacement of parts and
modifications
. . . . . . . . . . . . . . . . . . . . . . . . . . . . 257
Checking and refilling levels . . . . . . . . . . . . . . . 264
Filling the tank . . . . . . . . . . . . . . . . . . . . . . . . . . . . 264
Fuel . . . . . . . . . . . . . . . . . . . . . . . . . . . . . . . . . . . . 267
Selective Catalytic Reduction* (AdBlue) . . . . . . . 271
Working in the engine compartment . . . . . . . . . . 275
Engine oil . . . . . . . . . . . . . . . . . . . . . . . . . . . . . . . . 279
Engine coolant . . . . . . . . . . . . . . . . . . . . . . . . . . . 283
Vehicle battery . . . . . . . . . . . . . . . . . . . . . . . . . . . 288 3
Table of Contents
Page 64 of 385
62
Cockpit
The service interval display is reset
If the ser v
ice was not carried out by a Technical Service, the display can be
reset as follows: In vehicles with text messages:
Select the
Settings
menu.In the submenu Serv
ic
e, select the option Reset.Confirm with
OK when requested to do so by the system.
In vehicles without text messages:
Switch the ignition off.
Press and hold the
0.0 / S
ET button.
Switch the ignition back on.
Release the
0.0 / S
ET button and, press
for the next 20 seconds.
Do not reset the indicator to zero between two intervals, otherwise the dis-
p l
ay will be incorrect.
If, while the LongLife service is valid, the service interval display is reset to
zero, the “service will be activated by time or mileage”. The service interval
is no longer calculated individually ⇒ Booklet Maintenance Programme.Note
● The service message disappears after a few seconds, when the engine is
s t
arted or when OK is pressed.
● In vehicles with the LongLife system in which the battery has been dis-
connect ed f
or a long period of time, it is not possible to calculate the date
of the next service. Therefore the service interval display may not be correct.
In this case, please check the maximum permitted service intervals ⇒ Book-
let Maintenance Programme. SEAT information system
Introduction With the ignition switched on, it is possible to read the different functions of
the dis
p
lay by scrolling through the menus.
In vehicles with a multifunction steering wheel, there are no buttons on the
windscreen wiper lever. The multifunction display can only be controlled
from the buttons on the multifunction steering wheel.
The number of menus displayed on the instrument panel will vary according
to the vehicle electronics and equipment.
A specialised dealer will be able to programme or modify additional func-
tions, according to the vehicle equipment. SEAT recommends visiting a
Technical Service.
Some menu options can only be read when the vehicle is at a standstill.
As long as a priority 1 warning is displayed, it will not be possible to read
the menus. To display the menus, confirm the warning by pressing OK .
Addition a
l information and warnings:
● Exterior mirrors ⇒ pag
e 110
● Auxiliary heating ⇒ pag
e 163 WARNING
Any distraction may lead to an accident, with the risk of injury.
● Do not read the instrument panel menus when driving.
Page 160 of 385
158
Heating, Ventilation and Air conditioning
Some Climatronic controls may also be on the climate control system con-
tro l
panel located in the rear centre console. These controls are used to
make the appropriate settings for the rear seats. Control
butt on Additional information. Climatic
⇒ fig. 121; Climatr
onic
⇒ fig. 122. 1
Tem-
perat ur
e
... Climatic: rotate the control to adjust the temperature accord-
in
gly
.
Climatronic: the settings for the left hand side, the right-hand
side and the rear seats are made separately. Rotate the con-
trol to adjust the temperature accordingly. The temperature is
indicated on the outside ring. 2
Fan
... Climatic: setting 0, f
an and C
limatic switched off;
setting 4, fan set to maximum.
Climatronic: the Fan speed is automatically adjusted depend-
ing on the vehicle speed to avoid annoying noises. The fan
can also be adjusted manually. 3
Air dis-
tribution Climatic: rotate the continuous control to direct the airflow to
the de
s
ired area.
Climatronic: manually adjustable using the controls. Climatic: defro
s
t function. The airflow is directed at the wind-
screen. In this position, air recirculation is automatically
switched off or is not switched on. Climatronic: defro
s
t function. The air drawn in from outside
the vehicle is directed at the windscreen and air recirculation
is automatically switched off. To defrost the windscreen more
quickly, the air is dehumidified at temperatures over approxi-
mately +1.5°C (+35°F) and the fan runs at maximum output. The air is directed at the chest of driver and passengers by the
da
shbo
ard air vents. – Air distribution towards the footwell.
Air distribution towards the windscreen and the footwell.
AC Climatic, Climatronic: Pre
s
s the button to turn off/on cooling. Control
butt on Additional information. Climatic
⇒ fig. 121; Climatr
onic
⇒ fig. 122. Heated rear window: this only works when the engine is run-
ning and sw
it
ches off automatically after a maximum of 10 mi-
nutes. Air recirculation mode ⇒ pag
e 161. Climatronic: Autom
atic
air recirculation ⇒ page 161. Windscreen heating: only works when the engine is running
and swit
c
hes off automatically after a few minutes. Instant auxiliary heating on/off button
⇒ page 163. Switching
off
OFF Climatic: turn the fan switch to setting 0.
C
lim
atronic: press the OFF button or set the fan manually to
0. When the sy s
tem switches off, the OFF button will light up.
REAR Climatronic: pre
s
s the REAR button to adjust the climate con-
tro l
for the rear seats from the front. The REAR button will light
up when the fu nction i
s switched on. The settings for the rear
seats will be displayed. Press the button again to switch the
function off or do not touch any other button for around 10
seconds. REST Climatronic: pre
s
s the button REST to use residual heat. When
the engine i s
still warm but the ignition switched off, the heat
given off by the engine can be used to keep the passenger
compartment warm. The REST button will light up when the
fu nction i
s switched on. The function will switch off after
around 30 minutes and if the battery level is low.
Page 165 of 385
163
Heating, Ventilation and Air conditioning
Auxiliary heater* (additional heater) Introduction The auxiliary heater is powered by fuel from the vehicle's fuel tank and can
be used whi
l
e the vehicle is in motion and at a standstill. Select the mode
required (heat or fan) ⇒ page 165 on the instrument panel.
In winter, the auxiliary heater can be used in heat mode before switching on
the ignition to remove any ice, mist or snow from the windscreen (thin lay-
ers only).
Additional information and warnings:
● SEAT information system ⇒ pag
e 62
● Refuelling ⇒ pag
e 264 WARNING
The auxiliary heater fumes contain carbon dioxide, an odourless and col-
ourle s
s toxic gas. Carbon monoxide can cause people to lose conscious-
ness. It can also cause death.
● Never switch on the auxiliary heater or leave it running in places that
are enclo
sed or unventilated.
● Never program the independent heating system to be activated and
operated in c
losed, unventilated areas. WARNING
The components of the auxiliary heater exhaust system heat up a great
dea l
. This could cause a fire.
● Always park your vehicle so that no part of the exhaust system can
come in cont
act with flammable materials (such as dried grass). CAUTION
Never place food, medicines or other heat-sensitive objects close to the air
vents. F ood, medic
ines and other heat-sensitive objects may be damaged
or made unsuitable for use by the air coming from the air vents.
Switching the auxiliary heater on and off Switching the auxiliary heater on:
Manually using the instant on/off button. ⇒ page 157
ON
Manually using the remote control. ⇒ page 164
Automatically at the programmed and enabled on
time. ⇒ page 165
Switching the auxiliary heater off:
Manually using the instant on/off button for the
clim
at
e control system. ⇒ page 157
OFF
Manually using the remote control. ⇒ page 164
Automatically after the programmed time. ⇒ page 165
Automatically when the light comes on
(fuel r
e-
serve). ⇒ page 264
Automatically when the battery power drops to a
ver
y
low level. ⇒ page 288
Things to note
Aft
er sw
itching the auxiliary heater off, it continues to run for a short period
to completely burn any fuel remaining in the auxiliary heater. The exhaust
fumes are also extracted from the system. Safety First Operating instructions Practical tips Technical Data
Page 166 of 385
164
Heating, Ventilation and Air conditioning
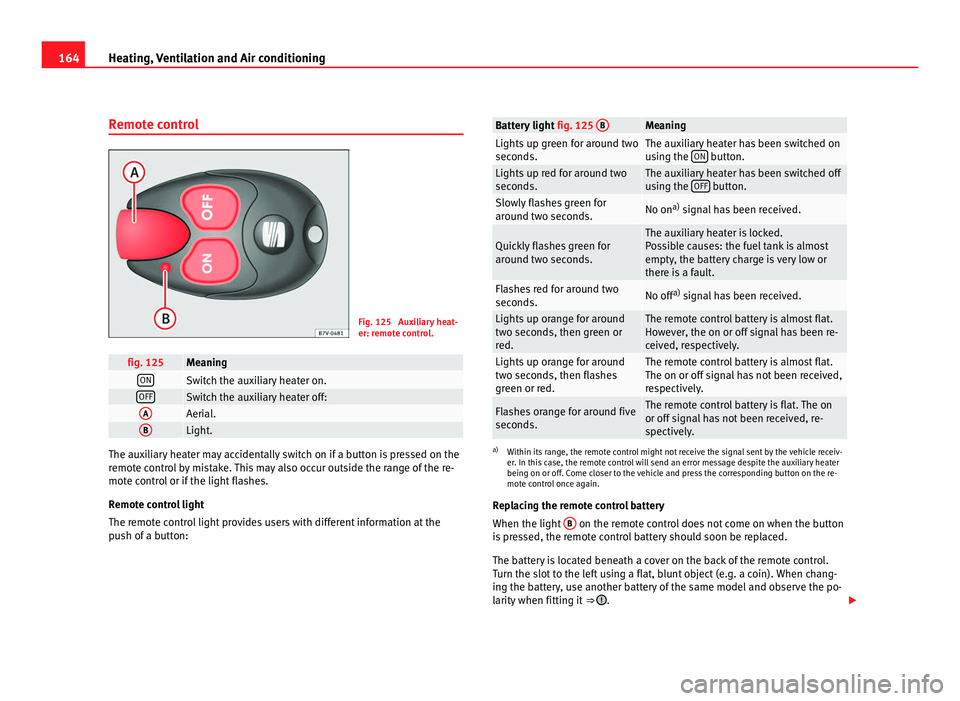
Remote control Fig. 125 Auxiliary heat-
er: remot
e c
ontrol. fig. 125 Meaning
ON
Switch the auxiliary heater on.
OFF
Switch the auxiliary heater off:
A
Aerial.
B
Light.
The auxiliary heater may accidentally switch on if a button is pressed on the
remot
e c
ontrol by mistake. This may also occur outside the range of the re-
mote control or if the light flashes.
Remote control light
The remote control light provides users with different information at the
push of a button: Battery light
fig. 125 B Meaning
Lights up green for around two
second
s. The auxiliary heater has been switched on
us
in
g the ON button.
Lights up red for around two
second
s. The auxiliary heater has been switched off
us
in
g the OFF button.
Slowly flashes green for
arou
nd tw
o seconds. No on
a)
signal has been received. Quickly flashes green for
arou
nd tw
o seconds. The auxiliary heater is locked.
Po
s
sible causes: the fuel tank is almost
empty, the battery charge is very low or
there is a fault. Flashes red for around two
second
s. No off
a)
signal has been received. Lights up orange for around
two sec
ond
s, then green or
red. The remote control battery is almost flat.
How
ev
er, the on or off signal has been re-
ceived, respectively. Lights up orange for around
two sec
ond
s, then flashes
green or red. The remote control battery is almost flat.
The on or off s
ign
al has not been received,
respectively. Flashes orange for around five
second
s. The remote control battery is flat. The on
or off s
ign
al has not been received, re-
spectively. a)
Within its range, the remote control might not receive the signal sent by the vehicle receiv-
er. In thi s
case, the remote control will send an error message despite the auxiliary heater
being on or off. Come closer to the vehicle and press the corresponding button on the re-
mote control once again.
Replacing the remote control battery
When the light B on the remote control does not come on when the button
is pr
essed, the remote control battery should soon be replaced.
The battery is located beneath a cover on the back of the remote control.
Turn the slot to the left using a flat, blunt object (e.g. a coin). When chang-
ing the battery, use another battery of the same model and observe the po-
larity when fitting it ⇒ .
Page 167 of 385
165
Heating, Ventilation and Air conditioning
Range
The rec eiv
er is in the interior of the vehicle. The remote control, when fitted
with new batteries, has a range of several hundred metres. Obstacles be-
tween the remote control and the vehicle, bad weather conditions and dis-
charged batteries can considerably reduce the range of the remote control.
An optimum range is obtained by keeping the remote control vertical, with
the aerial A pointing upwards. When doing so, do not cover the aerial with
your fin g
ers or with the palm of your hand.
There must be a minimum distance of two metres between the remote con-
trol and the vehicle. CAUTION
● The radiofrequency remote control contains electronic components.
Ther ef
ore, avoid getting the remote control wet and from being knocked
and protect it from direct sunlight.
● Use of inappropriate batteries may damage the remote control. For this
rea
son, always replace the dead battery with another of the same voltage,
size and specifications. For the sake of the environment
● Please dispose of old batteries so that they do not harm the environ-
ment .
● The r
emote control battery may contain perchlorate. Observe the legal
requirements
for their disposal.
Programming the auxiliary heater The heater or ventilation inside the vehicle can be programmed for a certain
period. Before programming, check that the day is correctly set in the
Auxi
liary heat-
er - day of the week menu ⇒ .
Enab lin
g the Auxiliary heater menu on the instrument panel
● From the main menu, select the Auxili
ary heater submenu and press the
OK button on the windscreen wiper lever.
● ALTERNATIVELY: pre s
s the or
arrow buttons on the multi-function
st eerin
g wheel until the Auxiliary heater menu is displayed. Menu options Description
Switching on
Swit
c
hing off The auxiliary heater can be set to come on automati-
cal
ly
if required. To do so, select a timer:
– The timer is displayed marked with a .
– Only one timer can be selected. If a timer has been
selected, Prog. ON will be displayed on the screen. If
no timer has been selected, the instrument panel
screen will display Prog. OFF.
– To modify the programmed timer, select another tim-
er or select the Off option. Timer 1
Timer 2
Timer 3 Three different timers (hh.mm) can later be selected
us
in
g the On option. If the auxiliary heater is to be
switched on for just a certain day of the week, select
the day of the week and the time for the auxiliary heat-
er to come on. Duration The operating time may vary between 10 and 60 mi-
nute
s
and can be set to 5-minute intervals. Operating mode Set to heat or ventilate the vehicle interior when the
auxi
li
ary heater is switched on. Day Set the current day of the week.
Manufacturer's
setting
s The predefined factory values for the functions of this
menu are r
e
stored. Back This returns to the main menu
Safety First Operating instructions Practical tips Technical Data
Page 168 of 385
166
Heating, Ventilation and Air conditioning
Checking programming
If the timer h
as been switched on after switching the ignition off, the instant
on button will remain lit for around ten seconds.
WARNING
Never program the independent heating system to be activated and oper-
ated in c lo
sed, unventilated areas. The auxiliary heater fumes contain
carbon dioxide, an odourless and colourless toxic gas. Carbon monoxide
can cause people to lose consciousness. It can also cause death.
Operating instructions The auxiliary heater exhaust system located below the vehicle must be kept
cl
e
ar of snow, mud and other objects. The exhaust fumes must not be ob-
structed in any way. The exhaust fumes generated by the auxiliary heater
are removed via an exhaust pipe fitted underneath the vehicle.
On heating the vehicle interior, depending on the outside temperature the
warm air is first directed at the windscreen and then to the rest of the pas-
senger compartment through the air vents. If the air vents are turned to-
wards the windows, for example, the form of air distribution may be affec-
ted.
Depending on the outside temperature, the temperature at which the auxili-
ary heater warms the vehicle interior may be somewhat higher if the heating
or climate control temperature control is set to maximum before switching
the heating on.
Depending on the engine, vehicles with auxiliary heater may be fitted with a
second battery in the luggage compartment that is responsible for powering
the auxiliary heater. Cases in which the auxiliary heater will not switch on
●
The auxiliary heater requires about as much power as the dipped head-
lights. If the batt
ery charge is low, the auxiliary heater will switch off auto-
matically or will not even switch on. This avoids problems when starting the
engine.
● The heater will switch just once each time. The timer will also have to be
switc
hed back on every time it is required. Note
● Noise will be heard while the auxiliary heater is running.
● When the air humidity i
s high and the outside temperature low, the
heating sy
stem may evaporate condensation from the auxiliary heater. In
this case, steam may be released from underneath the vehicle. This is com-
pletely normal and there is no need to suspect a fault!
● If the auxiliary heater runs several times over a prolonged period, the ve-
hicle b
attery may run flat. To re-charge the battery, drive the vehicle for a
long distance. In general: drive for as much time as the auxiliary heating
was working.
Page 294 of 385
292
Checking and refilling levels
● the idling s peed i s increased so that the alternator provides more elec-
tricity.
● where necessary, the power of the most powerful consumers is reduced
or even comp
letely disconnected.
● On starting the engine, the power supply from the 12-volt sockets and
the cigar
ette lighter may be interrupted for a short time.
The on-board management program cannot always prevent the battery from
running flat. For example, if the ignition is left on for a long period with the
engine off or if the side lights or parking lights are left on while the vehicle
is stationary.
Why does the battery run flat?
● When stationary for a long time without starting the engine, particularly
if the ignition is
switched on.
● Use of electrical consumers with the engine switched off.
● If the auxiliary heater is running ⇒ page 163.WARNING
Incorrectly securing the battery or using the wrong battery can cause
short -c
ircuits, fire and serious injuries.
● Always use only maintenance free batteries that do not run flat alone
and whose proper
ties, specifications and size correspond to the stand-
ard battery. The specifications are indicated on the battery case. WARNING
A highly explosive mixture of gases is released when the battery is under
ch ar
ge.
● The batteries should be charged in a well-ventilated room only.
● Never charge a frozen or recently thawed battery. A flat battery can
freeze at
temperatures around 0°C (+32°F). WARNING (Continued)
● Always replace a battery which has frozen.
● B
att
ery cables not correctly connected may cause a short circuit. Re-
connect fir
st the positive cable and then the negative cable. CAUTION
● Never disconnect the battery if the ignition is switched on or if the en-
gine i s
running. This could damage the electrical system or electronic com-
ponents.
● Never plug accessories supply current, such as solar panels or a battery
char
ger, to the 12-volt sockets or the cigarette lighter. This could damage
the vehicle's electrical system. For the sake of the environment
● Dispose of the battery in an environment-friendly manner. Batteries con-
t ain t
oxic substances such as sulphuric acid and lead.
● Battery acid can contaminate the environment. Collect any spilt service
fluids and al
low a dispose of them correctly.
Page 368 of 385
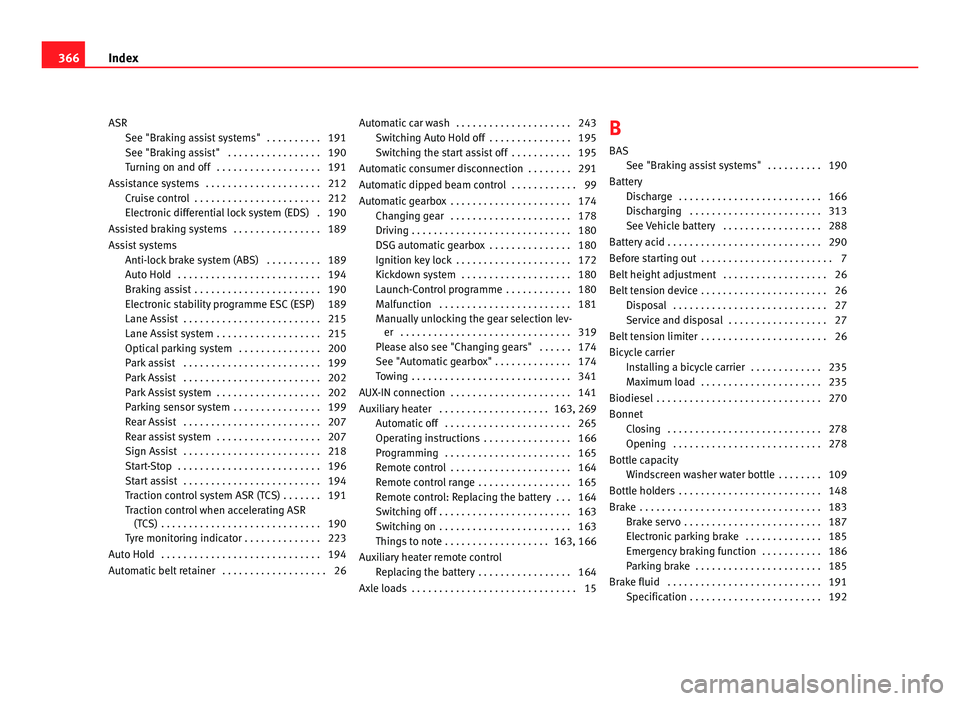
ASR
See "Brak in
g assist systems" . . . . . . . . . . 191
See "Braking assist" . . . . . . . . . . . . . . . . . 190
Turning on and off . . . . . . . . . . . . . . . . . . . 191
Assistance systems . . . . . . . . . . . . . . . . . . . . . 212 Cruise control . . . . . . . . . . . . . . . . . . . . . . . 212
Electronic differential lock system (EDS) . 190
Assisted braking systems . . . . . . . . . . . . . . . . 189
Assist systems Anti-lock brake system (ABS) . . . . . . . . . . 189
Auto Hold . . . . . . . . . . . . . . . . . . . . . . . . . . 194
Braking assist . . . . . . . . . . . . . . . . . . . . . . . 190
Electronic stability programme ESC (ESP) 189
Lane Assist . . . . . . . . . . . . . . . . . . . . . . . . . 215
Lane Assist system . . . . . . . . . . . . . . . . . . . 215
Optical parking system . . . . . . . . . . . . . . . 200
Park assist . . . . . . . . . . . . . . . . . . . . . . . . . 199
Park Assist . . . . . . . . . . . . . . . . . . . . . . . . . 202
Park Assist system . . . . . . . . . . . . . . . . . . . 202
Parking sensor system . . . . . . . . . . . . . . . . 199
Rear Assist . . . . . . . . . . . . . . . . . . . . . . . . . 207
Rear assist system . . . . . . . . . . . . . . . . . . . 207
Sign Assist . . . . . . . . . . . . . . . . . . . . . . . . . 218
Start-Stop . . . . . . . . . . . . . . . . . . . . . . . . . . 196
Start assist . . . . . . . . . . . . . . . . . . . . . . . . . 194
Traction control system ASR (TCS) . . . . . . . 191
Traction control when accelerating ASR(TCS) . . . . . . . . . . . . . . . . . . . . . . . . . . . . . 190
Tyre monitoring indicator . . . . . . . . . . . . . . 223
Auto Hold . . . . . . . . . . . . . . . . . . . . . . . . . . . . . 194
Automatic belt retainer . . . . . . . . . . . . . . . . . . . 26 Automatic car wash . . . . . . . . . . . . . . . . . . . . . 243
Switc hing Auto Hold off . . . . . . . . . . . . . . . 195
Switching the start assist off . . . . . . . . . . . 195
Automatic consumer disconnection . . . . . . . . 291
Automatic dipped beam control . . . . . . . . . . . . 99
Automatic gearbox . . . . . . . . . . . . . . . . . . . . . . 174 Changing gear . . . . . . . . . . . . . . . . . . . . . . 178
Driving . . . . . . . . . . . . . . . . . . . . . . . . . . . . . 180
DSG automatic gearbox . . . . . . . . . . . . . . . 180
Ignition key lock . . . . . . . . . . . . . . . . . . . . . 172
Kickdown system . . . . . . . . . . . . . . . . . . . . 180
Launch-Control programme . . . . . . . . . . . . 180
Malfunction . . . . . . . . . . . . . . . . . . . . . . . . 181
Manually unlocking the gear selection lev-er . . . . . . . . . . . . . . . . . . . . . . . . . . . . . . . 319
Please also see "Changing gears" . . . . . . 174
See "Automatic gearbox" . . . . . . . . . . . . . . 174
Towing . . . . . . . . . . . . . . . . . . . . . . . . . . . . . 341
AUX-IN connection . . . . . . . . . . . . . . . . . . . . . . 141
Auxiliary heater . . . . . . . . . . . . . . . . . . . . 163, 269 Automatic off . . . . . . . . . . . . . . . . . . . . . . . 265
Operating instructions . . . . . . . . . . . . . . . . 166
Programming . . . . . . . . . . . . . . . . . . . . . . . 165
Remote control . . . . . . . . . . . . . . . . . . . . . . 164
Remote control range . . . . . . . . . . . . . . . . . 165
Remote control: Replacing the battery . . . 164
Switching off . . . . . . . . . . . . . . . . . . . . . . . . 163
Switching on . . . . . . . . . . . . . . . . . . . . . . . . 163
Things to note . . . . . . . . . . . . . . . . . . . 163, 166
Auxiliary heater remote control Replacing the battery . . . . . . . . . . . . . . . . . 164
Axle loads . . . . . . . . . . . . . . . . . . . . . . . . . . . . . . 15 B
BAS
See "Brak
ing assist systems" . . . . . . . . . . 190
Battery Discharge . . . . . . . . . . . . . . . . . . . . . . . . . . 166
Discharging . . . . . . . . . . . . . . . . . . . . . . . . 313
See Vehicle battery . . . . . . . . . . . . . . . . . . 288
Battery acid . . . . . . . . . . . . . . . . . . . . . . . . . . . . 290
Before starting out . . . . . . . . . . . . . . . . . . . . . . . . 7
Belt height adjustment . . . . . . . . . . . . . . . . . . . 26
Belt tension device . . . . . . . . . . . . . . . . . . . . . . . 26 Disposal . . . . . . . . . . . . . . . . . . . . . . . . . . . . 27
Service and disposal . . . . . . . . . . . . . . . . . . 27
Belt tension limiter . . . . . . . . . . . . . . . . . . . . . . . 26
Bicycle carrier Installing a bicycle carrier . . . . . . . . . . . . . 235
Maximum load . . . . . . . . . . . . . . . . . . . . . . 235
Biodiesel . . . . . . . . . . . . . . . . . . . . . . . . . . . . . . 270
Bonnet Closing . . . . . . . . . . . . . . . . . . . . . . . . . . . . 278
Opening . . . . . . . . . . . . . . . . . . . . . . . . . . . 278
Bottle capacity Windscreen washer water bottle . . . . . . . . 109
Bottle holders . . . . . . . . . . . . . . . . . . . . . . . . . . 148
Brake . . . . . . . . . . . . . . . . . . . . . . . . . . . . . . . . . 183 Brake servo . . . . . . . . . . . . . . . . . . . . . . . . . 187
Electronic parking brake . . . . . . . . . . . . . . 185
Emergency braking function . . . . . . . . . . . 186
Parking brake . . . . . . . . . . . . . . . . . . . . . . . 185
Brake fluid . . . . . . . . . . . . . . . . . . . . . . . . . . . . 191 Specification . . . . . . . . . . . . . . . . . . . . . . . . 192366
Index
Page 377 of 385
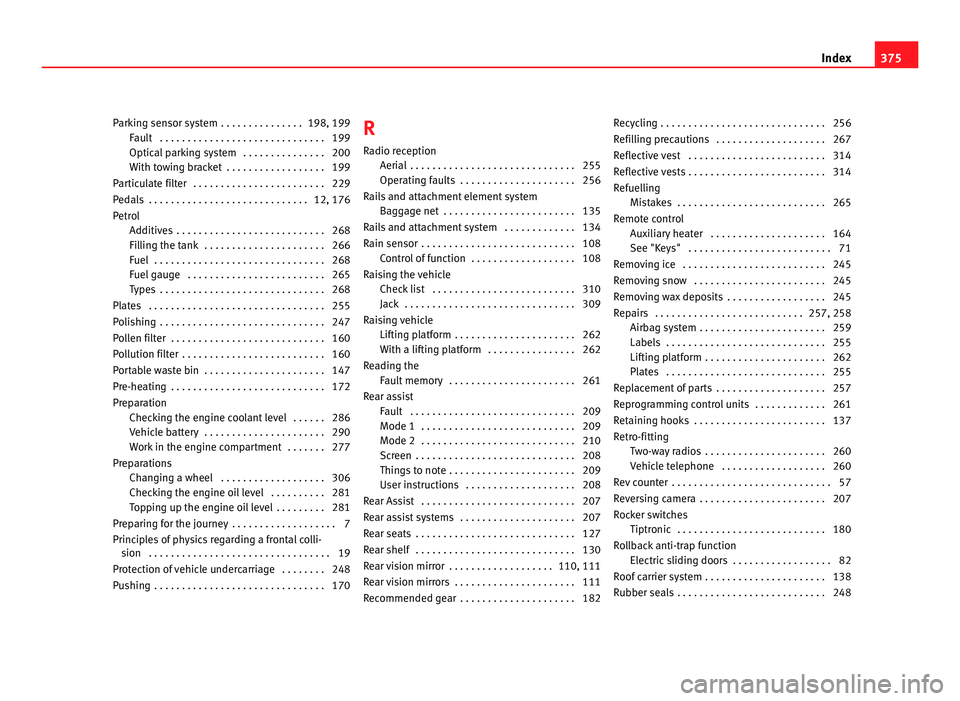
Parking sensor system . . . . . . . . . . . . . . . 198, 199
Fault
. . . . . . . . . . . . . . . . . . . . . . . . . . . . . . 199
Optical parking system . . . . . . . . . . . . . . . 200
With towing bracket . . . . . . . . . . . . . . . . . . 199
Particulate filter . . . . . . . . . . . . . . . . . . . . . . . . 229
Pedals . . . . . . . . . . . . . . . . . . . . . . . . . . . . . 12, 176
Petrol Additives . . . . . . . . . . . . . . . . . . . . . . . . . . . 268
Filling the tank . . . . . . . . . . . . . . . . . . . . . . 266
Fuel . . . . . . . . . . . . . . . . . . . . . . . . . . . . . . . 268
Fuel gauge . . . . . . . . . . . . . . . . . . . . . . . . . 265
Types . . . . . . . . . . . . . . . . . . . . . . . . . . . . . . 268
Plates . . . . . . . . . . . . . . . . . . . . . . . . . . . . . . . . 255
Polishing . . . . . . . . . . . . . . . . . . . . . . . . . . . . . . 247
Pollen filter . . . . . . . . . . . . . . . . . . . . . . . . . . . . 160
Pollution filter . . . . . . . . . . . . . . . . . . . . . . . . . . 160
Portable waste bin . . . . . . . . . . . . . . . . . . . . . . 147
Pre-heating . . . . . . . . . . . . . . . . . . . . . . . . . . . . 172
Preparation Checking the engine coolant level . . . . . . 286
Vehicle battery . . . . . . . . . . . . . . . . . . . . . . 290
Work in the engine compartment . . . . . . . 277
Preparations Changing a wheel . . . . . . . . . . . . . . . . . . . 306
Checking the engine oil level . . . . . . . . . . 281
Topping up the engine oil level . . . . . . . . . 281
Preparing for the journey . . . . . . . . . . . . . . . . . . . 7
Principles of physics regarding a frontal colli- sion . . . . . . . . . . . . . . . . . . . . . . . . . . . . . . . . . 19
Protection of vehicle undercarriage . . . . . . . . 248
Pushing . . . . . . . . . . . . . . . . . . . . . . . . . . . . . . . 170 R
Radio r eception
Aerial . . . . . . . . . . . . . . . . . . . . . . . . . . . . . . 255
Operating faults . . . . . . . . . . . . . . . . . . . . . 256
Rails and attachment element system Baggage net . . . . . . . . . . . . . . . . . . . . . . . . 135
Rails and attachment system . . . . . . . . . . . . . 134
Rain sensor . . . . . . . . . . . . . . . . . . . . . . . . . . . . 108 Control of function . . . . . . . . . . . . . . . . . . . 108
Raising the vehicle Check list . . . . . . . . . . . . . . . . . . . . . . . . . . 310
Jack . . . . . . . . . . . . . . . . . . . . . . . . . . . . . . . 309
Raising vehicle Lifting platform . . . . . . . . . . . . . . . . . . . . . . 262
With a lifting platform . . . . . . . . . . . . . . . . 262
Reading the Fault memory . . . . . . . . . . . . . . . . . . . . . . . 261
Rear assist Fault . . . . . . . . . . . . . . . . . . . . . . . . . . . . . . 209
Mode 1 . . . . . . . . . . . . . . . . . . . . . . . . . . . . 209
Mode 2 . . . . . . . . . . . . . . . . . . . . . . . . . . . . 210
Screen . . . . . . . . . . . . . . . . . . . . . . . . . . . . . 208
Things to note . . . . . . . . . . . . . . . . . . . . . . . 209
User instructions . . . . . . . . . . . . . . . . . . . . 208
Rear Assist . . . . . . . . . . . . . . . . . . . . . . . . . . . . 207
Rear assist systems . . . . . . . . . . . . . . . . . . . . . 207
Rear seats . . . . . . . . . . . . . . . . . . . . . . . . . . . . . 127
Rear shelf . . . . . . . . . . . . . . . . . . . . . . . . . . . . . 130
Rear vision mirror . . . . . . . . . . . . . . . . . . . 110, 111
Rear vision mirrors . . . . . . . . . . . . . . . . . . . . . . 111
Recommended gear . . . . . . . . . . . . . . . . . . . . . 182 Recycling . . . . . . . . . . . . . . . . . . . . . . . . . . . . . . 256
Refil
ling precautions . . . . . . . . . . . . . . . . . . . . 267
Reflective vest . . . . . . . . . . . . . . . . . . . . . . . . . 314
Reflective vests . . . . . . . . . . . . . . . . . . . . . . . . . 314
Refuelling Mistakes . . . . . . . . . . . . . . . . . . . . . . . . . . . 265
Remote control Auxiliary heater . . . . . . . . . . . . . . . . . . . . . 164
See "Keys" . . . . . . . . . . . . . . . . . . . . . . . . . . 71
Removing ice . . . . . . . . . . . . . . . . . . . . . . . . . . 245
Removing snow . . . . . . . . . . . . . . . . . . . . . . . . 245
Removing wax deposits . . . . . . . . . . . . . . . . . . 245
Repairs . . . . . . . . . . . . . . . . . . . . . . . . . . . 257, 258 Airbag system . . . . . . . . . . . . . . . . . . . . . . . 259
Labels . . . . . . . . . . . . . . . . . . . . . . . . . . . . . 255
Lifting platform . . . . . . . . . . . . . . . . . . . . . . 262
Plates . . . . . . . . . . . . . . . . . . . . . . . . . . . . . 255
Replacement of parts . . . . . . . . . . . . . . . . . . . . 257
Reprogramming control units . . . . . . . . . . . . . 261
Retaining hooks . . . . . . . . . . . . . . . . . . . . . . . . 137
Retro-fitting Two-way radios . . . . . . . . . . . . . . . . . . . . . . 260
Vehicle telephone . . . . . . . . . . . . . . . . . . . 260
Rev counter . . . . . . . . . . . . . . . . . . . . . . . . . . . . . 57
Reversing camera . . . . . . . . . . . . . . . . . . . . . . . 207
Rocker switches Tiptronic . . . . . . . . . . . . . . . . . . . . . . . . . . . 180
Rollback anti-trap function Electric sliding doors . . . . . . . . . . . . . . . . . . 82
Roof carrier system . . . . . . . . . . . . . . . . . . . . . . 138
Rubber seals . . . . . . . . . . . . . . . . . . . . . . . . . . . 248 375
Index