fuel pressure Seat Alhambra 2011 Owner's Manual
[x] Cancel search | Manufacturer: SEAT, Model Year: 2011, Model line: Alhambra, Model: Seat Alhambra 2011Pages: 385, PDF Size: 7.92 MB
Page 10 of 385
8
Safe driving
● Check that the lights and turn signals operate correctly.
● Chec k
the tyre pressures ( ⇒ pag
e 293) and level of fuel (⇒ page 264).
● Ensure there is good visibility through all the windows.
● Make sure that all objects and bags in the storage compartments, in the
luggag
e compartment and, where applicable, on the roof, are securely fas-
tened ⇒ page 13.
● Ensure there is nothing obstructing the free passage of the foot pedals.
● Use child retention systems appropriate for the child's body weight and
height ⇒
page 39.
● Correctly adjust front seat, head rests and rear-view mirrors to suit your
height ⇒
page 10.
● Wear close-fitting shoes which do not prevent you from using the pedals
correctly
.
● The driver's floor mat should be fixed to the floor, leaving the pedal area
unob
structed.
● Before starting out, ensure you are correctly seated and remain in this
position thr
oughout the journey. This applies to all passengers in the vehi-
cle ⇒ page 10.
● Correctly fasten your seat belt before starting to drive and keep it se-
curely
fastened throughout the journey. This applies to all passengers in the
vehicle ⇒ page 21.
● Never carry more passengers than the number of available seats and
seat belts
in your vehicle.
● Never drive with impaired faculties (for example, due to medication, al-
cohol
or drugs).
● Do not allow yourself to be distracted from the traffic, for example, to re-
set or swit
ch on a menu, by other passengers or to answer a phone call.
● Always try to adapt the speed of the vehicle and your style of driving to
the condition of the gr
ound or the road and to weather and traffic condi-
tions.
● Observe the highway code and speed limits. ●
On long journeys, rest at regular intervals (at least every two hours).
● If c
arrying animals, make sure they are correctly restrained in accord-
ance with their w
eight and size. WARNING
Always observe traffic regulations and speed limits and try to anticipate
traffic mo
vements. Correctly anticipating traffic situations may mean the
difference between arriving safe and sound at your destination or having
a serious accident. Note
Regular servicing of your vehicle not only helps to keep it in good working
order b ut
also helps to ensure road safety. Therefore, please ensure the ve-
hicle is taken for service as indicated in the Maintenance Programme. If the
vehicle is subjected to hard use, it may require certain maintenance work
before the next service date. Hard use may involve frequent driving in traffic
jams, driving in dusty areas or frequent use of the tow-bar. For further infor-
mation, please refer to a SEAT dealer or specialised workshop.
Driving abroad Check list
In some cou
ntrie
s, certain safety regulations and requirements are in force
relating to exhaust gas emissions, which differ from the technical character-
istics of the vehicle. Before travelling abroad, SEAT recommends you con-
sult a SEAT dealer about the legal requirements and the following points:
● Does the vehicle need technical modifications for driving abroad, for ex-
ample, a
djustment of the headlamps?
● Does the vehicle have all the tools, diagnostics equipment and spare
parts
required for inspections and repairs?
● Are there any SEAT dealers in the destination country?
Page 57 of 385
55
Cockpit
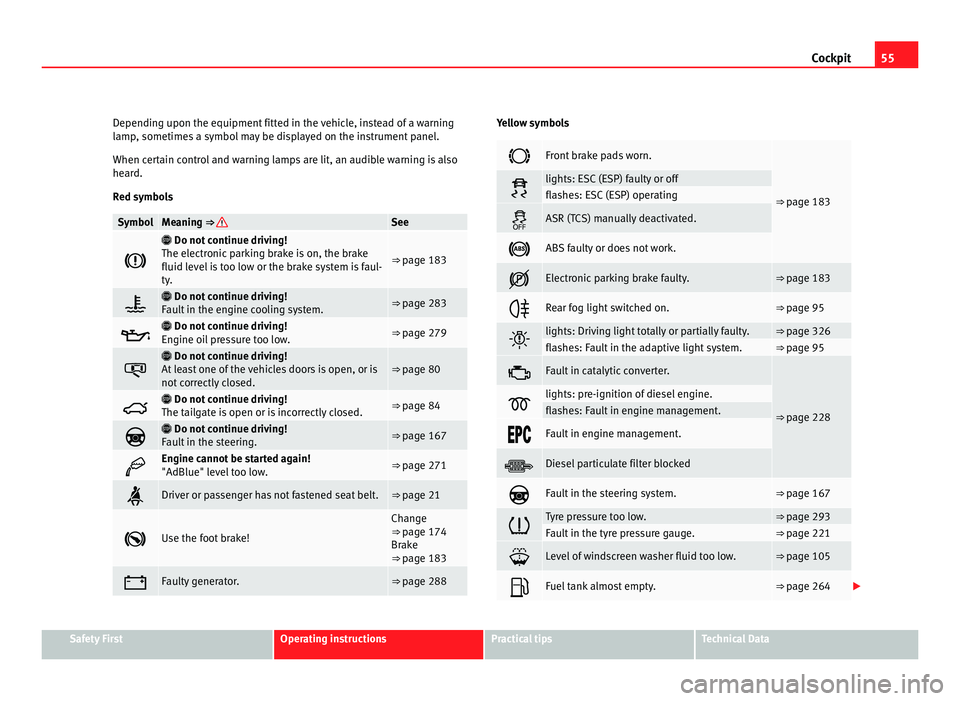
Depending upon the equipment fitted in the vehicle, instead of a warning
lamp , sometime
s a symbol may be displayed on the instrument panel.
When certain control and warning lamps are lit, an audible warning is also
heard.
Red symbols Symbol Meaning ⇒ See
Do not continue driving!
The el ectr
onic parking brake is on, the brake
fluid level is too low or the brake system is faul-
ty. ⇒ page 183
Do not continue driving!
F au
lt in the engine cooling system. ⇒ page 283
Do not continue driving!
En gine oi
l pressure too low. ⇒ page 279
Do not continue driving!
At l
east one of the vehicles doors is open, or is
not correctly closed. ⇒ page 80
Do not continue driving!
The t ai
lgate is open or is incorrectly closed. ⇒ page 84
Do not continue driving!
F au
lt in the steering. ⇒ page 167
Engine cannot be started again!
"AdBlue" lev
el
too low. ⇒ page 271
Driver or passenger has not fastened seat belt. ⇒ page 21
Use the foot brake! Change
⇒ pag
e 174
Br
ake
⇒ page 183 Faulty generator. ⇒ page 288 Yellow symbols
Front brake pads worn.
⇒ page 183 lights: ESC (ESP) faulty or off
flashes: ESC (ESP) operating
ASR (TCS) manually deactivated.
ABS faulty or does not work.
Electronic parking brake faulty. ⇒ page 183
Rear fog light switched on. ⇒ page 95
lights: Driving light totally or partially faulty. ⇒ page 326
flashes: Fault in the adaptive light system. ⇒ page 95
Fault in catalytic converter.
⇒ page 228 lights: pre-ignition of diesel engine.
flashes: Fault in engine management.
Fault in engine management.
Diesel particulate filter blocked
Fault in the steering system. ⇒ page 167
Tyre pressure too low. ⇒ page 293
Fault in the tyre pressure gauge. ⇒ page 221
Level of windscreen washer fluid too low. ⇒ page 105
Fuel tank almost empty. ⇒ page 264
Safety First Operating instructions Practical tips Technical Data
Page 120 of 385
118
Seats and storage compartments WARNING
People whose pain and temperature threshold has been affected by some
kind of medic
ine, paraplegia or chronic illness (e.g. diabetes) may sus-
tain burns to the back, buttocks and legs from use of the seat heating
that may lead to a long healing process or that may never completely
heal. Seek medical advice if you have doubts regarding your health.
● People with a limit pain and temperature threshold must never use
seat he
ating. CAUTION
● To avoid damaging the heating elements of the seat heating, please do
not kneel
on the seat or apply sharp pressure at a single point to the seat
cushion and backrest.
● Liquids, sharp objects and insulating materials on the seat could dam-
age the seat
heating.
● In the event of smells, switch off the seat heating immediately and have
the unit in
spected by a Technical Service. For the sake of the environment
The seat heating should remain on only when needed. Otherwise, it is an
unnec e
ssary fuel waste. Seat with position memory* Fig. 80 Memory buttons
on the outs
ide of
the
driver seat
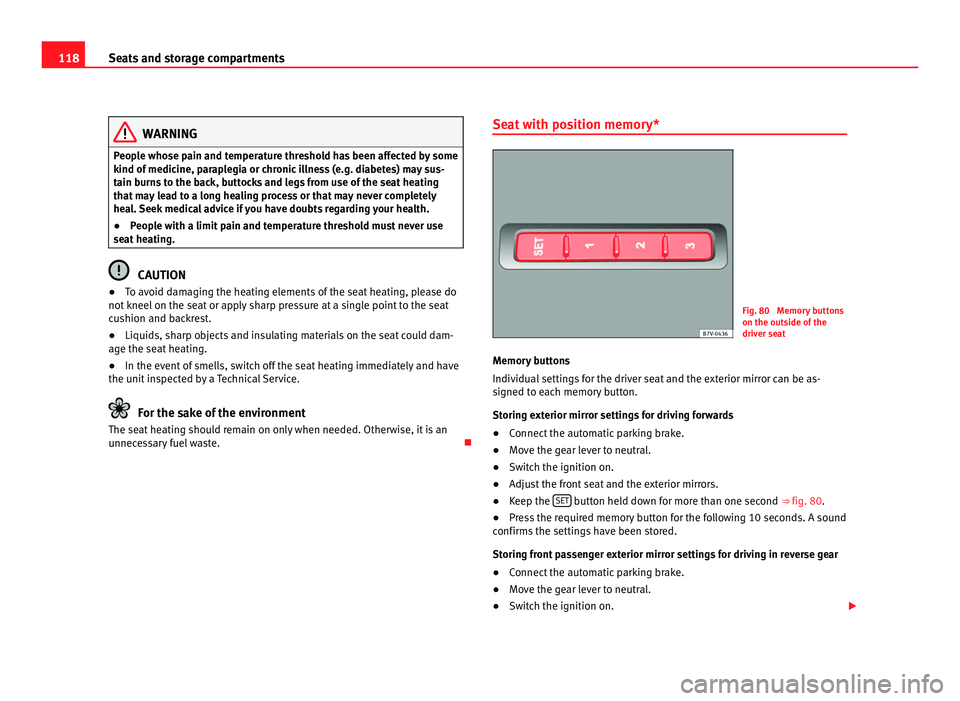
Memory buttons
Individual settin
gs for the driver seat and the exterior mirror can be as-
signed to each memory button.
Storing exterior mirror settings for driving forwards
● Connect the automatic parking brake.
● Move the gear lever to neutral.
● Switch the ignition on.
● Adjust the front seat and the exterior mirrors.
● Keep the SET button held down for more than one second ⇒ fig. 80.
● Press the required memory button for the following 10 seconds. A sound
confirms the settin
gs have been stored.
Storing front passenger exterior mirror settings for driving in reverse gear
● Connect the automatic parking brake.
● Move the gear lever to neutral.
● Switch the ignition on.
Page 169 of 385
167
Driving
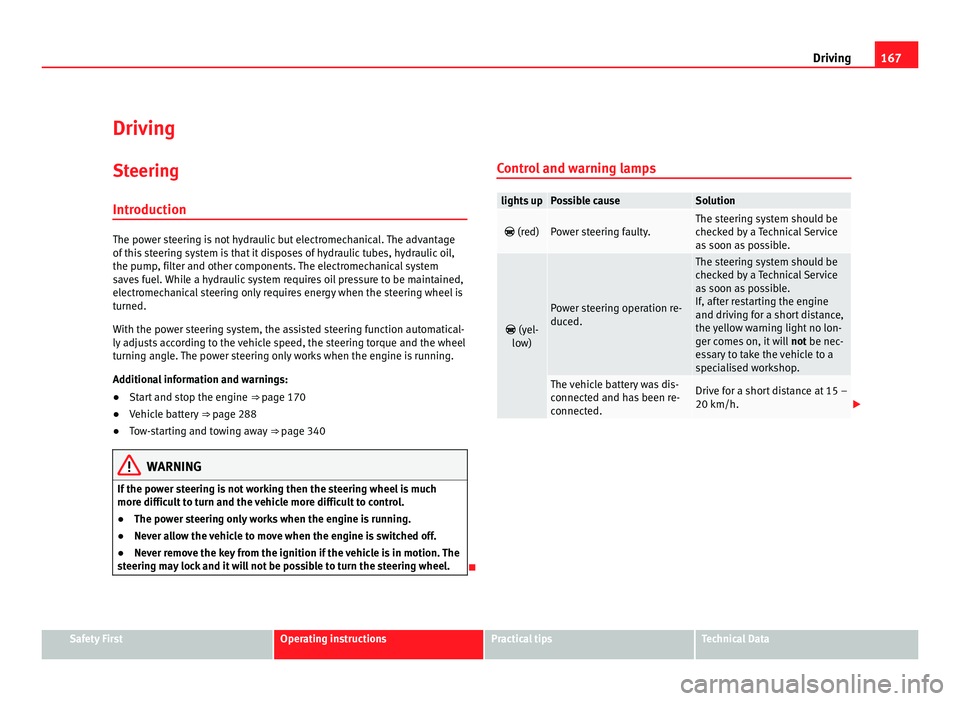
Driving SteeringIntroduction The power steering is not hydraulic but electromechanical. The advantage
of thi
s
steering system is that it disposes of hydraulic tubes, hydraulic oil,
the pump, filter and other components. The electromechanical system
saves fuel. While a hydraulic system requires oil pressure to be maintained,
electromechanical steering only requires energy when the steering wheel is
turned.
With the power steering system, the assisted steering function automatical-
ly adjusts according to the vehicle speed, the steering torque and the wheel
turning angle. The power steering only works when the engine is running.
Additional information and warnings:
● Start and stop the engine ⇒ page 170
● V
ehicle battery ⇒ page 288
● T
ow-starting and towing away ⇒ page 340WARNING
If the power steering is not working then the steering wheel is much
more diffic u
lt to turn and the vehicle more difficult to control.
● The power steering only works when the engine is running.
● Never allow the vehicle to move when the engine is switched off.
● Never remove the key from the ignition if the vehicle is in motion. The
steerin
g may lock and it will not be possible to turn the steering wheel. Control and warning lamps lights up Possible cause Solution
(red) Power steering faulty. The steering system should be
chec
k
ed by a Technical Service
as soon as possible.
(yel-
lo w) Power steering operation re-
duced. The steering system should be
chec
k
ed by a Technical Service
as soon as possible.
If, after restarting the engine
and driving for a short distance,
the yellow warning light no lon-
ger comes on, it will not be nec-
essary to take the vehicle to a
specialised workshop. The vehicle battery was dis-
connect
ed and h
as been re-
connected. Drive for a short distance at 15 –
20 km/h.
Safety First Operating instructions Practical tips Technical Data
Page 189 of 385
187
Driving
● On slopes, turn the front wheels so that they are against the edge of the
k erb
.
● Uphill, turn the wheels towards the centre of the road. WARNING
The components of the exhaust system reach very high temperatures.
This c
ould cause a fire and considerable damage.
● Always park your vehicle so that no part of the exhaust system can
come in cont
act with flammable materials (such as wood, leaves, spilled
fuel, dried grass, etc). CAUTION
● Special care should be taken when parking in areas with high kerbs or
fi x
ed barriers. Objects protruding from the ground may damage the bumper
or other parts of the vehicle during manoeuvres. To avoid damage, stop be-
fore the wheels touched the barrier or kerb.
● Special attention is required when driving through entrances, over
ramps, k
erbs or other objects. The vehicle underbody, bumpers, mudguards
and running gear, and the engine and exhaust system could be damaged as
you drive over these objects.
Information about the brakes For the first 200 to 300 km (100 to 200 miles),
new brake p
ads have not yet
reached their maximum braking capacity, and need to be “run in” first ⇒ .
The slightly r
educed braking effect can be compensated for by increasing
pressure on the brake pedal. While running in, the full braking distance or
emergency braking distance is larger then when the brake pads have been
run in. While running in, avoid full power braking or situations requiring
braking performance. For example, in heavy traffic. The rate of wear of the brake pads
depends
to a great extent on the condi-
tions in which the vehicle is used and the way the vehicle is driven. If the
vehicle is used frequently in city traffic or for short trips or driven sport style,
visit a specialist workshop regularly more frequently than advised in the
Maintenance Programme to have the bake pads checked.
If you drive with wet brakes, for example, after crossing areas of water, in
heavy rainfall or even after washing the car, the effect of the brakes is less-
ened as the brake discs are wet or even frozen (in winter). At higher speed,
dry the brakes as quickly as possible by braking gently several times. Only
do this without endangering vehicles behind you or any other road users
⇒ .
A la y
er of salt on the discs and brake pads will reduce brake efficiency and
increase braking distance. If you drive for a prolonged period on salted
roads without braking then brake carefully several times to eliminate the
layer of salt on the brakes ⇒ .
If the v
ehicle remains parked for considerable lengths of time, is used little,
or if the brakes are not used, there may be corrosion on the brake discs and
a buildup of dirt on the brake pads. If the brakes are not used frequently, or
if rust has formed on the discs, SEAT recommends cleaning the pads and
discs by braking firmly a few times at a moderately high speed. Only do this
without endangering vehicles behind you or any other road users ⇒ .
Fau lt
s in the brake system
During braking, if you notice that the vehicle does not react as usual (that
the braking distance has increased suddenly) it may be possible that there
is a fault in the braking system. The warning lamp lights up and a text
message displayed. Take the vehicle to a Technical Service immediately and
have the fault repaired. Drive at a moderate speed and be prepared to use
more pressure on the brake pedal, and allow for longer stopping distances.
Brake servo
The brake servo only operates when the engine is running and the pressure
applied by the driver on the brake pedal increases. Safety First Operating instructions Practical tips Technical Data
Page 223 of 385
221
Driving
Tyre monitoring systems Introduction The tyre monitor indicator monitors the tyre pressure of each wheel during
drivin
g u
sing the ABS sensors. The ABS sensors monitor the tyre tread pe-
rimeter and vibrations of each tire. The tyre monitor indicator warns the driv-
er if it detects a considerable drop in tyre pressure of one or several tyres
while driving. Loss of tyre pressure will be indicated by the indicator as
well as a sound and sometimes a text message on the screen of the instru-
ment panel. When you open the driver's door, you will find a label indicat-
ing the tyre pressure recommended by the manufacturer for the maximum
vehicle load for each tyre approved for the vehicle in question. By pressing
the adjustment button on the tyre monitoring indicator, you may change the
reference pressure for the tyres so that the tyre pressure to be monitored co-
incides with actual tyre pressure ⇒ page 223.
Suitable use of the adjustment button ⇒ page 223.
Additional information and warnings:
● Transporting ⇒ pag
e 13
● Braking, stopping and parking ⇒ pag
e 183
● Caring for and cleaning the vehicle exterior ⇒ pag
e 242
● Wheels and tyres ⇒ pag
e 293
● Accessories, parts replacement, repairs and modifications ⇒ pag
e 257 WARNING
Unsuitable handling of the wheels and tyres may lead to sudden tyre
pre s
sure losses, to tread separation or even to a blow-out.
● Check tyre pressures regularly and ensure they are maintained at the
pres
sures indicated. If the tyre pressure is too low, the tyres could over-
heat, resulting in tread detachment or even burst tyres.
● Tyre pressure should be that indicated on the label when the tyres are
col
d at all times ⇒ page 297.
● Regularly check the cold inflation pressure of the tyres. If necessary,
chan
ge the tyre pressure of the vehicle tyres while they are cold.
● Regularly check your tyres for damage and wear.
● Never exceed the maximum permitted speed or loads specified for the
type of ty
re fitted on your vehicle. WARNING
Incorrect use of the tyre monitoring indicator button could result in the
indicat or giv
ing erroneous messages or prevented from indicating the
danger caused by a defective tyre ⇒ page 223. CAUTION
● The tyre valves may be damaged if the cap is not in place. Check that the
c ap
s are identical to the standard caps and have been correctly tightened.
Do not use metal caps ⇒ page 223.
● Do not damage the valves when changing the tyres ⇒ page 223. For the sake of the environment
Under-inflated tyres lead to increased fuel consumption and tyre wear. Safety First Operating instructions Practical tips Technical Data
Page 229 of 385
227
Driving and the environment
Other factors which increase fuel consumption (examples):
● Fault in engine management.
● Driving on hills.
● Trailer towing.
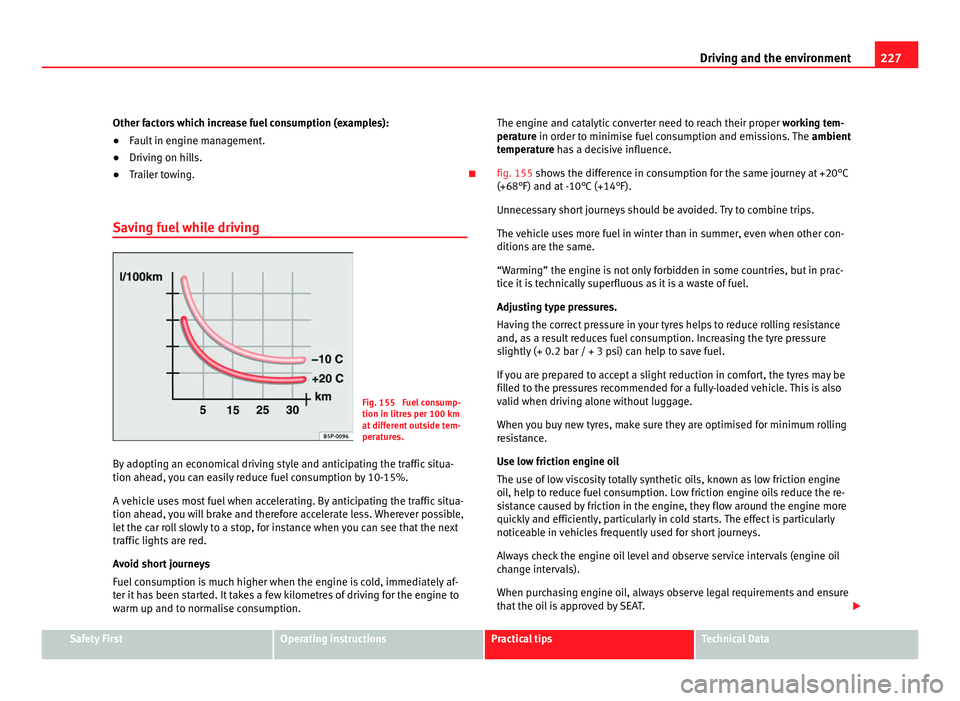
Saving fuel while driving Fig. 155 Fuel consump-
tion in litre
s
per 100 km
at different outside tem-
peratures.
By adopting an economical driving style and anticipating the traffic situa-
tion ahead,
you can easily reduce fuel consumption by 10-15%.
A vehicle uses most fuel when accelerating. By anticipating the traffic situa-
tion ahead, you will brake and therefore accelerate less. Wherever possible,
let the car roll slowly to a stop, for instance when you can see that the next
traffic lights are red.
Avoid short journeys
Fuel consumption is much higher when the engine is cold, immediately af-
ter it has been started. It takes a few kilometres of driving for the engine to
warm up and to normalise consumption. The engine and catalytic converter need to reach their proper
workin
g tem-
perature in order to minimise fuel consumption and emissions. The ambient
temperature has a decisive influence.
fig. 155 shows the difference in consumption for the same journey at +20°C
(+68°F) and at -10°C (+14°F).
Unnecessary short journeys should be avoided. Try to combine trips.
The vehicle uses more fuel in winter than in summer, even when other con-
ditions are the same.
“Warming” the engine is not only forbidden in some countries, but in prac-
tice it is technically superfluous as it is a waste of fuel.
Adjusting type pressures.
Having the correct pressure in your tyres helps to reduce rolling resistance
and, as a result reduces fuel consumption. Increasing the tyre pressure
slightly (+ 0.2 bar / + 3 psi) can help to save fuel.
If you are prepared to accept a slight reduction in comfort, the tyres may be
filled to the pressures recommended for a fully-loaded vehicle. This is also
valid when driving alone without luggage.
When you buy new tyres, make sure they are optimised for minimum rolling
resistance.
Use low friction engine oil
The use of low viscosity totally synthetic oils, known as low friction engine
oil, help to reduce fuel consumption. Low friction engine oils reduce the re-
sistance caused by friction in the engine, they flow around the engine more
quickly and efficiently, particularly in cold starts. The effect is particularly
noticeable in vehicles frequently used for short journeys.
Always check the engine oil level and observe service intervals (engine oil
change intervals).
When purchasing engine oil, always observe legal requirements and ensure
that the oil is approved by SEAT. Safety First Operating instructions Practical tips Technical Data
Page 269 of 385
267
Checking and refilling levels
Closing the tank cap
● Screw on the tank cap clockwise until it you hear it click into position.
● Press the tank flap until you hear it click into place. The tank flap must
be flush w ith the body
contour. WARNING
Do not continue refilling once the fuel nozzle has switched itself off. The
fuel t
ank may be filled too much. As a result, fuel may spurt out and spill.
This could lead to a fire, explosion and severe injuries. CAUTION
● Always remove any fuel spilled on the vehicle paintwork immediately to
av oid d
amage to the wheel housing, the tyre and vehicle paintwork. For the sake of the environment
Spilt fuel can contaminate the environment.
Refilling precautions Information on bulb replacement
⇒ pag
e 326.
Checklist
Never work on the engine or in the engine compartment if you are not famil-
iar with the operations to be carried out, the applicable safety standards
and especially if you do not have the instruments, liquids and tools neces-
sary ⇒ page 275, Working in the engine compartment! Have the work car-
ried out by a Technical Service if you are uncertain. Check the following reg-
ularly, preferably when you refuel:
● Windscreen washer fluid level ⇒ pag
e 105
● Engine oil level ⇒ pag
e 279 ●
Engine coolant level ⇒ p
age 283
● Brake fluid level ⇒ pag
e 183
● Tyre pressure ⇒ pag
e 293
● Vehicle lighting required to guarantee road safety:
Indicator
s
Side lights, dipped headlights and full beam headlights
Rear lights
Brake lights
Rear fog light ⇒ page 97 WARNING
Not following the checklist prepared for your own safety could lead to ac-
cident s
and severe injuries.
● Always follow the check list and perform the necessary operations.
Fuel Introduction You will find a factory-fitted sticker containing information on the type of
fuel
f
or your vehicle on the inside of the fuel tank flap.
Additional information and warnings:
● ⇒ Bookl et Maintenance Programme
● R
efuelling ⇒ pag e 264
● En
gine and exhaust system management ⇒ page 228
–
–
–
–
–
Safety First Operating instructions Practical tips Technical Data
Page 299 of 385
297
Wheels and tyres WARNING
New tyres do not give maximum grip and will not have reached their max-
imum brak in
g capacity to start with, and therefore need running in.
● To prevent accidents and major damage, extreme caution should be
taken f
or the first 600 km (370 miles). WARNING
There should be adequate space between the tyres and the vehicle in ac-
cord
ance with the vehicle design. If this is not the case, the tyres may
rub against parts of the running gear, chassis or brake lines, leading to
faults in the brake system or to tread detachment, and the risk of burst
tyres.
● The true tyre dimension should not be greater than the dimensions of
tyre
s manufactured and approved by SEAT and should not rub against
parts of the vehicle. Note
● Although tyres may be shown as being the same size, the true dimen-
s ion
s of different types of tyre may vary with respect to the nominal size, or
tread patterns may be different.
● If you use tyres that are approved by SEAT, you can be sure that the true
tyre dimen
sions will be correct for your vehicle. For other tyre models, the
tyre vendor should provide the manufacturer's certificate with the tyre, indi-
cating that this type of tyre is suitable for your vehicle. This certificate
should always be carried with the vehicle. Tyre pressures
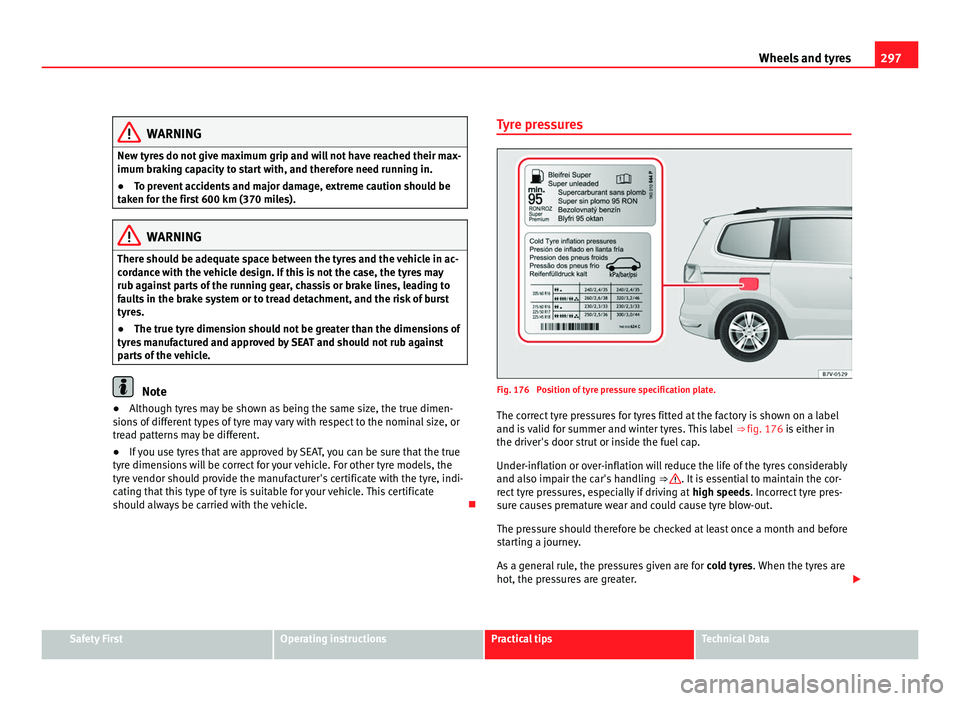
Fig. 176 Position of tyre pressure specification plate.
The corr ect
tyre pressures for tyres fitted at the factory is shown on a label
and is valid for summer and winter tyres. This label ⇒ fig. 176 is either in
the driver's door strut or inside the fuel cap.
Under-inflation or over-inflation will reduce the life of the tyres considerably
and also impair the car's handling ⇒ . It is essential to maintain the cor-
rect ty
re pressures, especially if driving at high speeds. Incorrect tyre pres-
sure causes premature wear and could cause tyre blow-out.
The pressure should therefore be checked at least once a month and before
starting a journey.
As a general rule, the pressures given are for cold tyres. When the tyres are
hot, the pressures are greater. Safety First Operating instructions Practical tips Technical Data
Page 300 of 385
298
Wheels and tyres
Never deflate a hot tyre in order to obtain the required pressure. This could
re s
ult in very low tyre pressures which may lead to sudden blow-outs.
Checking tyre pressures
Tyre pressures should only be checked when the vehicle has not been driv-
en for more than a few kilometres (miles) at low speeds in the past three
hours.
● The tyre pressures should be checked regularly, and only when the tyres
are co
ld. Always check all the tyres. Tyre pressures should be checked more
often in colder regions, and only when the vehicle has not been driven re-
cently. Always use a correctly-operating tyre gauge.
● Adjust tyre pressures to the loads carried in the vehicle.
● After checking the pressure, always replace the valve caps, and where
applic
able, observe the instructions given for adjusting the tyre control sys-
tem ⇒ page 221. WARNING
If tyre pressures are too high or too low, the tyre may deflate or burst
sud den
ly while driving. This could result in serious accident.
● If the tyre pressure is too low, the tyres could overheat, resulting in
trea
d detachment or even burst tyres.
● When driving at high speeds and/or fully loaded, the tyre could sud-
denly o
verheat, burst or be subject to tread detachment, with the resul-
tant loss of control of the vehicle.
● Tyre pressures which are too high or too low reduce the service life of
the tyre, aff
ecting the vehicle's performance.
● Tyre pressures should be checked regularly, at least once a month
and before lon
g journeys.
● Adjust the pressures of all the tyres to the vehicle load.
● Never deflate excess pressure from hot tyres. CAUTION
● Take care not to tilt the manometer when placing it on the valve. Other-
w i
se, the valve may be damaged.
● To avoid damage to the valves, always replace valve caps correctly.
Check th
at the caps are identical to the standard caps and have been cor-
rectly tightened. For the sake of the environment
Under-inflated tyres will increase the fuel consumption. Note
When checking tyre pressures, please observe the instructions for the tyre
contr o
l system ⇒ page 221.
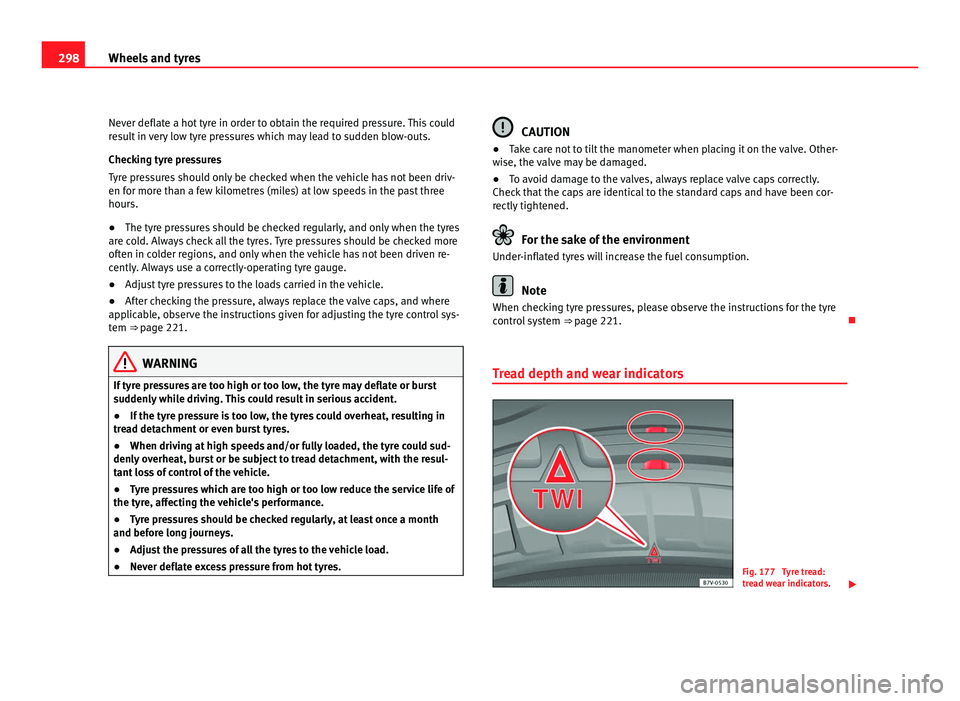
Tread depth and wear indicators Fig. 177 Tyre tread:
tre
a
d wear indicators.