sport mode Seat Alhambra 2011 Owner's Manual
[x] Cancel search | Manufacturer: SEAT, Model Year: 2011, Model line: Alhambra, Model: Seat Alhambra 2011Pages: 385, PDF Size: 7.92 MB
Page 15 of 385
13
Safe driving
Also valid for the front passenger:
● Move the front passenger seat back as far as possible for optimum pro-
tection shou l
d the airbag deploy.
Transporting objects Introduction Always transport heavy loads in the trunk and place the seat backs in a ver-
tical
po
sition. Always use the anchors provided with suitable rope to secure
heavy objects. Never overload the vehicle. Both the carrying capacity as well
as the distribution of the load in the vehicle have effects on the driving be-
haviour and braking ability ⇒ .
Addition a
l information and warnings:
● Tailgate ⇒ page 84
● T
o lower the passenger seat back ⇒ page 117
● Light
⇒ page 95
● Lug
gage compartment ⇒ page 125
● R
oof carrier ⇒ page 138
● T
owing mode ⇒ page 233
● Wheel
s and tyres ⇒ page 293 WARNING
Unsecured or incorrectly secured objects can cause serious injury in case
of a s ud
den manoeuvring or breaking or in case of an accident. This is es-
pecially true when objects are struck by a detonating airbag and fired
through the vehicle interior. To reduce the risks, please note the follow-
ing:
● Secure all objects in the vehicle. Always keep equipment and heavy
obj
ects in the luggage compartment.
● Always secure objects with suitable rope or slings so that they cannot
enter the are
as around the frontal or side airbags in case of sudden brak-
ing or an accident.
● Always ensure that objects inside the vehicle cannot move into the
area of
the bags while driving.
● While driving, always keep object compartments closed.
● Remove all objects from the passenger seat when this is followed
down. When the se
at back is folded down, it presses on small and light
objects and these are detected by the weight sensor on the seat; this
sends false information to the airbag control unit.
● While the backrest of the front passenger's seat is folded, the frontal
airbag mus
t remain disconnected and the PASSENGER AIRBAG OFF light
on.
● Objects secured in the vehicle should never be placed in such a way
as t
o make passengers sit in an incorrect position.
● If secured objects occupy a seat then this should not be occupied or
used by
anybody. Safety First Operating instructions Practical tips Technical Data
Page 17 of 385
15
Safe driving WARNING
Toxic gases may enter the vehicle interior when the tailgate is open. This
cou l
d cause loss of consciousness, carbon monoxide poisoning, serious
injury and accidents.
● To avoid toxic gases entering the vehicle always drive with the tail-
gate c
losed.
● In exceptional circumstances, if you must drive with the tailgate
open, obser
ve the following to reduce the entry of toxic gases inside the
vehicle:
–Close all windows and the sliding roof.
– Turn off the air recirculation for the heating and air conditioning.
– Open all of the air outlets in the dashboard.
– Turn the heating fan and heater to the highest level. CAUTION
An open tailgate changes the length and height of the vehicle.
Driving a loaded vehicle For the best handling when driving a loaded vehicle, note the following:
●
Secure all objects
⇒ pag
e 14.
● A
ccelerate gently and carefully.
● Avoid sudden braking and manoeuvres.
● Brake early.
● If necessary, read the instructions for driving with a trailer
⇒ page 233.
● If
necessary, read the instructions for driving with a roof carrier system
⇒ page 138. WARNING
A sliding load could considerably affect the stability and safety of the ve-
hicl e r
esulting in an accident with serious consequences.
● Secure loads correctly so they do not move.
● When transporting heavy objects, use suitable ropes or straps.
● Lock the seat backs in vertical position.
Specific vehicle weight information The instructions in the official vehicle documents take precedence. All the
tec
hnic
al data provided in this documentation is applicable to the basic
model. The vehicle data label in the Maintenance Programme or the vehicle
documents show which engine is installed in your vehicle.
The figures may be different depending on if additional equipment is fitted,
for different models and for special vehicles. WARNING
Exceeding the maximum authorised weight and the load on the axles
cou l
d cause damage to the vehicle, accidents and serious injuries.
● The real load on the axles should never exceed the maximum permit-
ted.
● The loa
d and its distribution in the vehicle have effects on the vehicle
handling and the br
aking ability. Always drive at a suitable speed. CAUTION
Distribute the load as uniformly and as low down on the vehicle as possible.
When tran s
porting heavy objects in the trunk/boot, these should be placed
as far forward as possible or over the rear axle to have as little influence on
handling as possible. Safety First Operating instructions Practical tips Technical Data
Page 45 of 385
43
Child safety
Suitable child seats
The chi l
d seat must be authorised by the manufacturer especially for use on
a front passenger seat with a frontal or side airbag.
If the front passenger seat is equipped with retaining rings, the child seat
can be secured using the approved retaining system provided it is approved
for this type of vehicle in accordance with current regulations in the country
in question.
Universal seats for children in groups 0, 0+, 1, 2 or 3 according to the ECE-
R 44 regulation. WARNING
If a child seat is mounted on the front passenger seat, the risk of the
chi l
d sustaining severe or fatal injuries in the event of an accident increa-
ses. Rear-facing child seats must never be mounted on the front passen-
ger seat when the front passenger airbag is enabled. This is life-threaten-
ing to the child should the frontal airbag deploy, as the child seat would
be struck by the inflated airbag and thrown against the backrest. WARNING
If, in exceptional circumstances, a child must be transported in a rear-fac-
ing c hi
ld seat on the front passenger seat, strictly observe the following:
● Always disable the front passenger airbag and leave it disabled.
● The child seat must be approved by the manufacturer for use on a
front p
assenger seat with frontal and side airbag.
● Follow the installation instructions of the child seat manufacturer and
obser
ve the warnings.
● Move the front passenger seat as far back as possible and adjust it to
its highe
st position to keep as far away as possible from the frontal air-
bag. WARNING (Continued)
● Move the backrest to the upright position.
● The se
at
belt height adjustment must be as high as possible.
● Children must always be protected with an approved child restraint
syst
em suited to their height and weight.
Use of the child seat on the rear seat If a child seat is mounted on the rear seat, adapt the position of the front
pa
s
senger seat so that the child has enough space. Therefore, adapt the
front passenger seat to the size of the child seat and the height of the child.
Ensure the passenger is in the correct position ⇒ page 10.
Move the second and third row of seats fully back and lock them. Place the
seat backs in a vertical position and fold the armrests down.
ISOFIX child seats approved for rear seats
The rear seats are suitable for child seats with the ISOFIX system specially
designed for this type of vehicle in accordance with regulation ECE-R 44.
ISOFIX child seats are divided into “specific categories for the vehicle”,
“limited” or “semi-universal”.
Child seat manufacturers supply a list of vehicles with each ISOFIX seat,
which includes the models for which the ISOFIX child seat in question is ap-
proved. If the vehicle is included in the manufacturer's list and the ISOFIX
child seat belongs to a seat category included in the list, then it can be
used in your vehicle. If necessary, contact the child seat manufacturer for an
updated list of vehicles. Safety First Operating instructions Practical tips Technical Data
Page 127 of 385
125
Seats and storage compartments WARNING
Travelling with the head restraints removed or improperly adjusted in-
cr e
ases the risk of severe or fatal injuries in the event of accidents and
sudden braking or manoeuvres.
● Always fit and adjust the head restraint properly whenever a person
is oc
cupying a seat.
● Refit any removed head restraints immediately so that passengers
are properly
protected. CAUTION
On removing and fitting the head restraint, make sure the head restraint
does not
hit the interior roof of the vehicle or the backrest of the front seat.
This could damage the interior roof and other parts of the vehicle.
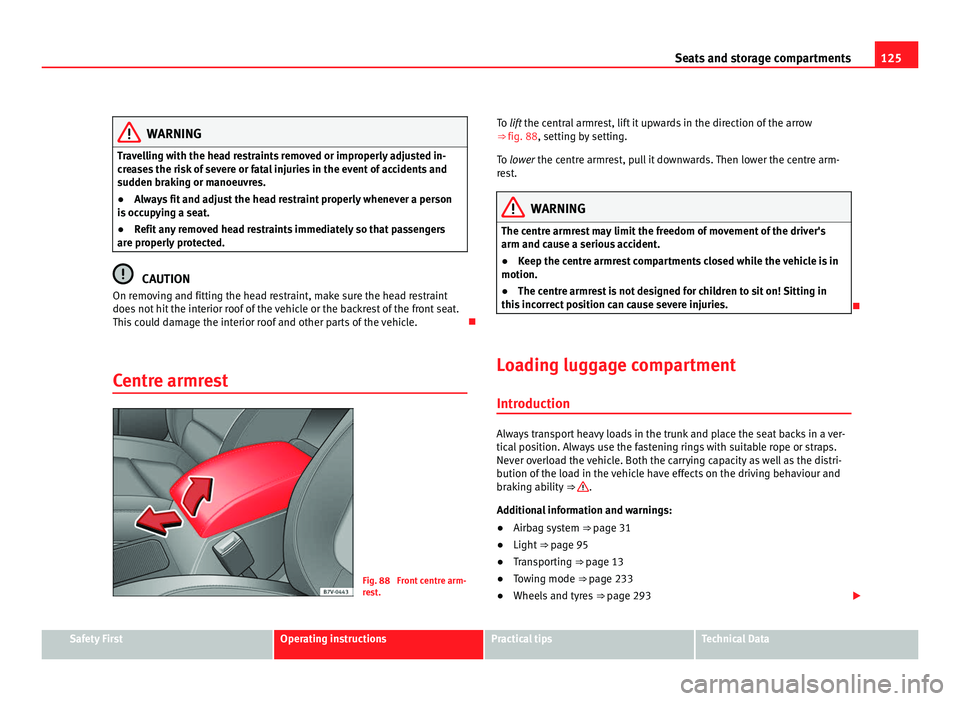
Centre armrest Fig. 88 Front centre arm-
re
s
t. To lift the central armrest, lift it upwards in the direction of the arrow
⇒ fig. 88
, setting by setting.
To lower the centre armrest, pull it downwards. Then lower the centre arm-
rest. WARNING
The centre armrest may limit the freedom of movement of the driver's
arm and cau se a seriou
s accident.
● Keep the centre armrest compartments closed while the vehicle is in
motion.
● The centre armrest is not designed for children to sit on! Sitting in
this inc
orrect position can cause severe injuries.
Loading luggage compartment Introduction Always transport heavy loads in the trunk and place the seat backs in a ver-
tical
po
sition. Always use the fastening rings with suitable rope or straps.
Never overload the vehicle. Both the carrying capacity as well as the distri-
bution of the load in the vehicle have effects on the driving behaviour and
braking ability ⇒ .
Addition a
l information and warnings:
● Airbag system ⇒ page 31
● Light
⇒ page 95
● Tr
ansporting ⇒ page 13
● T
owing mode ⇒ page 233
● Wheel
s and tyres ⇒ page 293 Safety First Operating instructions Practical tips Technical Data
Page 189 of 385
187
Driving
● On slopes, turn the front wheels so that they are against the edge of the
k erb
.
● Uphill, turn the wheels towards the centre of the road. WARNING
The components of the exhaust system reach very high temperatures.
This c
ould cause a fire and considerable damage.
● Always park your vehicle so that no part of the exhaust system can
come in cont
act with flammable materials (such as wood, leaves, spilled
fuel, dried grass, etc). CAUTION
● Special care should be taken when parking in areas with high kerbs or
fi x
ed barriers. Objects protruding from the ground may damage the bumper
or other parts of the vehicle during manoeuvres. To avoid damage, stop be-
fore the wheels touched the barrier or kerb.
● Special attention is required when driving through entrances, over
ramps, k
erbs or other objects. The vehicle underbody, bumpers, mudguards
and running gear, and the engine and exhaust system could be damaged as
you drive over these objects.
Information about the brakes For the first 200 to 300 km (100 to 200 miles),
new brake p
ads have not yet
reached their maximum braking capacity, and need to be “run in” first ⇒ .
The slightly r
educed braking effect can be compensated for by increasing
pressure on the brake pedal. While running in, the full braking distance or
emergency braking distance is larger then when the brake pads have been
run in. While running in, avoid full power braking or situations requiring
braking performance. For example, in heavy traffic. The rate of wear of the brake pads
depends
to a great extent on the condi-
tions in which the vehicle is used and the way the vehicle is driven. If the
vehicle is used frequently in city traffic or for short trips or driven sport style,
visit a specialist workshop regularly more frequently than advised in the
Maintenance Programme to have the bake pads checked.
If you drive with wet brakes, for example, after crossing areas of water, in
heavy rainfall or even after washing the car, the effect of the brakes is less-
ened as the brake discs are wet or even frozen (in winter). At higher speed,
dry the brakes as quickly as possible by braking gently several times. Only
do this without endangering vehicles behind you or any other road users
⇒ .
A la y
er of salt on the discs and brake pads will reduce brake efficiency and
increase braking distance. If you drive for a prolonged period on salted
roads without braking then brake carefully several times to eliminate the
layer of salt on the brakes ⇒ .
If the v
ehicle remains parked for considerable lengths of time, is used little,
or if the brakes are not used, there may be corrosion on the brake discs and
a buildup of dirt on the brake pads. If the brakes are not used frequently, or
if rust has formed on the discs, SEAT recommends cleaning the pads and
discs by braking firmly a few times at a moderately high speed. Only do this
without endangering vehicles behind you or any other road users ⇒ .
Fau lt
s in the brake system
During braking, if you notice that the vehicle does not react as usual (that
the braking distance has increased suddenly) it may be possible that there
is a fault in the braking system. The warning lamp lights up and a text
message displayed. Take the vehicle to a Technical Service immediately and
have the fault repaired. Drive at a moderate speed and be prepared to use
more pressure on the brake pedal, and allow for longer stopping distances.
Brake servo
The brake servo only operates when the engine is running and the pressure
applied by the driver on the brake pedal increases. Safety First Operating instructions Practical tips Technical Data
Page 240 of 385
238
Trailer towing
●The vehicle centre of gravity and handling change because of the trailer
lo a
d and because of the increased combined mass of the vehicle and trail-
er.
● If the towing vehicle is empty and the trailer loaded then the load distri-
bution is
incorrect. If you must travel in these conditions, drive carefully and
reduce your speed accordingly.
Hill starts with a trailer
Depending on the hill and the gross combined weight, it is possible that the
combined vehicle and trailer move backwards slightly when starting.
For a hill start with a trailer, proceed as follows:
● Press and hold the brake pedal.
● Press the button once to turn off the electric parking brake
⇒ p ag
e 183.
● Press and hold the button to hold the vehicle and trailer combination
us in
g the parking brake.
● With a manual gearbox: press the clutch pedal to the floor.
● Engage first gear or the gear range D ⇒ page 174, Ch
anging gear.
● Release the brake pedal.
● Move off slowly. To do this, gently release the clutch pedal (for manual
gearbo
x).
● Release the button only when the engine provides sufficient power
to mo v
e the vehicle and trailer combination. WARNING
Jerking the trailer in an unsuitable manner could cause loss of vehicle
contr o
l with the subsequent serious consequences.
● Driving with a trailer and transporting heavy or a large objects will
chan
ge the vehicle handling and braking distances. WARNING (Continued)
● Antic ipate traffic and be extremely cautious. Brake early.
● Adju
s
t your speed and driving style to visibility, road, traffic and
weather c
onditions. Reduce your speed, especially on steep hills.
● Accelerate gently and carefully. Avoid brusque manoeuvres and sud-
den brakin
g.
● Always take the following precautions seriously. Reduce your speed
immediately
if you observe the trailer rocking from side to side.
● Never try to stop the “snaking” by increasing speed.
● Always take the speed limits for vehicles with and without trailers in
each c
ountry into account.
Stabilising the vehicle and trailer combination Stabilisation of the vehicle and trailer combination is an extension of the
electr
onic
stability control ESC (ESP) and helps, with the assistance of the
trajectory control, to reduce trailer “snaking”.
Stabilisation of the vehicle and trailer combination is active when the ESC
(ESP) indicator on the dashboard remains lit for about two seconds more
than the ABS indicator.
Requirements for stabilising the vehicle/trailer combination
● An original tow hitch is fitted by the manufacturer or a compatible model
is r
etrofitted.
● The ESC (ESP) is on. The warning indicator in the control panel is not
lit
.
● The trailer is connected to the vehicle using the socket.
● The vehicle is driven faster than 60 km/h.
● The maximum drawbar load is used.
Page 295 of 385
293
Wheels and tyres
Wheels and tyres
Wheels
Introduction The SEAT Alhambra is equipped as standard with anti-puncture technology
tyr
e
s (Conti-Seal). In the event of a puncture or air leak of up to 5 mm, the
tyre seals the hole with a protective layer inside the tread.
SEAT recommend that all work on tyres and wheels is carried out by a Tech-
nical Service. They have the necessary special tools and replacement parts,
trained personnel and facilities for disposing of the old tyres. SEAT recom-
mends visiting a Technical Service.
Additional information and warnings:
● Transporting ⇒ page 13
● T
owing mode ⇒ page 233
● Br
aking, stopping and parking ⇒ page 183
● P
ark assist system ⇒ page 202
● T
yre control systems ⇒ page 221
● C
aring for and cleaning the vehicle exterior ⇒ page 242
● Wheel
trims ⇒ page 304
● Ch
ange wheel ⇒ page 305
● Not
es for the user ⇒ page 255 WARNING
The vehicle cannot be totally controlled or braked if the tyres (new or
used) ar e w
orn or damaged.
● Incorrect use of wheels and tyres could make driving more dangerous
and res
ult in serious accidents and damage.
● All four wheels must be fitted with radial tyres of the same type, size
(rol
ling circumference) and the same tread pattern.
● New tyres do not give maximum grip and will not have reached their
maximum br
aking capacity to start with, and therefore need running in.
To prevent accidents and major damage, extreme caution should be tak-
en for the first 600 km (370 miles).
● Check tyre pressures regularly and ensure they are maintained at the
pres
sures indicated. If the tyre pressure is too low, the tyres could over-
heat, resulting in tread detachment or even burst tyres.
● Never drive on damaged (punctured, cut, cracked or dented) or worn
tyre
s. Driving on damaged or worn tyres could result in burst tyres, seri-
ous accidents or damage. Worn or damaged tyres must be replaced im-
mediately.
● Never exceed the maximum permitted speed or loads specified for the
type of ty
re fitted on your vehicle.
● The efficiency of driver and brake assist systems also depends on the
grip of the tyr
es.
● If you notice unusual vibration or if the vehicle pulls to one side when
driving, s
top the car immediately and check the tyres and wheels for
damage.
● To minimise the risk of losing control of the vehicle or causing a seri-
ous ac
cident, never undo the bolted joints of beadlock wheels. Safety First Operating instructions Practical tips Technical Data
Page 346 of 385
344
General notes on the technical data
Technical Data
Genera l
notes on the technical data
Outstanding information
Important All data in the official vehicle documents take precedence
ov
er
this data.
All data provided in this manual are valid for the standard model in Spain.
The vehicle data card included in the Inspection and Maintenance Plan in
the vehicles registration documents show which engine is installed in the
vehicle.
The figures may be different depending on if additional equipment is fitted,
for different models, for special vehicles and for other countries.
Additional information and warnings:
● Transporting ⇒ page 13
● E
cological driving ⇒ page 225
● F
uel ⇒ page 267
● Engine oi
l ⇒ page 279
● En
gine coolant ⇒ page 283
● Wheel
s and tyres ⇒ page 293
● Not
es for the user ⇒ page 255 Abbr
eviations used in the Technical Data section Abbrevia-
tion Meaning
kW Kilowatt, engine power measurement.
PS Pferdestärke (horsepower), formerly used to denote engine
pow
er
. rpm Revolutions per minute - engine speed.
Nm Newton metres, unit of engine torque.
l/100 km Fuel consumption in litres per 100 km.
g/km Carbon dioxide emissions in grams per km travelled.
CO
2 Carbon dioxide
CN Cetane number, indication of the diesel combustion power.
RON Research octane number, indication of the knock resistance
of petr
o
l. WARNING
Failure to observe requirements for weight, loads, dimensions and maxi-
mum speed m a
y lead to severe accident.
Page 348 of 385
346
General notes on the technical data
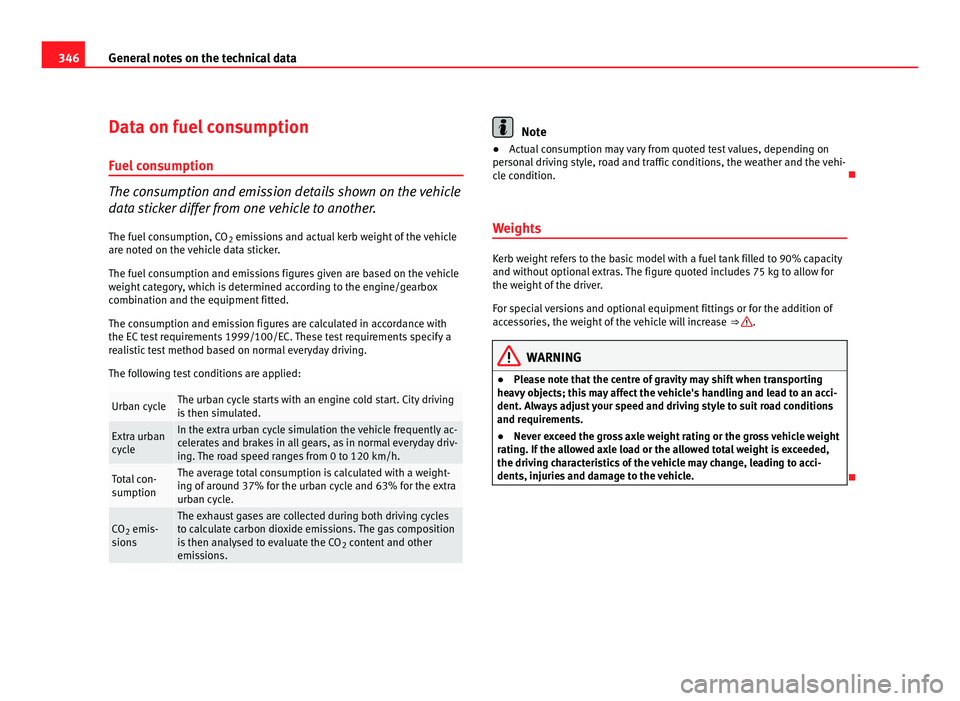
Data on fuel consumption
Fuel c
onsumption The consumption and emission details shown on the vehicle
data
s
ticker differ from one vehicle to another.
The fuel consumption, CO 2 emissions and actual kerb weight of the vehicle
are noted on the vehicle data sticker.
The fuel consumption and emissions figures given are based on the vehicle
weight category, which is determined according to the engine/gearbox
combination and the equipment fitted.
The consumption and emission figures are calculated in accordance with
the EC test requirements 1999/100/EC. These test requirements specify a
realistic test method based on normal everyday driving.
The following test conditions are applied: Urban cycle The urban cycle starts with an engine cold start. City driving
is
then s
imulated. Extra urban
cyc
l
e In the extra urban cycle simulation the vehicle frequently ac-
cel
er
ates and brakes in all gears, as in normal everyday driv-
ing. The road speed ranges from 0 to 120 km/h. Total con-
sumption The average total consumption is calculated with a weight-
ing of
ar
ound 37% for the urban cycle and 63% for the extra
urban cycle. CO
2 emis-
s ion
s The exhaust gases are collected during both driving cycles
to c
alc
ulate carbon dioxide emissions. The gas composition
is then analysed to evaluate the CO 2 content and other
emissions. Note
● Actual consumption may vary from quoted test values, depending on
per son
al driving style, road and traffic conditions, the weather and the vehi-
cle condition.
Weights Kerb weight refers to the basic model with a fuel tank filled to 90% capacity
and without
option
al extras. The figure quoted includes 75 kg to allow for
the weight of the driver.
For special versions and optional equipment fittings or for the addition of
accessories, the weight of the vehicle will increase ⇒ .
WARNING
● Please note that the centre of gravity may shift when transporting
he avy
objects; this may affect the vehicle's handling and lead to an acci-
dent. Always adjust your speed and driving style to suit road conditions
and requirements.
● Never exceed the gross axle weight rating or the gross vehicle weight
rating. If
the allowed axle load or the allowed total weight is exceeded,
the driving characteristics of the vehicle may change, leading to acci-
dents, injuries and damage to the vehicle.
Page 370 of 385
Child safety . . . . . . . . . . . . . . . . . . . . . . . . . . . . . 39
Chil
d s
afety seat
Securing with seat belt . . . . . . . . . . . . . . . . 44
Child seat . . . . . . . . . . . . . . . . . . . . . . . . . . . . . . 39 Integrated child seat . . . . . . . . . . . . . . . . . . 46
ISOFIX child seat on rear seats . . . . . . . . . . 43
Mounting child seats . . . . . . . . . . . . . . . . . . 42
Mounting systems . . . . . . . . . . . . . . . . . . . . 42
On rear seats . . . . . . . . . . . . . . . . . . . . . . . . 43
On the front passenger seat . . . . . . . . . . . . 42
Regulations . . . . . . . . . . . . . . . . . . . . . . . . . . 41
Securing using a Top Tether retaining strap 45
Securing using ISOFIX . . . . . . . . . . . . . . . . . 45
Securing using LATCH . . . . . . . . . . . . . . . . . 45
Transporting children in the vehicle . . . . . . 40
Weight categories . . . . . . . . . . . . . . . . . . . . 41
Child seats Disabling the front passenger airbag . . . . . 35
Cigarette lighter . . . . . . . . . . . . . . . . . . . . 150, 151
Cleaning Alcantara . . . . . . . . . . . . . . . . . . . . . . . . . . . 251
Engine compartment . . . . . . . . . . . . . . . . . 249
instrument panel . . . . . . . . . . . . . . . . . . . . 253
Seat belts . . . . . . . . . . . . . . . . . . . . . . . . . . 253
See "Care of your vehicle" . . . . . . . . . . . . . 242
wheels . . . . . . . . . . . . . . . . . . . . . . . . . . . . . 248
Windscreen wiper blades . . . . . . . . . . . . . 246
Cleaning chrome parts . . . . . . . . . . . . . . . . . . . 247
Cleaning the vehicle Folding exterior mirrors . . . . . . . . . . . . . . . 113
Climate control . . . . . . . . . . . . . . . . . . . . . . . . . 155 Air recirculation mode . . . . . . . . . . . . . . . . 161
Air vents . . . . . . . . . . . . . . . . . . . . . . . . . . . 161 Climatic . . . . . . . . . . . . . . . . . . . . . . . . . . . . 157
Climatr
onic . . . . . . . . . . . . . . . . . . . . . . . . . 157
Controls . . . . . . . . . . . . . . . . . . . . . . . . . . . . 157
Faults . . . . . . . . . . . . . . . . . . . . . . . . . . . . . 160
Indirect ventilation . . . . . . . . . . . . . . . . . . . 161
Things to note . . . . . . . . . . . . . . . . . . . . . . . 160
User instructions . . . . . . . . . . . . . . . . . . . . 159
Climatic see "Climate control" . . . . . . . . . . . . . . . . . 155
Climatronic see "Climate control" . . . . . . . . . . . . . . . . . 155
Closing Doors . . . . . . . . . . . . . . . . . . . . . . . . . . . . . . . 80
Electric sliding door . . . . . . . . . . . . . . . . . . . 82
Electric windows . . . . . . . . . . . . . . . . . . . . . . 89
Panorama sliding sunroof . . . . . . . . . . . . . . 92
See "Locking" . . . . . . . . . . . . . . . . . . . . . . . . 76
Sliding doors . . . . . . . . . . . . . . . . . . . . . . . . 81
Sunshade . . . . . . . . . . . . . . . . . . . . . . . . . . . 93
Tailgate . . . . . . . . . . . . . . . . . . . . . . . . . . . . . 86
Coat hooks . . . . . . . . . . . . . . . . . . . . . . . . . . . . 147
Cockpit . . . . . . . . . . . . . . . . . . . . . . . . . . . . . . . . 53
Code number . . . . . . . . . . . . . . . . . . . . . . . . . . 321
Collection of end-of-life vehicles . . . . . . . . . . . 256
Combined weight rating . . . . . . . . . . . . . . . . . 240
Compartment Glove compartment . . . . . . . . . . . . . . . . . . 144
Compartments Card compartments . . . . . . . . . . . . . . . . . . 144
Centre console . . . . . . . . . . . . . . . . . . . . . . 143
Drawers . . . . . . . . . . . . . . . . . . . . . . . . . . . . 146
Folding table . . . . . . . . . . . . . . . . . . . . . . . . 146
Front central armrest . . . . . . . . . . . . . . . . . 143 Instrument panel . . . . . . . . . . . . . . . . . . . . 142
Other stor
age compartments . . . . . . . . . . 147
Portable waste bin . . . . . . . . . . . . . . . . . . . 147
Rear floor area . . . . . . . . . . . . . . . . . . . . . . 145
Spectacle case . . . . . . . . . . . . . . . . . . . . . . 142
Compass . . . . . . . . . . . . . . . . . . . . . . . . . . . . . . . 60
Components . . . . . . . . . . . . . . . . . . . . . . . . . . . 258
Connectors Faults . . . . . . . . . . . . . . . . . . . . . . . . . . . . . 154
Consumer disconnection . . . . . . . . . . . . . . . . . 291
Consumption How it is determined . . . . . . . . . . . . . . . . . 270
Information . . . . . . . . . . . . . . . . . . . . . . . . . 270
Control lamp AdBlue . . . . . . . . . . . . . . . . . . . . . . . . . . . . 271
Brake pad wear indication . . . . . . . . . . . . . 184
Brake system . . . . . . . . . . . . . . . . . . . . . . . 184
Changing gear . . . . . . . . . . . . . . . . . . . . . . 175
Checking the engine oil level . . . . . . . . . . 279
Coolant . . . . . . . . . . . . . . . . . . . . . . . . . . . . 284
Cruise control . . . . . . . . . . . . . . . . . . . . . . . 212
Engine oil sensor . . . . . . . . . . . . . . . . . . . . 279
ESP . . . . . . . . . . . . . . . . . . . . . . . . . . . . . . . 184
Filling the tank . . . . . . . . . . . . . . . . . . . . . . 265
Fuel level . . . . . . . . . . . . . . . . . . . . . . . . . . . 265
Lane assist system . . . . . . . . . . . . . . . . . . . 216
Pressing the brake . . . . . . . . . . . . . . . . . . . 184
Steering column lock . . . . . . . . . . . . . . . . . 167
Tyre monitoring indicator . . . . . . . . . . . . . . 222
Tyre monitoring systems . . . . . . . . . . . . . . 222
Windscreen wiper fluid level . . . . . . . . . . . 105
Controlling function Electric exterior mirrors . . . . . . . . . . . . . . . 113368
Index