display Seat Alhambra 2015 User Guide
[x] Cancel search | Manufacturer: SEAT, Model Year: 2015, Model line: Alhambra, Model: Seat Alhambra 2015Pages: 305, PDF Size: 5.46 MB
Page 51 of 305
Cockpit
Using the menus on the instrument
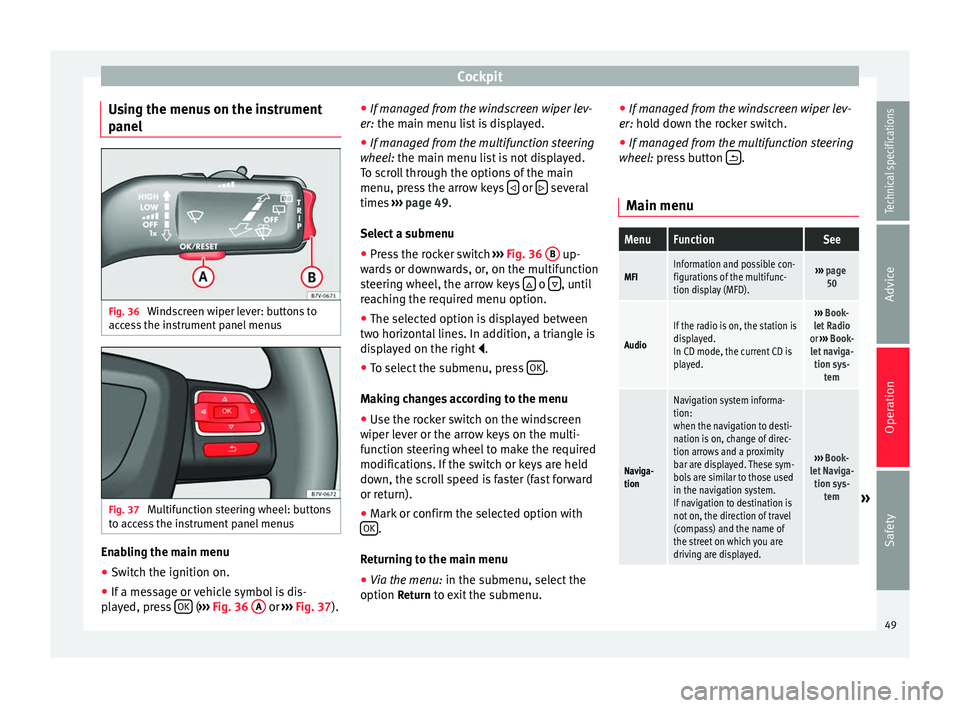
panel Fig. 36
Windscreen wiper lever: buttons to
access the instrument panel menus Fig. 37
Multifunction steering wheel: buttons
to access the instrument panel menus Enabling the main menu
● Switch the ignition on.
● If a message or vehicle symbol is dis-
played, press OK (
››› Fig. 36 A or
››› Fig. 37 ).●
If mana ge d from the windscreen wiper lev-
er: the main menu list is displayed.
● If manage
d from the multifunction steering
wheel: the main menu list is not displayed.
To s
croll through the options of the main
menu, press the arrow keys or
several
times ››› page 49 .
Sel ect
a submenu
● Press the rocker switch ››› Fig. 36
B up-
wards or downwards, or, on the multifunction
steering wheel, the arrow keys o
, until
reaching the required menu option.
● The selected option is displayed between
two horizontal lines. In addition, a triangle is
displayed on the right .
● To select the submenu, press OK .
Making changes according to the menu ● Use the rocker switch on the windscreen
wiper lever or the arrow keys on the multi-
function steering wheel to make the required
modifications. If the switch or keys are held
down, the scroll speed is faster (fast forward
or return).
● Mark or confirm the selected option with
OK .
Returning to the main menu
● Via the menu: in the submenu, select the
option Return to exit the submenu. ●
If managed from the windscreen wiper lev-
er: hold down the rocker switch.
● If mana ge
d from the multifunction steering
wheel: press button .
Main menu
MenuFunctionSee
MFIInformation and possible con-
figurations of the multifunc-
tion display (MFD).››› page
50
Audio
If the radio is on, the station is
displayed.
In CD mode, the current CD is
played.››› Book-
let Radio
or ››› Book-
let naviga- tion sys- tem
Naviga-
tion
Navigation system informa-
tion:
when the navigation to desti-
nation is on, change of direc-
tion arrows and a proximity
bar are displayed. These sym-
bols are similar to those used
in the navigation system.
If navigation to destination is
not on, the direction of travel
(compass) and the name of
the street on which you are
driving are displayed.
››› Book-
let Naviga- tion sys- tem
» 49
Technical specifications
Advice
Operation
Safety
Page 52 of 305
OperationMenuFunctionSee
Tele-
phoneMobile telephone pre-installa-
tion set up information and
options
›››
Book-
let Radio
or ››› Book-
let Naviga- tion sys- tem
Parking
heating
Information and configura-
tions of the parking heating:
switching the parking heating
on or off. Select the operating
mode and duration.
››› page
128
Vehicle
condition
Current warning or informa-
tion texts.
This option only appears
when one of the following
texts is available. The number
of available messages is dis-
played. Example 1/1 or 2/2.
››› page 40
Configu-
ration
Different setting options, for
example, the Convenience,
Lighting & Visibility menus,
and the time, speed warning
with winter tyres, language,
units of measurement, or “Dis-
play off”.
››› page
51 MFI
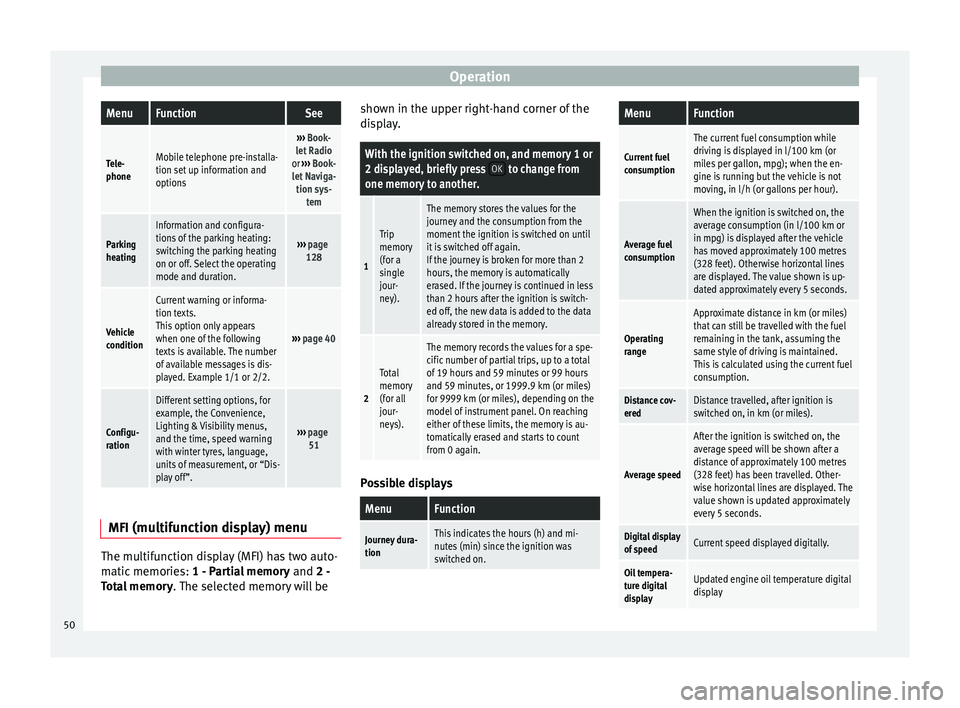
(multifunction display) menu The multifunction display (MFI) has two auto-
matic memories:
1 - Partial memory and 2 -
T ot
al memory . The selected memory will be shown in the upper right-hand corner of the
display.
With the ignition switched on, and memory 1 or
2 displayed, briefly press
OK to change from
one memory to another.
1
Trip
memory
(for a
single
jour-
ney).
The memory stores the values for the
journey and the consumption from the
moment the ignition is switched on until
it is switched off again.
If the journey is broken for more than 2
hours, the memory is automatically
erased. If the journey is continued in less
than 2 hours after the ignition is switch-
ed off, the new data is added to the data
already stored in the memory.
2
Total
memory
(for all
jour-
neys).
The memory records the values for a spe-
cific number of partial trips, up to a total
of 19 hours and 59 minutes or 99 hours
and 59 minutes, or 1999.9 km (or miles)
for 9999 km (or miles), depending on the
model of instrument panel. On reaching
either of these limits, the memory is au-
tomatically erased and starts to count
from 0 again. Possible displays
MenuFunction
Journey dura-
tionThis indicates the hours (h) and mi-
nutes (min) since the ignition was
switched on.
MenuFunction
Current fuel
consumption
The current fuel consumption while
driving is displayed in l/100 km (or
miles per gallon, mpg); when the en-
gine is running but the vehicle is not
moving, in l/h (or gallons per hour).
Average fuel
consumption
When the ignition is switched on, the
average consumption (in l/100 km or in mpg) is displayed after the vehicle
has moved approximately 100 metres
(328 feet). Otherwise horizontal lines
are displayed. The value shown is up-
dated approximately every 5 seconds.
Operating
range
Approximate distance in km (or miles)
that can still be travelled with the fuel
remaining in the tank, assuming the
same style of driving is maintained.
This is calculated using the current fuel
consumption.
Distance cov-
eredDistance travelled, after ignition is
switched on, in km (or miles).
Average speed
After the ignition is switched on, the
average speed will be shown after a
distance of approximately 100 metres
(328 feet) has been travelled. Other-
wise horizontal lines are displayed. The
value shown is updated approximately
every 5 seconds.
Digital display
of speedCurrent speed displayed digitally.
Oil tempera-
ture digital
displayUpdated engine oil temperature digital
display 50
Page 53 of 305
CockpitMenuFunction
Speed warn-
ing at --- km/hIf the stored speed is exceeded (be-
tween 30 - 250 km/h, or 18 -
155 mph), an audible warning is given
together with a visual warning. Changing between display modes
● In vehicles without multifunction steering
wheel: press the lever.
● Vehicle
s with a multifunction steering
wheel:
press or
.
Storing a speed for the speed warning
● Select the display Speed warning at --- km/h
.
● Press OK to store the current speed and
switch off the warning.
● In addition, set the required speed by
pressing the rocker switch on the windscreen
wiper lever or buttons or
on the multi-
function steering wheel for 5 seconds. Next,
press OK again or wait a few seconds. The
speed is stored and the warning activated.
● To switch off , press OK . The stored speed is
deleted.
Manually erasing memory 1 or 2
● Select the memory to be erased.
● Press and hold OK for approximately 2 sec-
onds. Personalising the displays
It is possible to select which of the displays
in the multifunction display you wish to see
on the instrument panel in the
settings
menu. The units of measurement can also be
modified ››› page 51 .
C onfigur
ation Menu
Configu-
ration
MenuFunction
Multi-
function
display
dataConfiguration of the multifunction display
data that you wish to see on the instrument
panel display ››› page 50.
Compass
Changing the magnetic region and calibra-
tion of the compass. To calibrate the com-
pass, please follow the instructions given
on the instrument panel display.
Conven-
ienceChanging vehicle convenience functions
››› page 52.
Lights &
visibilityConfiguration of vehicle lighting
››› page 52.
Time
Changing the hours and minutes of the in-
strument panel clock and the navigation
system. The time can be set here and the
choice can be made between the 24-hour
and 12-hour display. The S in the upper
part of the display indicates that the clock
is set to summer time.
Configu-
ration
MenuFunction
Winter
tyres
Changing the visual and audible speed
warnings. This function should only be
used when the vehicle is fitted with winter
tyres, which are not designed for travel at
high speeds.
LanguageChanging the language of the display texts
and the navigation system.
UnitsChanging the units of measurement for the
temperature, consumption and distance.
Second
speedSwitching second speed display on and off.
Auto-HoldSelect if the Auto-Hold function should be
on permanently.
ServiceCheck the service notifications or reset the
service intervals to zero.
Factory
settingsSome functions of the Configuration menu
will be reset to the factory value.
BackThe main menu is displayed again. 51
Technical specifications
Advice
Operation
Safety
Page 54 of 305
Operation
Submenu ConvenienceConven-
ience
menuFunction
Central
locking
››› page
57
Auto. lock (Auto Lock): automatic locking of
all doors and boot when reaching a speed
of approximately 15 km/h (10 mph). In or-
der to unlock the vehicle when it is stop-
ped, push the central locking button, pull
the door handle or remove the key from the
ignition lock if the Auto unlock function is
enabled.
Auto unlock (Auto Lock): Unlocking all doors and the boot by removing the ignition lock
key.
Door unlock: when unlocking the vehicle
with the key, the following doors unlock
based on the setting:
– All: all of the doors are unlocked.
– One door: when unlocking the vehicle with the key, only the driver's door unlocks.
Pressing the button
again unlocks all
doors and the boot.
– Vehicle side: the doors on the driver's side
unlock.
On vehicles fitted with the Keyless Access
››› page 57 system, when using the corre-
sponding handle, all doors unlock on the
side of the vehicle where the key is.
Handling
windows
Adjusting the electric windows: this ena-
bles the windows to be opened or closed
when the vehicle is unlocked or locked re-
spectively. The open function can only be
activated from the driver door ››› page 70.
Conven-
ience
menuFunction
Rear vi-
sion mir-
ror ad-
justmentTilts passenger mirror downwards when re-
verse gear is engaged. This enables the
driver to see the edge of the pavement, for
example ››› page 85.
Exterior
mirror ad-
just.If synchronised adjustment is selected,
when the driver side exterior mirror is ad-
justed, the passenger exterior mirror is also
moved.
Factory
settingsSome functions of the Convenience subme-
nu will be reset to the factory value.
BackThe Configuration menu is displayed again. Lights & visibility
submenu
Lights &
visibility
menuFunction
Coming
HomeThis permits the adjustment of the time the
headlamps stay on after locking or unlock-
ing the vehicle, the function can also be
connected or disconnected here
››› page 78.
Leaving
Home
Footwell
lightThis permits the adjustment of the bright-
ness of the footwell lighting when the doors
are open, the function can also be connec-
ted or disconnected here
Lights &
visibility
menuFunction
Conven-
ience turn
signalsSwitching convenience turn signals on and
off When the convenience turn signals are
connected,, these flash at least three times
when the turn signal is switched on
››› page 74.
Factory
settingsAll the configurations in the submenu
Lights & visibility are reset to the prede-
fined factory values.
Tourist
light
Headlamp adjustment for countries in
which vehicles are driven on the other side
of the road. When the mark is activated, the
headlamps of a left-hand drive vehicle are
adjusted for driving on the left. This func-
tion must only be used for a short period.
BackThe Configuration menu is displayed again. Personal convenience settings
When two people use a vehicle, SEAT recom-
mends that each person always uses “their”
own remote control key. When the ignition is
switched off, or the vehicle is locked, the per-
sonal convenience settings are stored and
automatically allocated to the vehicle key
››› page 47 .
The v
alues of the personalised convenience
settings of the following menu options are al-
located to the vehicle key:
52
Page 63 of 305
Opening and closing
few seconds on the lock sensor surface
››› Fig. 47 B located on the exterior part of
the driver or passenger door handle until the
windows and roof close.
Opening the doors by touching the sensor
s ur
face on the handle takes places in accord-
ance with the settings activated on the menu
Configuration - Convenience ››› page 47. CAUTION
The sensor surfaces on the door handles
could engage if hit with a water jet or high
pressure steam if there is a valid vehicle key
in the nearby area. If at least one of the win-
dows is open and the sensor surface B on
one of the handle permanently activates, all
windows will close. If the water jet or steam
is briefly moved away from the sensor sur-
face A on one of the handles and then poin-
ted at it again, all the windows will probably
open ››› page 60, Convenience functions. Note
● If the vehicle battery has little or no charge,
or the vehicle key battery is almost or entire-
ly out of charge, it is likely that the vehicle
will not be able to be lock or unlocked with
the Keyless Access system. The vehicle can
be unlocked or locked manually ››› page 259.
● If there is no valid key inside the vehicle or
the system fails to detect one, a warning will
display on the dash panel screen. This could
happen if any other radio frequency signal in- terferes with the key signal (e.g. from a mo-
bile device accessory) or if the key is covered
by another object (e.g. an aluminium case).
● If the sensors are very dirty, e.g. have a lay-
er of salt, how the sensors on the door han-
dles operate may be affected. If this is the
case, wash the vehicle ››› page 195.
● If the vehicle is equipped with an automatic
gearbox, it may only be locked in the gear
stick is in position P. Deadlock
FunctionNecessary operations
Locks the vehicle with
the "Safe" security sys-
tem.Press the button once on
the vehicle key.
Locks the vehicle with-
out the "Safe" security
system.
Press the button twice on
the vehicle key.
Touch the Keyless Access
close and ignition lock sensor
surface located on the exteri-
or part of the door handle
twice ››› page 59.
Press the central locking but-
ton on the driver door
once. Depending on the vehicle, when disabling
the ignition, a warning on the dash panel
screen may display stating that the "safe" se-curity system is activated (
Lock SAFE or SAFE-
L OCK
).
Disabling the "safe" security system
The "safe" security system may be disable in
one of the following ways:
● Press the button on the vehicle key
twice .
● Touc
h the Keyless Access close and igni-
tion lock sensor surface located on the exteri-
or part of the door handle twice ››› p
age 59.
● Switch the ignition on.
● Press the ignition push button of the
Keyless Access lock and ignition system.
When the “safe” security system is disabled,
the following needs to be taken into account:
● The vehicle can be opened and unlocked
from the inside using an inside door handle.
● The anti-theft alarm is activated.
● The vehicle interior monitoring system and
the anti-tow system are disabled. WARNING
Careless use of the “Safe” security system
can cause serious injury.
● Never leave anybody inside the vehicle if it
has been locked using the key. When the
"Safe" security system is activated, doors
cannot be opened from the inside! » 61
Technical specifications
Advice
Operation
Safety
Page 66 of 305
Operation
Warning lampIt
lights upPossible causeSolution
At least one vehicle
door is open or not
correctly shut. Stop driving imme-
diately!
Open the correspond-
ing door and close it
immediately. Several warning and control lamps light up
for a few seconds when the ignition is switch-
ed on, signalling that the function is being
verified. They will switch off after a few sec-
onds.
If a door is open or incorrectly closed, the
warning lamp
or on the instrument pan-
el will light up.
Depending on the vehicle equipment, a sym-
bol may be displayed on the dash panel
screen instead of the warning lamp. The indi-
cation is also visible when the ignition is
switched off. The indication disappears
around 15 seconds after the vehicle has
been locked. Sliding doors
Introduction WARNING
If a sliding door is not correctly closed, it
could open unexpectedly when driving and
cause serious injuries.
● Stop immediately and close it.
● When closing, ensure that the sliding door
has closed correctly. A closed sliding door
should be flush with the corresponding parts
of the bodywork.
● Only open and close sliding doors when no
body is in the way of the door. WARNING
If a sliding door is not fully open, it could
close unexpectedly and cause serious inju-
ries.
● Always open the sliding door fully. WARNING
Opening sliding doors while driving is dan-
gerous. These doors may be pushed open or
closed when the vehicle accelerates or brakes
and cause serious injuries.
● Never open the sliding doors when the ve-
hicle is in movement. Manually opening and closing the
sliding door
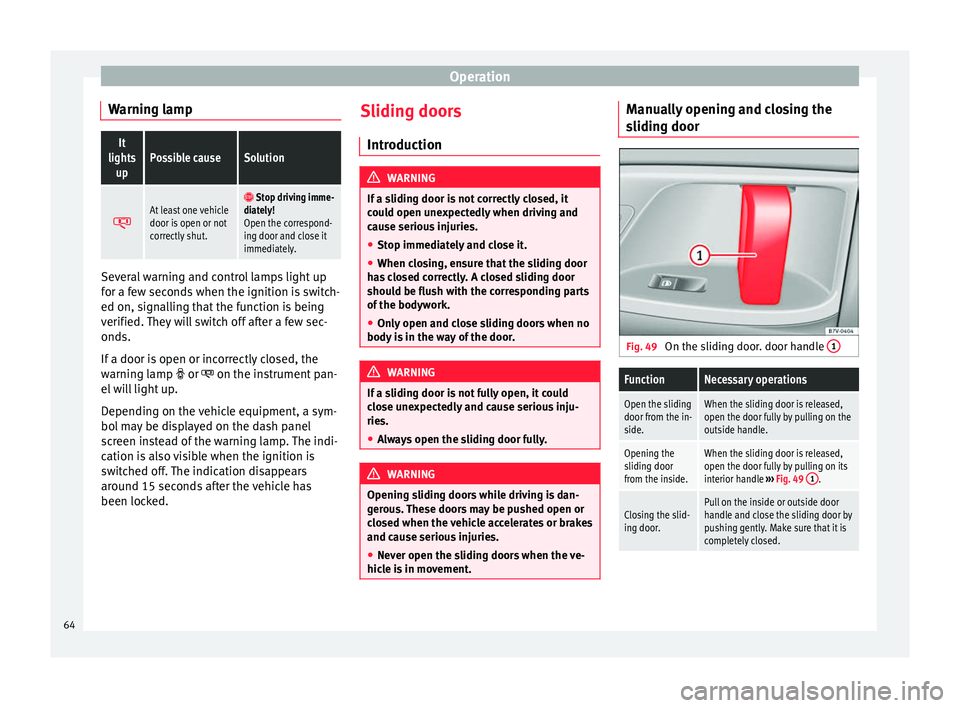
Fig. 49
On the sliding door. door handle 1
FunctionNecessary operations
Open the sliding
door from the in-
side.When the sliding door is released,
open the door fully by pulling on the
outside handle.
Opening the
sliding door
from the inside.When the sliding door is released,
open the door fully by pulling on its
interior handle
››› Fig. 49 1
.
Closing the slid-
ing door.Pull on the inside or outside door
handle and close the sliding door by
pushing gently. Make sure that it is
completely closed.64
Page 69 of 305
Opening and closing
CAUTION
Before opening the rear lid, ensure that there
is sufficient free space to open and close it,
for example if you are towing a trailer or in a
garage. Warning lampIt
lights upPossible causeSolution
The rear lid is open
or not correctly
shut. Stop driving imme-
diately!
Open the rear lid and
close it again. Several warning and control lamps light up
for a few seconds when the ignition is switch-
ed on, signalling that the function is being
verified. They will switch off after a few sec-
onds.
A warning lamp appears on the dash panel
if the boot hatch is open or not properly
closed.
Depending on the vehicle equipment, a sym-
bol may be displayed on the dash panel
screen instead of the warning lamp. The indi-
cation is also visible when the ignition is
switched off. The indication disappears
around 15 seconds after the vehicle has
been locked. WARNING
If the rear lid is not correctly closed, it could
open unexpectedly when driving and cause
serious injuries.
● Always stop immediately and close the rear
lid.
● Ensure that the rear lid has been locked in-
to place by the element on the lock carrier
when you close it. Opening the rear lid
Fig. 52
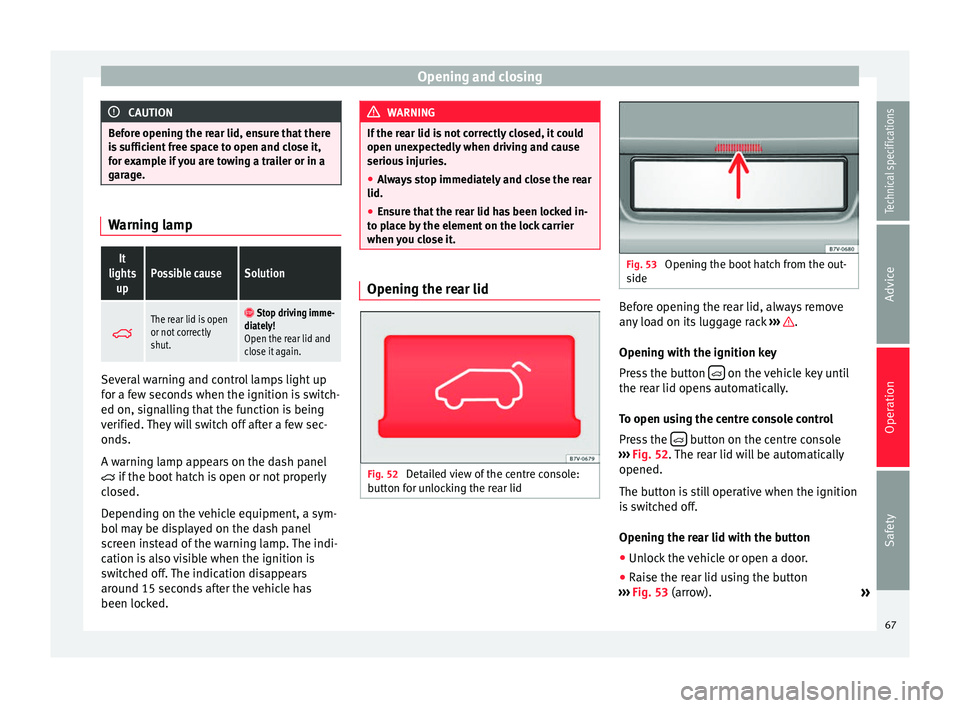
Detailed view of the centre console:
button for unlocking the rear lid Fig. 53
Opening the boot hatch from the out-
side Before opening the rear lid, always remove
any load on its luggage rack
››› .
Opening with the ignition key
Press the button on the vehicle key until
the rear lid opens automatically.
To open using the centre console control
Press the button on the centre console
››› Fig. 52 . The rear lid will be automatically
opened.
The b utt
on is still operative when the ignition
is switched off.
Opening the rear lid with the button
● Unlock the vehicle or open a door.
● Raise the rear lid using the button
››› Fig. 53 (arrow).
»
67
Technical specifications
Advice
Operation
Safety
Page 78 of 305
Operation
● Switching on the front fog lights : Turn
the sw it
ch to position or pull out to the
first stop.
● Switching on the rear fog light : turn the
light sw
itch to position or pull out to
the maximum.
● To switch off the fog lights, press the light
switch or turn it to position
.
Audible warnings to advise the driver that
the lights have not been switched off
If the key is not in the ignition and the driver
door is open, an audible warning signal is
heard in the following cases: this is a remind-
er to turn off the lights.
● When the parking light is on ››› page 76.
● When the light switch is in position .WARNING
The side lights or daytime driving lights are
not bright enough to illuminate the road
ahead and to ensure that other road users are
able to see you.
● Always use your dipped beam head lights if
it is raining or if visibility is poor. Turn signal and main beam lever
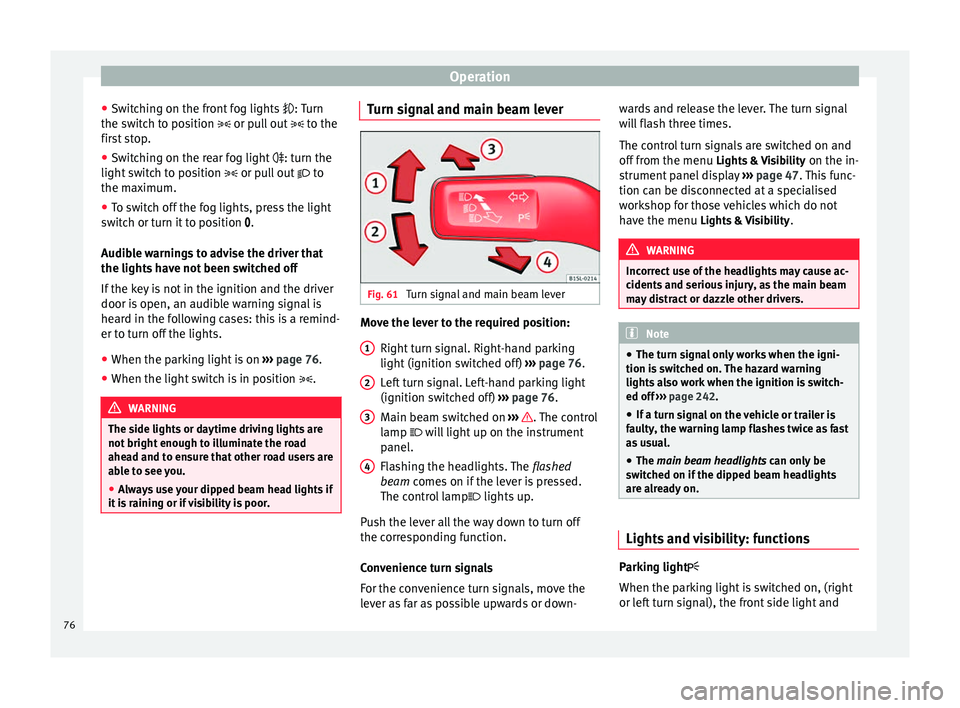
Fig. 61
Turn signal and main beam lever Move the lever to the required position:
Right turn signal. Right-hand parking
light (ignition switched off) ››› page 76.
Left turn signal. Left-hand parking light
(ignition switched off) ››› page 76.
Main beam switched on ››› . The control
lamp will light up on the instrument
panel.
Flashing the headlights. The flashed
beam comes on if the lever is pressed.
The c ontr
ol lamp lights up.
Push the lever all the way down to turn off
the corresponding function.
Convenience turn signals
For the convenience turn signals, move the
lever as far as possible upwards or down- 1 2
3
4 wards and release the lever. The turn signal
will flash three times.
The control turn signals are switched on and
off from the menu
Lights & Visibility on the in-
strument panel display ››› page 47. This func-
tion can be disconnected at a specialised
workshop for those vehicles which do not
have the menu Lights & Visibility
. WARNING
Incorrect use of the headlights may cause ac-
cidents and serious injury, as the main beam
may distract or dazzle other drivers. Note
● The turn signal only works when the igni-
tion is switched on. The hazard warning
lights also work when the ignition is switch-
ed off ››› page 242.
● If a t
urn signal on the vehicle or trailer is
faulty, the warning lamp flashes twice as fast
as usual.
● The main beam headlights can only be
sw
itched on if the dipped beam headlights
are already on. Lights and visibility: functions
Parking light
When the parking light is switched on, (right
or left turn signal), the front side light and
76
Page 80 of 305
Operation
them off again at speeds below approximate-
ly 30 km/h (18 mph).
Switching on and off Action
Switch-
ing on:– With the ignition on, turn the lights control
to the position and put the turn signal
and main beam lever in the main beam posi-
tion ››› page 76. When the headlight adjust-
ment (automatic lights also) is activated, the
warning lamp lights up in the dash panel
display
.
Switch-
ing off:– Disconnect the on button.
– OR: turn the lights control to a different po-
sition to
››› page 75.
– OR: place the turn signal and main beam
lever in the headlight flasher or main beam
position ››› page 76. The following conditions can cause the head-
light adjustment to fail to turn off the main
beam or fail to do so in time:
●
On roads with insufficient lighting with very
reflective signs
● If road users are insufficiently lit up, e.g.
pedestrians or cyclists.
● On closed curves, when the traffic in the
opposite direction is partially hidden, on pro-
nounced slopes
● On roads with traffic in the opposite direc-
tion and with a central reservation barrier
where the driver can see through gaps or
over it e.g. lorry drivers. ●
If the camera is damaged or if the power
supply has been cut off
● In the event of fog, snow or heavy rain
● In the event of dust or sand storms
● If the windscreen is damaged by the impact
from a stone in the camera's field of vision
● If the camera's field of vision is misted up,
dirty or covered by a sticker, snow or ice. WARNING
The greater comfort that the headlight ad-
justment provides (automatic also) must not
cause you to take risks. The system is not a
replacement for driver awareness.
● Always monitor the lights yourself and ad-
just them depending on the light, visibility
and traffic conditions.
● The headlight adjustment (automatic also)
may not correctly detect all situations and in
certain situations may only provide limited
function.
● If the windscreen is damaged or modifica-
tions are made to the vehicle lighting, this
may harm the functioning of the headlight
adjustment (automatic lights also), for exam-
ple, if additional headlight are fitted. Note
Main beam and flashed headlights can be
turned on and off manually at any time with
the turn signal and main beam lever
››› page 76. “Coming home” and “Leaving home”
function (guidance lights)
The “Coming home” function should be
switched on manually. However the “Leav-
ing home” function is automatically control-
led by a photo sensor.
Coming home: necessary operations
To switch sys-
tem on:
– Switch off the ignition.
– Briefly flash the headlights
for ap-
proximately one second ››› page 76.
The “Coming home” lighting comes on
when the driver door is opened. The
delay in switching off the headlights is
counted from when the last door or
boot hatch is closed.
To switch sys-
tem off:
– Automatically at the end of the delay
period.
– Automatically, if 30 seconds after
coming on, a vehicle door or the boot
hatch remains open.
– When the light switch is turned to po-
sition
.
– When the ignition is switched on.
Leaving home: necessary operations
To switch sys-
tem on:– Unlock the vehicle when the light
switch is in position and the pho-
to sensor detects darkness.78
Page 124 of 305
Operation
Air conditioning
Air conditioner Introduction Viewing Climatronic information
The factory-fitted radio or navigation system
screen briefly displays information relating to
Climatronic.
The units of temperature measurement is dis-
played on the factory-installed radio or navi-
gation system and, depending on the vehicle
equipment, can be set using the
Configura-
tion menu on the instrument panel. WARNING
Reduced visibility through the windows in-
creases the risk of serious accidents.
● Ensure that all windows are free of ice and
snow and that they are not fogged up pre-
venting a clear view of everything outside.
● The maximum heat output required to de-
frost windows quickly is only available when
the engine has reached its normal running
temperature. Only drive when you have good
visibility. ●
Always ensure that you use the air condi-
tioner and heated rear window to maintain
good visibility.
● Never leave the air recirculation on for a
long period of time. If the cooling system is
switched off and air recirculation mode
switched on, the windows can mist over very
quickly, considerably limiting visibility.
● Switch air recirculation mode off when it is
not required. WARNING
Stuffy or used air will increase fatigue and re-
duce driver concentration possibly resulting
in a serious accident.
● Never leave the fresh air fan turned off or
use the air recirculation for long periods of
time; the air in the vehicle interior will not be
refreshed. CAUTION
● Switch the air conditioner off if you think it
may be broken. This will avoid additional
damage. Have the air conditioner checked by
a specialised workshop.
● Repairs to the air conditioner require spe-
cialist knowledge and special tools. SEAT rec-
ommends taking your car in for technical
service. ●
Do not smoke when air recirculation is
switched on in vehicles with an air condition-
er. The smoke taken in could lie on the cool-
ing system vaporiser and on the activated
charcoal cartridge of the dust and pollen fil-
ter, leading to a permanently unpleasant
smell. Note
● When the cooling system is turned off, air
coming from the outside will not be dried. To
avoid fogging up the windows, SEAT recom-
mends leaving the cooler (compressor) on. To
do this, press the A/C button. The button
lamp should light up.
● If the humidity and temperature outside the
vehicle are high, condensation can drip off
the evaporator in the cooling system and
form a pool underneath the vehicle, this is
completely normal and there is no need to
suspect a leak.
● Keep the air intake slots in front of the
windscreen free of snow, ice and leaves to en-
sure heating and cooling are not impaired,
and to prevent the windows from misting
over. 122