ignition Seat Alhambra 2015 Repair Manual
[x] Cancel search | Manufacturer: SEAT, Model Year: 2015, Model line: Alhambra, Model: Seat Alhambra 2015Pages: 305, PDF Size: 5.46 MB
Page 143 of 305
Driving
● Press and hold the brake pedal until the ve-
hicle comes to a standstill.
● Connect the electronic parking brake
››› page 140 .
● For an aut
omatic gearbox, move the selec-
tor lever to position P.
● Sw
itch off the engine and release the brake
pedal.
● Remove the key from the ignition.
● If necessary, turn the steering wheel slight-
ly to lock the steering.
● With a manual gearbox, engage 1st gear on
flat ground and slopes, or even reverse gear
on hills, and release the clutch pedal.
● Ensure that all passengers leave the vehi-
cle, especially children.
● When leaving the vehicle, take all keys with
you.
● Lock the vehicle.
Additional information for steep slopes and
hills
Before switching off the engine, rotate the
steering wheel so that if the vehicle should
move, it will be held by the kerb.
● On slopes, turn the front wheels so that
they are against the edge of the kerb.
● Uphill, turn the wheels towards the centre
of the road. WARNING
The components of the exhaust system reach
very high temperatures. This could cause a
fire and considerable damage.
● Always park your vehicle so that no part of
the exhaust system can come in contact with
flammable materials (such as wood,
leaves,dried grass, or spilled fuel). CAUTION
● Special care should be taken when parking
in areas with high kerbs or fixed barriers. Ob-
jects protruding from the ground may dam-
age the bumper or other parts of the vehicle
during manoeuvres. To avoid damage, stop
before the wheels touch the barrier or kerb.
● Special attention is required when driving
through entrances, over ramps, kerbs or oth-
er objects. The vehicle underbody, bumpers,
mudguards and running gear, and the engine
and exhaust system could be damaged as
you drive over these objects. Information about the brakes
For the first 200 to 300 km, new brake pads
have not yet reached their maximum braking
capacity, and need to be “run in” first
››› .
The slightly reduced braking effect can be
compensated for by increasing pressure on
the brake pedal. While running in, the full
br ak
ing distance or emergency braking dis- tance is larger
then when the brake pads
have been run in. While running in, avoid full
power braking or situations requiring braking
performance. For example, in heavy traffic.
The
rate of wear of the brake pads depends
to a great extent on the conditions in which
the vehicle is used and the way the vehicle is
driven. If the vehicle is used frequently in city
traffic or for short trips or driven sport style,
visit a specialised workshop regularly, more
frequently than advised in the Maintenance
Programme, to have the brake pads checked.
If you drive with wet brakes, for example, af-
ter crossing areas of water, in heavy rainfall
or even after washing the car, the effect of
the brakes is lessened as the brake discs are
wet or even frozen (in winter). At higher
speed, “dry” the brakes as quickly as possi-
ble by braking gently several times. Only do
this without endangering vehicles behind
you or any other road users ››› .
A layer of salt on the discs and brake pads
w i
ll reduce the effectiveness of the brakes
and increase braking distance. If you drive for
a prolonged period on salted roads without
braking then brake carefully several times to
eliminate the layer of salt on the brakes ››› .
If the vehicle remains parked for considera-
ble lengths of time, is used little, or if the
brakes are not used, there may be corrosion
on the brake discs and a build up of dirt on
the brake pads. If the brakes are not used »
141
Technical specifications
Advice
Operation
Safety
Page 145 of 305
Driving
reduce the strain on the brake system. Other-
wise, the brakes may overheat and fail. Only
use the brakes to reduce speed or to stop.
Note
When checking the front brake pads, take the
time to also check the rear brake pads. The
thickness of the brake pads should be
checked visually and regularly, by looking
through the openings in the wheel rims or
from underneath the vehicle. If necessary, re-
move the wheels to check them thoroughly.
SEAT recommends taking your car in for tech-
nical service. Changing gear
Introduction When reverse gear is engaged and the
ignition is switched on the following takes
place:
● Reverse lights light up.
● When reversing, the air conditioner auto-
matically changes to air recirculation mode.
● The rear window heater switches on when
the windscreen wiper is activated.
● Also, the parking sensor system, the opti-
cal parking sensor and the camera for the re-
verse assist system are connected. WARNING
Rapid acceleration can cause loss of traction
and skidding, especially on slippery ground.
This could cause loss of control of the vehicle
resulting in an accident and considerable
damage.
● Only use the kick-down function or rapid
acceleration if visibility, weather, road and
traffic conditions so permit. WARNING
Do not allow the brakes to “rub” for a pro-
longed period of time, or brake frequently or
for long periods of time. Continuous braking
heats up the brakes. This could significantly
reduce braking power, increase braking dis-
tance or even result in the total failure of the
brake system. Warning and control lampsIt lights
upPossible causeSolution
(red)Brake pedal not
pressed!Press brake pedal to
the floor.
(green)Brake pedal not
pressed.
To select a range of
gears, press the
brake pedal.
Please also see "Elec-
tronic parking brake"
››› page 137.
FlashesPossible causeSolution
(green)
The selector lever
locking button
has not engaged.
The vehicle does
not start to move.Engage the selector
lever lock
››› page 145. Several warning and control lamps light up
for a few seconds when the ignition is switch-
ed on, signalling that the function is being
verified. They will switch off after a few sec-
onds.
WARNING
Observe the safety warnings ››› in Control
and warning lamps on page 47. Manual gearbox: Engaging gears
Fig. 129
Gear shift pattern of a 6-speed man-
ual gearbox » 143
Technical specifications
Advice
Operation
Safety
Page 146 of 305
Operation
The position of each of the gears is shown on
the gear stick ››› Fig. 129 .
● Keep the c
lutch pedal pushed all the way
down.
● Move the gearbox lever to the required po-
sition.
In some countries, it is necessary to press the
clutch pedal to the floor to start the engine.
Selecting reverse gear
● With the vehicle at a standstill, press the
clutch pedal to the floor and keep pressed.
● Push the gear lever down.
● Move the gear stick to the left and then for-
wards to reverse gear ››› Fig. 129 R .
WARNING
When the engine is running, the vehicle will
start to move as soon as a gear is engaged
and the clutch released. This is also the case
with the electronic parking brake on.
● Never engage the reverse gear when a vehi-
cle is moving forward. CAUTION
To prevent damage and avoid premature
wear, please observe the following:
● While driving, do not leave your hand rest-
ing on the gear stick. The pressure applied by your hand is transmitted to the gearbox se-
lector forks.
● Always ensure that the vehicle is complete-
ly stopped before engaging the reverse gear.
● When changing gear, always make sure the
clutch pedal is pushed right to the floor.
● Never hold the vehicle “on the clutch” on
hills with the engine on. Automatic gearbox*: selecting gears
Fig. 130
Automatic gearbox selector lever
with locking button (arrow) The selector lever has a lock. When changing
the selector lever from position
P
to a range
of
gears, press the brake pedal and press the
lock on the selector lever, located on the
front part of the knob, in the direction of the
arrow ››› Fig. 130
. To move the gear selector
lever from the position N to D or to R, first
press and hold the brake pedal. When the ignition is on, the current position
of the selector lever is shown on the instru-
ment panel.
Selector
lever po- sitionsDenomi- nationMeaning ›››
Parking
lock
The driven wheels are locked
mechanically.
They only engage when the
vehicle is at a standstill . To
change the position of the
selector lever, press the
brake pedal and switch on
the ignition.
Reverse
gearReverse gear is engaged.
Only select reverse gear
when the vehicle is at a
standstill.
Neutral
The gear box is in neutral. No
movement is transmitted to
the wheels and the engine
does not act as a brake.
Standard
forwards driving
position (normal pro-
gramme)The gears are changed (up
and down) automatically.
The gear shifts are deter-
mined by the engine load,
your individual driving style
and the speed of the vehicle. 144
Page 147 of 305
DrivingSelector
lever po- sitionsDenomi- nationMeaning ›››
Standard
forwards driving
position (sports pro-
gramme)
The shift up to a higher gear
is automatically delayed and
the shift down is faster with
respect to the D range of
gears, to take full advantage
of the engine power. The
gear shifts are determined by
the engine load, your individ-
ual driving style and the
speed of the vehicle. Selector lever locking
The gear selector lever lock prevents, in
P or
N , a gear selection from being inadvertently
en
gaged and the vehicle moving off acciden-
tally.
To release the gear selector lever lock, press
and hold the brake pedal with the ignition
on. Press simultaneously on the selector lev-
er lock.
The selector lever lock is not engaged if it is
moved quickly through position N (e.g. when
shiftin
g from R to D). This makes it possible,
for instance, to “rock the vehicle backwards
and forwards” if it is stuck in snow or mud.
The selector lever lock engages automatically
if the brake pedal is not pressed and the lev-
er is in position N
for more than about one
second at a speed of less than 5 km/h
(3 mph). In vehicles with a DSG
®
automatic gearbox,
on rare occasions the selector lever lock may
not engage. In this case, the transmission is
locked to prevent the vehicle from moving ac-
cidentally. The green control light flashes
and an inform
ation text is displayed. Proceed
as follows to engage the selector lever lock:
● Press the brake pedal and then release. WARNING
Placing the selector lever in an incorrect posi-
tion may cause loss of control of the vehicle
and a serious accident.
● Do not press the accelerator when engag-
ing a range of gears.
● With the engine running and a range of
gears selected, the vehicle will move off
when the brake pedal is released.
● Never select reverse gear or the parking
lock while driving. WARNING
Unintentional movements of the vehicle
could cause serious injury.
● As a driver, you should never leave your ve-
hicle if the engine is running and a gear range
is engaged. If you have to leave your vehicle
while the engine is running, you must apply
the electronic parking brake and engage
parking lock P with the selector lever.
● While the engine is running and with the D,
S or R range of gears selected, keep the brake pressed to keep the vehicle at a standstill.
Transmission is not totally interrupted either
when the vehicle is idling or when the vehicle
“continues moving forwards”.
●
Never engage the R or P gear ranges when
the vehicle is moving.
● Never leave the vehicle with the gear selec-
tor in N. The vehicle may move downhill re-
gardless of whether the engine is switched
on or not. CAUTION
If, when the vehicle is at a standstill, the
electronic parking brake is not applied and
the brake pedal is released while in position
P, the vehicle may move a few centimetres
forwards or backwards. Note
If, while driving, the selector lever is acciden-
tally placed in position N, lift your foot off the
accelerator. Wait until the engine is running
at idle speed before selecting a new gear
range. 145
Technical specifications
Advice
Operation
Safety
Page 154 of 305
OperationFlashesPossible causeSolution
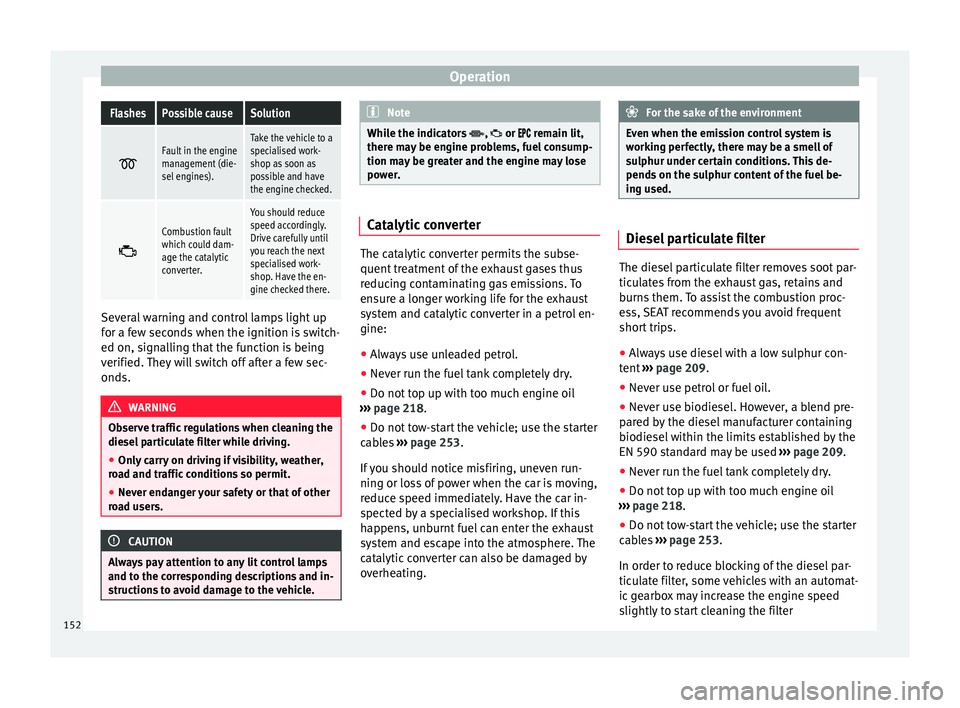
Fault in the engine
management (die-
sel engines).Take the vehicle to a
specialised work-
shop as soon as
possible and have
the engine checked.
Combustion fault
which could dam-
age the catalytic
converter.
You should reduce
speed accordingly.
Drive carefully until
you reach the next
specialised work-
shop. Have the en-
gine checked there.
Several warning and control lamps light up
for a few seconds when the ignition is switch-
ed on, signalling that the function is being
verified. They will switch off after a few sec-
onds.
WARNING
Observe traffic regulations when cleaning the
diesel particulate filter while driving.
● Only carry on driving if visibility, weather,
road and traffic conditions so permit.
● Never endanger your safety or that of other
road users. CAUTION
Always pay attention to any lit control lamps
and to the corresponding descriptions and in-
structions to avoid damage to the vehicle. Note
While the indicators ,
or remain lit,
there may be engine problems, fuel consump-
tion may be greater and the engine may lose
power. Catalytic converter
The catalytic converter permits the subse-
quent treatment of the exhaust gases thus
reducing contaminating gas emissions. To
ensure a longer working life for the exhaust
system and catalytic converter in a petrol en-
gine:
● Always use unleaded petrol.
● Never run the fuel tank completely dry.
● Do not top up with too much engine oil
››› page 218 .
● Do not t
ow-start the vehicle; use the starter
cables ›››
page 253.
If
you should notice misfiring, uneven run-
ning or loss of power when the car is moving,
reduce speed immediately. Have the car in-
spected by a specialised workshop. If this
happens, unburnt fuel can enter the exhaust
system and escape into the atmosphere. The
catalytic converter can also be damaged by
overheating. For the sake of the environment
Even when the emission control system is
working perfectly, there may be a smell of
sulphur under certain conditions. This de-
pends on the sulphur content of the fuel be-
ing used. Diesel particulate filter
The diesel particulate filter removes soot par-
ticulates from the exhaust gas, retains and
burns them. To assist the combustion proc-
ess, SEAT recommends you avoid frequent
short trips.
● Always use diesel with a low sulphur con-
tent ›››
page 209 .
● Nev er u
se petrol or fuel oil.
● Never use biodiesel. However, a blend pre-
pared by the diesel manufacturer containing
biodiesel within the limits established by the
EN 590 standard may be used ›››
page 209.
● Never run the fuel tank completely dry.
● Do not top up with too much engine oil
››› page 218.
● Do not t
ow-start the vehicle; use the starter
cables ›››
page 253.
In order t
o reduce blocking of the diesel par-
ticulate filter, some vehicles with an automat-
ic gearbox may increase the engine speed
slightly to start cleaning the filter
152
Page 156 of 305
Operation
Driver assistance systems
Braking and stability systems Brake assist systems The brake assist systems ESC, ABS, BAS, ASR
and EDL only operate when the ignition is
switched on. They contribute significantly to
increasing active safety.
Electronic Stability Control (ESC)
ESC reduces the risk of skidding and increa-
ses the vehicle stability by braking individual
wheels under specific driving conditions. ESC
detects critical handling situations, such as
understeer, oversteer and wheelspin on the
driven wheels. The system stabilises the ve-
hicle by braking individual wheels or by re-
ducing the engine torque.
The ESC has limits. It is important to realise
that the ESC is also subject to the laws of
physics. ESC will not be able to deal with all
situations with which drivers may be faced.
For example, if the road surface changes sud-
denly then ESC will not be useful in all cases.
If the vehicle suddenly enters a section cov-
ered by water, mud or snow then ESC will not
provide assistance in the same way as on dry
ground. If the vehicle loses its grip on the
ground and moves on a film of water (“aqua-
planing”), the ESC will not be able to assist the driver to control the vehicle as the loss of
adherence with the road surface will prevent-
ing braking and steering. If the vehicle is
driven through series of bends at high
speed, the ESC will not always be as effec-
tive: the vehicle reaction to aggressive driv-
ing is not the same as at reduced speeds.
When driving with a trailer, ESC does not pro-
vide the same amount of vehicle control as
without a trailer.
Adjust your speed and driving style to road,
traffic and weather conditions. ESC cannot
push the limits of the laws of physics; im-
prove the transmission available or maintain
the vehicle on the road if a lack of driver at-
tention creates an inevitable situation. Other-
wise, ESC assists in maintaining vehicle con-
trol in extreme situations and uses the move-
ments of the steering made by the driver to
maintain the vehicle moving in the desired
direction. If the vehicle is driven at such a
speed that it will leave the road before ESC
can intervene then the system cannot pro-
vide assistance.
The ABS, BAS, ASR and EDL systems are in-
corporated into the ESC. The ESC is always
on. The ESC should only be turned off using
the ASR button
›››
Fig. 134 when traction is
in s
ufficient. Always remember to turn on the
ASR once more when the vehicle has traction
again. Anti-lock brake system (ABS)
ABS can prevent the wheels from locking dur-
ing braking until just before the vehicle stops
thus helping the driver to steer the vehicle
and maintain control. This means that, even
during full braking, the risk of skidding is re-
duced:
● Press and hold the brake pedal fully. Do not
remove your foot from the brake pedal or re-
duce braking force!
● Do not “pump” the brake pedal, or reduce
braking force!
● Maintain vehicle direction when braking
fully.
● When the brake pedal is released or when
the brake force is reduced, ABS is turned off.
ABS control can be observed by vibration of
the brake pedal and noise. You should never
expect
the ABS to reduce the braking dis-
tance under
any circumstances. This distance
will increase when driving on gravel, recent
snow or on icy and slippery ground.
When driving on loose ground, the all-terrain
configuration of the ABS is automatically
turned on. When ABS is activated, the front
wheels may lock briefly. This shortens the
braking distance in off-road situations as the
wheels are prevented from digging into loose
surfaces. All-terrain ABS only intervenes
when driving in a straight line. When the
154
Page 160 of 305
Operation
CAUTION
Before entering an automatic car wash, al-
ways switch the Auto Hold function off, as it
could be damaged when the electronic park-
ing brake automatically engages. Start-Stop Function*
Fig. 136
Detailed view of the centre console:
Start-Stop function button With the Start-Stop system enabled, the en-
gine is automatically stopped when the vehi-
cle is at a standstill. The engine restarts auto-
matically when required.
The function is enabled automatically when-
ever the ignition is switched on. The instru-
ment panel displays information on the cur-
rent status. Vehicles with a manual gearbox
● When the vehicle is at a standstill, leave it
in neutral and take your foot off the clutch.
The engine switches off.
● Simply depress the clutch pedal to move
off again.
Vehicles with an automatic gearbox
● When the vehicle is at a standstill, depress
the brake or keep it pressed down. The en-
gine switches off.
● The engine will start again as soon as you
release the brake pedal.
● With the selector lever set to position P, the
en gine w
ill not start until a range of gears is
selected or the accelerator pedal is de-
pressed.
Important conditions for the engine to
automatically switch off
● The driver seat belt must be buckled.
● The driver door must be closed.
● The bonnet must be closed.
● The factory-fitted towing bracket must not
be electrically connected to a trailer.
● A minimum engine temperature has been
reached.
● The steering wheel must not be turned
more than 270 degrees.
● The vehicle has moved since the last stop. ●
In vehicles with Climatronic: the tempera-
ture inside the vehicle is within the pre-set
temperature range.
● The temperature set is neither very high nor
very low.
● The air conditioning defrost function is not
switched on.
● In vehicles with Climatronic: the blower has
not been manually set to a high speed.
● The power level of the vehicle's battery is
sufficient.
● The vehicle's battery temperature is neither
too high nor too low.
● The vehicle is not on a steep gradient or
slope.
● The front wheels are not overly turned.
● The heated windscreen is not switched on.
● Reverse gear is not engaged.
● The park assist system is not switched on.
Conditions for automatically restarting the
engine
The engine may automatically restart under
the following conditions:
● If the vehicle interior is too hot or too cold.
● If the vehicle moves.
● If the vehicle's battery voltage drops.
158
Page 162 of 305
Operation
show it. Therefore, it will not warn you of
these objects. Ignoring the warnings of the
parking sensor system could cause consider-
able damage to the vehicle.
● The bumper sensors may become damaged
or misaligned, for example, when parking.
● To ensure that the system works properly,
the bumper sensors must be kept clean, free
of ice and snow and uncovered.
● When cleaning the sensors with high-pres-
sure or steam cleaning equipment, spray the
sensors briefly at a distance of no less than
10 cm (4 inches). Note
Acoustic sources may lead to erroneous warn-
ings on the parking sensor system, e.g.
rough tarmac, cobbles or the noise of other
vehicles. Parking sensor system*
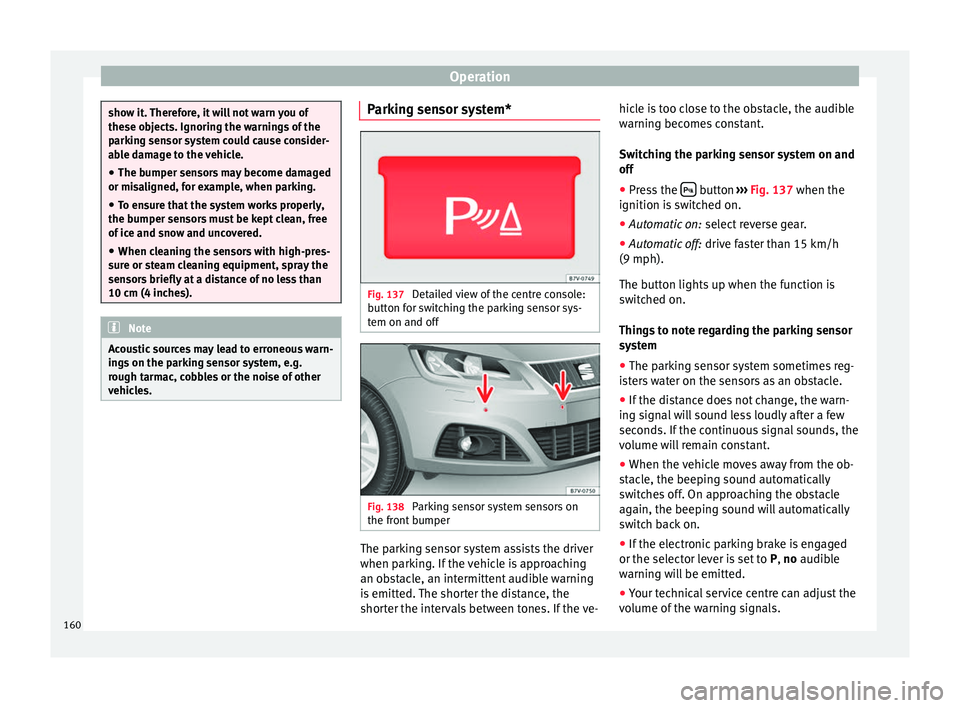
Fig. 137
Detailed view of the centre console:
button for switching the parking sensor sys-
tem on and off Fig. 138
Parking sensor system sensors on
the front bumper The parking sensor system assists the driver
when parking. If the vehicle is approaching
an obstacle, an intermittent audible warning
is emitted. The shorter the distance, the
shorter the intervals between tones. If the ve-hicle is too close to the obstacle, the audible
warning becomes constant.
Switching the parking sensor system on and
off
● Press the button
››› Fig. 137 when the
ignition i s
switched on.
● Automatic on: select reverse gear.
● Automatic off: drive faster than 15 km/h
(9 mph).
The button lights up when the function is
switched on.
Things to note regarding the parking sensor
system
● The parking sensor system sometimes reg-
isters water on the sensors as an obstacle.
● If the distance does not change, the warn-
ing signal will sound less loudly after a few
seconds. If the continuous signal sounds, the
volume will remain constant.
● When the vehicle moves away from the ob-
stacle, the beeping sound automatically
switches off. On approaching the obstacle
again, the beeping sound will automatically
switch back on.
● If the electronic parking brake is engaged
or the selector lever is set to P, no
audible
warning will be emitted.
● Your technical service centre can adjust the
volume of the warning signals.
160
Page 169 of 305
Driver assistance systems
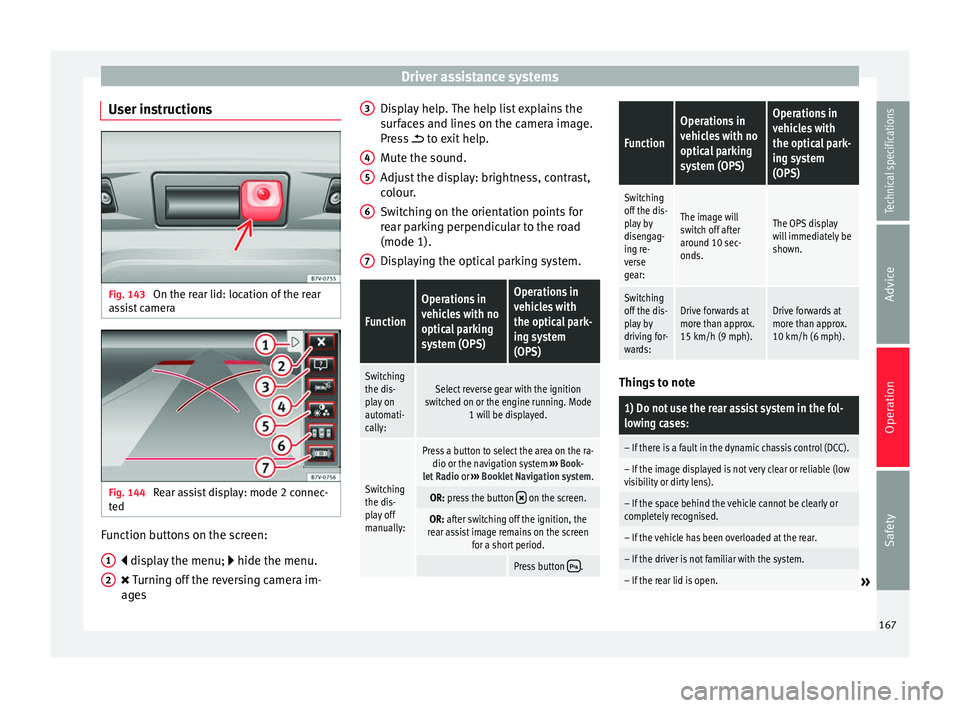
User instructions Fig. 143
On the rear lid: location of the rear
assist camera Fig. 144
Rear assist display: mode 2 connec-
ted Function buttons on the screen:
display the menu;
hide the menu.
Turning off the reversing camera im-
ages
1 2 Display help. The help list explains the
surfaces and lines on the camera image.
Press
to exit help.
M ut
e the sound.
Adjust the display: brightness, contrast,
colour.
Switching on the orientation points for
rear parking perpendicular to the road
(mode 1).
Displaying the optical parking system.
Function
Operations in
vehicles with no
optical parking
system (OPS)Operations in
vehicles with
the optical park-
ing system
(OPS)
Switching
the dis-
play on
automati-
cally:Select reverse gear with the ignition
switched on or the engine running. Mode 1 will be displayed.
Switching
the dis-
play off
manually:
Press a button to select the area on the ra-dio or the navigation system ››› Book-
let Radio or ››› Booklet Navigation system.
OR: press the button on the screen.
OR: after switching off the ignition, the
rear assist image remains on the screen for a short period.
Press button . 3
4
5
6
7
Function
Operations in
vehicles with no
optical parking
system (OPS)Operations in
vehicles with
the optical park-
ing system
(OPS)
Switching
off the dis-
play by
disengag-
ing re-
verse
gear:
The image will
switch off after
around 10 sec-
onds.The OPS display
will immediately be
shown.
Switching
off the dis-
play by
driving for-
wards:Drive forwards at
more than approx.
15 km/h (9 mph).Drive forwards at
more than approx.
10 km/h (6 mph).
Things to note
1) Do not use the rear assist system in the fol-
lowing cases:
– If there is a fault in the dynamic chassis control (DCC).
– If the image displayed is not very clear or reliable (low
visibility or dirty lens).
– If the space behind the vehicle cannot be clearly or
completely recognised.
– If the vehicle has been overloaded at the rear.
– If the driver is not familiar with the system.
– If the rear lid is open.»
167
Technical specifications
Advice
Operation
Safety
Page 172 of 305
Operation
●
To avoid unexpected operation of the cruise
control system, turn it off every time you fin-
ish using it.
● It is dangerous to use a set speed which is
too high for the prevailing road, traffic or
weather conditions.
● When travelling down hills, the CCS cannot
maintain a constant speed. The vehicle tends
to accelerate under its own weight. Select a
lower gear or use the foot brake to slow the
vehicle. Warning and control lamp
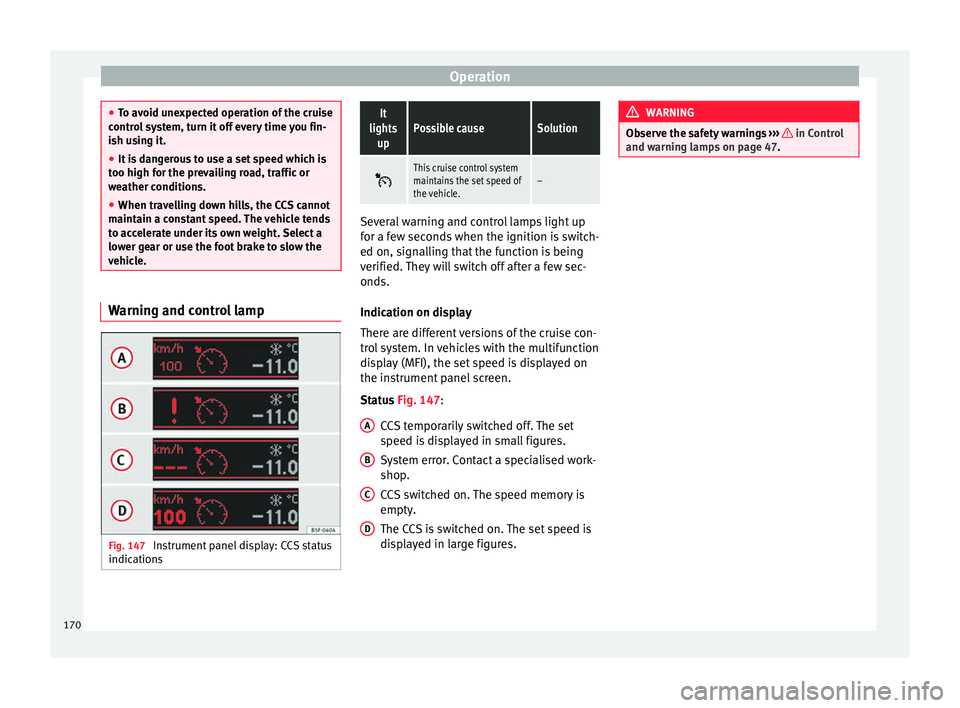
Fig. 147
Instrument panel display: CCS status
indicationsIt
lights upPossible causeSolution
This cruise control system
maintains the set speed of
the vehicle.–
Several warning and control lamps light up
for a few seconds when the ignition is switch-
ed on, signalling that the function is being
verified. They will switch off after a few sec-
onds.
Indication on display
There are different versions of the cruise con-
trol system. In vehicles with the multifunction
display (MFI), the set speed is displayed on
the instrument panel screen.
Status
Fig. 147
:
CCS temporarily switched off. The set
speed is displayed in small figures.
System error. Contact a specialised work-
shop.
CCS switched on. The speed memory is
empty.
The CCS is switched on. The set speed is
displayed in large figures.
A B
C
D WARNING
Observe the safety warnings ››› in Control
and warning lamps on page 47. 170