brake Seat Alhambra 2018 Owner's Manual
[x] Cancel search | Manufacturer: SEAT, Model Year: 2018, Model line: Alhambra, Model: Seat Alhambra 2018Pages: 324, PDF Size: 7.04 MB
Page 5 of 324
Frequently Asked Ques-
tion
sBefore driving
How do you adjust the seat?
››› page 15
How do you adjust the steering wheel? ››› page 18
How do you adjust the exterior mirrors? ››› page 18
How do you turn on the exterior lights? ››› page 25
How does the automatic gearbox selector lever work?
››› page 36
How do you refuel? ››› page 40
How do you activate the windscreen wipers and wind-
screen washer system? ››› page 27
Emergency situations
A warning lamp lights up or flashes. What does this
mean? ››› page 34
Where are the first-aid kit and the warning triangle in
the vehicle? ››› page 83
How do you open the bonnet? ››› page 13
How do you perform a jump start? ››› page 52
Where is the vehicle tool kit located? ››› page 46
How do you repair a tyre with the anti-puncture kit?
››› page 45
How do you change a wheel? ››› page 46
How do you change a fuse? ››› page 43
How do you change a light? ››› page 92
How do you tow a vehicle? ››› page 51
Useful tips
How do you set the time? ››› page 103
When should the vehicle inspection should be per-
formed? ››› page 105
What functions do the buttons/thumbwheels on the
steering wheel perform? ››› page 108
How do you remove the luggage compartment cover?
››› page 170
How do you drive in an economical and environmental-
ly-friendly way? ››› page 200
How do you check and top up the engine oil?
››› page 40
How do you check and top up the engine coolant?
››› page 41
How do you top up the windscreen washer fluid?
››› page 42
How do you check and top up the brake fluid?
››› page 42
How do you check and adjust tyre pressure values?
››› page 291
Vehicle washing tips ››› page 253
Functions of interest
How does the START-STOP system work? ››› page 209
What parking assistants are available? ››› page 211,
››› page 214
How does the rear assist work? ››› page 217
How does the lane departure warning system work?
››› page 222
How does tyre pressure monitoring work? ››› page 234
How do you open the vehicle without a key (Keyless Ac-
cess)? ››› page 117
Interior lighting and ambient light ››› page 136
Page 8 of 324
Table of Contents
Park Assist system* (Park Assist) . . . . . . . . . . . 214
Rear assist* (Rear View Camera) . . . . . . . . . . . . 217
Cruise control* (Cruise control system -
C C
S)
. . . . . . . . . . . . . . . . . . . . . . . . . . . . . . . . . . . 221
Lane Assist system* . . . . . . . . . . . . . . . . . . . . . . 222
Blind spot detector (BSD) with rear cross traffic
alert
(RCTA) . . . . . . . . . . . . . . . . . . . . . . . . . . . . . 225
Traffic signal detection (Sign Assist)* . . . . . . . . 230
Tiredness detection (recommendation to take
a break)
. . . . . . . . . . . . . . . . . . . . . . . . . . . . . . . . 232
Dynamic Chassis control (DCC)* . . . . . . . . . . . . 233
Tyre monitoring systems . . . . . . . . . . . . . . . . . . 234
Towing bracket device . . . . . . . . . . . . . . . . . . . . 237
Driving with a trailer . . . . . . . . . . . . . . . . . . . . . . 237
Advice . . . . . . . . . . . . . . . . . . . . . . . . . . . . . . . . 247
Care and maintenance . . . . . . . . . . . . . . . . . . . . 247
Accessories, replacement of parts and modifi-
cations
. . . . . . . . . . . . . . . . . . . . . . . . . . . . . . . . 247
Caring for and cleaning the vehicle exterior . . . 253
Caring for and cleaning the vehicle interior . . . 259
Notes for the user . . . . . . . . . . . . . . . . . . . . . . . . 263
Checking and refilling levels . . . . . . . . . . . . . . . 264
Filling the tank . . . . . . . . . . . . . . . . . . . . . . . . . . 264
Fuel . . . . . . . . . . . . . . . . . . . . . . . . . . . . . . . . . . . 267
Selective catalytic reduction* (AdBlue) . . . . . . 268
Working in the engine compartment . . . . . . . . 271
Engine oil . . . . . . . . . . . . . . . . . . . . . . . . . . . . . . 274
Engine coolant . . . . . . . . . . . . . . . . . . . . . . . . . . 277
Brake fluid . . . . . . . . . . . . . . . . . . . . . . . . . . . . . 281
Windscreen washer reservoir . . . . . . . . . . . . . . 283
Vehicle battery . . . . . . . . . . . . . . . . . . . . . . . . . . 283
Wheels and tyres . . . . . . . . . . . . . . . . . . . . . . . . 287
Tyres . . . . . . . . . . . . . . . . . . . . . . . . . . . . . . . . . . 287
Winter service . . . . . . . . . . . . . . . . . . . . . . . . . . . 295 Technical data
. . . . . . . . . . . . . . . . . . . . . . . . 297
Technical features . . . . . . . . . . . . . . . . . . . . . . . 297
Important information . . . . . . . . . . . . . . . . . . . . 297
Towing a trailer . . . . . . . . . . . . . . . . . . . . . . . . . . 298
Wheels . . . . . . . . . . . . . . . . . . . . . . . . . . . . . . . . 299
Engine data . . . . . . . . . . . . . . . . . . . . . . . . . . . . . 300
Dimensions . . . . . . . . . . . . . . . . . . . . . . . . . . . . . 305
Index . . . . . . . . . . . . . . . . . . . . . . . . . . . . . . . . . 307
6
Page 27 of 324
The essentials
● Pu
sh the he
ad restraint down as far as it
will go. Ensure that it does not interfere with
the seatbelt from the upper attachment.
● Tighten the strap so that the top of the
chil
d seat rests on the seat backrest.
››› in Safety instructions on page 76 Starting the vehicle
Ignition lock Fig. 39
Vehicle key positions Switch ignition on: Place the key in the igni-
tion and s
t
ar
t the engine.
Locking and unlocking the steering wheel
● Engaging the steering wheel lock: Remove
the key fr
om the ignition and turn the wheel until it locks. In vehicles with an automatic
gearbo
x, the gear lever must be in the P posi-
tion in order to remove the key. If necessary,
press the locking key on the selector lever
and release it again.
● Unlocking the steering wheel: Put the key
into the ignition and turn it
at the same time
as the steering wheel in the direction indica-
ted by the arrow. If it is not possible to turn
the steering wheel, it may be because it is
locked.
Turning on/switching off the ignition, glow
plugs reheating
● Switch ignition on: Turn the key to the 2 position.
●
Switch ignition off. Turn the key to the 1 position.
●
Diesel vehicles : The glo
w p
lugs reheat
when the ignition is switched on.
Starting the engine
● Manual gearbox: press the clutch pedal all
the way
down and move the gearbox lever in-
to neutral.
● Automatic gearbox: Press the brake pedal
and move the sel
ector lever to the P position
or into N.
● Turn the key to the 3 position. The key au-
t om
atic
ally returns to the 2 position. Do not
pr e
s
s the accelerator. Start-Stop System*
When you s
top and release the clutch pedal,
the Start-Stop system* turns off the engine.
The ignition remains switched on.
››› in Ignition lock on page 184
››› page 184 Lights and visibility
Light sw
it
ch Fig. 40
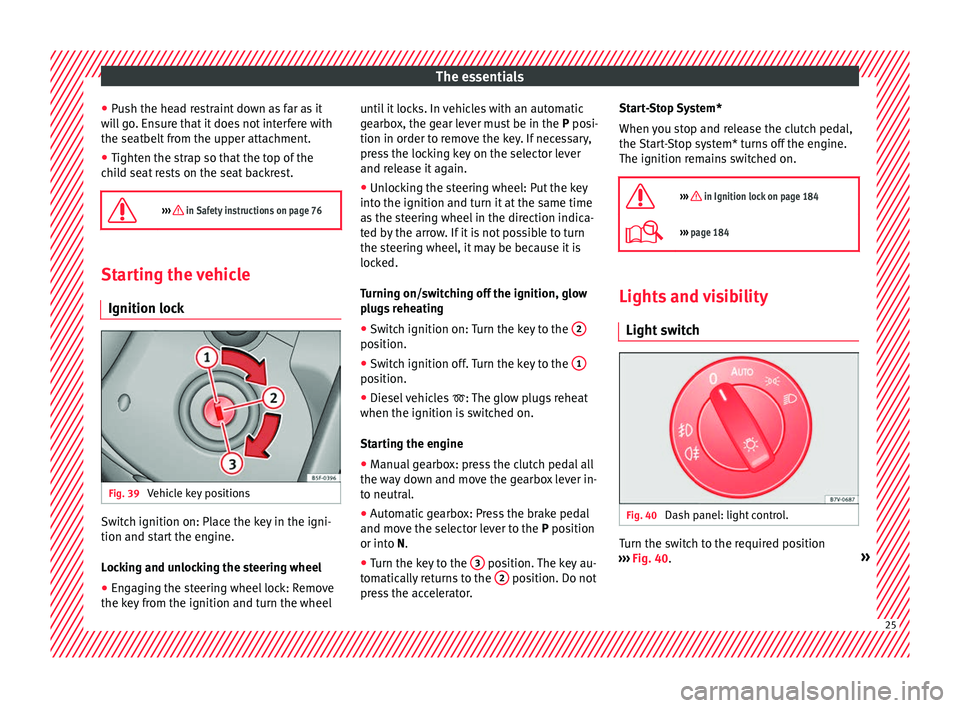
Dash panel: light control. Turn the switch to the required position
› ›
›
Fig. 40. » 25
Page 35 of 324
The essentials
■ Door u n
loc
k (individual opening, Auto
Lock)
■ Convenience handling of windows
■ Rear vision mirror adjustment
■ Lights & visibility settings
menu
■ Coming home and leaving home
■ Footwell light
■ Convenience turn signals
The stored settings are automatically activa-
ted, at the latest when the ignition is switch-
ed on. Please refer to the information and
tips relating to the seat memory
››› page 147. Cruise control
Operating the c ruise control system
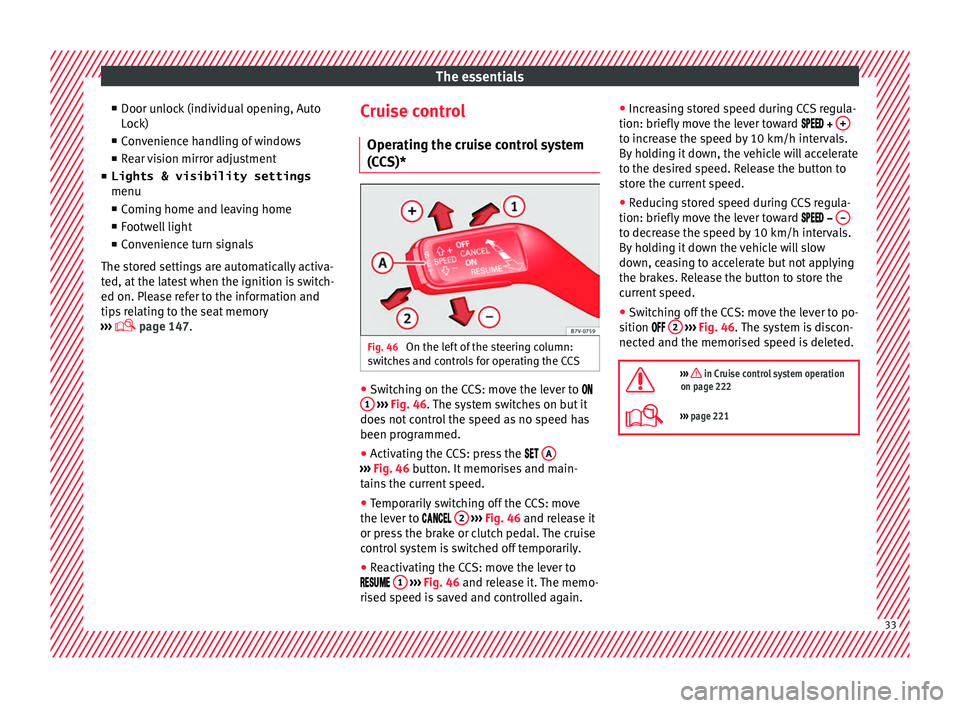
(CCS)* Fig. 46
On the left of the steering column:
sw it
c
hes and controls for operating the CCS ●
Switching on the CCS: move the lever to
1
› ›
› Fig. 46
. The system switches on but it
does not control the speed as no speed has
been programmed.
● Activating the CCS: press the A ›››
Fig. 46 butt on. It
memorises and main-
tains the current speed.
● Temporarily switching off the CCS: move
the lev er t
o 2
› ›
› Fig. 46 and release it
or press the brake or clutch pedal. The cruise
control system is switched off temporarily.
● Reactivating the CCS: move the lever to
1
› ›
› Fig. 46
and release it. The memo-
rised speed is saved and controlled again. ●
Incre
asing stored speed during CCS regula-
tion: briefly move the lever toward + to increase the speed by 10 km/h intervals.
B
y
ho
lding it down, the vehicle will accelerate
to the desired speed. Release the button to
store the current speed.
● Reducing stored speed during CCS regula-
tion: briefly mov
e the lever toward – to decrease the speed by 10 km/h intervals.
B
y
ho
lding it down the vehicle will slow
down, ceasing to accelerate but not applying
the brakes. Release the button to store the
current speed.
● Switching off the CCS: move the lever to po-
sition 2
› ›
› Fig. 46
. The system is discon-
nected and the memorised speed is deleted.
››› in Cruise control system operation
on page 222
››› page 221 33
Page 36 of 324
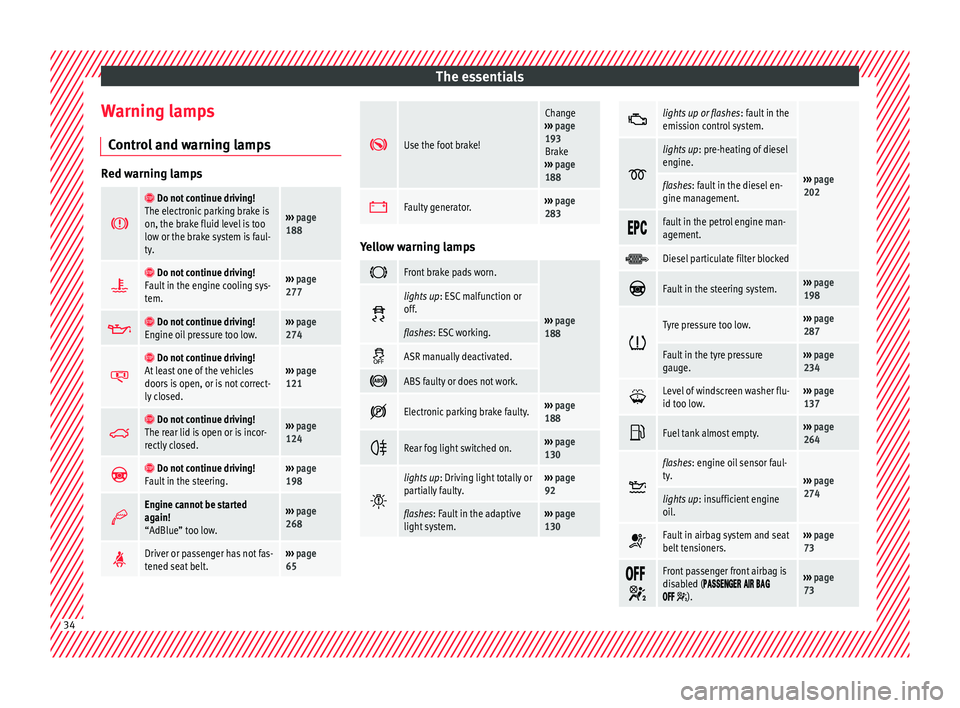
The essentials
Warning lamps C ontr
o
l and warning lamps Red warning lamps
Do not continue driving!
The electronic parking brake is
on, the brake fluid level is too
low or the brake system is faul-
ty.
››› page
188
Do not continue driving!
Fault in the engine cooling sys-
tem.››› page
277
Do not continue driving!
Engine oil pressure too low.››› page
274
Do not continue driving!
At least one of the vehicles
doors is open, or is not correct-
ly closed.››› page
121
Do not continue driving!
The rear lid is open or is incor-
rectly closed.››› page
124
Do not continue driving!
Fault in the steering.››› page
198
Engine cannot be started
again!
“AdBlue” too low.›››
page
268
Driver or passenger has not fas-
tened seat belt.›››
page
65
Use the foot brake!
Change
››› page
193
Brake
››› page
188
Faulty generator.›››
page
283 Yellow warning lamps
Front brake pads worn.
›››
page
188
lights up
: ESC malfunction or
off.
flashes: ESC working.
ASR manually deactivated.
ABS faulty or does not work.
Electronic parking brake faulty.›››
page
188
Rear fog light switched on.›››
page
130
lights up
: Driving light totally or
partially faulty.››› page
92
flashes: Fault in the adaptive
light system.››› page
130
lights up or flashes
: fault in the
emission control system.
››› page
202
lights up
: pre-heating of diesel
engine.
flashes: fault in the diesel en-
gine management.
fault in the petrol engine man-
agement.
Diesel particulate filter blocked
Fault in the steering system.›››
page
198
Tyre pressure too low.›››
page
287
Fault in the tyre pressure
gauge.››› page
234
Level of windscreen washer flu-
id too low.›››
page
137
Fuel tank almost empty.›››
page
264
flashes: engine oil sensor faul-
ty.
›››
page
274
lights up : insufficient engine
oil.
Fault in airbag system and seat
belt tensioners.›››
page
73
Front passenger front airbag is
disabled (
).
››› page
73 34
Page 37 of 324
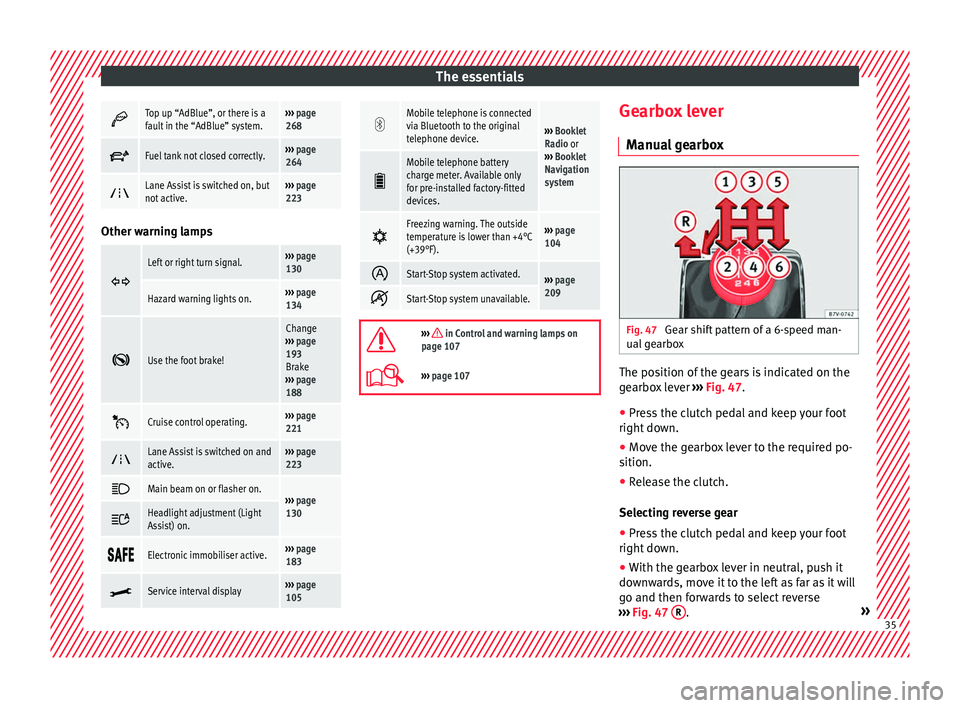
The essentials
Top up “AdBlue”, or there is a
fault in the “AdBlue” system.›››
page
268
Fuel tank not closed correctly.›››
page
264
Lane Assist is switched on, but
not active.›››
page
223 Other warning lamps
Left or right turn signal.›››
page
130
Hazard warning lights on.››› page
134
Use the foot brake!
Change
››› page
193
Brake
››› page
188
Cruise control operating.›››
page
221
Lane Assist is switched on and
active.›››
page
223
Main beam on or flasher on.›››
page
130 Headlight adjustment (Light
Assist) on.
Electronic immobiliser active.›››
page
183
Service interval display›››
page
105
Mobile telephone is connected
via Bluetooth to the original
telephone device.
›››
Booklet
Radio or
››› Booklet
Navigation
system
Mobile telephone battery
charge meter. Available only
for pre-installed factory-fitted
devices.
Freezing warning. The outside
temperature is lower than +4°C
(+39°F).›››
page
104
Start-Stop system activated.›››
page
209
Start-Stop system unavailable.
››› in Control and warning lamps on
page 107
››› page 107 Gearbox lever
M anua
l
gearbox Fig. 47
Gear shift pattern of a 6-speed man-
ual g
e
arbox The position of the gears is indicated on the
g
e
arbo
x lever ››› Fig. 47.
● Press the clutch pedal and keep your foot
right down.
● Mo
ve the gearbox lever to the required po-
sition.
● Rel
ease the clutch.
Selecting r
everse gear
● Press the clutch pedal and keep your foot
right down.
● W
ith the gearbox lever in neutral, push it
downw
ards, move it to the left as far as it will
go and then forwards to select reverse
››› Fig. 47 R .
» 35
Page 38 of 324
The essentials
● Rel
e
ase the clutch.
››› in Manual gear change on page 194
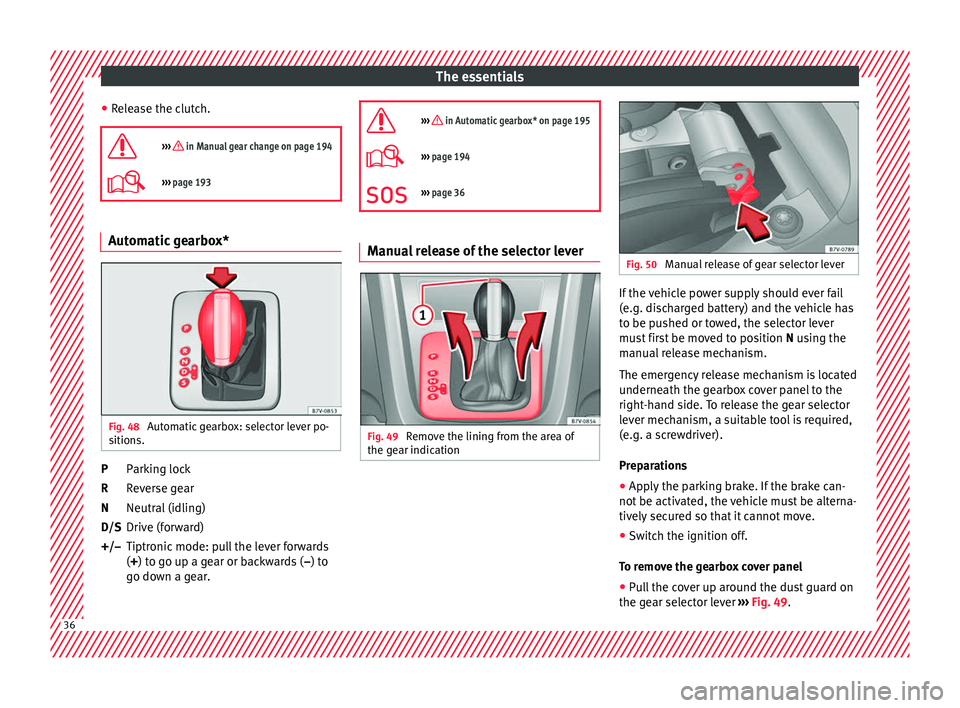
››› page 193 Automatic gearbox*
Fig. 48
Automatic gearbox: selector lever po-
s ition
s. Parking lock
R
ev
er
se gear
Neutral (idling)
Drive (forward)
Tiptronic mode: pull the lever forwards
(+) to go up a gear or backwards ( –) to
go down a gear.
P
R
N
D/S
+/–
››› in Automatic gearbox* on page 195
›››
page 194
››› page 36 Manual release of the selector lever
Fig. 49
Remove the lining from the area of
the g e
ar indic
ation Fig. 50
Manual release of gear selector lever If the vehicle power supply should ever fail
(e.
g. di
s
charged battery) and the vehicle has
to be pushed or towed, the selector lever
must first be moved to position N using the
manual release mechanism.
The emergency release mechanism is located
underneath the gearbox cover panel to the
right-hand side. To release the gear selector
lever mechanism, a suitable tool is required,
(e.g. a screwdriver).
Preparations
● Apply the parking brake. If the brake can-
not be activat
ed, the vehicle must be alterna-
tively secured so that it cannot move.
● Switch the ignition off.
To remo
ve the gearbox cover panel
● Pull the cover up around the dust guard on
the gear sel
ector lever ››› Fig. 49.36
Page 39 of 324
The essentials
● Tak
e the c
over off by passing it over the
gear selector lever ››› .
M anua
l
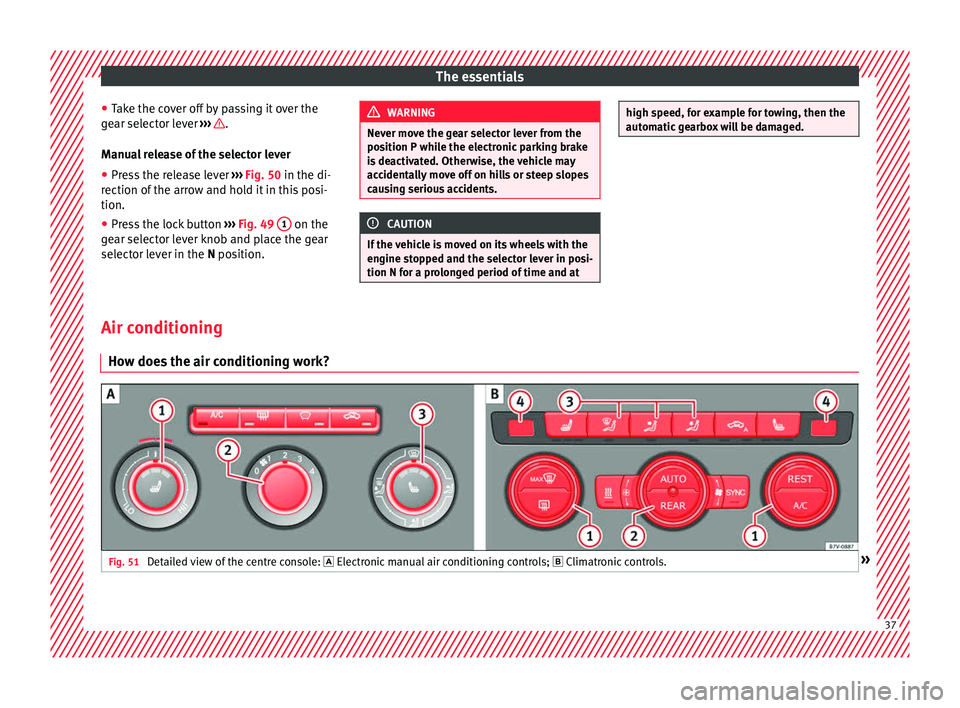
release of the selector lever
● Press the release lever ›››
Fig. 50 in the di-
rection of the arrow and hold it in this posi-
tion.
● Press the lock button ›››
Fig. 49 1 on the
g e
ar sel
ector lever knob and place the gear
selector lever in the N position. WARNING
Never move the gear selector lever from the
pos ition P whi
le the electronic parking brake
is deactivated. Otherwise, the vehicle may
accidentally move off on hills or steep slopes
causing serious accidents. CAUTION
If the vehicle is moved on its wheels with the
engine s t
opped and the selector lever in posi-
tion N for a prolonged period of time and at high speed, for example for towing, then the
autom
atic
gearbox will be damaged. Air conditioning
Ho w doe
s
the air conditioning work?Fig. 51
Detailed view of the centre console: El
ectronic
manual air conditioning controls; Climatronic controls. » 37
Page 44 of 324
The essentials
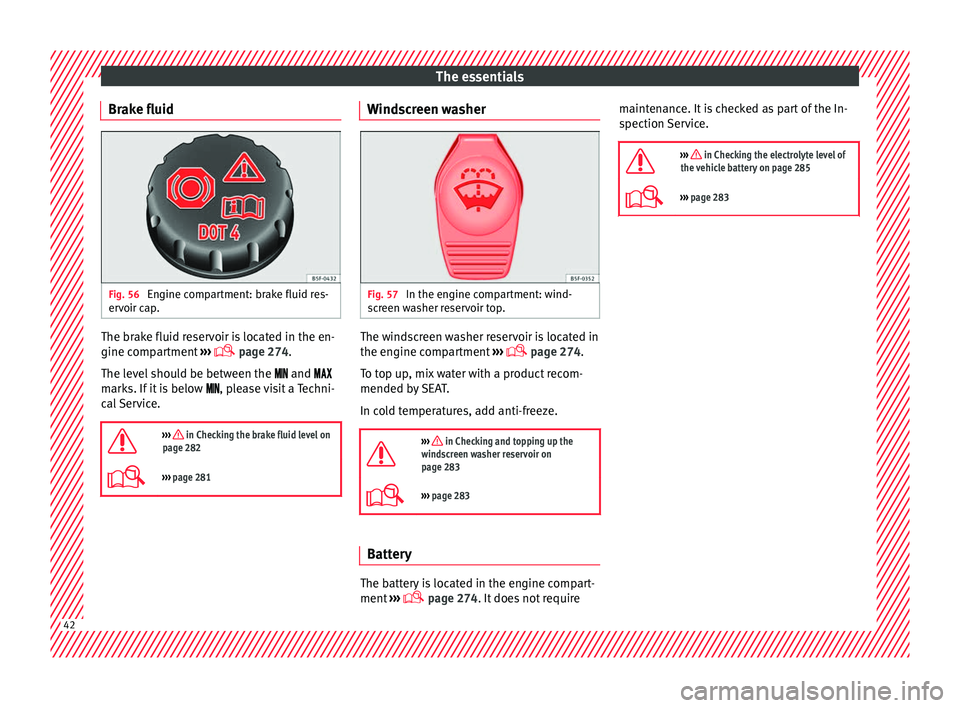
Brake fluid Fig. 56
Engine compartment: brake fluid res-
er v
oir c
ap. The brake fluid reservoir is located in the en-
gine c
omp
ar
tment ›››
page 274
.
The level should be between the and
marks. If it is below , please visit a Techni-
cal Service.
››› in Checking the brake fluid level on
page 282
››› page 281 Windscreen washer
Fig. 57
In the engine compartment: wind-
s c
r
een washer reservoir top. The windscreen washer reservoir is located in
the en
gine c
omp
artment ›››
page 274.
To top up, mix water with a product recom-
mended by SEAT.
In cold temperatures, add anti-freeze.
››› in Checking and topping up the
windscreen washer reservoir on
page 283
››› page 283 Battery
The battery is located in the engine compart-
ment
›
›
› page 274. It does not require maintenance. It is checked as part of the In-
spection Ser
vice.
››› in Checking the electrolyte level of
the vehicle battery on page 285
››› page 283 42
Page 46 of 324
The essentials
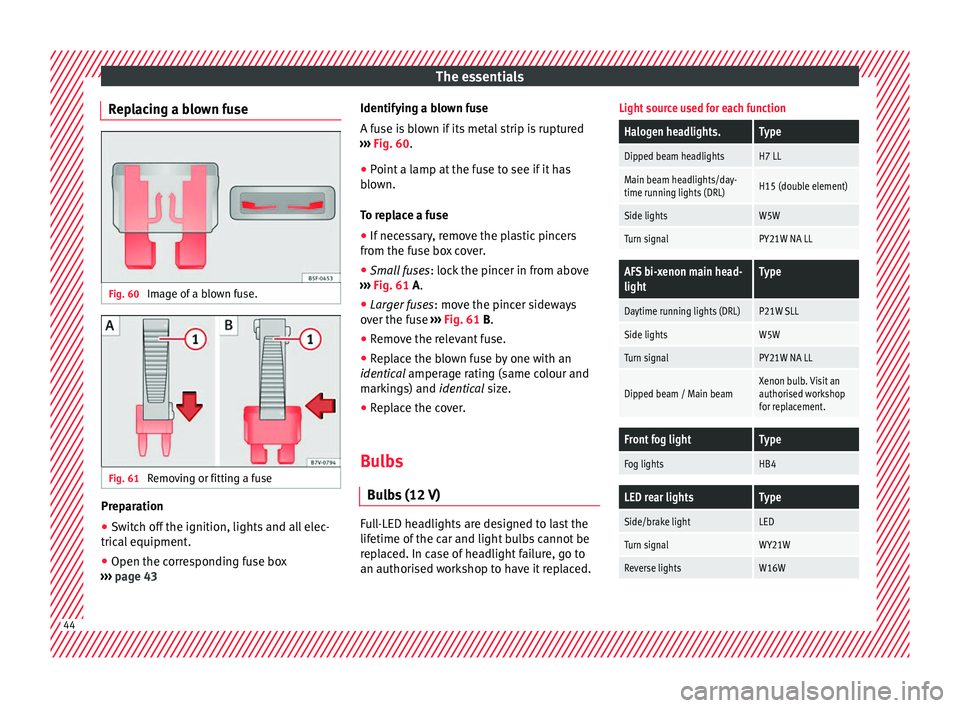
Replacing a blown fuse Fig. 60
Image of a blown fuse. Fig. 61
Removing or fitting a fuse Preparation
● Switch off the ignition, lights and all elec-
tric al
equipment
.
● Open the corresponding fuse box
›››
page 43 Identifying a blown fuse
A fuse i
s blown if its metal strip is ruptured
››› Fig. 60.
● Point a lamp at the fuse to see if it has
blown.
T
o replace a fuse
● If necessary, remove the plastic pincers
from the fu
se box cover.
● Small fuses: lock the pinc
er in from above
››› Fig. 61 A.
● Larger fuses : move the pinc
er sideways
over the fuse ››› Fig. 61 B.
● Remove the relevant fuse.
● Replace the blown fuse by one with an
identica
l amperage rating (same colour and
markings) and identical size.
● Replace the cover.
Bulbs Bul
bs (12 V) Full-LED headlights are designed to last the
lif
etime of
the c
ar and light bulbs cannot be
replaced. In case of headlight failure, go to
an authorised workshop to have it replaced.
Light source used for each function
Halogen headlights.Type
Dipped beam headlightsH7 LL
Main beam headlights/day-
time running lights (DRL)H15 (double element)
Side lightsW5W
Turn signalPY21W NA LL
AFS bi-xenon main head-
lightType
Daytime running lights (DRL)P21W SLL
Side lightsW5W
Turn signalPY21W NA LL
Dipped beam / Main beamXenon bulb. Visit an
authorised workshop
for replacement.
Front fog lightType
Fog lightsHB4
LED rear lightsType
Side/brake lightLED
Turn signalWY21W
Reverse lightsW16W 44