service indicator Seat Altea 2007 Owner's Manual
[x] Cancel search | Manufacturer: SEAT, Model Year: 2007, Model line: Altea, Model: Seat Altea 2007Pages: 302, PDF Size: 9.17 MB
Page 34 of 302
Airbag system
32Monitoring of airbag and belt tension device system
The functionality of the airbag and belt tension device system is constantly
monitored electronically. Each time th e ignition is switched on, the warning
lamp
lights for several seconds and the display in the instrument panel*
shows AIRBAG / TENSIONER .
The system must be checked when the warning lamp
:
•
does not come on when the ignition is switched on,
•
does not go out about 4 seconds after the ignition is switched on,
•
goes out and then comes on again after the ignition is switched on,
•
or if it comes on or flickers while the car is moving.
In the event of a malfunction, the warning lamp remains on continuously. In
addition, depending on the malfunctio n, a fault message appears in the
display of the combi-instrument for approx. 10 seconds and a short acoustic
signal is given. In this event, you should have a qualified workshop check the
system immediately.
If any of the airbags are deactivated by the Authorised Service Centre, the
indicator lights for several seconds more after the veri fication and will turn off
if there is no fault.
WARNING
•
If there is a malfunction, the air bag and belt tension device system
cannot properly perform its protective function.
•
If a malfunction should occur, have the system checked immediately by
a qualified workshop. Otherwise there is a risk that, in the event of an acci-
dent, the airbag system and belt tension devices may not be triggered, or
may not be triggered correctly.
Repair, care and disposal of the airbagsThe parts of the airbag system are installed in various places in your vehicle.
If you work on the airbag system or remove and install parts of the system
when performing other repair work, parts of the airbag system may be
damaged. The consequence may be that, in the event of an accident, the
airbag inflates incorrectly or does not inflate at all.
The relevant safety requirements must be observed when the vehicle or
components of the airbag are scrapped . The specialist workshops and the
Vehicle disposal centres are familiar with these requirements.
WARNING
•
If repairs are not carried out by a professional, or if the airbags are used
incorrectly, the risk of severe or fatal injuries is increased. The airbags may
fail to inflate, or could inflate in the wrong circumstances.
•
Do not cover or stick anything on the steering wheel hub or the soft
plastic surface of the airbag unit on the passenger side of the dashboard,
and do not obstruct or modify them in any way.
•
It is important not to attach any objects such as cup holders or tele-
phone mountings to the surfaces covering the airbag units.
•
To clean the steering wheel or dash panel, you may use only a dry cloth
or one moistened with water. Never clean the dash panel and surface of the
airbag module with cleansers containing solvents. Solvents cause the
surface to become porous. If the airbag inflates, disintegrating plastic
parts can cause substantial injuries.
•
Never attempt to repair, adjust, remove or install parts of the airbag
system.
•
Any work on the airbag system or re moval and installation of the airbag
components for other repairs (such as repairs to the steering wheel) should
be performed only by a qualified workshop. Qualified workshops have the
necessary tools, repair information and qualified personnel.
altea_ingles_0706.book Seite 32 Mittwoch, 30. August 2006 3:48 15
Page 104 of 302
Unlocking and locking
102
– Operate the button once for locking on the remote control, the indicators will flash.
– Operate the button once for unlocking on the remote control for more than 2 seconds.
– The key will have been programmed and the vehicle will unlock, confirming at the same time the synchronisation.It is possible that the vehicle could no longer be opened and closed with the
remote control if the button is repeatedly pressed outside of the effective
range of the radio frequency remote cont rol. The remote control key will have
to be resynchronised.
Spare remote control keys are available from Authorised Service Centres, they
must be matched to the locking system.
Up to eight remote control keys can be used.Anti-theft alarm system*Description of anti-theft alarm system*
The anti-theft alarm triggers an alarm if unauthorised move-
ments are detected around the vehicle.The anti-theft alarm makes it more diffi cult to break into the vehicle or steal
it. Audible and visible alarms are triggered if the car is opened using the
mechanical key, or if unauthorised access is gained to the vehicle.
The anti-theft alarm system is automatically switched on when the vehicle is
locked. The system is then primed. When does the system trigger an alarm?
The system triggers an alarm if the fol
lowing unauthorised actions are carried
out when the car is locked:
•
Mechanical opening of the vehicle with the vehicle key
•
Opening a door
•
Opening the bonnet
•
Opening the tailgate
•
Switching on the ignition
•
Movements in the vehicle
•
Undue manipulation of the alarm
•
Battery handling
The horn sounds and the indicators flash for approx. 30 seconds. This may be
repeated up to 10 times depending on the country.
Opening the doors mechanically (emergency opening)
If the remote control function fails, you will have to use the key to unlock the
car. This is done as follows:
•
Unfold the key by pressing the button shown by the (arrow).
•
Use the lock on the driver door to un lock the vehicle. The anti-theft alarm
system remains active, but an alarm is not triggered immediately.
•
Switch on the ignition within 15 seconds. When the ignition is switched
on, the electronic immobiliser recognises a valid vehicle key and deactivates
the anti-theft alarm system. If you do not switch on the ignition within 15
seconds, the alarm is triggered.
How is the alarm switched off?
When the vehicle is unlocked via the unlocking button of the remote control
or when the key is inserted in the ignition lock.
altea_ingles_0706.book Seite 102 Mittwoch, 30. August 2006 3:48 15
Page 228 of 302
Checking and refilling levels
226Checking tyre pressure
The correct tyre pressure can be seen on the sticker on the
inside of the tank flap.1. Read the required tyre inflation pressure from the sticker. The
values refer to Summer tyres. For Winter tyres, you must add 0.2
bar to the values given on the sticker.
2. The tyre pressures should only be checked when the tyres are cold. The slightly raised pressures of warm tyres must not be
reduced.
3. Adjust the tyre pressure to the load you are carrying.Tyre pressure
The correct tyre pressure is especially important at high speeds. The pressure
should therefore be checked at least once a month and before starting a
journey.
WARNING
A tyre can easily burst if the pressure is too low, causing an accident!•
At continuously high speeds, a tyre with insufficient pressure flexes
more. In this way it becomes too hot, and this can cause tread separation
and tyre blow-out. Always observ e the recommended tyre pressures.
•
If the tyre pressure is too low or too high, the tyres will wear prema-
turely and the vehicle will not h andle well. Risk of accident!For the sake of the environment
Under-inflated tyres will increase fuel consumption.
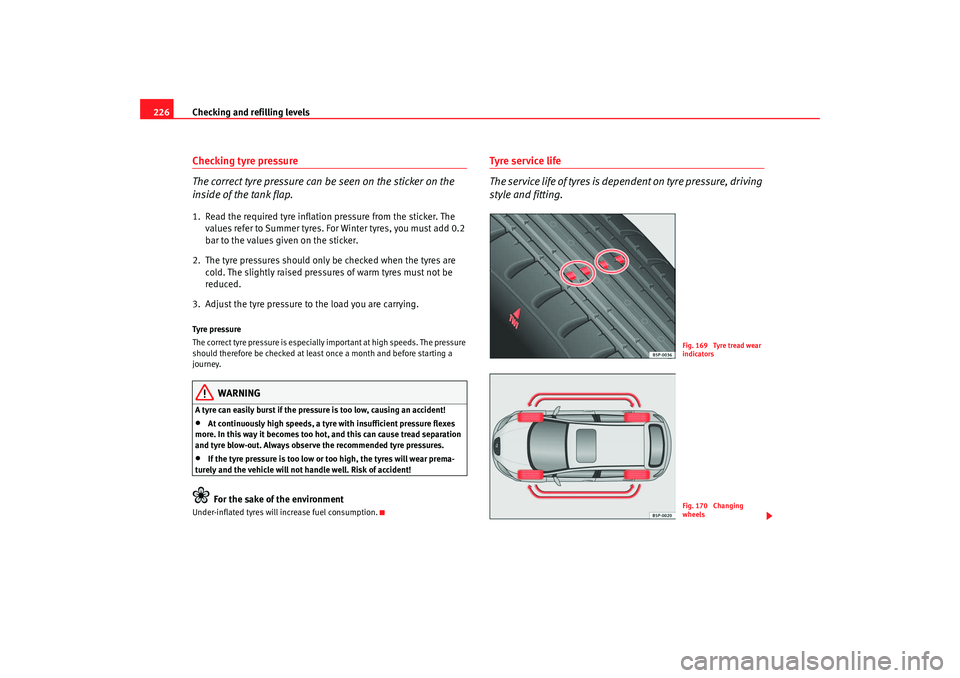
Tyre service life
The service life of tyres is dependent on tyre pressure, driving
style and fitting.
Fig. 169 Tyre tread wear
indicatorsFig. 170 Changing
wheels
altea_ingles_0706.book Seite 226 Mittwoch, 30. August 2006 3:48 15
Page 229 of 302
Checking and refilling levels227
Safety First
Operating instructions
Tips and Maintenance
Te c h n i c a l D a t a
Wear indicators
The original tyres on your vehicle have 1.6 mm high “tread wear indicators”
⇒
page 226, fig. 169 running across the tread. Depending on the make,
there will be six to eight of them evenly spaced around the tyre. Markings on
the tyre sidewall (for instance the letters “TWI” or other symbols) indicate the
positions of the tread wear indicators. The minimum tread depth required by
law is 1.6 mm (measured in the tread grooves next to the tread wear indica-
tors). Worn tyres must be replaced. Different figures may apply in export
countries ⇒.
Tyre pressure
Incorrect tyre pressure causes premature wear and could cause tyre blow-out.
For this reason, the tyre pressure should be checked at least once per month
⇒ page 226.
Driving style
Fast cornering, heavy acceleration and hard braking all increase tyre wear.
Changing wheels around
If the front tyres are worn considerably more than the rear ones it is advisable
to change them around as shown ⇒page 226, fig. 170 . All the tyres will then
last for about the same time.
Wheel balance
The wheels on new vehicles are balanced. However, various factors encoun-
tered in normal driving can cause them to become unbalanced, which results
in steering vibration.
Unbalanced wheels should be rebalanced, as they otherwise cause excessive
wear on steering, suspension and tyres. A wheel must also be rebalanced
when a new tyre is fitted.
Incorrect wheel alignment
Incorrect wheel alignment causes excessive tyre wear, impairing the safety of
the vehicle. If tyres show excessive wear, you should have the wheel align-
ment checked by an Authorised Service Centre.
WARNING
There is a serious danger of accidents if a tyre bursts during driving!•
The tyres must be replaced at the latest when the tread is worn down to
the tread wear indicators. Failure to do so could result in an accident. Worn
tyres do not grip well at high speeds on wet roads. There is also a greater
risk of “aquaplaning”.
•
At continuously high speeds, a tyre with insufficient pressure flexes
more. This causes it to overheat. This can cause tread separation and tyre
blow-out. Risk of accident. Always observe the recommended tyre pres-
sures.
•
If tyres show excessive wear, you should have the running gear checked
by an Authorised Service Centre.
•
Keep chemicals such as oil, fuel and brake fluid away from tyres.
•
Damaged wheels and tyres must be replaced immediately!For the sake of the environment
Under-inflated tyres will increase fuel consumption.Puncture-proof tyres
Puncture-proof tyres will usually allow the vehicle to continue
even when one of the tyres has a puncture.Vehicles that are factory-fitted with puncture-proof tyres
19)
indicate
on the instrument panel when there is a loss of tyre pressure.
19)Depending upon version and country.
altea_ingles_0706.book Seite 227 Mittwoch, 30. August 2006 3:48 15
Page 299 of 302
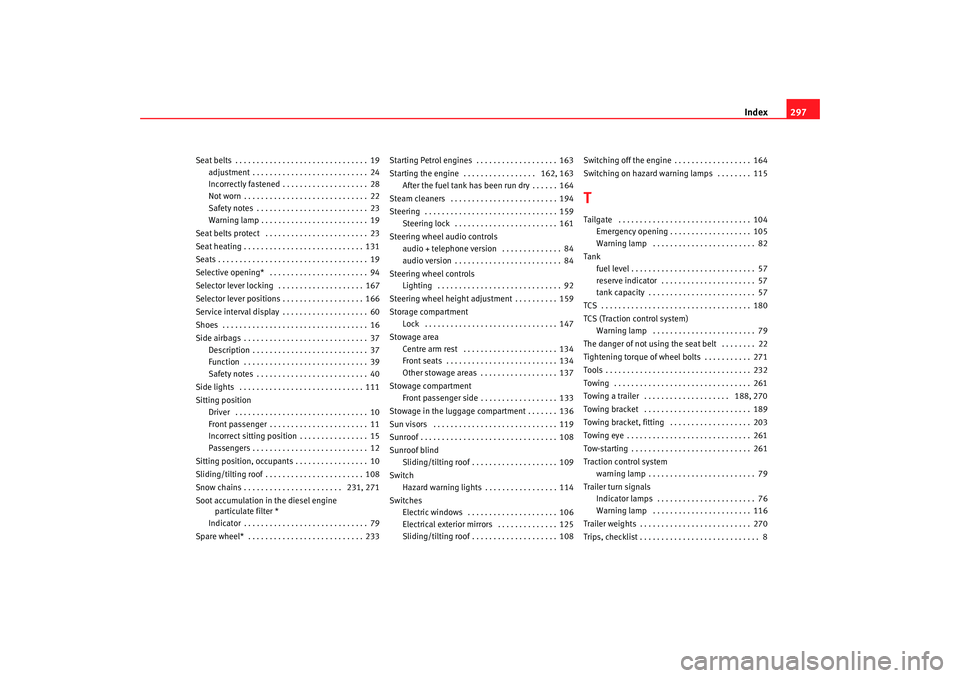
Index297
Seat belts . . . . . . . . . . . . . . . . . . . . . . . . . . . . . . . 19
adjustment . . . . . . . . . . . . . . . . . . . . . . . . . . . 24
Incorrectly fastened . . . . . . . . . . . . . . . . . . . . 28
Not worn . . . . . . . . . . . . . . . . . . . . . . . . . . . . . 22
Safety notes . . . . . . . . . . . . . . . . . . . . . . . . . . 23
Warning lamp . . . . . . . . . . . . . . . . . . . . . . . . . 19
Seat belts protect . . . . . . . . . . . . . . . . . . . . . . . . 23
Seat heating . . . . . . . . . . . . . . . . . . . . . . . . . . . . 131
Seats . . . . . . . . . . . . . . . . . . . . . . . . . . . . . . . . . . . 19
Selective opening* . . . . . . . . . . . . . . . . . . . . . . . 94
Selector lever locking . . . . . . . . . . . . . . . . . . . . 167
Selector lever positions . . . . . . . . . . . . . . . . . . . 166
Service interval display . . . . . . . . . . . . . . . . . . . . 60
Shoes . . . . . . . . . . . . . . . . . . . . . . . . . . . . . . . . . . 16
Side airbags . . . . . . . . . . . . . . . . . . . . . . . . . . . . . 37 Description . . . . . . . . . . . . . . . . . . . . . . . . . . . 37
Function . . . . . . . . . . . . . . . . . . . . . . . . . . . . . 39
Safety notes . . . . . . . . . . . . . . . . . . . . . . . . . . 40
Side lights . . . . . . . . . . . . . . . . . . . . . . . . . . . . . 111
Sitting position Driver . . . . . . . . . . . . . . . . . . . . . . . . . . . . . . . 10
Front passenger . . . . . . . . . . . . . . . . . . . . . . . 11
Incorrect sitting position . . . . . . . . . . . . . . . . 15
Passengers . . . . . . . . . . . . . . . . . . . . . . . . . . . 12
Sitting position, occupants . . . . . . . . . . . . . . . . . 10
Sliding/tilting roof . . . . . . . . . . . . . . . . . . . . . . . 108
Snow chains . . . . . . . . . . . . . . . . . . . . . . . 231, 271
Soot accumulation in the diesel engine
particulate filter *
Indicator . . . . . . . . . . . . . . . . . . . . . . . . . . . . . 79
Spare wheel* . . . . . . . . . . . . . . . . . . . . . . . . . . . 233 Starting Petrol engines . . . . . . . . . . . . . . . . . . . 163
Starting the engine . . . . . . . . . . . . . . . . . 162, 163
After the fuel tank has been run dry . . . . . . 164
Steam cleaners . . . . . . . . . . . . . . . . . . . . . . . . . 194
Steering . . . . . . . . . . . . . . . . . . . . . . . . . . . . . . . 159 Steering lock . . . . . . . . . . . . . . . . . . . . . . . . 161
Steering wheel audio controls audio + telephone version . . . . . . . . . . . . . . 84
audio version . . . . . . . . . . . . . . . . . . . . . . . . . 84
Steering wheel controls Lighting . . . . . . . . . . . . . . . . . . . . . . . . . . . . . 92
Steering wheel height adjustment . . . . . . . . . . 159
Storage compartment Lock . . . . . . . . . . . . . . . . . . . . . . . . . . . . . . . 147
Stowage area Centre arm rest . . . . . . . . . . . . . . . . . . . . . . 134
Front seats . . . . . . . . . . . . . . . . . . . . . . . . . . 134
Other stowage areas . . . . . . . . . . . . . . . . . . 137
Stowage compartment Front passenger side . . . . . . . . . . . . . . . . . . 133
Stowage in the luggage compartment . . . . . . . 136
Sun visors . . . . . . . . . . . . . . . . . . . . . . . . . . . . . 119
Sunroof . . . . . . . . . . . . . . . . . . . . . . . . . . . . . . . . 108
Sunroof blind Sliding/tilting roof . . . . . . . . . . . . . . . . . . . . 109
Switch Hazard warning lights . . . . . . . . . . . . . . . . . 114
Switches Electric windows . . . . . . . . . . . . . . . . . . . . . 106
Electrical exterior mirrors . . . . . . . . . . . . . . 125
Sliding/tilting roof . . . . . . . . . . . . . . . . . . . . 108 Switching off the engine . . . . . . . . . . . . . . . . . . 164
Switching on hazard warning lamps . . . . . . . . 115
TTailgate . . . . . . . . . . . . . . . . . . . . . . . . . . . . . . . 104
Emergency opening . . . . . . . . . . . . . . . . . . . 105
Warning lamp . . . . . . . . . . . . . . . . . . . . . . . . 82
Tank fuel level . . . . . . . . . . . . . . . . . . . . . . . . . . . . . 57
reserve indicator . . . . . . . . . . . . . . . . . . . . . . 57
tank capacity . . . . . . . . . . . . . . . . . . . . . . . . . 57
TCS . . . . . . . . . . . . . . . . . . . . . . . . . . . . . . . . . . . 180
TCS (Traction control system) Warning lamp . . . . . . . . . . . . . . . . . . . . . . . . 79
The danger of not using the seat belt . . . . . . . . 22
Tightening torque of wheel bo lts . . . . . . . . . . . 271
Tools . . . . . . . . . . . . . . . . . . . . . . . . . . . . . . . . . . 232
Towing . . . . . . . . . . . . . . . . . . . . . . . . . . . . . . . . 261
Towing a trailer . . . . . . . . . . . . . . . . . . . . 188, 270
Towing bracket . . . . . . . . . . . . . . . . . . . . . . . . . 189
Towing bracket, fitting . . . . . . . . . . . . . . . . . . . 203
Towing eye . . . . . . . . . . . . . . . . . . . . . . . . . . . . . 261
Tow-starting . . . . . . . . . . . . . . . . . . . . . . . . . . . . 261
Traction control system warning lamp . . . . . . . . . . . . . . . . . . . . . . . . . 79
Trailer turn signals Indicator lamps . . . . . . . . . . . . . . . . . . . . . . . 76
Warning lamp . . . . . . . . . . . . . . . . . . . . . . . 116
Trailer weights . . . . . . . . . . . . . . . . . . . . . . . . . . 270
Trips, checklist . . . . . . . . . . . . . . . . . . . . . . . . . . . . 8
altea_ingles_0706.book Seite 297 Mittwoch, 30. August 2006 3:48 15
Page 300 of 302
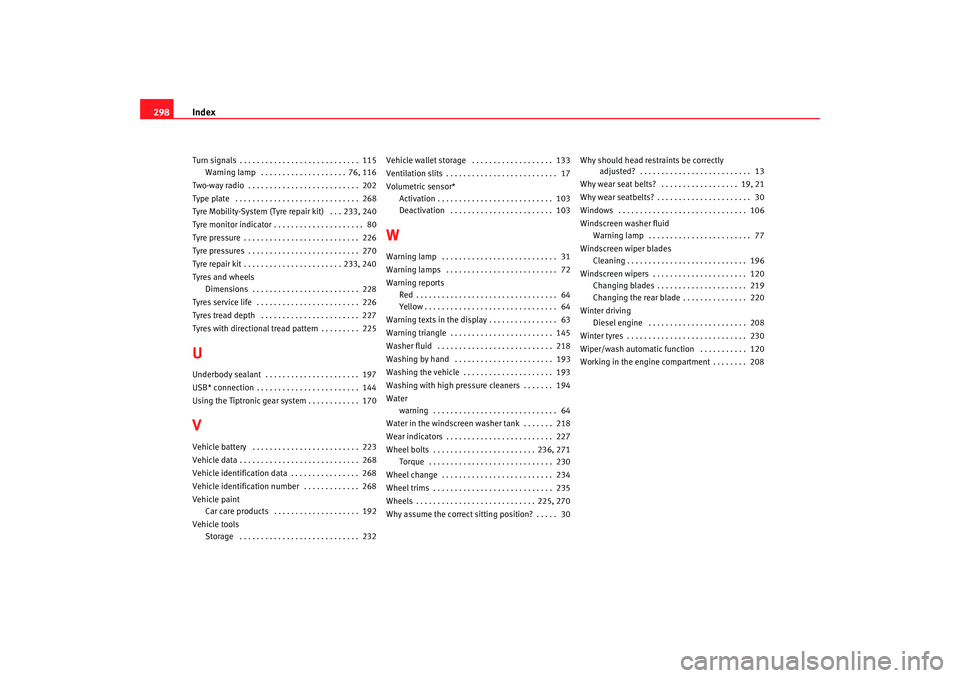
Index
298Turn signals . . . . . . . . . . . . . . . . . . . . . . . . . . . . 115
Warning lamp . . . . . . . . . . . . . . . . . . . . 76, 116
Two-way radio . . . . . . . . . . . . . . . . . . . . . . . . . . 202
Type plate . . . . . . . . . . . . . . . . . . . . . . . . . . . . . 268
Tyre Mobility-System (Tyre repair kit) . . . 233, 240
Tyre monitor indicator . . . . . . . . . . . . . . . . . . . . . 80
Tyre pressure . . . . . . . . . . . . . . . . . . . . . . . . . . . 226
Tyre pressures . . . . . . . . . . . . . . . . . . . . . . . . . . 270
Tyre repair kit . . . . . . . . . . . . . . . . . . . . . . . 233, 240
Tyres and wheels Dimensions . . . . . . . . . . . . . . . . . . . . . . . . . 228
Tyres service life . . . . . . . . . . . . . . . . . . . . . . . . 226
Tyres tread depth . . . . . . . . . . . . . . . . . . . . . . . 227
Tyres with directional tread pattern . . . . . . . . . 225UUnderbody sealant . . . . . . . . . . . . . . . . . . . . . . 197
USB* connection . . . . . . . . . . . . . . . . . . . . . . . . 144
Using the Tiptronic gear system . . . . . . . . . . . . 170VVehicle battery . . . . . . . . . . . . . . . . . . . . . . . . . 223
Vehicle data . . . . . . . . . . . . . . . . . . . . . . . . . . . . 268
Vehicle identification data . . . . . . . . . . . . . . . . 268
Vehicle identification number . . . . . . . . . . . . . 268
Vehicle paint Car care products . . . . . . . . . . . . . . . . . . . . 192
Vehicle tools Storage . . . . . . . . . . . . . . . . . . . . . . . . . . . . 232 Vehicle wallet storage . . . . . . . . . . . . . . . . . . . 133
Ventilation slits . . . . . . . . . . . . . . . . . . . . . . . . . . 17
Volumetric sensor*
Activation . . . . . . . . . . . . . . . . . . . . . . . . . . . 103
Deactivation . . . . . . . . . . . . . . . . . . . . . . . . 103
WWarning lamp . . . . . . . . . . . . . . . . . . . . . . . . . . . 31
Warning lamps . . . . . . . . . . . . . . . . . . . . . . . . . . 72
Warning reportsRed . . . . . . . . . . . . . . . . . . . . . . . . . . . . . . . . . 64
Yellow . . . . . . . . . . . . . . . . . . . . . . . . . . . . . . . 64
Warning texts in the display . . . . . . . . . . . . . . . . 63
Warning triangle . . . . . . . . . . . . . . . . . . . . . . . . 145
Washer fluid . . . . . . . . . . . . . . . . . . . . . . . . . . . 218
Washing by hand . . . . . . . . . . . . . . . . . . . . . . . 193
Washing the vehicle . . . . . . . . . . . . . . . . . . . . . 193
Washing with high pressure cleaners . . . . . . . 194
Water warning . . . . . . . . . . . . . . . . . . . . . . . . . . . . . 64
Water in the windscreen washer tank . . . . . . . 218
Wear indicators . . . . . . . . . . . . . . . . . . . . . . . . . 227
Wheel bolts . . . . . . . . . . . . . . . . . . . . . . . . 236, 271 Torque . . . . . . . . . . . . . . . . . . . . . . . . . . . . . 230
Wheel change . . . . . . . . . . . . . . . . . . . . . . . . . . 234
Wheel trims . . . . . . . . . . . . . . . . . . . . . . . . . . . . 235
Wheels . . . . . . . . . . . . . . . . . . . . . . . . . . . . 225, 270
Why assume the correct sitting position? . . . . . 30 Why should head restraints be correctly
adjusted? . . . . . . . . . . . . . . . . . . . . . . . . . . 13
Why wear seat belts? . . . . . . . . . . . . . . . . . . 19, 21
Why wear seatbelts? . . . . . . . . . . . . . . . . . . . . . . 30
Windows . . . . . . . . . . . . . . . . . . . . . . . . . . . . . . 106
Windscreen washer fluid Warning lamp . . . . . . . . . . . . . . . . . . . . . . . . 77
Windscreen wiper blades Cleaning . . . . . . . . . . . . . . . . . . . . . . . . . . . . 196
Windscreen wipers . . . . . . . . . . . . . . . . . . . . . . 120 Changing blades . . . . . . . . . . . . . . . . . . . . . 219
Changing the rear blade . . . . . . . . . . . . . . . 220
Winter driving Diesel engine . . . . . . . . . . . . . . . . . . . . . . . 208
Winter tyres . . . . . . . . . . . . . . . . . . . . . . . . . . . . 230
Wiper/wash automatic function . . . . . . . . . . . 120
Working in the engine compartment . . . . . . . . 208
altea_ingles_0706.book Seite 298 Mittwoch, 30. August 2006 3:48 15