towing Seat Altea 2012 Owner's Manual
[x] Cancel search | Manufacturer: SEAT, Model Year: 2012, Model line: Altea, Model: Seat Altea 2012Pages: 313, PDF Size: 4.47 MB
Page 6 of 313
Trailer towing . . . . . . . . . . . . . . . . . . . . . . . . . . . . . . 208
Instructions to follow . . . . . . . . . . . . . . . . . . . . . . 208
Ball coupling of towing bracket* . . . . . . . . . . . . . 209
Driving tips . . . . . . . . . . . . . . . . . . . . . . . . . . . . . . 209
Fitting a towing bracket* . . . . . . . . . . . . . . . . . . . 209
Vehicle maintenance and cleaning . . . . . . . . . 212
General notes . . . . . . . . . . . . . . . . . . . . . . . . . . . . 212
Care of the vehicle exterior . . . . . . . . . . . . . . . . . . 213
Vehicle interior maintenance . . . . . . . . . . . . . . . . 218
Accessories, parts replacement and
modifications . . . . . . . . . . . . . . . . . . . . . . . . . . . . . 221
Accessories and spare parts . . . . . . . . . . . . . . . . 221
Technical modifications . . . . . . . . . . . . . . . . . . . . 221
Roof aerial* . . . . . . . . . . . . . . . . . . . . . . . . . . . . . . 222
Mobile phones and two-way radios . . . . . . . . . . . 222
Checking and refilling levels . . . . . . . . . . . . . . . 223
Refuelling . . . . . . . . . . . . . . . . . . . . . . . . . . . . . . . 223
LPG system* . . . . . . . . . . . . . . . . . . . . . . . . . . . . . 225
Petrol . . . . . . . . . . . . . . . . . . . . . . . . . . . . . . . . . . . 228
Diesel . . . . . . . . . . . . . . . . . . . . . . . . . . . . . . . . . . . 229
Working in the engine compartment . . . . . . . . . . 230
Engine oil . . . . . . . . . . . . . . . . . . . . . . . . . . . . . . . . 233
Coolant . . . . . . . . . . . . . . . . . . . . . . . . . . . . . . . . . 237
Washer fluid and windscreen wiper blades . . . . 239
Brake fluid . . . . . . . . . . . . . . . . . . . . . . . . . . . . . . . 242
Vehicle battery . . . . . . . . . . . . . . . . . . . . . . . . . . . 243
Wheels and tyres . . . . . . . . . . . . . . . . . . . . . . . . . . 247
Wheels . . . . . . . . . . . . . . . . . . . . . . . . . . . . . . . . . . 247
If and when . . . . . . . . . . . . . . . . . . . . . . . . . . . . . . . 255
Tools, tyre repair kit and spare wheel . . . . . . . . . 255
Wheel change . . . . . . . . . . . . . . . . . . . . . . . . . . . . 256
Tyre repair kit (Tyre-Mobility-System)* . . . . . . . . . 262
Fuses . . . . . . . . . . . . . . . . . . . . . . . . . . . . . . . . . . . 264
Bulb change . . . . . . . . . . . . . . . . . . . . . . . . . . . . . 268
Jump-starting . . . . . . . . . . . . . . . . . . . . . . . . . . . . . 277
Towing and tow-starting . . . . . . . . . . . . . . . . . . . . 280 Technical Specifications
. . . . . . . . . . . 283
Description of specifications . . . . . . . . . . . . . . . 283
Important information . . . . . . . . . . . . . . . . . . . . . 283
Information on fuel consumption . . . . . . . . . . . . 285
Towing a trailer . . . . . . . . . . . . . . . . . . . . . . . . . . . 285
Wheels . . . . . . . . . . . . . . . . . . . . . . . . . . . . . . . . . . 286
Technical specifications . . . . . . . . . . . . . . . . . . . . 287
Checking fluid levels . . . . . . . . . . . . . . . . . . . . . . . 287
Petrol engine 1.4 63 kW (85 PS) . . . . . . . . . . . . . 288
Petrol engine 1.6 75 kW (102 PS) . . . . . . . . . . . . 289
Petrol engine 1.2 77 kW (105 PS) . . . . . . . . . . . . 290
Petrol engine 1.4 92 kW (125 PS) . . . . . . . . . . . . 291
Petrol engine 1.8 118 kW (160 PS) . . . . . . . . . . . 292
Diesel engine 1.6 TDI CR 66 kW (90 PS) with/
without DPF . . . . . . . . . . . . . . . . . . . . . . . . . . . . . . 294
Diesel engine 1.6 TDI CR 77 kW (105 PS) with/
without DPF . . . . . . . . . . . . . . . . . . . . . . . . . . . . . . 295
Diesel engine 1.6 TDI CR 77 kW (105 PS) DPF
Start-Stop . . . . . . . . . . . . . . . . . . . . . . . . . . . . . . . . 296
Diesel engine 2.0 TDI CR 103 kW (140 PS) . . . . . 297
Dimensions and capacities . . . . . . . . . . . . . . . . . 299
Index . . . . . . . . . . . . . . . . . . . . . . . . . . . . . . . . . . . 301
4Table of Contents
Page 90 of 313
88Cockpit
Cruise speed (Cruise control)*
The warning lamp comes on when the cruise control system
is switched on.
The warning lamp lights up when the cruise control system is switched
on. For further information on the cruise control system, see ⇒ page 190.
Indicator for open doors or tailgate*
This warning lamp lights up if one of the doors or the tail-
gate is open. The warning light should go off when all the doors are closed correctly.
The system also works when the ignition is switched off. It should go off ap-
prox. 15 seconds after the vehicle is locked.
Electromechanical steering*
For vehicles with power steering, the level of steering assistance depends
on the vehicle's speed and on the steering angle.
The warning lamp should light up for a few seconds when the ignition is
switched on. It should go out once the engine is started.
If the battery is disconnected, the indicator remains lit, even with the en-
gine running. The warning light only goes off after a distance of approx. 50
m. There is a fault in the electromechanical steering system if the lamp does
not go out or lights up whilst the vehicle is in motion. The warning lamp
may appear in two different colours to indicate faults. If it lights yellow, this
indicates a minor fault. If it lights red, seek workshop assistance immedi-
ately, as the steering assistance is not working; in this case you should not
keep driving. Stop the vehicle and seek technical assistance. The power
steering does not work if the battery is flat or if the engine is off (for exam-
ple, for towing). You should take into account that you will need considera-
bly more power than normal to steer the vehicle if the power steering is not
working correctly or at all.
For those vehicles fitted with ESC* (ESP) the function “Recommended steer-
ing manoeuvre” is included. See
⇒ page 196.
Emission control system*
This warning lamp monitors the exhaust system.
Warning lamp flashes:
When there is misfiring that can damage the catalytic converter. Reduce
speed and drive carefully to the nearest specialised workshop to have the
engine checked.
The instrument panel displays the following message 1)
: EXHAUST GAS SEE
WORKSHOP.
Warning lamp is lit:
If a fault has developed during driving which has reduced the quality of the
exhaust gas (e.g. lambda probe fault). Reduce speed and drive carefully to
the nearest specialised workshop to have the engine checked.
The following message is shown in the instrument panel display: EXHAUST
GAS SEE WORKSHOP .
1)
Depending on the version of the model.
Page 119 of 313
117
Lights and visibility
● If you are towing a trailer equipped with a rear fog light on a vehicle with
a factory-fitted towing bracket, the rear fog light on the vehicle will automat-
ically be switched off.
● The use of the lighting described here is subject to the relevant statutory
requirements.
● Depending on weather conditions (very cold or wet), the front and rear
lights and the indicators may be temporarily misted. This has no influence
on the useful life of the lighting system. The lights will soon demist when
they are switched on.
Automatic lighting*
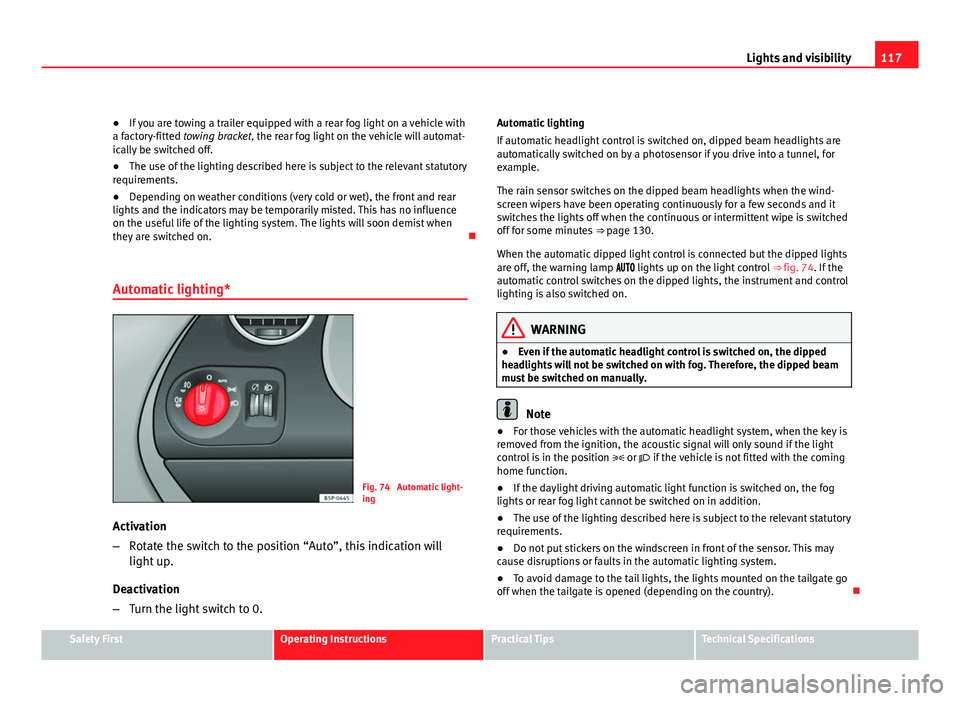
Fig. 74 Automatic light-
ing
Activation
– Rotate the switch to the position “Auto”, this indication will
light up.
Deactivation
– Turn the light switch to 0. Automatic lighting
If automatic headlight control is switched on, dipped beam headlights are
automatically switched on by a photosensor if you drive into a tunnel, for
example.
The rain sensor switches on the dipped beam headlights when the wind-
screen wipers have been operating continuously for a few seconds and it
switches the lights off when the continuous or intermittent wipe is switched
off for some minutes
⇒ page 130.
When the automatic dipped light control is connected but the dipped lights
are off, the warning lamp lights up on the light control ⇒ fig. 74. If the
automatic control switches on the dipped lights, the instrument and control
lighting is also switched on.
WARNING
● Even if the automatic headlight control is switched on, the dipped
headlights will not be switched on with fog. Therefore, the dipped beam
must be switched on manually.
Note
● For those vehicles with the automatic headlight system, when the key is
removed from the ignition, the acoustic signal will only sound if the light
control is in the position or if the vehicle is not fitted with the coming
home function.
● If the daylight driving automatic light function is switched on, the fog
lights or rear fog light cannot be switched on in addition.
● The use of the lighting described here is subject to the relevant statutory
requirements.
● Do not put stickers on the windscreen in front of the sensor. This may
cause disruptions or faults in the automatic lighting system.
● To avoid damage to the tail lights, the lights mounted on the tailgate go
off when the tailgate is opened (depending on the country).
Safety FirstOperating InstructionsPractical TipsTechnical Specifications
Page 124 of 313
122Lights and visibility
3. Switch the engine off.
4. Apply the handbrake.
5. On a manual gearbox engage 1st gear. On an automatic, move
the selector lever to P.
6. Use the warning triangle to draw the attention of other road users to your vehicle.
7. Always take the vehicle key with you when you leave the vehi- cle.
Switch on the hazard warning lights to warn other road users, for example
when:
● reaching the tail end of a traffic jam,
● there is an emergency
● your vehicle breaks down due to a technical fault,
● you are towing another vehicle or your vehicle is being towed.
All turn signals flash simultaneously when the hazard warning lights are
switched on. That is that the two turn signal turn signal lamps and the
turn signal lamp in the switch will flash at the same time. The hazard
warning lights also work when the ignition is switched off.
Emergency braking warning
If the vehicle is braked suddenly and continuously at a speed of more than
80 km/h, the brake light flashes several times per second to warn vehicles
driving behind. If you continue braking, the hazard warning lights will come
on automatically when the vehicle comes to a standstill. They switch off au-
tomatically when the vehicle starts to move again.
WARNING
● The risk of an accident increases if your vehicle breaks down. Always
use the hazard warning lights and a warning triangle to draw the atten-
tion of other road users to your stationary vehicle.
● Never park where the catalytic converter could come into contact with
inflammable materials under the vehicle, for example dry grass or spilt
petrol. This could start a fire!
Note
● The battery will run down if the hazard warning lights are left on for a
long time, even if the ignition is switched off.
● The use of the hazard warning lights described here is subject to the rel-
evant statutory requirements.
Page 173 of 313
171
Driving
For example:
● When driving with snow chains.
● When driving in deep snow or on loose surfaces.
● When the vehicle is stuck, to rock it backwards and forwards.
Next, the button should be pressed to reactivate the ASR (TCS).
WARNING
● Do not forget that the Electronic Stability Control ESC (ESP) cannot
defy the laws of physics. This should be kept in mind, particularly on
slippery and wet roads and when towing a trailer.
● Always adapt your driving style to suit the condition of the roads and
the traffic situation. Do not let the extra safety afforded by ESC (ESP)
tempt you into taking any risks when driving.
● Please refer to the corresponding warning notes on ESC (ESP)
⇒ page 194, Intelligent technology.
Ignition lock
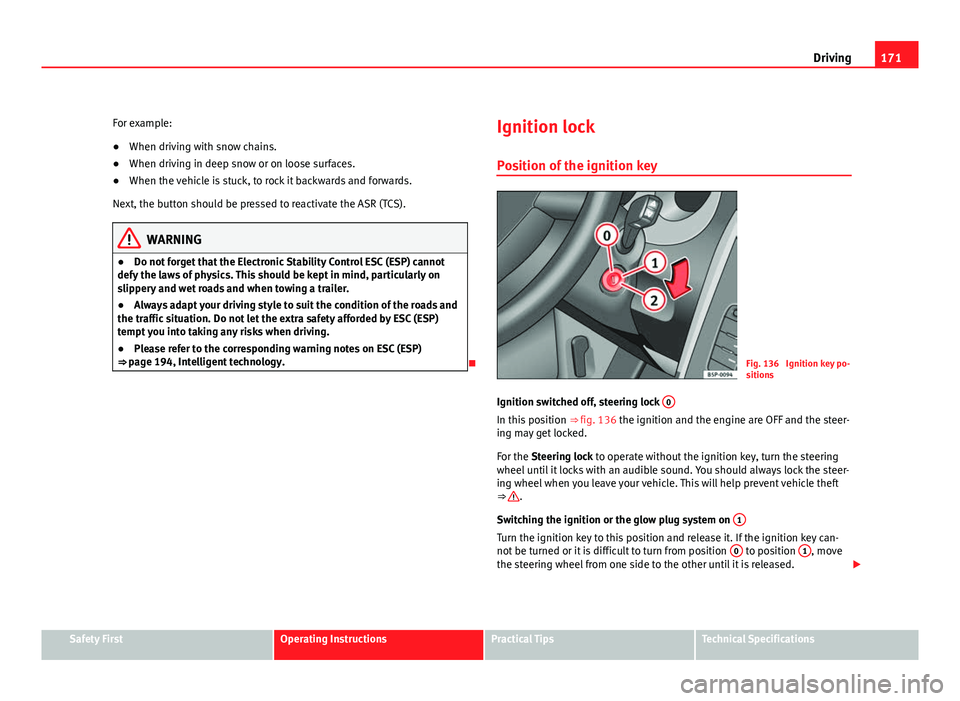
Position of the ignition keyFig. 136 Ignition key po-
sitions
Ignition switched off, steering lock 0
In this position
⇒ fig. 136 the ignition and the engine are OFF and the steer-
ing may get locked.
For the Steering lock to operate without the ignition key, turn the steering
wheel until it locks with an audible sound. You should always lock the steer-
ing wheel when you leave your vehicle. This will help prevent vehicle theft
⇒
.
Switching the ignition or the glow plug system on 1
Turn the ignition key to this position and release it. If the ignition key can-
not be turned or it is difficult to turn from position 0 to position 1, move
the steering wheel from one side to the other until it is released.
Safety FirstOperating InstructionsPractical TipsTechnical Specifications
Page 189 of 313
187
Driving
Parking aid acoustic system*
General notes
Various systems are available to help you when parking or manoeuvring in
tight spaces, depending on the equipment fitted on your vehicle.
The SEAT Parking System* gives an acoustic warning if there are any obsta-
cles behind your vehicle.
When you are parking, the SEAT Parking System Plus* warns you acoustical-
ly and optically 1)
about obstacles “in front of” and “behind” the vehicle.
Note
To ensure the acoustic parking aid works properly, the sensors must be kept
clean and free of snow and ice.
SEAT Parking System: Description
The Parking System is an acoustic parking aid.
Sensors are located in the rear bumper. When the sensors detect an obsta-
cle, you are alerted by acoustic signals. The measuring range of the sensors
starts at approximately:
RearSide0.60Centre1.60
The acoustic signals sound with increasing frequency as you approach the
obstacle. When the vehicle is less than 0.30 m away from the obstacle, the
warning tone will sound continuously. Do not drive on! The volume of the warning beeps will be gradually reduced after about four
seconds if the vehicle remains at a constant distance from a detected obsta-
cle (it does not affect the permanent acoustic signal).
The parking aid is switched on automatically when reverse gear is engaged.
You will hear a brief confirmation tone.
WARNING
● The parking aid is not a replacement for driver awareness. The driver
is personally responsible for safe parking and other manoeuvres.
● The sensors have blind spots in which obstacles are not registered.
Always look out for small children and animals because the system will
not always detect them. Always pay attention when reversing to avoid ac-
cidents.
● Always keep a close eye on the area around the vehicle and make full
use of the rear view mirrors.
CAUTION
Please note that low obstacles detected by the system may no longer be
registered by the sensors as the vehicle moves closer, so the system will not
give any further warning. Certain kinds of obstacles (such as wire fences,
chains, thin painted posts or trailer draw bars, etc) may not always be de-
tected by the system, so take care not to damage the vehicle in such cases.
Note
Please refer to the notes on towing ⇒ page 189.
1)
Vehicles with a navigation system.
Safety FirstOperating InstructionsPractical TipsTechnical Specifications
Page 191 of 313
189
Driving
an obstacle. As the vehicle gets closer to the obstacle, the colour of the seg-
ment changes to red and the acoustic signal beeps continuously. When the
penultimate segment is displayed, this means that the vehicle has reached
the collision zone. Stop moving immediately! ⇒
.
WARNING
● The parking aid is not a replacement for driver awareness. The driver
is personally responsible for safe parking and other manoeuvres.
● The sensors have blind spots in which obstacles are not registered.
Always look out for small children and animals because the system will
not always detect them. Always pay attention when reversing to avoid ac-
cidents.
● Always keep a close eye on the area around the vehicle and make full
use of the rear view mirrors.
CAUTION
Please note that low obstacles detected by the system may no longer be
registered by the sensors as the vehicle moves closer, so the system will not
give any further warning. Certain kinds of obstacles (such as wire fences,
chains, thin painted posts or trailer draw bars, etc) may not always be de-
tected by the system, so take care not to damage the vehicle in such cases.
Note
● Please refer to the notes on towing ⇒ page 189.
● There is a slight delay in the picture display.
Towing bracket
In towing mode, the rear parking aid sensors are not enabled when you se-
lect reverse gear or press the switch . This function may not be guaran- teed on towing brackets that are not factory fitted. This results in the follow-
ing restrictions:
SEAT Parking System*
No warning is given
SEAT Parking System Plus:*
There is no rear distance warning. The system will still give a warning when
obstacles are detected while driving forward. The optical display changes to
towing mode.
Fault messages
If you hear a long beep for a few seconds and the LED on the switch *
starts flashing when you switch on the parking aid, a system fault has oc-
curred. Please refer the problem to an Authorised SEAT dealer or specialised
workshop.
Note
If the fault is not corrected before you switch off the ignition, it will only be
indicated by the flashing LED on the switch the next time you switch on
the parking aid.
Safety FirstOperating InstructionsPractical TipsTechnical Specifications
Page 198 of 313
196Intelligent technology
The ASR (TCS) is connected automatically when the engine starts. If neces-
sary, it may be turned on or off by briefly pushing the button on the centre
console.
When the ASR (TCS) is disconnected, the warning lamp OFF
lights up. The
TCS should normally be left on. Only in exceptional circumstances, when the
slipping of the wheels is required, it will be necessary to have it disconnec-
ted, for example.
● With compact temporary spare wheel.
● When using the snow chains.
● When driving in deep snow or on loose surfaces
● When the vehicle is bogged-down, to free it by rocking.
The TCS should be switched on again as soon as possible.
WARNING
● Remember that the ASR (TCS) cannot defy the laws of physics. This
should be kept in mind, particularly on slippery and wet roads and when
towing a trailer.
● Always adapt your driving style to suit the condition of the roads and
the traffic situation. Do not let the extra safety afforded by ASR (TCS)
tempt you into taking any risks when driving.
CAUTION
● To ensure that the ASR (TCS) functions correctly, all four wheels must be
fitted with the same tyres. Any differences in the rolling radius of the tyres
can cause the system to reduce engine power when this is not desired.
● Modifications to the vehicle (e.g. to the engine, the brake system, run-
ning gear or any components affecting the wheels and tyres) could affect
the efficiency of the ABS and ASR (TCS). XDS*
Driveshaft differential
When taking a bend, the driveshaft differential mechanism allows the outer
wheel to turn at a higher speed than the inner wheel. In this way, the wheel
that is turning faster (outer wheel) receives less drive torque than the inner
wheel. This may mean that in certain situations the torque delivered to the
inner wheel is too high, causing the wheels to spin. On the other hand, the
outer wheel is receiving a lower drive torque than it could transmit. This
causes an overall loss of lateral grip on the front axle, resulting in under-
steer or “lengthening” of the trajectory.
By using the ESC (ESP) sensors and signals, the XDS system is able to de-
tect and correct this effect.
Through the ESC (ESP), the XDS brakes the inner wheel, thereby counteract-
ing the excess drive torque in this wheel. This means that the driver's de-
sired trajectory is much more precise,
The XDS system operates in combination with the ESC (ESP) and is always
active, even when the traction control ASR (TCS) is disconnected.
Electronic Stability Control ESC (ESP) *
General notes
The Electronic Stability Control increases the vehicle's stabil-
ity on the road. The Electronic Stability Control helps reduce the danger of skidding.
The Electronic Stability Control ESC (ESP) includes the ABS, EDL, ASR (TCS)
and Steering manoeuvre recommendations.
Page 199 of 313
197
Intelligent technology
Electronic Stability Control ESC (ESP) *
The ESC (ESP) reduces the danger of skidding by braking the wheels indi-
vidually.
The system uses the steering wheel angle and road speed to calculate the
changes of direction desired by the driver, and constantly compares them
with the actual behaviour of the vehicle. If the desired course is not being
maintained (for instance, if the vehicle is starting to skid), then the ESC
(ESP) compensates automatically by braking the appropriate wheel.
The forces acting on the braked wheel bring the vehicle back to a stable
condition. If the vehicle tends to oversteer, the system will act on the front
wheel on the outside of the turn.
Steering manoeuvre recommendations
This is a complementary safety function included in the ESC (ESP). This
function aids the driver to better stabilize the vehicle in a critical situation.
For example, in case of sudden braking surface with varied adherence, the
vehicle will tend to destabilise its trajectory to the right or to the left. In this
case the ESC (ESP) recognises the situation and helps the driver with a
counter steering manoeuvre from the power steering.
This function simply provides the driver with a recommended manoeuvre in
critical situations.
The vehicle does not steer itself with this function, the driver has full control
of the vehicle at all times.
WARNING
● Remember that ESC (ESP) cannot defy the laws of physics. This
should be kept in mind, particularly on slippery and wet roads and when
towing a trailer.
● Always adapt your driving style to suit the condition of the roads and
the traffic situation. Do not let the extra safety afforded by ESC (ESP)
tempt you into taking any risks when driving.
CAUTION
● To ensure that the ESC (ESP) functions correctly, all four wheels must be
fitted with the same tyres. Any differences in the rolling radius of the tyres
can cause the system to reduce engine power when this is not desired.
● Modifications to the vehicle (e.g. to the engine, the brake system, run-
ning gear or any components affecting the wheels and tyres) could affect
the efficiency of the ABS, EDL, ESC (ESP) and ASR (TCS).
Anti-lock brake system (ABS)
The anti-lock brake system prevents the wheels locking during braking
⇒ page 195.
Electronic differential lock (EDL)*
The electronic differential lock helps prevent the loss of trac-
tion caused if one of the driven wheels starts spinning.
EDL helps the vehicle to start moving, accelerate and climb a gradient in
slippery conditions where this may otherwise be difficult or even impossi-
ble.
The system will control the revolutions of the drive wheels using the ABS
sensors (in case of an EDL fault the warning lamp for ABS lights up)
⇒ page 84.
At speeds of up to approximately 80 km/h, it is able to balance out differen-
ces in the speed of the driven wheels of approximately 100 rpm caused by a
slippery road surface on one side of the vehicle. It does this by braking the
wheel which has lost traction and distributing more driving force to the oth-
er driven wheel via the differential.
Safety FirstOperating InstructionsPractical TipsTechnical Specifications
Page 210 of 313
208Trailer towing
Trailer towing
Instructions to follow
Your vehicle may be used to tow a trailer when fitted with the correct equip-
ment.
If the car is supplied with a factory-fitted towing bracket it will already have
the necessary technical modifications and meet the statutory requirements
for towing a trailer. If you wish to retrofit a towing bracket, consult
⇒ page 209.
Connectors
Your vehicle is fitted with a 12-pin connector for the electrical connection
between the trailer and the vehicle.
If the trailer has a 7-pin plug you will need to use an adapter cable. This is
available in any SEAT dealer.
Trailer weight / drawbar load
Never exceed the authorised trailer weight. If you do not load the trailer up
to the maximum permitted trailer weight, you can then climb correspond-
ingly steeper slopes.
The maximum trailer weights listed are only applicable for altitudes up to
1000 m above sea level. With increasing altitude the engine power and
therefore the vehicle's climbing ability are impaired because of the reduced
air density. The maximum trailer weight has to be reduced accordingly. The
weight of the vehicle and trailer combination must be reduced by 10% for
every further 1000 m (or part thereof). The gross combination weight is the
actual weight of the laden vehicle plus the actual weight of the laden trailer.
When possible, operate the trailer with the maximum permitted drawbar
load on the ball joint of the towing bracket, but do not exceed the specified
limit. The figures for
trailer weights and drawbar loads that are given on the data
plate of the towing bracket are for certification purposes only. The correct
figures for your specific model, which may be lower than these figures for
the towing bracket, are given in the vehicle documents or in ⇒ chapter Tech-
nical Data.
Distributing the load
Distribute loads in the trailer so that heavy objects are as near to the axle as
possible. Loads carried in the trailer must be secured to prevent them mov-
ing.
Tyre pressure
Set tyre pressure to the maximum permissible pressure shown on the stick-
er on the inside of the fuel tank flap. Set the tyre pressure of the trailer tyres
in accordance with the trailer manufacturer's recommendations.
Exterior mirrors
Check whether you can see enough of the road behind the trailer with the
standard mirrors. If this is not the case, you should have additional mirrors
fitted. Both exterior mirrors should be mounted on hinged extension brack-
ets. Adjust the mirrors to give sufficient vision to the rear.
WARNING
Never transport people in a trailer. This could result in fatal accidents.
Note
● Towing a trailer places additional demands on the vehicle. We recom-
mend additional services between the normal inspection intervals if the ve-
hicle is used frequently for towing a trailer.
● Find out whether special regulations apply to towing a trailer in your
country.