jump start terminals Seat Altea Freetrack 2010 Owner's Manual
[x] Cancel search | Manufacturer: SEAT, Model Year: 2010, Model line: Altea Freetrack, Model: Seat Altea Freetrack 2010Pages: 294, PDF Size: 7.71 MB
Page 264 of 294

If and when
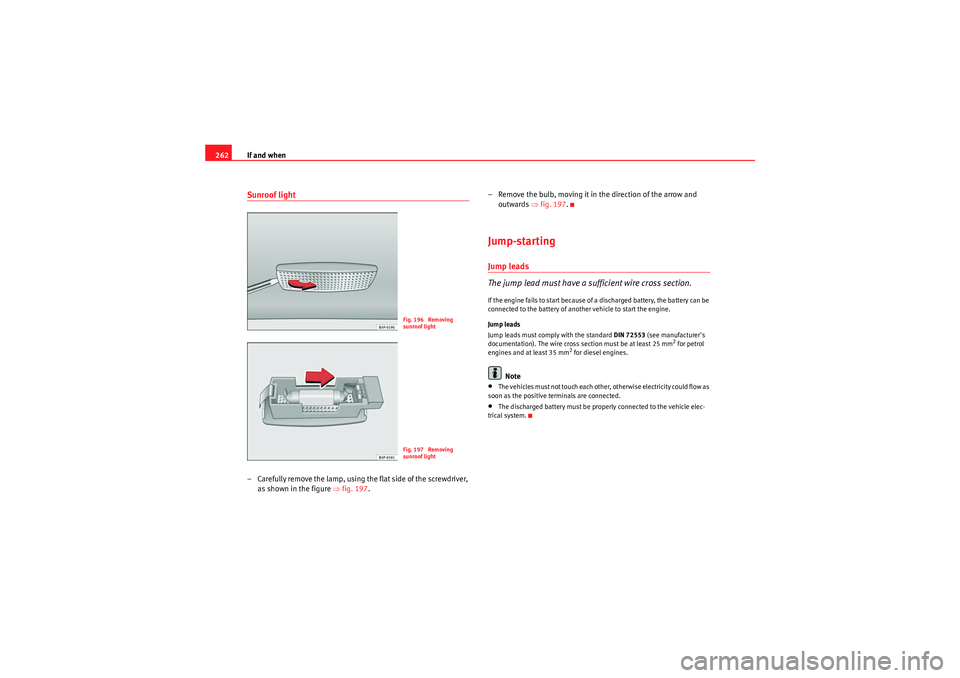
262Sunroof light– Carefully remove the lamp, using the flat side of the screwdriver,
as shown in the figure ⇒fig. 197 . – Remove the bulb, moving it in the direction of the arrow and
outwards ⇒fig. 197 .
Jump-startingJump leads
The jump lead must have a sufficient wire cross section.If the engine fails to start because of a discharged battery, the battery can be
connected to the battery of another vehicle to start the engine.
Jump leads
Jump leads must comply with the standard DIN 72553 (see manufacturer's
documentation). The wire cross section must be at least 25 mm
2 for petrol
engines and at least 35 mm
2 for diesel engines.
Note
•The vehicles must not touch each other, otherwise electricity could flow as
soon as the positive terminals are connected.•The discharged battery must be properly connected to the vehicle elec-
trical system.
Fig. 196 Removing
sunroof lightFig. 197 Removing
sunroof light
Freetrack_EN.book Seite 262 Donnerstag, 10. September 2009 10:33 10
Page 265 of 294

If and when263
Safety First
Controls and equipment
Practical tips
Technical Data
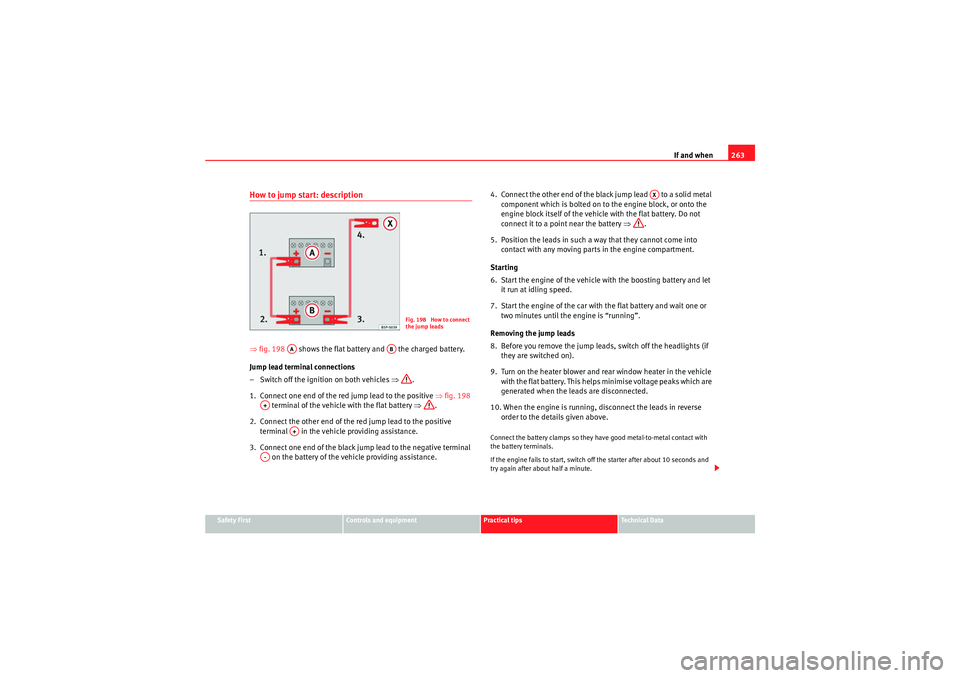
How to jump start: description⇒fig. 198 shows the flat battery and the charged battery.
Jump lead terminal connections
– Switch off the ignition on both vehicles ⇒.
1. Connect one end of the red jump lead to the positive ⇒fig. 198
terminal of the vehicle with the flat battery ⇒.
2. Connect the other end of the red jump lead to the positive terminal in the vehicle providing assistance.
3. Connect one end of the black jump lead to the negative terminal on the battery of the vehicle providing assistance. 4. Connect the other end of the black jump lead to a solid metal
component which is bolted on to the engine block, or onto the
engine block itself of the vehicle with the flat battery. Do not
connect it to a point near the battery ⇒.
5. Position the leads in such a way that they cannot come into contact with any moving parts in the engine compartment.
Starting
6. Start the engine of the vehicle with the boosting battery and let it run at idling speed.
7. Start the engine of the car with the flat battery and wait one or two minutes until the engine is “running”.
Removing the jump leads
8. Before you remove the jump leads, switch off the headlights (if they are switched on).
9. Turn on the heater blower and rear window heater in the vehicle with the flat battery. This helps minimise voltage peaks which are
generated when the leads are disconnected.
10. When the engine is running, disconnect the leads in reverse order to the details given above.
Connect the battery clamps so they have good metal-to-metal contact with
the battery terminals.
If the engine fails to start, switch off the starter after about 10 seconds and
try again after about half a minute.
Fig. 198 How to connect
the jump leads
AA
AB
A+
A+
A-
AX
Freetrack_EN.book Seite 263 Donnerstag, 10. September 2009 10:33 10