fog lights Seat Altea XL 2007 Owner's Manual
[x] Cancel search | Manufacturer: SEAT, Model Year: 2007, Model line: Altea XL, Model: Seat Altea XL 2007Pages: 298, PDF Size: 8.87 MB
Page 78 of 298
Cockpit
76First look at the coolant temperature gauge. If the needle is in the normal
range, top up with coolant at the earliest opportunity ⇒ .
WARNING
•
If your vehicle is immobilised for any technical reasons, move it to a
safe distance from traffic. Turn off the engine, turn on the hazard lights and
place the warning triangle.
•
Never open the bonnet if you can see or hear steam or coolant escaping
from the engine compartment. Risk of scalding. Wait until you can no
longer see or hear escaping steam or coolant.
•
The engine compartment of any motor vehicle is a dangerous area!
Before carrying out any work in the engine compartment, switch off the
engine and allow it to cool down. Alwa ys note the corresponding warnings
⇒ page 208.
Rear fog light
This warning lamp lights up when the rear fog light is switched on
. Further
information ⇒page 111.
Tu r n si g nal s
The warning lamp flashes when the turn signals are in oper-
ation.Depending on which turn signal is operated, either the left
or right
indi-
cator lamp flashes. Both warning lamps will flash at the same time when the
hazard warning lights are switched on.
If one turn signal fails, the warning lamp will start flashing twice as fast. Further information on the turn signals
⇒page 115.
Trailer turn signals
This warning lamp also flashes when the turn signals are
operated while towing a caravan or trailer.The warning lamp
flashes when the turn signals are operated, provided a
trailer is correctly attached and connected to the vehicle.
The warning lamp will not flash if one of the turn signals on the trailer fails.
Main beam headlights
This warning lamp lights up when the main beams are on.The warning lamp
lights up when the main beams are on or when the
headlight flasher is operated.
Further information ⇒page 115.
Bulb defect
The warning lamp lights up when a bulb in the vehicle’s exte-
rior lighting is defective.The warning lamp
lights up when a bulb in the vehicle’s exterior lighting
(e.g. left-hand main beam) is defective.
The following text is displayed in the instrument panel display
12): MAIN
BEAM LEFT DEFECT .
AlteaXL_DEF_ingles Seite 76 Freitag, 25. August 2006 2:19 14
Page 107 of 298
Opening and closing105
Safety First
Operating instructions
Tips and Maintenance
Te c h n i c a l D a t a
WARNING
•
Always close the tailgate properly. Risk of accident or injury.
•
The tailgate must not be opened when the reverse or rear fog lights are
lit. This may damage the lighting units.
•
Do not close the tailgate by pushin g it down with your hand on the
window. The glass could shatter. Risk of injury!
•
Ensure the tailgate is locked after closing. If not, it may open unexpect-
edly while driving.
•
If the tailgate is not properly closed , open it with the handle and close
it correctly. Do no try to close it by pressing on the tailgate surface as this
may lead to a damaged surface.
•
Never allow children to play in or ar ound the vehicle. A locked vehicle
can be subjected to extremely high and low temperatures, depending on
the time of year. This could cause serious injuries/illness. It could even
have fatal consequences. Close and lock both the tailgate and all the other
doors when you are not using the vehicle.
•
Never close the tailgate without observing and ensuring it is clear, to do
otherwise could cause serious injury to you and others. Make sure that no
one is in the path of the tailgate.
•
Never drive with the tailgate open or half-closed, exhaust gasses may
penetrate into the interior of th e vehicle. Danger of poisoning!
•
If only the boot is opened then do not leave the key inside. The vehicle
may not be opened if the key is left inside.
Emergency opening
This allows the vehicle to be opened if the central locking
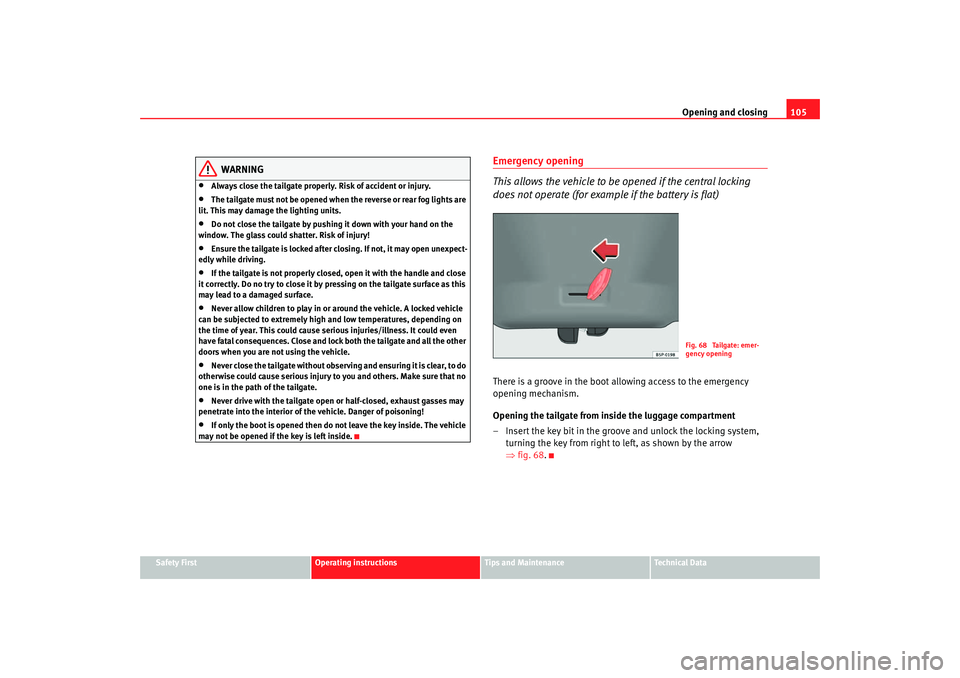
does not operate (for example if the battery is flat)There is a groove in the boot allowing access to the emergency
opening mechanism.
Opening the tailgate from inside the luggage compartment
– Insert the key bit in the groove and unlock the locking system, turning the key from right to left, as shown by the arrow
⇒fig. 68 .
Fig. 68 Tailgate: emer-
gency opening
AlteaXL_DEF_ingles Seite 105 Freitag, 25. August 2006 2:19 14
Page 113 of 298
Lights and visibility111
Safety First
Operating instructions
Tips and Maintenance
Te c h n i c a l D a t a
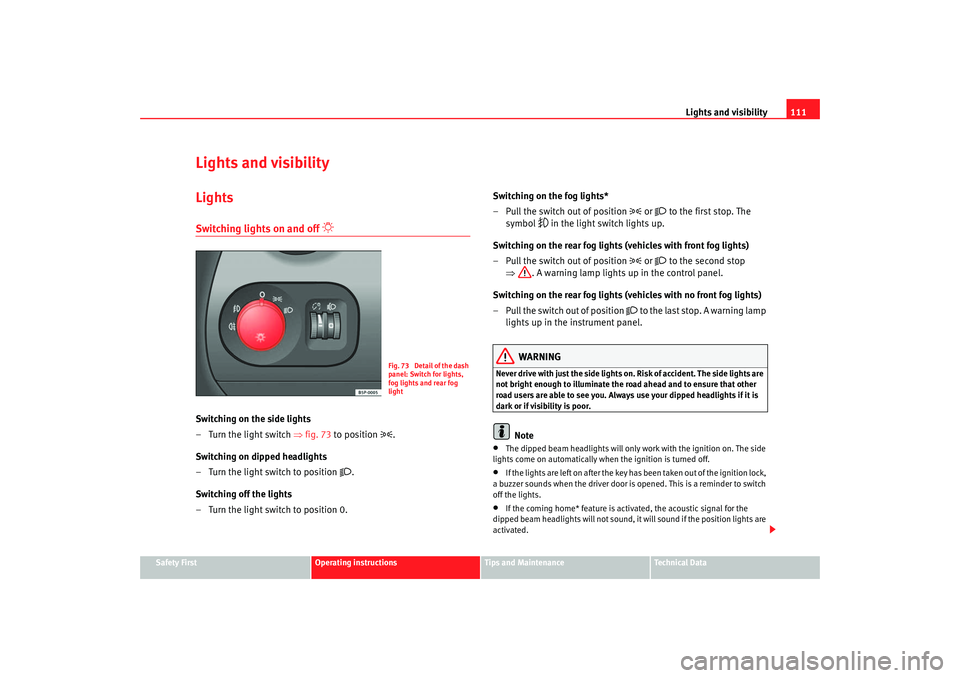
Lights and visibilityLightsSwitching lights on and off
Switching on the side lights
– Turn the light switch ⇒ fig. 73 to position
.
Switching on dipped headlights
– Turn the light switch to position
.
Switching off the lights
– Turn the light switch to position 0. Switching on the fog lights*
– Pull the switch out of position
or
to the first stop. The
symbol
in the light switch lights up.
Switching on the rear fog lights (vehicles with front fog lights)
– Pull the switch out of position
or
to the second stop
⇒ . A warning lamp lights up in the control panel.
Switching on the rear fog lights (vehicles with no front fog lights)
– Pull the switch out of position
to the last stop. A warning lamp
lights up in the instrument panel.
WARNING
Never drive with just the side lights on . Risk of accident. The side lights are
not bright enough to illuminate the road ahead and to ensure that other
road users are able to see you. Always use your dipped headlights if it is
dark or if visibility is poor.
Note
•
The dipped beam headlights will only work with the ignition on. The side
lights come on automatically when the ignition is turned off.
•
If the lights are left on after the key has been taken out of the ignition lock,
a buzzer sounds when the driver door is opened. This is a reminder to switch
off the lights.
•
If the coming home* feature is activated, the acoustic signal for the
dipped beam headlights will not sound, it will sound if the position lights are
activated.
Fig. 73 Detail of the dash
panel: Switch for lights,
fog lights and rear fog
light
AlteaXL_DEF_ingles Seite 111 Freitag, 25. August 2006 2:19 14
Page 114 of 298
Lights and visibility
112•
The rear fog light is so bright that it can dazzle drivers behind you. You
should use the rear fog light only when visibility is very poor.
•
If you are towing a trailer equipped with a rear fog light on a vehicle with
a factory-fitted towing bracket, the rear fog light on the car will automatically
be switched off.
•
The use of the lighting described here is subject to the relevant statutory
requirements.
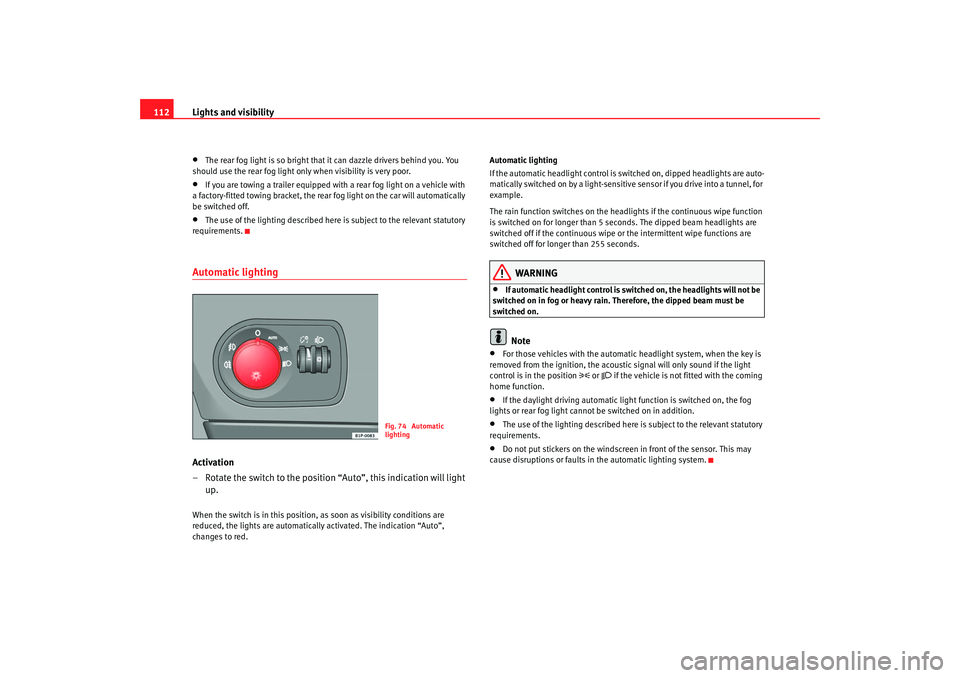
Automatic lightingActivation
– Rotate the switch to the position “Auto”, this indication will light up.When the switch is in this position, as soon as visibility conditions are
reduced, the lights are automaticall y activated. The indication “Auto”,
changes to red. Automatic lighting
If the automatic headlight control is switched on, dipped headlights are auto-
matically switched on by a light-sensitive sensor if you drive into a tunnel, for
example.
The rain function switches on the headlights if the continuous wipe function
is switched on for longer than 5 seconds. The dipped beam headlights are
switched off if the continuous wipe or the intermittent wipe functions are
switched off for longer than 255 seconds.
WARNING
•
If automatic headlight control is switched on, the headlights will not be
switched on in fog or heavy rain. Therefore, the dipped beam must be
switched on.Note
•
For those vehicles with the automatic headlight system, when the key is
removed from the ignition, the acoustic signal will only sound if the light
control is in the position
or if the vehicle is not fitted with the coming
home function.
•
If the daylight driving automatic light function is switched on, the fog
lights or rear fog light cannot be switched on in addition.
•
The use of the lighting described here is subject to the relevant statutory
requirements.
•
Do not put stickers on the windscreen in front of the sensor. This may
cause disruptions or faults in the automatic lighting system.
Fig. 74 Automatic
lighting
AlteaXL_DEF_ingles Seite 112 Freitag, 25. August 2006 2:19 14
Page 157 of 298
Air conditioning155
Safety First
Operating instructions
Tips and Maintenance
Te c h n i c a l D a t a
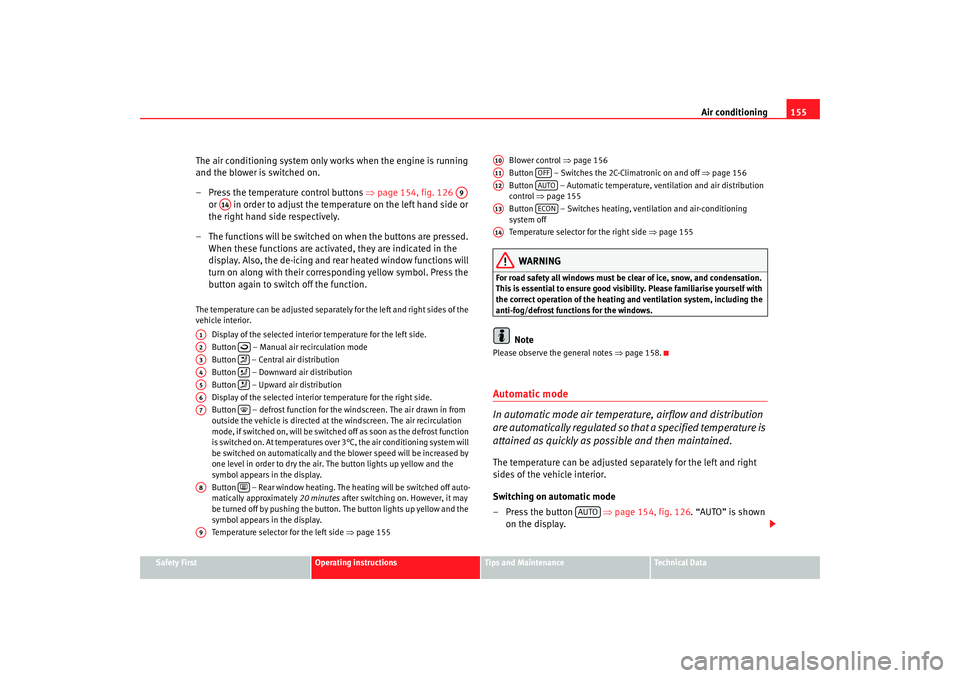
The air conditioning system only works when the engine is running
and the blower is switched on.
– Press the temperature control buttons ⇒page 154, fig. 126
or in order to adjust the temperature on the left hand side or
the right hand side respectively.
– The functions will be switched on when the buttons are pressed. When these functions are activated, they are indicated in the
display. Also, the de-icing and re ar heated window functions will
turn on along with their corres ponding yellow symbol. Press the
button again to switch off the function.The temperature can be adjusted separately for the left and right sides of the
vehicle interior.
Display of the selected interior temperature for the left side.
Button – Manual air recirculation mode
Button – Central air distribution
Button – Downward air distribution
Button – Upward air distribution
Display of the selected interior temperature for the right side.
Button – defrost function for the windscreen. The air drawn in from
outside the vehicle is directed at the windscreen. The air recirculation
mode, if switched on, will be switched off as soon as the defrost function
is switched on. At temperatures over 3°C, the air conditioning system will
be switched on automatically and the blower speed will be increased by
one level in order to dry the air. The button lights up yellow and the
symbol appears in the display.
Button – Rear window heating. The heating will be switched off auto-
matically approximately 20 minutes after switching on. However, it may
be turned off by pushing the button. The button lights up yellow and the
symbol appears in the display.
Temperature selector for the left side ⇒page 155 Blower control
⇒page 156
Button – Switches the 2C-Climatronic on and off ⇒page 156
Button – Automatic temperature, ventilation and air distribution
control ⇒page 155
Button – Switches heating, ventilation and air-conditioning
system off
Temperature selector for the right side ⇒page 155
WARNING
For road safety all windows must be clear of ice, snow, and condensation.
This is essential to ensure good visibility. Please familiarise yourself with
the correct operation of the heating and ventilation system, including the
anti-fog/defrost functions for the windows.
Note
Please observe the general notes ⇒page 158.Automatic mode
In automatic mode air temperature, airflow and distribution
are automatically regulated so that a specified temperature is
attained as quickly as possible and then maintained.The temperature can be adjusted separately for the left and right
sides of the vehicle interior.
Switching on automatic mode
– Press the button ⇒page 154, fig. 126 . “AUTO” is shown
on the display.
A9
A14
A1A2
A3
A4
A5
A6A7
A8
A9
A10A11
OFF
A12
AUTO
A13
ECON
A14
AUTO
AlteaXL_DEF_ingles Seite 155 Freitag, 25. August 2006 2:19 14
Page 252 of 298
If and when
250Xenon headlights
22) /directional
Dipped and full beam - D1S
23)
Flashing and extra full beam - H1
Position W5W
Turn signals PY21W
Fog lights
Fog lights - H3
Fixed rear light
Stop/Position - P21W
24)
Turn signals - P21W
Rear tailgate light unit
Anti fog (driver side) - P21W
Reverse (passenger side) - P21W
Position - W5W
Indicator
Indicator - W5W
Registration plate light
Registration plate light - C5W
Note
•
Due to the difficulty in accessing the lamps, any replacement work should
be done by a SEAT dealer. However, the following is a description of how to
change the bulbs except for the fog lights and interior bulbs.
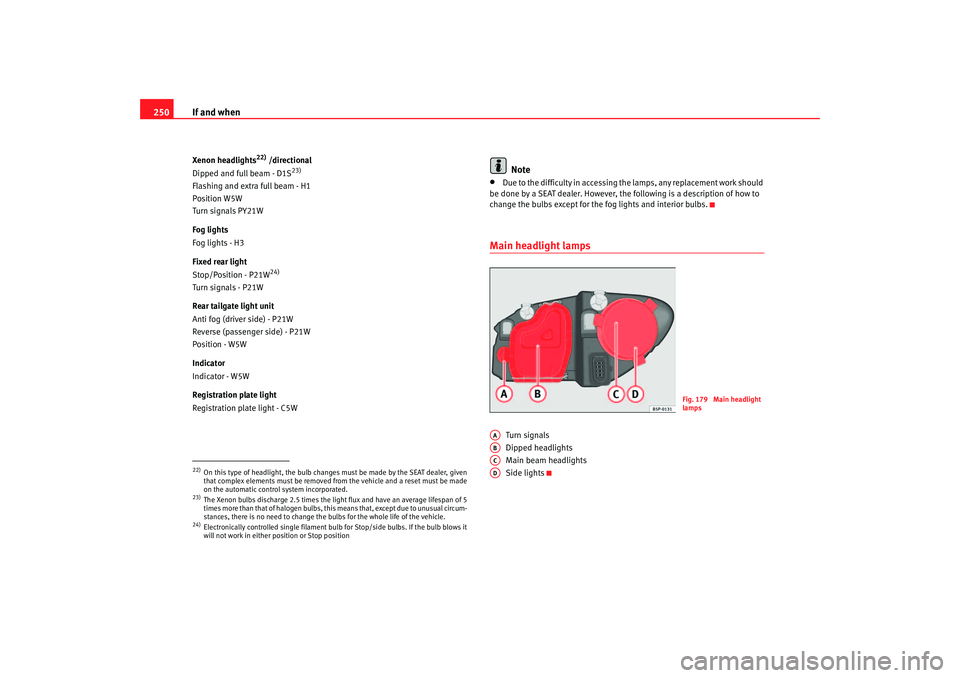
Main headlight lamps
Turn signals
Dipped headlights
Main beam headlights
Side lights
22)On this type of headlight, the bulb changes must be made by the SEAT dealer, given
that complex elements must be removed from the vehicle and a reset must be made
on the automatic control system incorporated.23)The Xenon bulbs discharge 2.5 times the light flux and have an average lifespan of 5
times more than that of halo gen bulbs, this means that, except due to unusual circum-
stances, there is no need to change the bulbs for the whole life of the vehicle.24)Electronically controlled single filament bulb for Stop/side bulbs. If the bulb blows it
will not work in either position or Stop position
Fig. 179 Main headlight
lamps
AAABACAD
AlteaXL_DEF_ingles Seite 250 Freitag, 25. August 2006 2:19 14
Page 255 of 298
If and when253
Safety First
Operating instructions
Tips and Maintenance
Te c h n i c a l D a t a
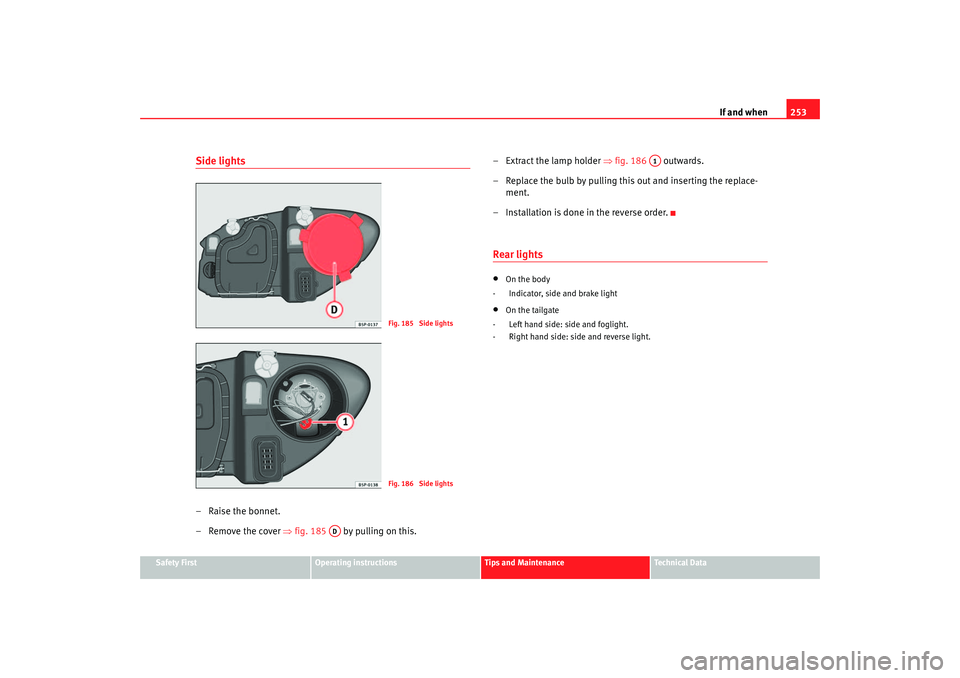
Side lights–Raise the bonnet.
– Remove the cover ⇒fig. 185 by pulling on this. – Extract the lamp holder
⇒fig. 186 outwards.
– Replace the bulb by pulling this out and inserting the replace- ment.
– Installation is done in the reverse order.
Rear lights•
On the body
- Indicator, side and brake light
•
On the tailgate
- Left hand side: side and foglight.
- Right hand side: side and reverse light.
Fig. 185 Side lightsFig. 186 Side lights
AD
A1
AlteaXL_DEF_ingles Seite 253 Freitag, 25. August 2006 2:19 14
Page 257 of 298
If and when255
Safety First
Operating instructions
Tips and Maintenance
Te c h n i c a l D a t a
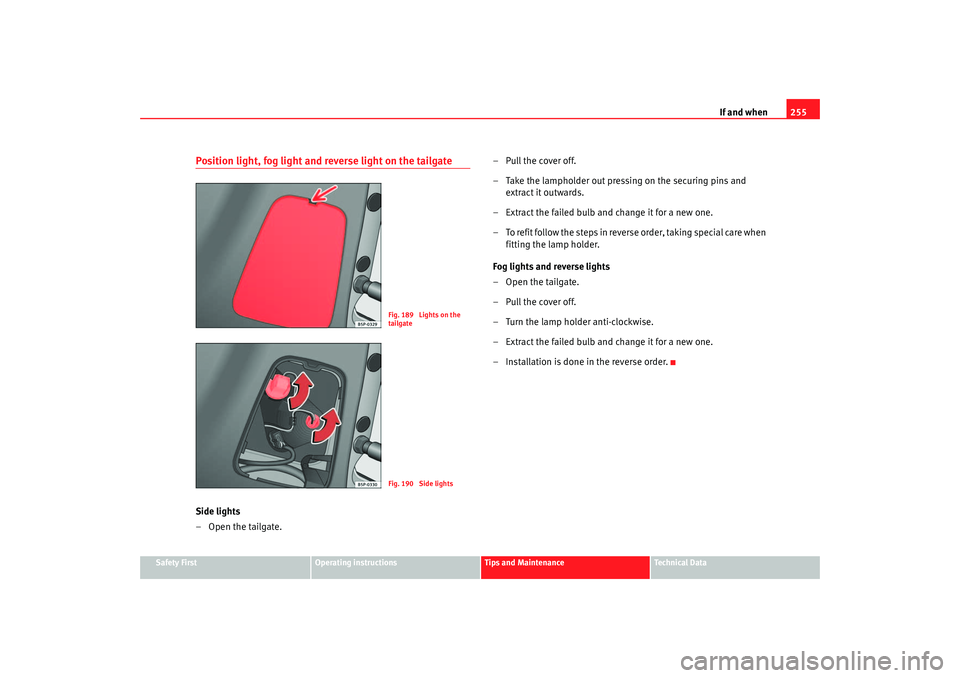
Position light, fog light and reverse light on the tailgateSide lights
– Open the tailgate. –Pull the cover off.
– Take the lampholder out pressing on the securing pins and
extract it outwards.
– Extract the failed bulb and change it for a new one.
– To refit follow the steps in reverse order, taking special care when fitting the lamp holder.
Fog lights and reverse lights
–Open the tailgate.
–Pull the cover off.
– Turn the lamp holder anti-clockwise.
– Extract the failed bulb and change it for a new one.
– Installation is done in the reverse order.
Fig. 189 Lights on the
tailgateFig. 190 Side lights
AlteaXL_DEF_ingles Seite 255 Freitag, 25. August 2006 2:19 14
Page 290 of 298
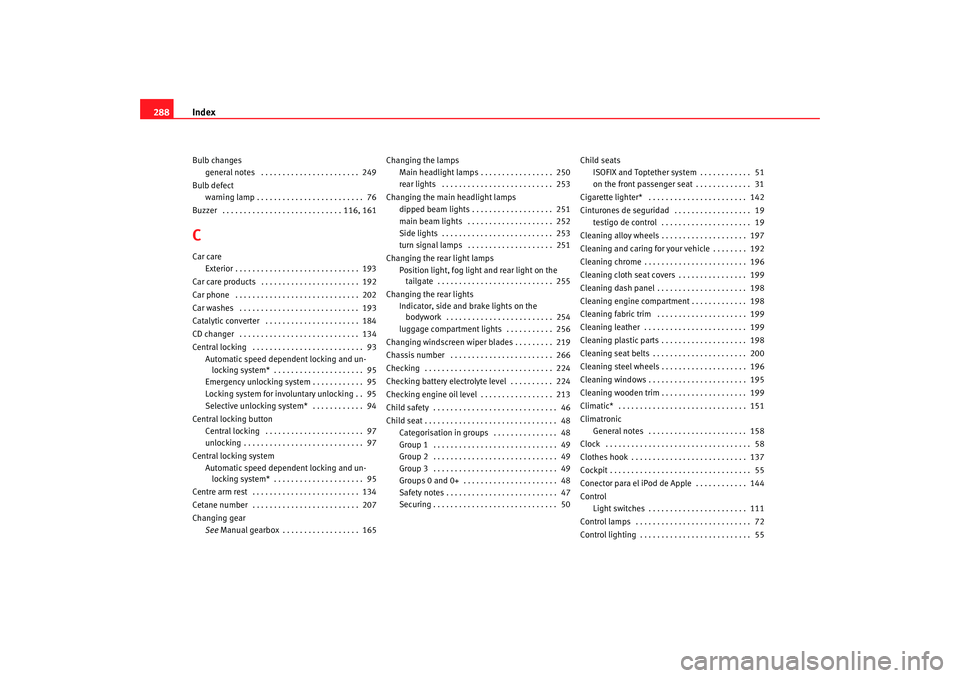
Index
288Bulb changes
general notes . . . . . . . . . . . . . . . . . . . . . . . 249
Bulb defect warning lamp . . . . . . . . . . . . . . . . . . . . . . . . . 76
Buzzer . . . . . . . . . . . . . . . . . . . . . . . . . . . . 116, 161CCar care Exterior . . . . . . . . . . . . . . . . . . . . . . . . . . . . . 193
Car care products . . . . . . . . . . . . . . . . . . . . . . . 192
Car phone . . . . . . . . . . . . . . . . . . . . . . . . . . . . . 202
Car washes . . . . . . . . . . . . . . . . . . . . . . . . . . . . 193
Catalytic converter . . . . . . . . . . . . . . . . . . . . . . 184
CD changer . . . . . . . . . . . . . . . . . . . . . . . . . . . . 134
Central locking . . . . . . . . . . . . . . . . . . . . . . . . . . 93 Automatic speed dependent locking and un-locking system* . . . . . . . . . . . . . . . . . . . . . 95
Emergency unlocking system . . . . . . . . . . . . 95
Locking system for invo luntary unlocking . . 95
Selective unlocking system* . . . . . . . . . . . . 94
Central locking button Central locking . . . . . . . . . . . . . . . . . . . . . . . 97
unlocking . . . . . . . . . . . . . . . . . . . . . . . . . . . . 97
Central locking system Automatic speed dependent locking and un-locking system* . . . . . . . . . . . . . . . . . . . . . 95
Centre arm rest . . . . . . . . . . . . . . . . . . . . . . . . . 134
Cetane number . . . . . . . . . . . . . . . . . . . . . . . . . 207
Changing gear See Manual gearbox . . . . . . . . . . . . . . . . . . 165 Changing the lamps
Main headlight lamps . . . . . . . . . . . . . . . . . 250
rear lights . . . . . . . . . . . . . . . . . . . . . . . . . . 253
Changing the main headlight lamps dipped beam lights . . . . . . . . . . . . . . . . . . . 251
main beam lights . . . . . . . . . . . . . . . . . . . . 252
Side lights . . . . . . . . . . . . . . . . . . . . . . . . . . 253
turn signal lamps . . . . . . . . . . . . . . . . . . . . 251
Changing the rear light lamps Position light, fog ligh t and rear light on the
tailgate . . . . . . . . . . . . . . . . . . . . . . . . . . . 255
Changing the rear lights Indicator, side and brake lights on the bodywork . . . . . . . . . . . . . . . . . . . . . . . . . 254
luggage compartment lights . . . . . . . . . . . 256
Changing windscreen wiper blades . . . . . . . . . 219
Chassis number . . . . . . . . . . . . . . . . . . . . . . . . 266
Checking . . . . . . . . . . . . . . . . . . . . . . . . . . . . . . 224
Checking battery electrolyte level . . . . . . . . . . 224
Checking engine oil level . . . . . . . . . . . . . . . . . 213
Child safety . . . . . . . . . . . . . . . . . . . . . . . . . . . . . 46
Child seat . . . . . . . . . . . . . . . . . . . . . . . . . . . . . . . 48 Categorisation in groups . . . . . . . . . . . . . . . 48
Group 1 . . . . . . . . . . . . . . . . . . . . . . . . . . . . . 49
Group 2 . . . . . . . . . . . . . . . . . . . . . . . . . . . . . 49
Group 3 . . . . . . . . . . . . . . . . . . . . . . . . . . . . . 49
Groups 0 and 0+ . . . . . . . . . . . . . . . . . . . . . . 48
Safety notes . . . . . . . . . . . . . . . . . . . . . . . . . . 47
Securing . . . . . . . . . . . . . . . . . . . . . . . . . . . . . 50 Child seats
ISOFIX and Toptether system . . . . . . . . . . . . 51
on the front passenger seat . . . . . . . . . . . . . 31
Cigarette lighter* . . . . . . . . . . . . . . . . . . . . . . . 142
Cinturones de seguridad . . . . . . . . . . . . . . . . . . 19 testigo de control . . . . . . . . . . . . . . . . . . . . . 19
Cleaning alloy wheels . . . . . . . . . . . . . . . . . . . . 197
Cleaning and caring for your vehicle . . . . . . . . 192
Cleaning chrome . . . . . . . . . . . . . . . . . . . . . . . . 196
Cleaning cloth seat covers . . . . . . . . . . . . . . . . 199
Cleaning dash panel . . . . . . . . . . . . . . . . . . . . . 198
Cleaning engine compartment . . . . . . . . . . . . . 198
Cleaning fabric trim . . . . . . . . . . . . . . . . . . . . . 199
Cleaning leather . . . . . . . . . . . . . . . . . . . . . . . . 199
Cleaning plastic parts . . . . . . . . . . . . . . . . . . . . 198
Cleaning seat belts . . . . . . . . . . . . . . . . . . . . . . 200
Cleaning steel wheels . . . . . . . . . . . . . . . . . . . . 196
Cleaning windows . . . . . . . . . . . . . . . . . . . . . . . 195
Cleaning wooden trim . . . . . . . . . . . . . . . . . . . . 199
Climatic* . . . . . . . . . . . . . . . . . . . . . . . . . . . . . . 151
Climatronic General notes . . . . . . . . . . . . . . . . . . . . . . . 158
Clock . . . . . . . . . . . . . . . . . . . . . . . . . . . . . . . . . . 58
Clothes hook . . . . . . . . . . . . . . . . . . . . . . . . . . . 137
Cockpit . . . . . . . . . . . . . . . . . . . . . . . . . . . . . . . . . 55
Conector para el iPod de Apple . . . . . . . . . . . . 144
Control Light switches . . . . . . . . . . . . . . . . . . . . . . . 111
Control lamps . . . . . . . . . . . . . . . . . . . . . . . . . . . 72
Control lighting . . . . . . . . . . . . . . . . . . . . . . . . . . 55
AlteaXL_DEF_ingles Seite 288 Freitag, 25. August 2006 2:19 14
Page 292 of 298
Index
290Emission control system
warning lamp . . . . . . . . . . . . . . . . . . . . . . . . . 81
Engine Running in . . . . . . . . . . . . . . . . . . . . . . . . . . 183
Engine compartment Working in the engine compartment . . . . . 208
Engine coolant . . . . . . . . . . . . . . . . . . . . . . . . . 215
Engine fault Warning lamp . . . . . . . . . . . . . . . . . . . . . . . . 81
Engine management Warning lamp . . . . . . . . . . . . . . . . . . . . . . . . 81
Engine oil . . . . . . . . . . . . . . . . . . . . . . . . . . . . . . 211 Changing . . . . . . . . . . . . . . . . . . . . . . . . . . . 215
Checking level . . . . . . . . . . . . . . . . . . . . . . . 213
Oil properties . . . . . . . . . . . . . . . . . . . . . . . . 212
Specifications . . . . . . . . . . . . . . . . . . . . . . . 211
Topping up . . . . . . . . . . . . . . . . . . . . . . . . . . 214
Engine oil dipstick . . . . . . . . . . . . . . . . . . . . . . . 213
Engine oil pressure Warning lamp . . . . . . . . . . . . . . . . . . . . . 64, 78
Environmental tip Avoiding pollution . . . . . . . . . . . . . . . . . . . . 206
ESP . . . . . . . . . . . . . . . . . . . . . . . . . . . . . . . . 81, 181
Example of menu use Open the configuration menu . . . . . . . . . . . 67
Program a speed limit warning . . . . . . . . . . 67
To activate and deactivate the speed limit warning . . . . . . . . . . . . . . . . . . . . . . . . . . . . 68 Examples of menu use
Open the main menu . . . . . . . . . . . . . . . . . . 67
Open the winter tyres menu . . . . . . . . . . . . . 67
To close the winter tyres menu . . . . . . . . . . 68
Exterior mirrors . . . . . . . . . . . . . . . . . . . . . . . . . 195
External aerial . . . . . . . . . . . . . . . . . . . . . . . . . . 202
FFastening rings . . . . . . . . . . . . . . . . . . . . . . . . . . 18
Fire extinguisher . . . . . . . . . . . . . . . . . . . . . . . . 145
Floor mats . . . . . . . . . . . . . . . . . . . . . . . . . . . . . . 16
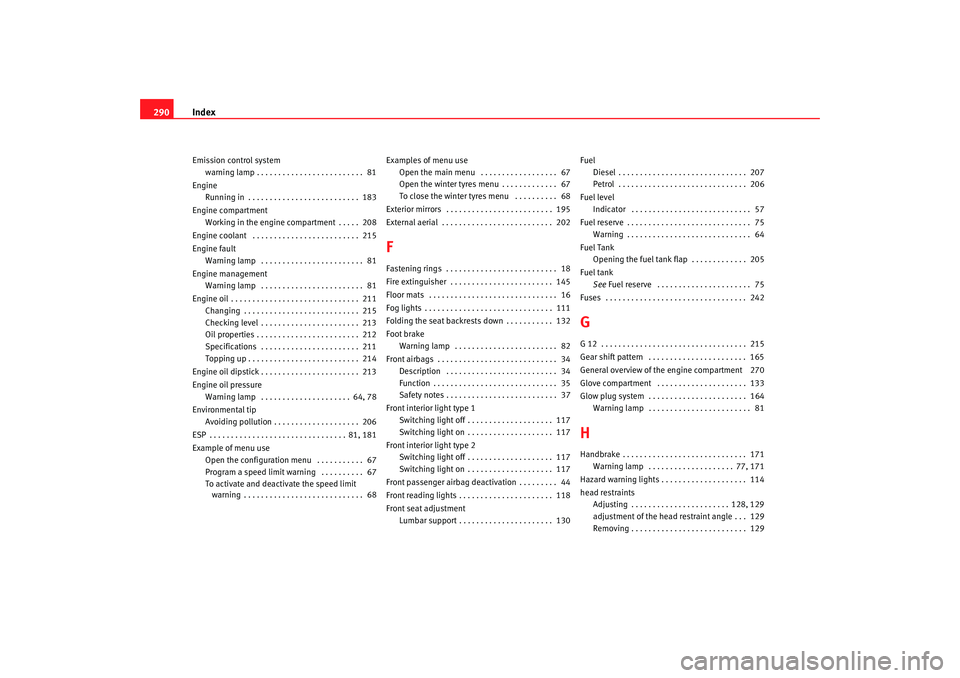
Fog lights . . . . . . . . . . . . . . . . . . . . . . . . . . . . . . 111
Folding the seat backrests down . . . . . . . . . . . 132
Foot brake Warning lamp . . . . . . . . . . . . . . . . . . . . . . . . 82
Front airbags . . . . . . . . . . . . . . . . . . . . . . . . . . . . 34 Description . . . . . . . . . . . . . . . . . . . . . . . . . . 34
Function . . . . . . . . . . . . . . . . . . . . . . . . . . . . . 35
Safety notes . . . . . . . . . . . . . . . . . . . . . . . . . . 37
Front interior light type 1 Switching light off . . . . . . . . . . . . . . . . . . . . 117
Switching light on . . . . . . . . . . . . . . . . . . . . 117
Front interior light type 2 Switching light off . . . . . . . . . . . . . . . . . . . . 117
Switching light on . . . . . . . . . . . . . . . . . . . . 117
Front passenger airbag deactivation . . . . . . . . . 44
Front reading lights . . . . . . . . . . . . . . . . . . . . . . 118
Front seat adjustment Lumbar support . . . . . . . . . . . . . . . . . . . . . . 130 Fuel
Diesel . . . . . . . . . . . . . . . . . . . . . . . . . . . . . . 207
Petrol . . . . . . . . . . . . . . . . . . . . . . . . . . . . . . 206
Fuel level Indicator . . . . . . . . . . . . . . . . . . . . . . . . . . . . 57
Fuel reserve . . . . . . . . . . . . . . . . . . . . . . . . . . . . . 75 Warning . . . . . . . . . . . . . . . . . . . . . . . . . . . . . 64
Fuel Tank Opening the fuel tank flap . . . . . . . . . . . . . 205
Fuel tank See Fuel reserve . . . . . . . . . . . . . . . . . . . . . . 75
Fuses . . . . . . . . . . . . . . . . . . . . . . . . . . . . . . . . . 242
GG 12 . . . . . . . . . . . . . . . . . . . . . . . . . . . . . . . . . . 215
Gear shift pattern . . . . . . . . . . . . . . . . . . . . . . . 165
General overview of the engine compartment 270
Glove compartment . . . . . . . . . . . . . . . . . . . . . 133
Glow plug system . . . . . . . . . . . . . . . . . . . . . . . 164 Warning lamp . . . . . . . . . . . . . . . . . . . . . . . . 81HHandbrake . . . . . . . . . . . . . . . . . . . . . . . . . . . . . 171Warning lamp . . . . . . . . . . . . . . . . . . . . 77, 171
Hazard warning lights . . . . . . . . . . . . . . . . . . . . 114
head restraints Adjusting . . . . . . . . . . . . . . . . . . . . . . . 128, 129
adjustment of the head restraint angle . . . 129
Removing . . . . . . . . . . . . . . . . . . . . . . . . . . . 129
AlteaXL_DEF_ingles Seite 290 Freitag, 25. August 2006 2:19 14