tow Seat Altea XL 2014 User Guide
[x] Cancel search | Manufacturer: SEAT, Model Year: 2014, Model line: Altea XL, Model: Seat Altea XL 2014Pages: 321, PDF Size: 4.52 MB
Page 132 of 321
130Lights and visibility
Rear window wiper
The window wiper lever operates the windscreen wiper and
the wash and wipe system for the rear window.
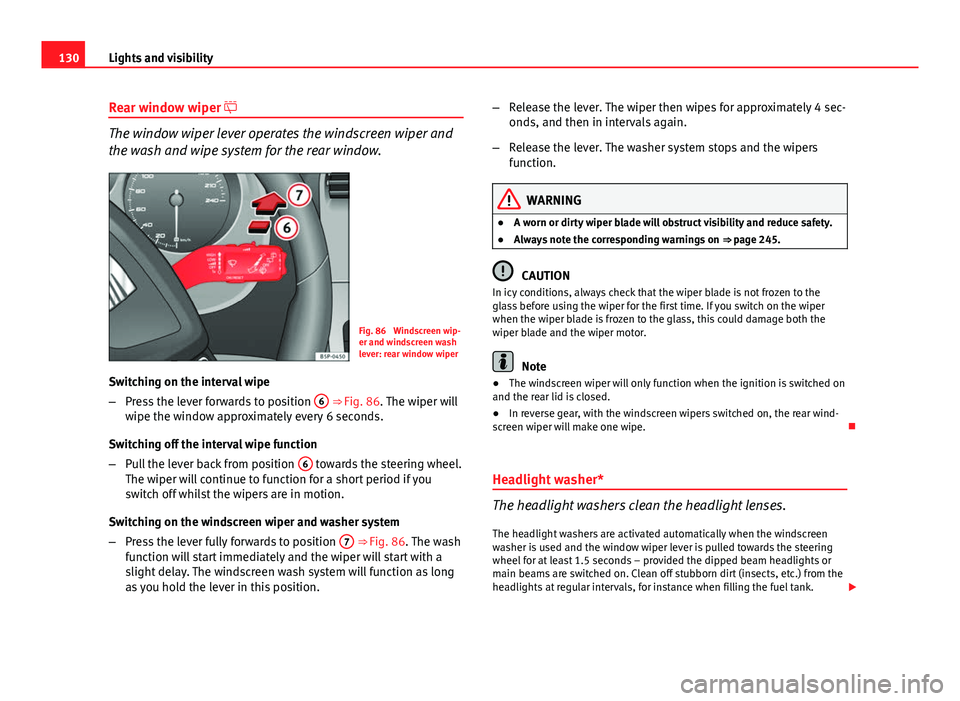
Fig. 86 Windscreen wip-
er and windscreen wash
lever: rear window wiper
Switching on the interval wipe
– Press the lever forwards to position 6
⇒ Fig. 86. The wiper will
wipe the window approximately every 6 seconds.
Switching off the interval wipe function
– Pull the lever back from position 6
towards the steering wheel.
The wiper will continue to function for a short period if you
switch off whilst the wipers are in motion.
Switching on the windscreen wiper and washer system
– Press the lever fully forwards to position 7
⇒ Fig. 86. The wash
function will start immediately and the wiper will start with a
slight delay. The windscreen wash system will function as long
as you hold the lever in this position. –
Release the lever. The wiper then wipes for approximately 4 sec-
onds, and then in intervals again.
– Release the lever. The washer system stops and the wipers
function.
WARNING
● A worn or dirty wiper blade will obstruct visibility and reduce safety.
● Always note the corresponding warnings on ⇒ page 245.
CAUTION
In icy conditions, always check that the wiper blade is not frozen to the
glass before using the wiper for the first time. If you switch on the wiper
when the wiper blade is frozen to the glass, this could damage both the
wiper blade and the wiper motor.
Note
● The windscreen wiper will only function when the ignition is switched on
and the rear lid is closed.
● In reverse gear, with the windscreen wipers switched on, the rear wind-
screen wiper will make one wipe.
Headlight washer*
The headlight washers clean the headlight lenses. The headlight washers are activated automatically when the windscreen
washer is used and the window wiper lever is pulled towards the steering
wheel for at least 1.5 seconds – provided the dipped beam headlights or
main beams are switched on. Clean off stubborn dirt (insects, etc.) from the
headlights at regular intervals, for instance when filling the fuel tank.
Page 151 of 321
149
Seats and storage
The table in the right-hand compartment is fitted in the left-hand slot of the
front of the mobile storage compartment and the table in the left-hand com-
partment is fitted in the right-hand slot.
The tables have two positions for use and cannot be interchanged.
WARNING
● The mobile stowage compartment supports a maximum load of 5 kg.
Do not overload.
● Do not drive when the cover of the mobile storage compartment is
open.
● Do not drive when the tables are set up for use.
● When the vehicle is moving, keep the tables stored inside the mobile
storage compartment with the cover closed, and likewise when they are
not in use
● Never place hot drinks in the cup holders. The drink may spill and
cause burns when the vehicle is moving.
● Do not leave cans in the cup holders when the vehicle is in motion,
there is a danger that the can may be flung around the vehicle and cause
injury.
● Make sure that the mounting plate is correctly clipped onto the cush-
ion frame.
● When the plate is not in use, store inside the storage compartment.
● When the mobile storage compartment is not in use, it should always
be fastened by the storage net in the luggage compartment.
Note
● Check that the mobile storage compartment is correctly fitted, pulling it
forwards by the front glove compartment and checking that both safety
clips are correctly clipped onto the rings. Fitting and removal
This storage compartment may only be placed in the central
area of the rear seat
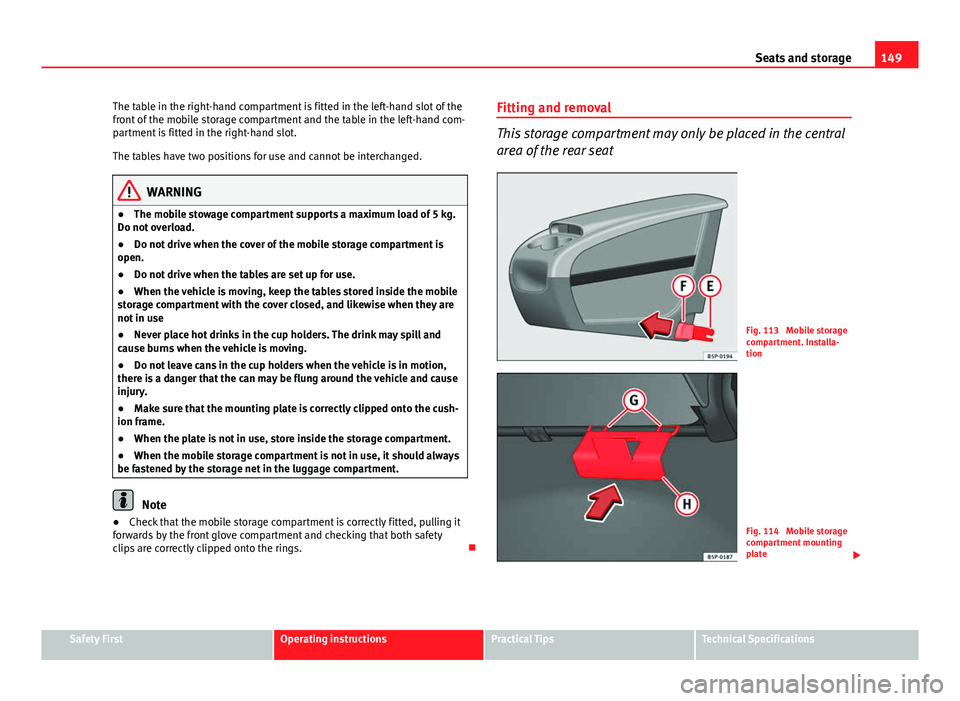
Fig. 113 Mobile storage
compartment. Installa-
tion
Fig. 114 Mobile storage
compartment mounting
plate
Safety FirstOperating instructionsPractical TipsTechnical Specifications
Page 156 of 321
154Seats and storage
First-aid kit, warning triangle, fire
extinguisher
Warning triangle* and first-aid kit*
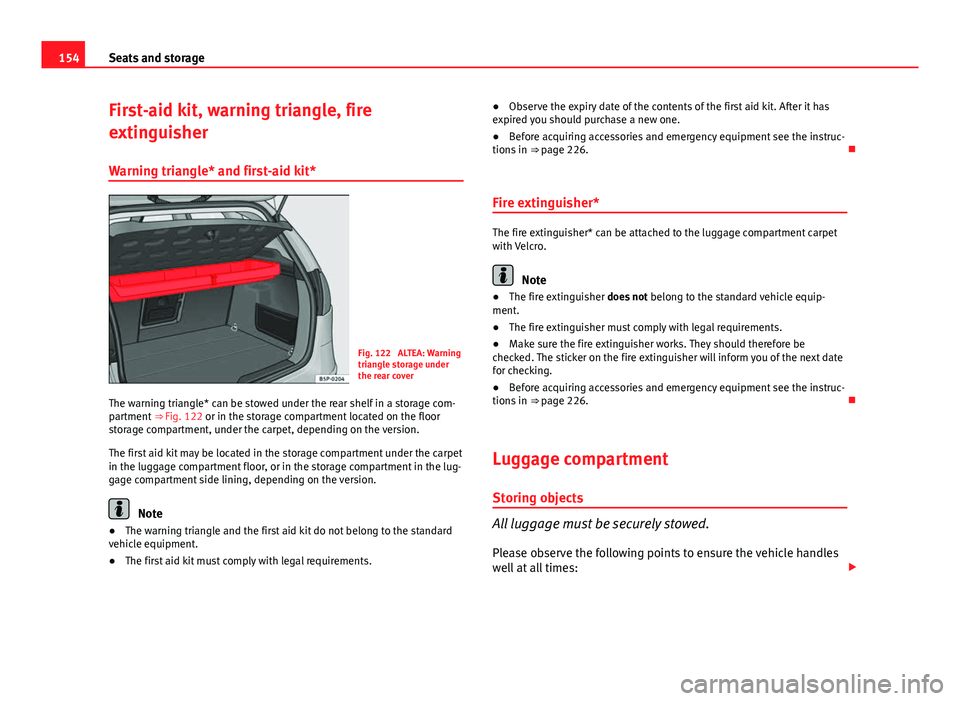
Fig. 122 ALTEA: Warning
triangle storage under
the rear cover
The warning triangle* can be stowed under the rear shelf in a storage com-
partment ⇒ Fig. 122 or in the storage compartment located on the floor
storage compartment, under the carpet, depending on the version.
The first aid kit may be located in the storage compartment under the carpet
in the luggage compartment floor, or in the storage compartment in the lug-
gage compartment side lining, depending on the version.
Note
● The warning triangle and the first aid kit do not belong to the standard
vehicle equipment.
● The first aid kit must comply with legal requirements. ●
Observe the expiry date of the contents of the first aid kit. After it has
expired you should purchase a new one.
● Before acquiring accessories and emergency equipment see the instruc-
tions in ⇒ page 226.
Fire extinguisher*
The fire extinguisher* can be attached to the luggage compartment carpet
with Velcro.
Note
● The fire extinguisher does not belong to the standard vehicle equip-
ment.
● The fire extinguisher must comply with legal requirements.
● Make sure the fire extinguisher works. They should therefore be
checked. The sticker on the fire extinguisher will inform you of the next date
for checking.
● Before acquiring accessories and emergency equipment see the instruc-
tions in ⇒ page 226.
Luggage compartment
Storing objects
All luggage must be securely stowed. Please observe the following points to ensure the vehicle handles
well at all times:
Page 162 of 321
160Air conditioning
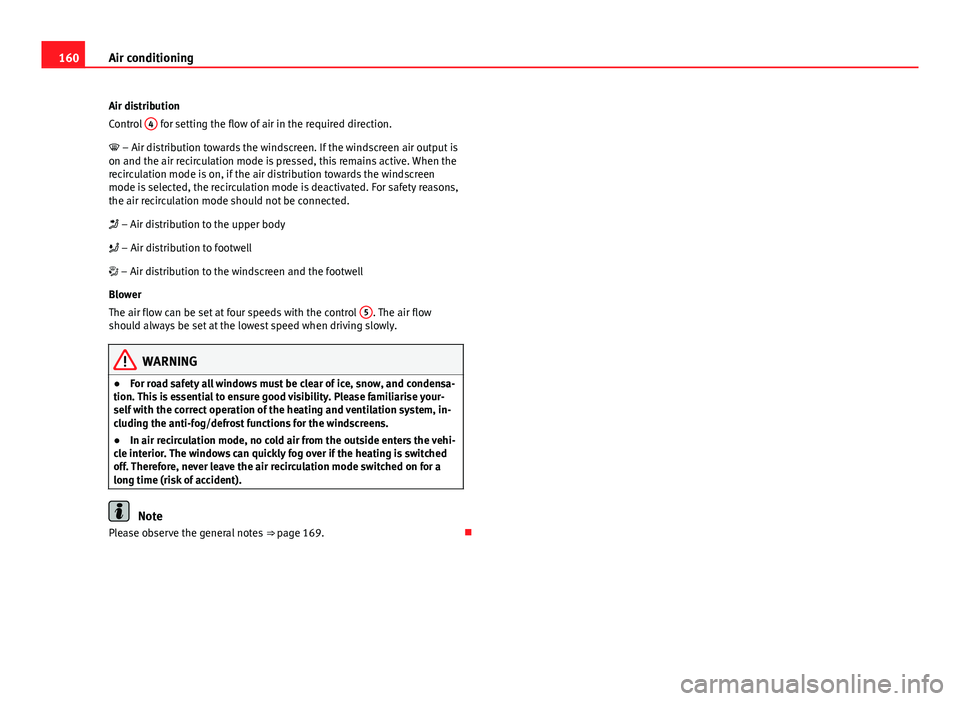
Air distribution
Control 4
for setting the flow of air in the required direction.
– Air distribution towards the windscreen. If the windscreen air output is
on and the air recirculation mode is pressed, this remains active. When the
recirculation mode is on, if the air distribution towards the windscreen
mode is selected, the recirculation mode is deactivated. For safety reasons,
the air recirculation mode should not be connected.
– Air distribution to the upper body
– Air distribution to footwell
– Air distribution to the windscreen and the footwell
Blower
The air flow can be set at four speeds with the control 5
. The air flow
should always be set at the lowest speed when driving slowly.
WARNING
● For road safety all windows must be clear of ice, snow, and condensa-
tion. This is essential to ensure good visibility. Please familiarise your-
self with the correct operation of the heating and ventilation system, in-
cluding the anti-fog/defrost functions for the windscreens.
● In air recirculation mode, no cold air from the outside enters the vehi-
cle interior. The windows can quickly fog over if the heating is switched
off. Therefore, never leave the air recirculation mode switched on for a
long time (risk of accident).
Note
Please observe the general notes ⇒ page 169.
Page 164 of 321
162Air conditioning
Heating and cooling the interior
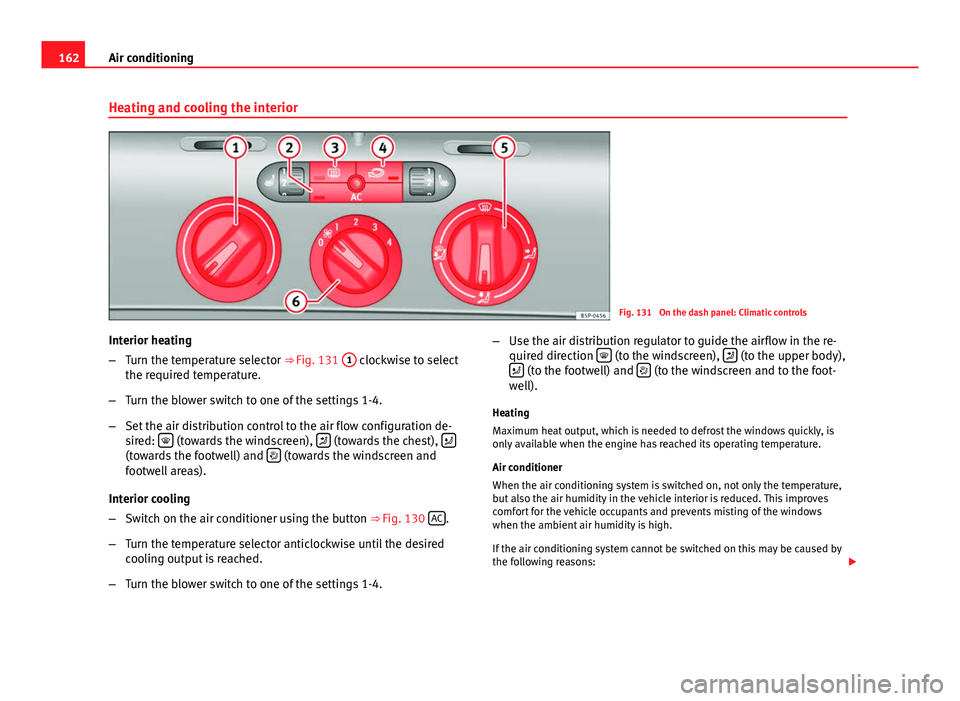
Fig. 131 On the dash panel: Climatic controls
Interior heating
– Turn the temperature selector ⇒ Fig. 131 1
clockwise to select
the required temperature.
– Turn the blower switch to one of the settings 1-4.
– Set the air distribution control to the air flow configuration de-
sired:
(towards the windscreen), (towards the chest), (towards the footwell) and (towards the windscreen and
footwell areas).
Interior cooling
– Switch on the air conditioner using the button ⇒ Fig. 130 AC
.
– Turn the temperature selector anticlockwise until the desired
cooling output is reached.
– Turn the blower switch to one of the settings 1-4. –
Use the air distribution regulator to guide the airflow in the re-
quired direction
(to the windscreen), (to the upper body),
(to the footwell) and (to the windscreen and to the foot-
well).
Heating
Maximum heat output, which is needed to defrost the windows quickly, is
only available when the engine has reached its operating temperature.
Air conditioner
When the air conditioning system is switched on, not only the temperature,
but also the air humidity in the vehicle interior is reduced. This improves
comfort for the vehicle occupants and prevents misting of the windows
when the ambient air humidity is high.
If the air conditioning system cannot be switched on this may be caused by
the following reasons:
Page 165 of 321
163
Air conditioning
● The engine is not running.
● The blower is switched off.
● The outside temperature is lower than approximately +3 °C (+37 °F).
● The air conditioning system compressor has been temporarily switched
off because the engine coolant temperature is too high. ●
The air conditioner fuse is faulty.
● Another fault in the vehicle. Have the air conditioner checked by a speci-
alised workshop.
Air recirculation mode
Air recirculation mode prevents fumes or unpleasant smells from coming from the outside.
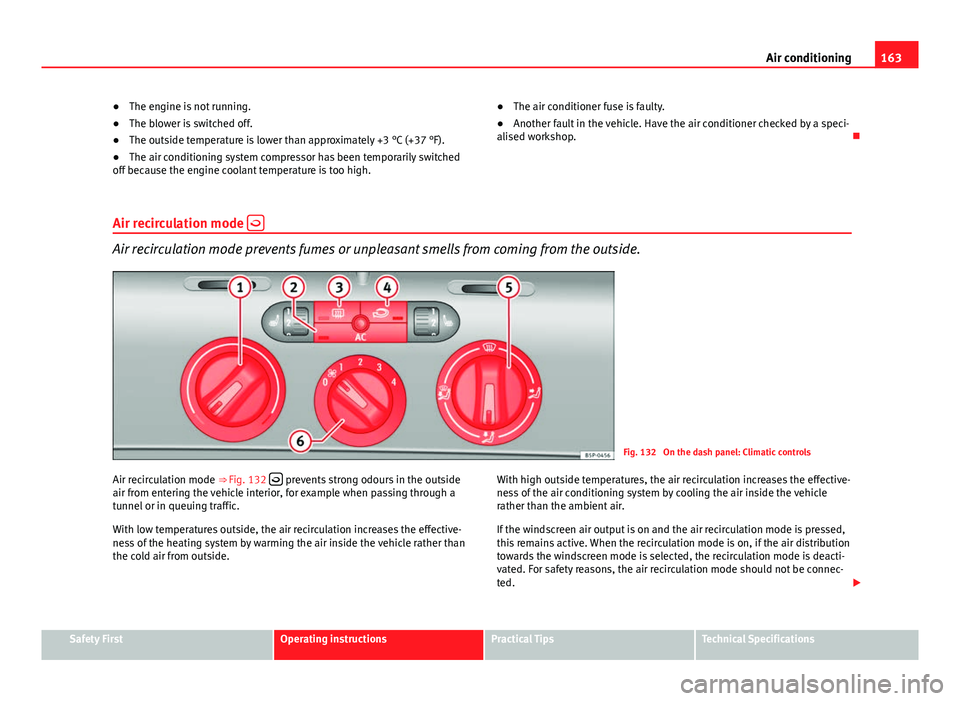
Fig. 132 On the dash panel: Climatic controls
Air recirculation mode ⇒ Fig. 132
prevents strong odours in the outside
air from entering the vehicle interior, for example when passing through a
tunnel or in queuing traffic.
With low temperatures outside, the air recirculation increases the effective-
ness of the heating system by warming the air inside the vehicle rather than
the cold air from outside. With high outside temperatures, the air recirculation increases the effective-
ness of the air conditioning system by cooling the air inside the vehicle
rather than the ambient air.
If the windscreen air output is on and the air recirculation mode is pressed,
this remains active. When the recirculation mode is on, if the air distribution
towards the windscreen mode is selected, the recirculation mode is deacti-
vated. For safety reasons, the air recirculation mode should not be connec-
ted.
Safety FirstOperating instructionsPractical TipsTechnical Specifications
Page 171 of 321
169
Air conditioning
With high outside temperatures, the air recirculation increases the effective-
ness of the air conditioning system by cooling the air inside the vehicle
rather than the ambient air.
If the windscreen air output is on and the air recirculation mode is pressed,
this remains active. When the recirculation mode is on, if the air distribution
towards the windscreen mode is selected, the recirculation mode is deacti-
vated. For safety reasons, the air recirculation mode should not be connec-
ted.
WARNING
In air recirculation mode, no cold air from the outside enters the vehicle
interior. If the air conditioning system is switched off, the windows can
quickly mist over. Therefore, never leave the air recirculation mode
switched on for a long time (risk of accident).
General notes
Pollution filter
The pollution filter (a combined particulate filter and active carbon filter)
serves as a barrier against impurities in the outside air, including dust and
pollen.
For the air conditioner to work with maximum efficiency, the pollution filter
must be replaced at the intervals specified in the Service Plan.
If the filter loses efficiency prematurely due to use in areas reaching very
high pollution levels, the pollen filter must be changed more frequently
than stated in the Service Schedule.
Air conditioner
When the air conditioning system is switched on, not only the temperature,
but also the air humidity in the vehicle interior is reduced. This improves comfort for the vehicle occupants and prevents misting of the windows
when the ambient air humidity is high.
If the air conditioning system cannot be switched on this may be caused by
the following reasons:
●
The engine is not running.
● The AC
button is disconnected.
● The outside temperature is lower than approximately +3 °C (+37 °F).
● The air conditioning system compressor has been temporarily switched
off because the engine coolant temperature is too high.
● The air conditioner fuse is faulty.
● Another fault in the vehicle. Have the air conditioner checked by a speci-
alised workshop.
CAUTION
● If you suspect that the air conditioner is damaged, switch it off with but-
ton AC
to prevent further damage and have it checked by a specialised
workshop.
● Repairs to the air conditioner require specialist knowledge and special
tools. Therefore, we recommend you to take the vehicle to a specialised
workshop.
Note
● If the humidity and temperature outside the vehicle are high, condensa-
tion can drip off the evaporator in the cooling system and so forming a pud-
dle underneath the vehicle. This is completely normal and there is no need
to suspect a leak.
● Keep the air intake slots in front of the windscreen free of snow, ice and
leaves to ensure heating and cooling are not impaired, and to prevent the
windows from misting over.
● The air from the vents flows through the vehicle interior and is extracted
by slots designed for this purpose. Therefore, do not cover these slots with
items of clothing or other objects.
Safety FirstOperating instructionsPractical TipsTechnical Specifications
Page 174 of 321
172Driving
WARNING (Continued)
● Adjust the driver seat or steering wheel so that there is a distance of
at least 25 cm between the steering wheel and your chest ⇒ Fig. 138. If
you fail to observe the minimum distance, the airbag will not protect you.
Risk of fatal injury.
● If your physical constitution does not allow you to maintain the mini-
mum distance of 25 cm, contact a Technical Service. The Technical Serv-
ice will help you to decide if special specific modifications are necessary.
● If you adjust the steering wheel so that it points towards your face,
the driver airbag will not protect you properly in the event of an accident.
Make sure that the steering wheel points towards your chest.
● When driving, always hold the steering wheel with both hands on the
outside of the ring at the 9 o'clock and 3 o'clock positions. Never hold
the steering wheel at the 12 o'clock position, or in any other manner
(e.g. in the centre of the steering wheel, or on the inside of the rim). In
such cases, if the airbag is triggered, you may sustain injuries to the
arms, hands and head.
Safety
Electronic Stability Control (ESC)*
The ESC helps make driving safer in extreme driving condi-
tions.
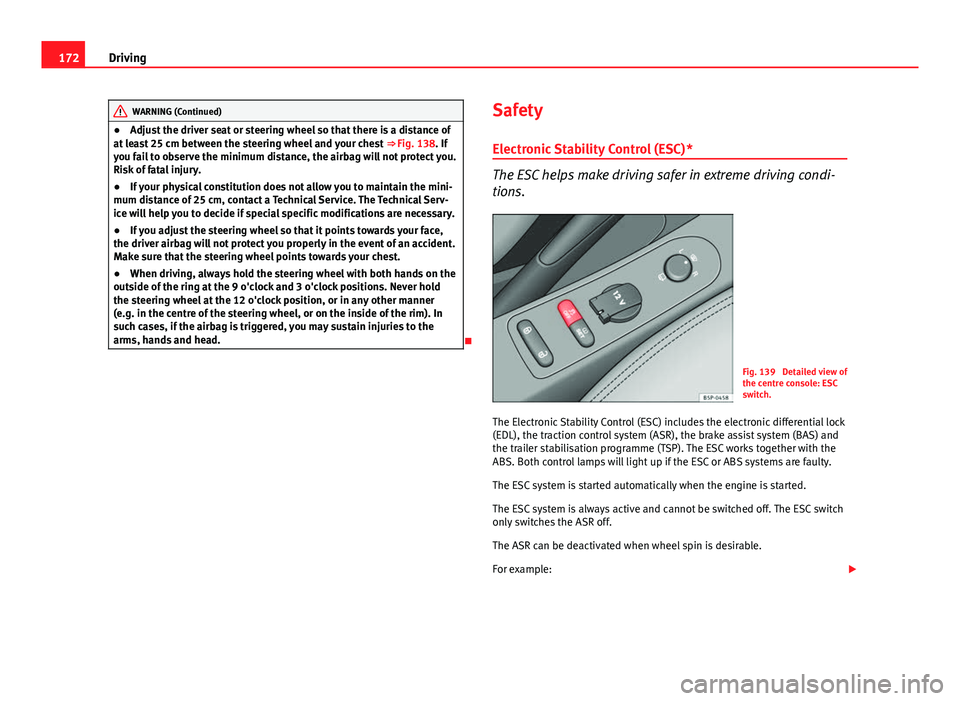
Fig. 139 Detailed view of
the centre console: ESC
switch.
The Electronic Stability Control (ESC) includes the electronic differential lock
(EDL), the traction control system (ASR), the brake assist system (BAS) and
the trailer stabilisation programme (TSP). The ESC works together with the
ABS. Both control lamps will light up if the ESC or ABS systems are faulty.
The ESC system is started automatically when the engine is started.
The ESC system is always active and cannot be switched off. The ESC switch
only switches the ASR off.
The ASR can be deactivated when wheel spin is desirable.
For example:
Page 175 of 321
173
Driving
● When driving with snow chains.
● When driving in deep snow or on loose surfaces.
● When the vehicle is stuck, to rock it backwards and forwards.
Press the button to switch the ASR back on when you no longer need wheel
spin.
WARNING
● Do not forget that the Electronic stability control (ESC) cannot defy
the laws of physics. This should be kept in mind, particularly on slippery
and wet roads and when towing a trailer.
● Always adapt your driving style to suit the condition of the roads and
the traffic situation. The greater safety provided by the ESC should not
encourage you to run any risks.
● Please refer to the corresponding warning notes on ESC in
⇒ page 196, Intelligent technology.
Ignition lock
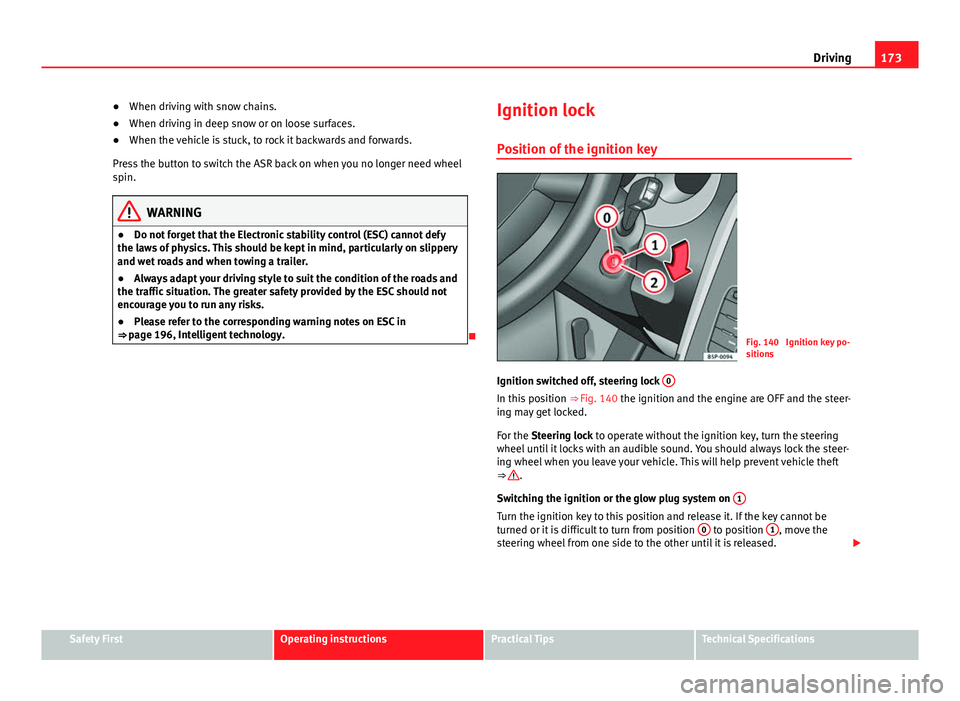
Position of the ignition keyFig. 140 Ignition key po-
sitions
Ignition switched off, steering lock 0
In this position
⇒ Fig. 140 the ignition and the engine are OFF and the steer-
ing may get locked.
For the Steering lock to operate without the ignition key, turn the steering
wheel until it locks with an audible sound. You should always lock the steer-
ing wheel when you leave your vehicle. This will help prevent vehicle theft
⇒
.
Switching the ignition or the glow plug system on 1
Turn the ignition key to this position and release it. If the key cannot be
turned or it is difficult to turn from position 0 to position 1, move the
steering wheel from one side to the other until it is released.
Safety FirstOperating instructionsPractical TipsTechnical Specifications
Page 177 of 321
175
Driving
If the engine does not start immediately, switch the starter off after 10 sec-
onds and try again after half a minute. If the engine still does not start, the
fuel pump fuse should be checked ⇒ page 272, Fuses.
WARNING
● Never start or run the engine in unventilated or closed rooms. The ex-
haust gases contain carbon monoxide, an odourless and colourless poi-
sonous gas. Risk of fatal accidents. Carbon monoxide can cause loss of
consciousness. It can also result in death.
● Never leave the vehicle unattended if the engine is running.
● Never use “cold start sprays”, they could explode or cause the engine
to run at high revs. Risk of injury.
CAUTION
● When the engine is cold, you should avoid high engine speeds, driving
at full throttle and over-loading the engine. Risk of engine damage.
● The vehicle should not be pushed or towed more than 50 metres to start
the engine. Unburnt fuel could enter the catalytic converter and damage it.
● Before attempting to push-start or tow a vehicle in order to start it, you
should first try to start it using the battery of another vehicle. Note and fol-
low the instructions in ⇒ page 287, Jump-starting.
For the sake of the environment
Do not warm-up the engine by running the engine with the vehicle station-
ary. Start off immediately, driving gently. This helps the engine reach oper-
ating temperature faster and reduces emissions. Starting diesel engines
The engine can only be started using a genuine SEAT key
with its correct code.
– Move the gearbox lever to the neutral position and depress the
clutch pedal thoroughly and hold it in this position for the start-
er to turn the engine on.
– Turn the ignition key to the starting position.
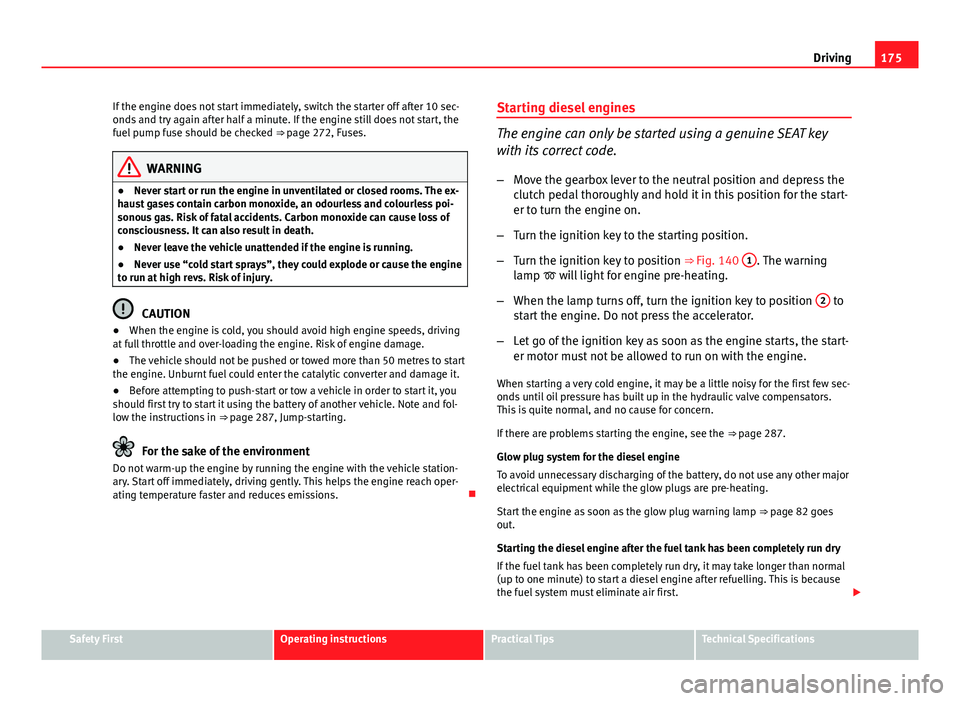
– Turn the ignition key to position ⇒ Fig. 140 1
. The warning
lamp will light for engine pre-heating.
– When the lamp turns off, turn the ignition key to position 2
to
start the engine. Do not press the accelerator.
– Let go of the ignition key as soon as the engine starts, the start-
er motor must not be allowed to run on with the engine.
When starting a very cold engine, it may be a little noisy for the first few sec-
onds until oil pressure has built up in the hydraulic valve compensators.
This is quite normal, and no cause for concern.
If there are problems starting the engine, see the ⇒ page 287.
Glow plug system for the diesel engine
To avoid unnecessary discharging of the battery, do not use any other major
electrical equipment while the glow plugs are pre-heating.
Start the engine as soon as the glow plug warning lamp ⇒ page 82 goes
out.
Starting the diesel engine after the fuel tank has been completely run dry
If the fuel tank has been completely run dry, it may take longer than normal
(up to one minute) to start a diesel engine after refuelling. This is because
the fuel system must eliminate air first.
Safety FirstOperating instructionsPractical TipsTechnical Specifications