wiper blades Seat Altea XL 2014 Owner's Manual
[x] Cancel search | Manufacturer: SEAT, Model Year: 2014, Model line: Altea XL, Model: Seat Altea XL 2014Pages: 321, PDF Size: 4.52 MB
Page 6 of 321
Trailer towing . . . . . . . . . . . . . . . . . . . . . . . . . . . . . . 210
Instructions to follow . . . . . . . . . . . . . . . . . . . . . . 210
Ball coupling of towing bracket* . . . . . . . . . . . . . 211
Driving tips . . . . . . . . . . . . . . . . . . . . . . . . . . . . . . 211
Fitting a towing bracket* . . . . . . . . . . . . . . . . . . . 212
Vehicle maintenance and cleaning . . . . . . . . . 214
General notes . . . . . . . . . . . . . . . . . . . . . . . . . . . . 214
Care of the vehicle exterior . . . . . . . . . . . . . . . . . . 215
Vehicle interior maintenance . . . . . . . . . . . . . . . . 220
Accessories, replacement of parts and
modifications . . . . . . . . . . . . . . . . . . . . . . . . . . . . . 226
Accessories and spare parts . . . . . . . . . . . . . . . . 226
Technical modifications . . . . . . . . . . . . . . . . . . . . 226
Roof aerial* . . . . . . . . . . . . . . . . . . . . . . . . . . . . . . 227
Mobile phones and two-way radios . . . . . . . . . . . 227
Checking and refilling levels . . . . . . . . . . . . . . . 228
Refuelling . . . . . . . . . . . . . . . . . . . . . . . . . . . . . . . 228
LPG system (Liquefied petroleum gas)* . . . . . . . 230
Petrol . . . . . . . . . . . . . . . . . . . . . . . . . . . . . . . . . . . 233
Diesel . . . . . . . . . . . . . . . . . . . . . . . . . . . . . . . . . . . 234
Working in the engine compartment . . . . . . . . . . 235
Engine oil . . . . . . . . . . . . . . . . . . . . . . . . . . . . . . . . 238
Coolant . . . . . . . . . . . . . . . . . . . . . . . . . . . . . . . . . 242
Washer fluid and windscreen wiper blades . . . . 244
Brake fluid . . . . . . . . . . . . . . . . . . . . . . . . . . . . . . . 249
Vehicle battery . . . . . . . . . . . . . . . . . . . . . . . . . . . 250
Wheels and tyres . . . . . . . . . . . . . . . . . . . . . . . . . . 253
Wheels . . . . . . . . . . . . . . . . . . . . . . . . . . . . . . . . . . 253
If and when . . . . . . . . . . . . . . . . . . . . . . . . . . . . . . . 262
Vehicle tools, tyre repair kit and spare wheel . . . 262
Wheel change . . . . . . . . . . . . . . . . . . . . . . . . . . . . 264
Tyre repair kit (Tyre-Mobility-System)* . . . . . . . . . 269
Fuses . . . . . . . . . . . . . . . . . . . . . . . . . . . . . . . . . . . 272
Bulb change . . . . . . . . . . . . . . . . . . . . . . . . . . . . . 274
Jump-starting . . . . . . . . . . . . . . . . . . . . . . . . . . . . . 287
Towing and tow-starting . . . . . . . . . . . . . . . . . . . . 290 Technical Specifications
. . . . . . . . . . . 293
Description of specifications . . . . . . . . . . . . . . . 293
Important information . . . . . . . . . . . . . . . . . . . . . 293
Information on fuel consumption . . . . . . . . . . . . 294
Towing a trailer . . . . . . . . . . . . . . . . . . . . . . . . . . . 295
Wheels . . . . . . . . . . . . . . . . . . . . . . . . . . . . . . . . . . 296
Technical specifications . . . . . . . . . . . . . . . . . . . . 297
Checking fluid levels . . . . . . . . . . . . . . . . . . . . . . . 297
Petrol engine 1.6 75 kW (102 PS) . . . . . . . . . . . . 298
1.2 TSI 77 kW (105 HP) Start-Stop petrol engine 299
Petrol engine 1.4 92 kW (125 PS) . . . . . . . . . . . . 300
Petrol engine 2.0 155 kW (211 PS) . . . . . . . . . . . 301
Diesel engine 1.6 TDI CR 66 kW (90 PS) with/
without DPF . . . . . . . . . . . . . . . . . . . . . . . . . . . . . . 302
Diesel engine 1.6 TDI CR 77 kW (105 PS) with/
without DPF . . . . . . . . . . . . . . . . . . . . . . . . . . . . . . 303
Diesel engine 1.6 TDI CR 77 kW (105 PS) DPF
Start-Stop . . . . . . . . . . . . . . . . . . . . . . . . . . . . . . . . 304
Diesel engine 2.0 TDI CR 103 kW (140 PS) . . . . . 305
Diesel engine 2.0 TDI CR 125 kW (170 PS) . . . . . 306
Dimensions and capacities . . . . . . . . . . . . . . . . . 307
Index . . . . . . . . . . . . . . . . . . . . . . . . . . . . . . . . . . . 309
4Table of Contents
Page 129 of 321
127
Lights and visibility
Rear door sun blind*
– Pull out the visor and hook it onto the hooks at the top of the
door frame ⇒ Fig. 82.
Windscreen wipers
Front windscreen wipers
The window wiper lever controls the windscreen wipers and
the automatic wash and wipe.
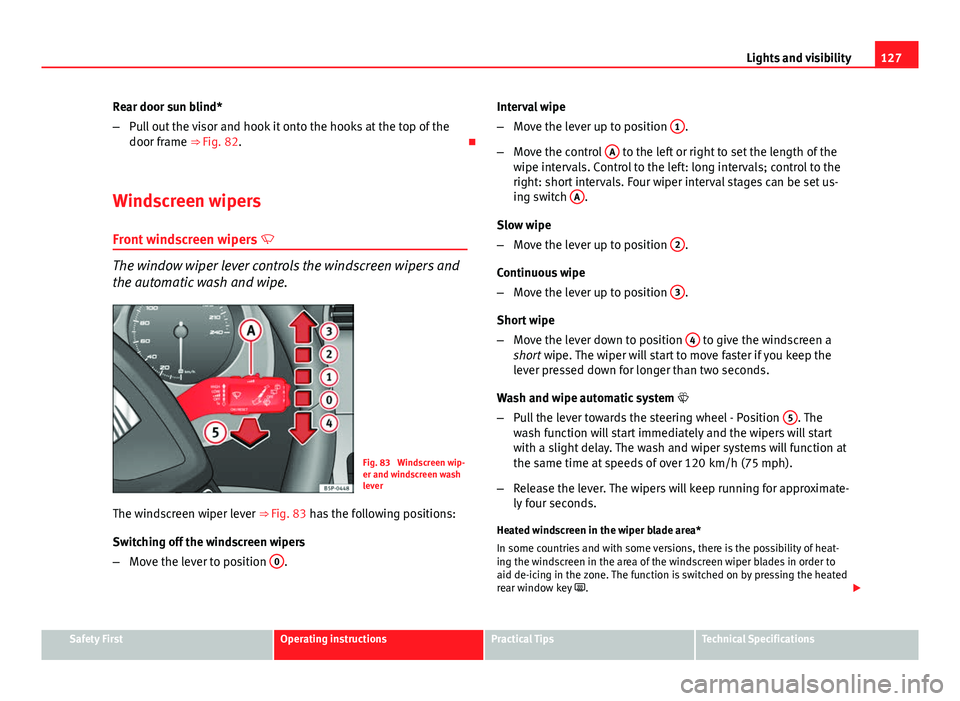
Fig. 83 Windscreen wip-
er and windscreen wash
lever
The windscreen wiper lever ⇒ Fig. 83 has the following positions:
Switching off the windscreen wipers
– Move the lever to position 0
. Interval wipe
–
Move the lever up to position 1
.
– Move the control A
to the left or right to set the length of the
wipe intervals. Control to the left: long intervals; control to the
right: short intervals. Four wiper interval stages can be set us-
ing switch A
.
Slow wipe
– Move the lever up to position 2
.
Continuous wipe
– Move the lever up to position 3
.
Short wipe
– Move the lever down to position 4
to give the windscreen a
short wipe. The wiper will start to move faster if you keep the
lever pressed down for longer than two seconds.
Wash and wipe automatic system
– Pull the lever towards the steering wheel - Position 5
. The
wash function will start immediately and the wipers will start
with a slight delay. The wash and wiper systems will function at
the same time at speeds of over 120 km/h (75 mph).
– Release the lever. The wipers will keep running for approximate-
ly four seconds.
Heated windscreen in the wiper blade area*
In some countries and with some versions, there is the possibility of heat-
ing the windscreen in the area of the windscreen wiper blades in order to
aid de-icing in the zone. The function is switched on by pressing the heated
rear window key .
Safety FirstOperating instructionsPractical TipsTechnical Specifications
Page 130 of 321
128Lights and visibility
WARNING
● Worn and dirty wiper blades reduce visibility and safety levels while
driving.
● In cold conditions, you should not use the wash/wipe system unless
you have warmed the windscreen with the heating and ventilation sys-
tem. The windscreen washer fluid could otherwise freeze on the wind-
screen and obscure your view of the road.
● Always note the corresponding warnings on ⇒ page 245.
CAUTION
In icy conditions, always check that the wiper blades are not frozen to the
glass before using the wipers for the first time. If you switch on the wind-
screen wipers when the wiper blades are frozen to the windscreen, you
could damage both the wiper blades and the wiper motor.
Note
● The windscreen wipers will only work when the ignition is switched on.
● In certain versions of vehicles with alarms, the windscreen wiper will on-
ly work when the ignition is on and the bonnet closed.
● When in use, the wipers do not go as far as the rest position. When the
lever is moved to position 0, they are totally hidden.
● The next speed down will automatically be selected if wiper speed 2
⇒ Fig. 83 or 3 is selected when the vehicle stops. The set speed will be
resumed when the vehicle starts again
● The windscreen will be wiped again after approximately five seconds
once the “automatic wipe/wash system” has been operated, provided the
vehicle is in transit (drip function). If you activate the wipers less than three
seconds after the drip function, a new wash sequence will begin without the
last wipe. For the “drip” function to work again, you have to turn the ignition
off and then on again. ●
When the “interval wipe function” is on, the intervals are directly propor-
tional to the speed. This way, the higher the vehicle speed the shorter the
intervals.
● The wiper will try to wipe away any obstacles that are on the windscreen.
The wiper will stop moving if the obstacle blocks its path. Remove the ob-
stacle and switch the wiper back on again.
● Before removing any objects that may be trapped in the side areas of
the windscreen, always move the wiper arms to the service position (hori-
zontal).
● The heat output of the heated jets is controlled automatically when the
ignition is switched on, depending upon the outside temperature.
Page 220 of 321

218Vehicle maintenance and cleaning
If possible, use a de-icing spray to remove ice. If you use an ice scraper,
push it in one direction only without swinging it.
Use window cleaner or a silicone remover to clean rubber, oil, grease and
silicone deposits off.
Wax deposits can be removed with a special cleaner available in your Tech-
nical Services. Wax deposits on the windscreen could cause the wiper
blades to judder. Adding a window cleaner that dissolves wax to the wind-
screen washer fluid prevents wiper blades from juddering, but wax deposits
are not removed.
CAUTION
● Never use warm or hot water to remove snow and ice from windows and
mirrors. This could cause the glass to crack!
● The heating element for the rear window is located on the inner side of
the window. To prevent damage, do not put stickers over the heating ele-
ments on the inside of the window.
Cleaning windscreen wiper blades
Clean wiper blades improve visibility.
1. Use a soft cloth to remove dust and dirt from the windscreen wiper blades.
2. Use window cleaner to clean the windscreen wiper blades. Use a sponge or a cloth to remove stubborn dirt. Rubber seals maintenance
If rubber seals are well looked after, they will not freeze so
quickly.
1. Use a soft cloth to remove dust and dirt from the rubber seals.
2. Apply a specialist care product to the rubber seals.
The rubber strips on the doors, windows, bonnet and rear lid will remain
pliable and last longer if they are treated with a suitable care product (for
example silicone spray).
Caring for rubber seals will also prevent premature ageing and leaks. The
doors will be easier to open. If rubber seals are well looked after, they will
not freeze so quickly in winter.
Door lock cylinders
The door lock cylinders can freeze up in winter.
To de-ice the lock cylinders you should only use spray with lubricating and
anti-corrosive properties.
Cleaning chrome parts
1. Clean chrome parts with a damp cloth.
2. Polish chrome parts with a soft, dry cloth. If this does not provide satisfying results, use a specialist chrome cleaning
product. Chrome cleaning products will remove stains from the surface.
Page 246 of 321
244Checking and refilling levels
Topping up coolant
–Only use new coolant liquid.
– Do not fill above the “MAX” mark.
Closing the coolant expansion tank
– Screw the cap on again tightly.
The position of the coolant expansion reservoir is shown in the correspond-
ing engine compartment illustration ⇒ page 297.
Make sure that the coolant meets the required specifications ⇒ page 242.
Do not use a different type of additive if additive G12+ is not available. In
this case use only water and bring the coolant concentration back up to the
correct level as soon as possible by putting in the specified additive
⇒ page 242.
Always top up with new coolant.
Do not fill above the “MAX” mark. Otherwise the excess coolant will be
forced out of the cooling system when the engine is hot.
The coolant additive G12+ (dyed purple) may be mixed with G12 (dyed red)
and also with G 11.
WARNING
Any work carried out in the engine compartment or on the engine must
be carried out cautiously.
● When working in the engine compartment, always observe the safety
warnings ⇒ page 235.
● When the engine is warm or hot, the cooling system is pressurised!
Do not unscrew the cap on the coolant expansion tank when the engine
is hot. This is a burn injury risk.
CAUTION
● When mixed with other additives the colour of G12 will change to brown.
If this occurs you should have the coolant changed immediately. Failure to
do so will result in engine damage!
● If a lot of coolant fluid has been lost, wait for the engine to cool down
before putting in cold coolant. This avoids damaging the engine. Large cool-
ant losses are an indication of leaks in the cooling system. See a special-
ised workshop immediately and have the cooling system checked. Other-
wise, there is a risk of engine damage.
Washer fluid and windscreen wiper blades Topping up washer fluid
The water for cleaning the windscreen should always be
mixed with washer fluid.
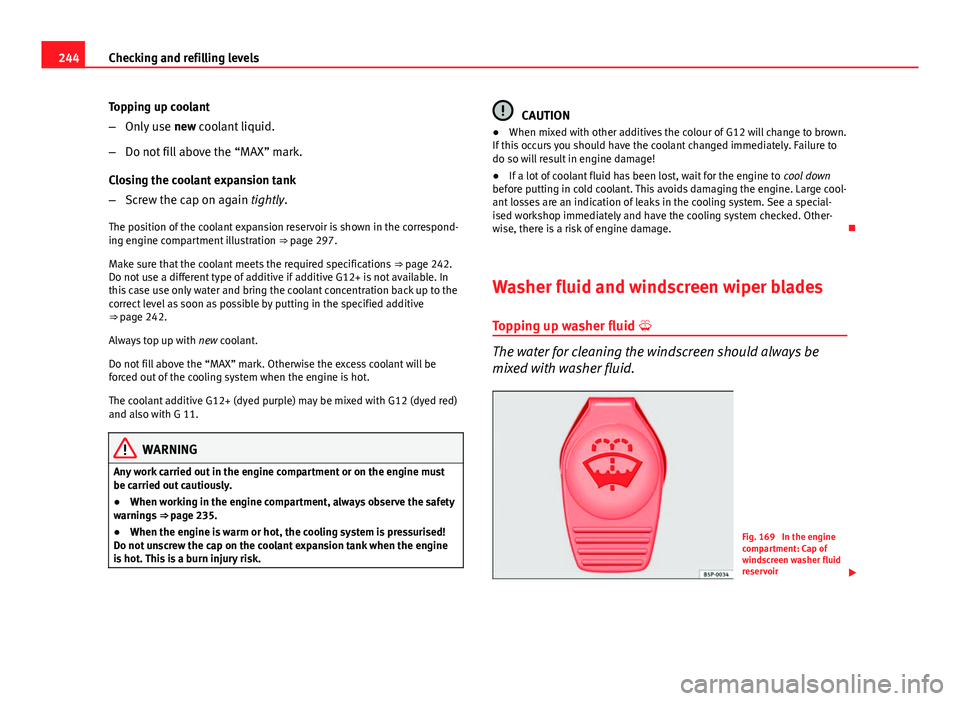
Fig. 169 In the engine
compartment: Cap of
windscreen washer fluid
reservoir
Page 247 of 321
245
Checking and refilling levels
The windscreen washer and the headlight washers are supplied with fluid
from the windscreen washer fluid container in the engine compartment.
The reservoir is located on the right-hand side of the engine compartment.
Plain water is not enough to clean the windscreen and headlights. We rec-
ommend that you always add a product to the windscreen washer fluid. Ap-
proved windscreen cleaning products exist on the market with high deter-
gent and anti-freeze properties, these may be added all-year-round. Please
follow the dilution instructions on the packaging.
WARNING
Any work carried out in the engine compartment or on the engine must
be carried out cautiously.
● When working in the engine compartment, always observe the safety
warnings ⇒ page 235.
CAUTION
● Never put radiator anti-freeze or other additives into the windscreen
washer fluid.
● Always use approved windscreen cleansing products diluted as per in-
structions. If you use other washer fluids or soap solutions, the tiny holes in
the fan-shaped nozzles could become blocked. Changing windscreen wiper blades
If the windscreen wiper blades are in perfect condition, you
will benefit from an improved visibility. Damaged wiper
blades should be replaced immediately.
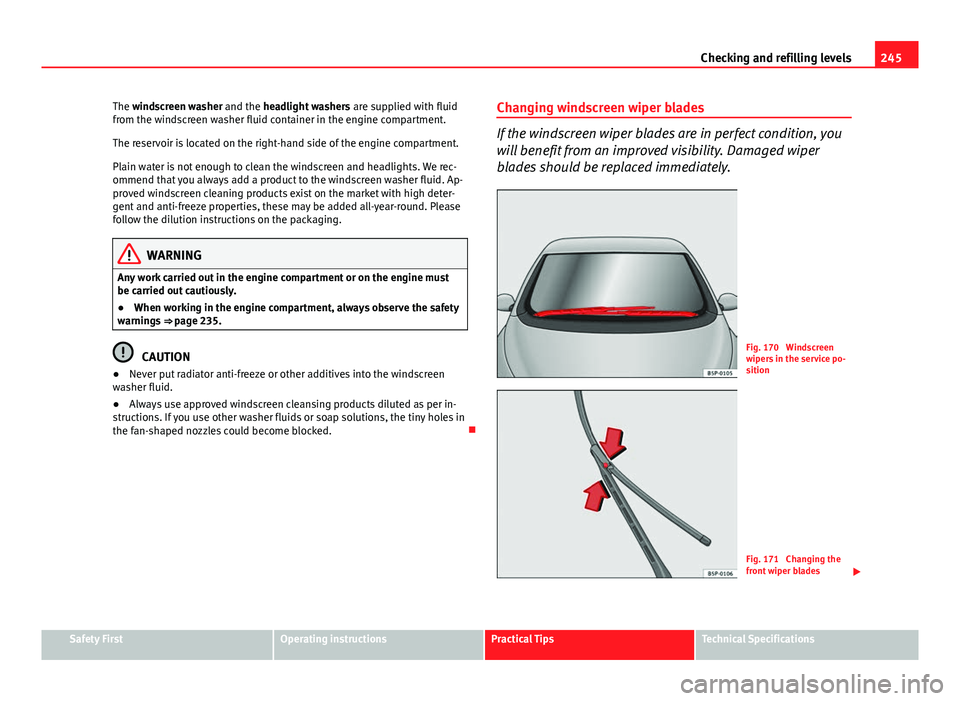
Fig. 170 Windscreen
wipers in the service po-
sition
Fig. 171 Changing the
front wiper blades
Safety FirstOperating instructionsPractical TipsTechnical Specifications
Page 248 of 321
246Checking and refilling levels
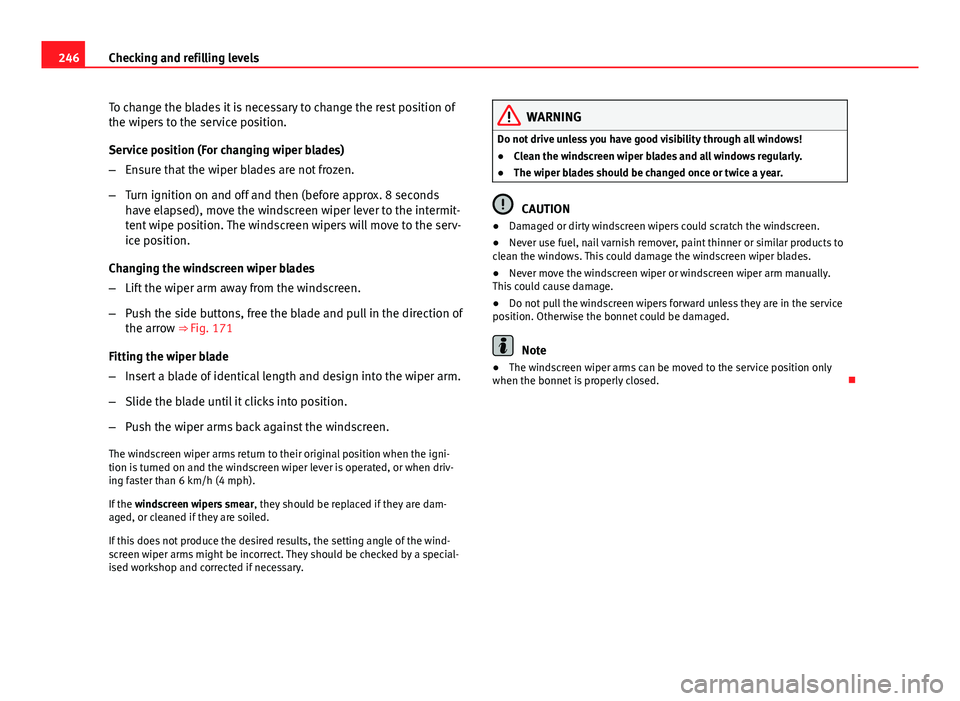
To change the blades it is necessary to change the rest position of
the wipers to the service position.
Service position (For changing wiper blades)
–Ensure that the wiper blades are not frozen.
– Turn ignition on and off and then (before approx. 8 seconds
have elapsed), move the windscreen wiper lever to the intermit-
tent wipe position. The windscreen wipers will move to the serv-
ice position.
Changing the windscreen wiper blades
– Lift the wiper arm away from the windscreen.
– Push the side buttons, free the blade and pull in the direction of
the arrow ⇒ Fig. 171
Fitting the wiper blade
– Insert a blade of identical length and design into the wiper arm.
– Slide the blade until it clicks into position.
– Push the wiper arms back against the windscreen.
The windscreen wiper arms return to their original position when the igni-
tion is turned on and the windscreen wiper lever is operated, or when driv-
ing faster than 6 km/h (4 mph).
If the windscreen wipers smear , they should be replaced if they are dam-
aged, or cleaned if they are soiled.
If this does not produce the desired results, the setting angle of the wind-
screen wiper arms might be incorrect. They should be checked by a special-
ised workshop and corrected if necessary.
WARNING
Do not drive unless you have good visibility through all windows!
● Clean the windscreen wiper blades and all windows regularly.
● The wiper blades should be changed once or twice a year.
CAUTION
● Damaged or dirty windscreen wipers could scratch the windscreen.
● Never use fuel, nail varnish remover, paint thinner or similar products to
clean the windows. This could damage the windscreen wiper blades.
● Never move the windscreen wiper or windscreen wiper arm manually.
This could cause damage.
● Do not pull the windscreen wipers forward unless they are in the service
position. Otherwise the bonnet could be damaged.
Note
● The windscreen wiper arms can be moved to the service position only
when the bonnet is properly closed.
Page 249 of 321
247
Checking and refilling levels
Applies to the model: ALTEA
Changing the rear wiper blade
A good rear wiper blade is essential for clear rear vision.
Damaged wiper blades should be replaced immediately.
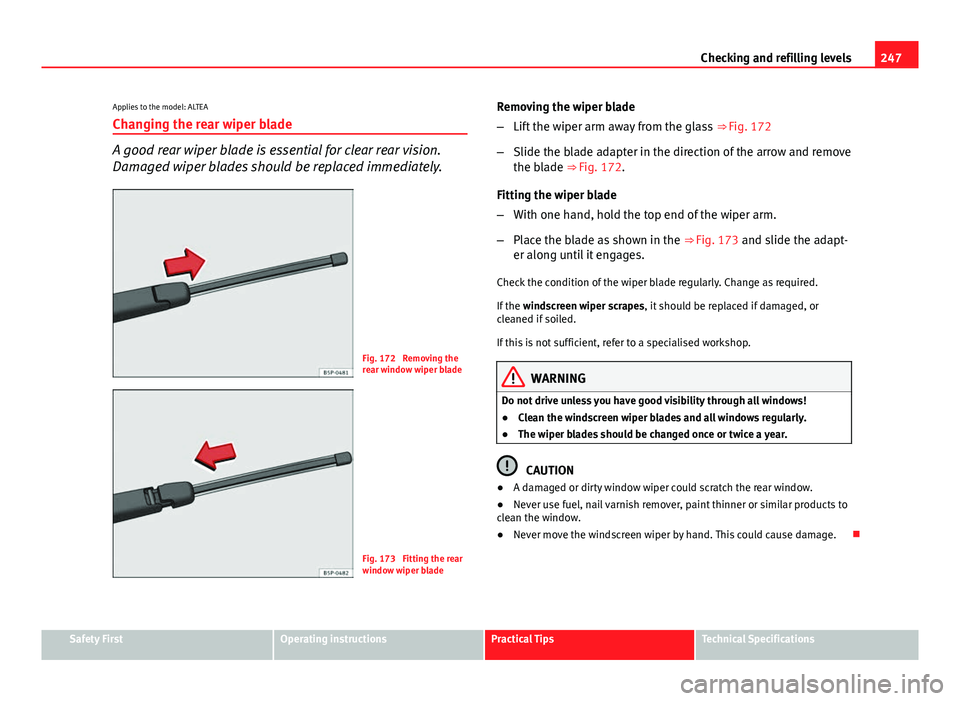
Fig. 172 Removing the
rear window wiper blade
Fig. 173 Fitting the rear
window wiper blade Removing the wiper blade
–
Lift the wiper arm away from the glass ⇒ Fig. 172
– Slide the blade adapter in the direction of the arrow and remove
the blade ⇒ Fig. 172.
Fitting the wiper blade
– With one hand, hold the top end of the wiper arm.
– Place the blade as shown in the ⇒ Fig. 173 and slide the adapt-
er along until it engages.
Check the condition of the wiper blade regularly. Change as required.
If the windscreen wiper scrapes, it should be replaced if damaged, or
cleaned if soiled.
If this is not sufficient, refer to a specialised workshop.
WARNING
Do not drive unless you have good visibility through all windows!
● Clean the windscreen wiper blades and all windows regularly.
● The wiper blades should be changed once or twice a year.
CAUTION
● A damaged or dirty window wiper could scratch the rear window.
● Never use fuel, nail varnish remover, paint thinner or similar products to
clean the window.
● Never move the windscreen wiper by hand. This could cause damage.
Safety FirstOperating instructionsPractical TipsTechnical Specifications
Page 250 of 321
248Checking and refilling levels
Applies to the model: ALTEA XL / ALTEA FREETRACK
Changing the rear wiper blade
A good rear wiper blade is essential for clear rear vision.
Damaged wiper blades should be replaced immediately.
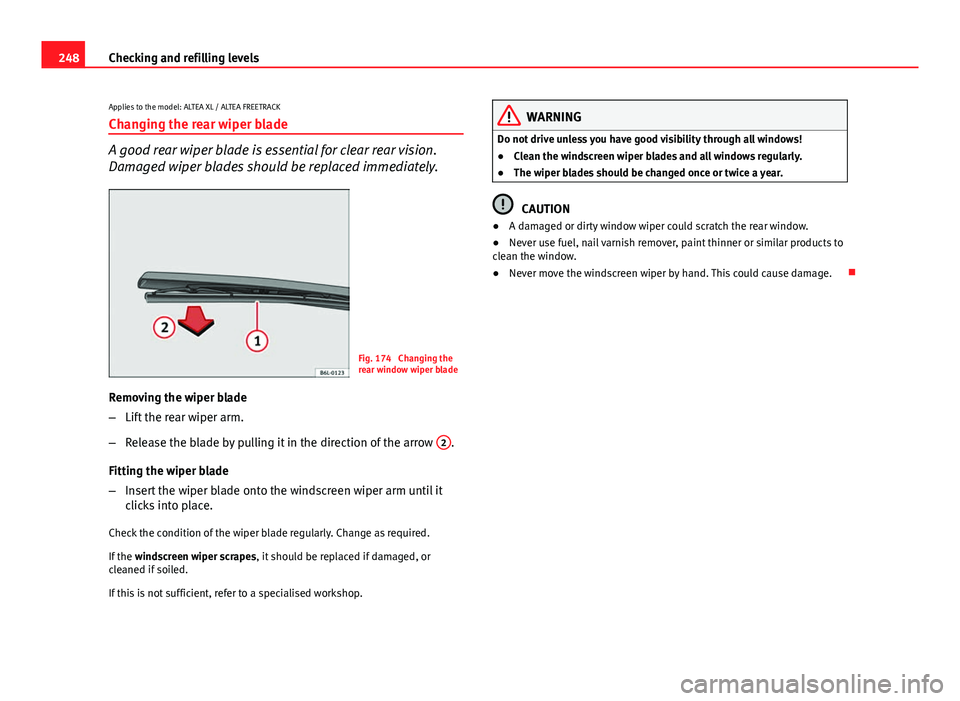
Fig. 174 Changing the
rear window wiper blade
Removing the wiper blade
– Lift the rear wiper arm.
– Release the blade by pulling it in the direction of the arrow 2
.
Fitting the wiper blade
– Insert the wiper blade onto the windscreen wiper arm until it
clicks into place.
Check the condition of the wiper blade regularly. Change as required.
If the windscreen wiper scrapes, it should be replaced if damaged, or
cleaned if soiled.
If this is not sufficient, refer to a specialised workshop.
WARNING
Do not drive unless you have good visibility through all windows!
● Clean the windscreen wiper blades and all windows regularly.
● The wiper blades should be changed once or twice a year.
CAUTION
● A damaged or dirty window wiper could scratch the rear window.
● Never use fuel, nail varnish remover, paint thinner or similar products to
clean the window.
● Never move the windscreen wiper by hand. This could cause damage.
Page 312 of 321
C
Car care Exterior . . . . . . . . . . . . . . . . . . . . . . . . . . . . 215
Catalytic converter . . . . . . . . . . . . . . . . . . . . . . 205
CCS . . . . . . . . . . . . . . . . . . . . . . . . . . . . . . . . . . 193
CD changer . . . . . . . . . . . . . . . . . . . . . . . . . . . . 141
Central lock button Locking . . . . . . . . . . . . . . . . . . . . . . . . . . . . . 99
Unlocking . . . . . . . . . . . . . . . . . . . . . . . . . . . 99
Central locking . . . . . . . . . . . . . . . . . . . . . . . . . . 96 Automatic locking system for involuntaryunlocking . . . . . . . . . . . . . . . . . . . . . . . . . . 98
Automatic speed-dependent locking and unlocking system . . . . . . . . . . . . . . . . . . . 98
Emergency unlocking system . . . . . . . . . . . 98
Selective unlocking system . . . . . . . . . . . . . 97
Unlocking system . . . . . . . . . . . . . . . . . . . . . 98
Centre armrest . . . . . . . . . . . . . . . . . . . . . . . . . 141
Cetane number . . . . . . . . . . . . . . . . . . . . . . . . . 234
Changing gear see Manual gearbox . . . . . . . . . . . . . . . . . . 182
Changing gear in tiptronic mode . . . . . . . . . . 186
Changing the bulbs Main headlight bulbs . . . . . . . . . . . . . . . . . 276
Changing the main headlight bulbs Main beam lights . . . . . . . . . . . . . . . . . . . . 278
Side lights . . . . . . . . . . . . . . . . . . . . . . . . . . 279
Turn signal bulbs . . . . . . . . . . . . . . . . . . . . 276
Changing the main headlight lamps dipped lights . . . . . . . . . . . . . . . . . . . . . . . 277 Changing the tail light bulbs
Position light, fog light and tail light on therear lid . . . . . . . . . . . . . . . . . . . . . . . . . . . 283
Changing the tail lights Luggage compartment lights . . . . . . . . . . 284
Rear fog light . . . . . . . . . . . . . . . . . . . . . . . 281
Reverse light . . . . . . . . . . . . . . . . . . . . . . . . 281
Side lights . . . . . . . . . . . . . . . . . . . . . . . . . . 280
Turn signal light . . . . . . . . . . . . . . . . . . . . . 281
Turn signal, side and brake lights on thebody . . . . . . . . . . . . . . . . . . . . . . . . . . . . . 282
Changing windscreen wiper blades . . . . . . . . 245
Chassis number . . . . . . . . . . . . . . . . . . . . . . . . 294
Checking . . . . . . . . . . . . . . . . . . . . . . . . . . . . . . 251
Checking battery electrolyte level . . . . . . . . . . 251
Checking engine oil level . . . . . . . . . . . . . . . . . 240
Checklist Seat upholstery . . . . . . . . . . . . . . . . . . . . . 221
Child safety . . . . . . . . . . . . . . . . . . . . . . . . . . . . . 46
Child seat Categorisation in groups . . . . . . . . . . . . . . . 48
Group 1 . . . . . . . . . . . . . . . . . . . . . . . . . . . . . 49
Group 2 . . . . . . . . . . . . . . . . . . . . . . . . . . . . . 49
Group 3 . . . . . . . . . . . . . . . . . . . . . . . . . . . . . 49
Groups 0 and 0+ . . . . . . . . . . . . . . . . . . . . . . 48
Safety notes . . . . . . . . . . . . . . . . . . . . . . . . . 46
Securing . . . . . . . . . . . . . . . . . . . . . . . . . . . . 51
Child seats . . . . . . . . . . . . . . . . . . . . . . . . . . . . . 48 ISOFIX system . . . . . . . . . . . . . . . . . . . . . . . . 52
on the front passenger seat . . . . . . . . . . . . . 31
Top Tether system . . . . . . . . . . . . . . . . . . . . 52
Cigarette lighter . . . . . . . . . . . . . . . . . . . . . . . . 151
Cleaning alloy wheel rims . . . . . . . . . . . . . . . . 219 Cleaning chrome . . . . . . . . . . . . . . . . . . . . . . . 218
Cleaning engine compartment . . . . . . . . . . . . 220
Cleaning steel wheel rims . . . . . . . . . . . . . . . . 219
Cleaning windows . . . . . . . . . . . . . . . . . . . . . . 217
Climatic . . . . . . . . . . . . . . . . . . . . . . . . . . . . . . . 161
Climatronic
General notes . . . . . . . . . . . . . . . . . . . . . . . 169
Clock . . . . . . . . . . . . . . . . . . . . . . . . . . . . . . . . . . 59
Clothes hook . . . . . . . . . . . . . . . . . . . . . . . . . . 145
Cockpit . . . . . . . . . . . . . . . . . . . . . . . . . . . . . . . . 55
Coming/leaving home function . . . . . . . . . . . . 118
Compartment for on-board documentation . . 141
control lamp . . . . . . . . . . . . . . . . . . . . . . . . . . . . 32
Control lamps . . . . . . . . . . . . . . . . . . . . . . . . . . . 76
Control lighting . . . . . . . . . . . . . . . . . . . . . . . . . . 55
Controls electric windows . . . . . . . . . . . . . . . . . . . . . 110
Exterior mirrors . . . . . . . . . . . . . . . . . . . . . . 132
Sliding/tilting sunroof . . . . . . . . . . . . . . . . 112
Convenience closing Sliding/tilting sunroof . . . . . . . . . . . . . . . . 113
Windows . . . . . . . . . . . . . . . . . . . . . . . . . . . 112
Convenience opening Windows . . . . . . . . . . . . . . . . . . . . . . . . . . . 112
Coolant . . . . . . . . . . . . . . . . . . . . . . . . . . . 242, 243 control lamp . . . . . . . . . . . . . . . . . . . . . . . . . 66
Coolant level . . . . . . . . . . . . . . . . . . . . . . . . . . . 243 Control lamp . . . . . . . . . . . . . . . . . . . . . . . . . 81
Coolant loss . . . . . . . . . . . . . . . . . . . . . . . . . . . 243
Coolant temperature control lamp . . . . . . . . . . . . . . . . . . . . . . . . . 81
Control lamp . . . . . . . . . . . . . . . . . . . . . . . . . 81
310 Index