technical data Seat Arona 2017 Repair Manual
[x] Cancel search | Manufacturer: SEAT, Model Year: 2017, Model line: Arona, Model: Seat Arona 2017Pages: 308, PDF Size: 6.66 MB
Page 191 of 308
Driving
Inertia mode The inertia mode enables the kinetic energy
of the
v
ehicle to be harnessed enabling cer-
tain stretches to be driven without using the
accelerator. This enables fuel to be saved.
Use the inertia mode to “let the vehicle roll”
before, for example, arriving in a town.
Switching on inertia mode
Important: selector lever must be in position
D, gradients below 12 %.
– Select, in SEAT Drive Profile*, Eco mode
›› ›
page 225.
– Take your foot off the accelerator.
The driver mes
sage Inertia will be dis-
played. At speeds higher than 20 km/h (12
mph), the gearbox will automatically disen-
gage and the vehicle will roll freely, without
the effect of the engine brake. While the vehi-
cle rolls, the engine runs at idling speed.
Stopping inertia mode
– Press the brake or the accelerator pedal.
To mak
e use of the braking force and switch
off the engine again, simply press the brake
pedal briefly.
Applying both the inertia mode (= prolonged
section with less energy) and the switching
off using inertia (= shorter section without the need for fuel) facilitates improved fuel
cons
umption and emission balance. WARNING
● If the iner ti
a mode has been switched on,
take into account, when approaching an ob-
stacle and releasing the accelerator pedal,
that the vehicle will not decelerate in the usu-
al manner: risk of accident!
● When using inertia mode while travelling
down hil
ls, the vehicle can increase speed:
risk of accident!
● If other users drive your vehicle, warn them
about inerti
a mode. Note
● Inerti a mode i
s only available in eco (SEAT
Drive Profile*) driving mode.
● The driver message Inertia is on
ly dis-
played with the current consumption. In iner-
tia mode the gear will no longer be displayed
(for example “E” will appear instead of “E7”).
● On downhill sections with gradients above
15 %, the inertia mode w
ill automatically be
switched off temporarily. Backup programme
A backup programme is in place if a fault
shou
l
d oc
cur in the control system. If all the positions of the selector lever are
shown ov
er a light background on the instru-
ment panel display, there is a system fault
and the automatic gearbox will operate in
with the backup programme. When the back-
up programme is activated, it is possible to
drive the vehicle, however, at low speeds and
within a selected range of gears. In some ca-
ses driving in reverse gear may not be possi-
ble. CAUTION
If the gearbox operates with the backup pro-
gramme, t ak
e the vehicle to a specialised
workshop and have the fault repaired without
delay. Clutch
Clutch overheating! Please
stop!
The c lut
ch has overheated and could be dam-
aged. Stop the vehicle and wait for the gear-
box to cool with the engine at idling speed
and the selector lever in position P. When the
warning lamp and the driver message switch
off, have the fault corrected by a specialised
workshop without delay. If the warning lamp
and the driver message do not switch off, do
not continue driving. Seek specialist assis-
tance.
189
Technical data
Advice
Operation
Emergencies
Safety
Page 193 of 308
Driving
Run-in and economical driving R u
nnin
g in a new engine The engine needs to be run-in over the first
1500 km (900 mil
e
s).
For the first 1,000 kilometres (600 miles)
– Do not drive at speeds of more than 2/3
the maximum s
peed.
– Do not accelerate hard.
– Avoid high engine revolutions.
– Do not tow a trailer.
From 1,000 k i
lometres (600 miles) to 1,500
kilometres (900 miles)
– Speeds can be gradual
ly increased to the
maximum road speed or maximum permis-
sible engine speed (rpm).
During its first few hours of running, the in-
ternal friction in the engine is greater than
later on, when all the moving parts have bed-
ded in. For the sake of the environment
If the engine is run in gently, its life will be in-
cr e
ased and its oil consumption reduced. Tyre and brake pad run-in
New tyres should be run in carefully for the
firs
t
500 km (300 miles) and new brake pads
should be run in carefully for the first 200 km
(125 miles).
During the first 200 km (125 miles) you have
to compensate for the reduced braking effect
by applying more pressure to the brake ped-
al. In case of a sharp braking, the braking
distance will be longer with new brake pads
than with brake pads which have been run-
in. WARNING
● At fir s
t, new tyres do not give maximum
grip, and require running-in. This may cause
an accident. Drive particularly carefully in the
first 500 km (300 miles).
● New brake pads must be “run in” and do
not hav
e the correct friction properties during
the first 200 km (125 miles). However, the re-
duced braking capacity may be compensated
by pressing on the brake pedal a little harder. Environmental compatibility
Environmental protection is a top priority in
the de
s
ign, c
hoice of materials and manufac-
ture of your new SEAT. Constructive measures to encourage recy-
cling
● Joints
and connections designed for easy
dismantlin
g.
● Modular construction to facilitate disman-
tling.
● Incr
eased use of single-grade materials.
● Plastic parts and elastomers are marked in
accor
dance with ISO 1043, ISO 11469 and
ISO 1629.
Choice of materials
● Use of recycled materials.
● Use of compatible plastics in the same part
if its c
omponents are not easily separated.
● Use of recycled materials and/or materials
originating fr
om renewable sources.
● Reduction of volatile components, includ-
ing odour, in p
lastic materials.
● Use of CFC-free coolants.
Ban on heavy
metals, with the exceptions
dictated by law (Annex II of ELV Directive
2000/53/EC): cadmium, lead, mercury, hexa-
valent chromium.
Manufacturing methods
● Reduction of the quantity of thinner in the
protectiv
e wax for cavities.
● Use of plastic film as protection during ve-
hicle tr
ansport. »
191
Technical data
Advice
Operation
Emergencies
Safety
Page 195 of 308
Driving
Maintain the correct tyre pressures
B e
ar in mind th
at keeping the tyres at an ad-
equate pressure saves fuel. If the tyre pres-
sure is just one bar (14.5 psi/100 kPa) too
low, fuel consumption can increase by as
much as 5%. Due to the greater rolling resist-
ance, under-inflation also increases tyre wear
wear and impairs handling.
The tyre pressures should always be checked
when the tyres are cold.
Do not use winter tyres all year round as they
increase fuel consumption by up to 10%.
Avoid unnecessary weight
Given that every kilo of extra weight will in-
crease the fuel consumption, it is advisable
to always check the luggage compartment to
make sure that no unnecessary loads are be-
ing transported.
A roof rack is often left in place for the sake
of convenience, even when it is no longer
needed. At a speed of 100 km/h (62 mph)
and 120 km/h (75 mph) your vehicle will use
about 12% more fuel as a result of the extra
wind resistance caused by the roof rack even
when it is not in use.
Save electricity
The engine activates the alternator, which
produces electricity. With the need for elec-
tricity, fuel consumption also increases. Be-
cause of this, always turn off electrical devi- ces when you do not need them. Examples of
device
s that use a lot of electricity are: the
blower at high speeds, the rear window heat-
ing or the seat heaters*. Note
● If y
our vehicle has Start-Stop, it is not rec-
ommended that you switch this function off.
● It is recommended that you close
the win-
dows when driving at more than 60 km/h
(37 mph).
● Do not drive with your foot resting on the
clutc
h pedal,, as the pressure can make the
plate spin, more fuel will be used and it can
burn the clutch plate lining, causing a serious
fault.
● Do not hold the car on a hill with the clutch,
use the foot
brake or hand brake, using the
latter to start. The fuel consumption will be
lower and you will prevent the clutch plate
from being damaged.
● On descents, use the engine brake, chang-
ing to the g
ear that is more suitable for the
slope. Fuel consumption will be “zero” and
the brakes will not suffer. Engine management and ex-
h
au
s
t gas purification system
Introduction WARNING
● Bec au
se of the high temperatures which
can occur in the exhaust purification system
(catalytic converter or diesel particulate fil-
ter), do not park the vehicle where the ex-
haust can come into contact with flammable
materials under the car (e.g. on grass or at
the forest edge). Fire hazard!
● Do not apply wax underneath the vehicle
around the ar
ea of the exhaust system: Fire
hazard! Note
While the control lamps , , or re-
m ain lit, ther
e may be engine problems, fuel
consumption may increase and the engine
may lose power. Catalytic converter
To maintain the useful life of the catalytic
c
on
v
erter
– Use only unleaded petrol with petrol en-
gines, as
lead damages the catalytic con-
verter.
– Do not let the fuel get too low in the tank. »
193
Technical data
Advice
Operation
Emergencies
Safety
Page 197 of 308
Driving
Engine pre-heating/fault system* The warning lamp lights up to show that the
glow p
lug
s are preheating the diesel engine.
The control lamp lights up
If the control lamp lights up when the en-
gine is started it means that the glow plugs
are preheating. The engine can be started
straight away when the lamp switches off.
Control lamp flashes
If a fault develops in the engine management
system while you are driving, the glow plug
system lamp will flash . Take the vehicle to
a specialised workshop as soon as possible
and have the engine checked.
Driving tips Drivin g abr
oadTo drive abroad, the following must be taken
int
o c
on
sideration:
● For vehicles fitted with a catalytic converter
ensur
e that unleaded petrol is available for
the journey. See the chapter “Refuelling”. Au-
tomobile organisations will have information
about service station networks selling unlea-
ded fuel. ●
In some countrie
s, it is possible that your
car model is not sold, and therefore some
spare parts are not available or the technical
services may only be able to carry out limited
repairs.
SEAT importers and distributors will gladly
provide information about the technical prep-
aration that your vehicle requires and also
about necessary maintenance and repair
possibilities.
Adhesive strips for headlights
In countries where vehicles drive on the other
side of the road to your home country, the
asymmetric dipped beam may dazzle drivers
of oncoming vehicles.
To prevent dazzling, you must apply stickers
to certain parts of the headlight lenses. Fur-
ther information is available at any Technical
Service.
Driving on flooded roads To prevent damage to the vehicle when driv-
in
g thr
ough w
ater, for example, along a floo-
ded road, please observe the following:
● The water should never come above the
lower edg
e of the bodywork.
● Drive at pedestrian speed. WARNING
After driving through water, mud, sludge,
etc ., the br
aking effect can be delayed slight-
ly due to moisture build-up on the discs and
brake pads. Applying the brakes carefully
several times will remove the moisture and
restore the full braking effect. CAUTION
● Drivin g thr
ough flooded areas may severely
damage vehicle components such as the en-
gine, transmission, running gear or electrical
system.
● Whenever driving through water, the Start-
Stop sys
tem* must be switched off
››› page 196. Note
● Check the depth of
the water before enter-
ing the flooded zone.
● Do not stop in the water, drive in reverse, or
stop the en
gine in any situation.
● Note that vehicles travelling in the opposite
direction ma
y splash water that could exceed
the maximum permitted water height for your
vehicle.
● Avoid driving through salt water (corro-
sion). 195
Technical data
Advice
Operation
Emergencies
Safety
Page 199 of 308
Driver assistance systems
display. The engine may stop before the ve-
hic l
e c
omes to a halt in the deceleration
phase (at 7 km/h or 2 km/h, depending on
the vehicle’s gearbox).
– When you take your foot off the brake pedal
the engine wi
ll start up again. The warning
lamp will switch off.
Additional information related to the auto-
matic gearbox
The engine stops when the selector lever is in
the positions P, D, N and S, in addition to
when in manual mode. With the selector lev-
er in position P, the engine will also remain
switched off when you take your foot off the
brake pedal. In order to start the engine up
again the accelerator must be pressed, or an-
other gear engaged or the brake released.
If the selector lever is placed in position R
during the stopping phase, the engine will
start up again.
Change from position D to P to prevent the
engine from accidentally starting when
changing and passing by position R.
Additional information about vehicles with
Adaptive Cruise Control (ACC)
In vehicles with an automatic gearbox and
the ACC function, if the vehicle ahead drives
off again, the engine will start up again in
certain operating conditions. Note
● In v ehic
les with an automatic gearbox, you
can control whether the engine should switch
off or not by reducing or increasing the brake
force applied. While the vehicle remains stop-
ped, the engine will not stop if the brake ped-
al is slightly pressed, in traffic jams with fre-
quent stopping and starting for example. As
soon as strong pressure is applied to the
brake pedal, the engine will stop.
● In vehicles with manual gearbox, during
the stop
ping phases the brake pedal must re-
main depressed to prevent the vehicle from
moving.
● If the engine “stalls” in vehicles with man-
ual g
earbox, it can be directly started up
again by immediately pressing the clutch
pedal. General notes
The system can interrupt the Start-Stop mode
fr
equently
f
or different reasons.
The engine does not switch off
Before the stopping phase, the system veri-
fies whether certain conditions are met. The
engine does not switch off, in the following
situations for example:
● The engine has not yet reached the mini-
mum required t
emperature for the Start-Stop
mode. ●
The interior temper
ature selected for the air
conditioner has not yet been reached.
● The interior temperature is very high/low.
● Defrost function button activated
›››
page 48.
● The parking aid* is switched on.
● The battery is very low.
● The steering wheel is overly turned or is be-
ing turned.
● If
there is a danger of misting.
● After engaging reverse gear.
● In case of a very steep gradient.
The indication is
shown on the instrument
panel display, and in addition, the driver in-
formation system* shows, .
The engine starts by itself
During a stopping phase the normal Start-
Stop mode can be interrupted in the follow-
ing situations: The engine restarts by itself
without involvement from the driver.
● The interior temperature differs from the
value select
ed on the air conditioner.
● Defrost function button activated
›››
page 48.
● The brake has been pressed several times
consec
utively.
● The battery is too low.
● High power consumption. »
197
Technical data
Advice
Operation
Emergencies
Safety
Page 201 of 308
Driver assistance systems
Control lamp Lights up
The Cruise Control System (GRA) is switched on and ac-
tive.
OR: The Adaptive Cruise Control system (CCS) is switch-
ed on and active.
OR: the speed limiter is switched on and active. Several warning and control lamps light up
for a f
ew sec
onds when the ignition is switch-
ed on, signalling that the function is being
verified. They will switch off after a few sec-
onds.
Displayed on the CCS screen
Status Fig. 183:
CCS temporarily switched off. The set
speed is displayed in small or darkened
figures.
System error. Contact a specialised work-
shop.
CCS switched on. The speed memory is
empty.
The CCS is switched on. The set speed is
displayed in large figures. WARNING
Use of the cruise control could cause acci-
dents and sev
ere injuries if it is not possibleA
B
C
D to drive at a constant speed maintaining the
saf
ety
distance.
● Do not use the cruise control in heavy traf-
fic, if the dis
tance from the vehicle in front is
insufficient, on steep roads, with several
bends or in slippery circumstances (snow,
ice, rain or loose gravel), or on flooded roads.
● Never use the CCS when driving off-road or
on unpav
ed roads.
● Always adapt your speed and the distance
to the v
ehicles ahead in line with visibility,
weather conditions, the condition of the road
and the traffic situation.
● To avoid unexpected operation of the cruise
contro
l system, turn it off every time you fin-
ish using it.
● It is dangerous to use a set speed which is
too high for the pr
evailing road, traffic or
weather conditions.
● When travelling down hills, the CCS cannot
maintain a c
onstant speed. The vehicle tends
to accelerate under its own weight. Select a
lower gear or use the foot brake to slow the
vehicle. WARNING
Observe the safety warnings ›››
in Warning
symbol s on p
age 117. Operating the cruise control system*
Read the additional information carefully
›› ›
page 42
The value indicated in the table in brackets
(in mph, miles per hour) only refers to instru-
ment panels with indications in miles.
Changing gear in CCS mode
The CCS decelerates as soon as the clutch
pedal is pressed, intervening again automati-
cally after a gear is engaged.
Travelling down hills with the CCS
When travelling down hills the CCS cannot
maintain a constant speed. Slow the vehicle
down using the brake pedal and reduce
gears if required.
Automatic off
The cruise control system (CCS) is switched
off automatically or temporarily:
● If the system detects a fault that could af-
fect the w
orking order of the CCS.
● If you press and maintain the accelerator
pedal f
or a certain time, driving faster than
the stored speed.
● If the dynamic driving control systems in-
terv
ene (e.g. ASR or ESC).
● If the brake pedal is pressed.
● If the airbag is triggered. »
199
Technical data
Advice
Operation
Emergencies
Safety
Page 203 of 308
Driver assistance systems
●
When drivin g do
wnhill, the speed limiter
cannot limit the vehicle speed. Its speed will
increase due to its own weight. In this case,
select a lower gear or use the foot brake to
slow the vehicle. WARNING
Observe the safety warnings ›
››
in Warning
symbol s on p
age 117. Note
● Differ ent
versions of the instrument panel
are available and therefore the versions and
instructions on the display may vary.
● If when switching the ignition off, the
cruise c
ontrol system (CCS), the adaptive
cruise control (ACC) or the speed limiter were
switched on, then the cruise control system or the adaptive cruise control will automati-
ca
l
ly switch themselves on when the ignition
is back on. However, no speed will be stored.
The last set speed of the speed limiter will be
stored. Operate the speed limiter
Fig. 185
On the left of the steering column:
contr o
l and buttons to operate the speed lim-
iter. Fig. 186
On the left of the steering column:
third l ev
er for operating the speed limiter.
FunctionPosition of the turn signal lever ››› Fig. 185
or the third lever ››› Fig. 186Effect
Switching on the speed limiterMove controller 1 to position and press button 2 of the turn signal
lever or move the third lever forward and press button 2.The system switches on. The last set speed of the speed lim-
iter is stored. It does not take effect yet.» 201
Technical data
Advice
Operation
Emergencies
Safety
Page 205 of 308
Driver assistance systemsFunctionPosition of the turn signal lever
››› Fig. 185
or the third lever ››› Fig. 186Effect
Switching off the speed limiterMove control 1 of the turn signal lever into position or the third lever
into position .The system switches off The values shown in the table in brackets, in
mph, are di
s
played only in instrument panels
with indications in miles.
Going down slopes with the speed limiter
If the set speed of the speed limiter is excee-
ded while driving downhill, soon afterwards
the warning and control lamps flash
››› page 200 and an acoustic warning may
sound. In this case, use the foot brake to
slow the vehicle or, if necessary, select a low-
er gear.
Switching off temporarily
If you wish to temporarily switch off the
speed limiter, e.g. to overtake, move control
››› Fig. 185 1 of the turn signal lever into po-
sition
or the third lever into pressure
point or press button 2 on any lever.
Aft er o
vertaking, the speed limiter can be
switched on with the previously set speed by
pressing button 3 on the turn signal lever in
the are a
or by moving the third lever in-
to pressure point . Switch the speed limiter off temporarily by
pres
sing down the accelerator (kick-down)
If the accelerator is pressed right down (kick-
down) and the set speed is exceeded be-
cause driver wishes to do so, the limiter is
temporarily disabled.
To confirm it being switched off an acoustic
signal sound once. While the limiter is off,
the warning and control lamp flashes.
When the accelerator is no longer pressed
down and the speed is reduced below the set
value, the limiter switches on again. The con-
trol lamp will light up and remain lit.
Automatic off
The speed limiter is automatically switched
off:
● If the system detects a fault that could neg-
atively aff
ect the working order of the limiter.
● If the airbag is triggered. CAUTION
For automatic switching off due to system
fai lur
es, for security reasons, the limiter is
only completely switched off when the driver stops pressing the accelerator at some point
or c
ons
ciously switches off the system. Area monitoring system (Front
As
s
i
st) including City emergen-
cy braking and pedestrian
monitoring*
Introduction The Front Assist monitoring system can help
to av
oid r
ear collisions within the speed
range of between 4 km/h (2.5 mph) and 250
km/h (156 mph). The system has the Front
Assist function with City emergency braking
and pedestrian monitoring.
The Front Assist system may warn the driver,
within the constraints of the system, of im-
pending collisions, prepare the vehicle for
emergency braking in case of danger, provide
support during braking and apply automatic
braking.
The Front Assist is not a replacement for
driver awareness. »
203
Technical data
Advice
Operation
Emergencies
Safety
Page 207 of 308
Driver assistance systems
On-screen warning lamps and mes-
s ag
e
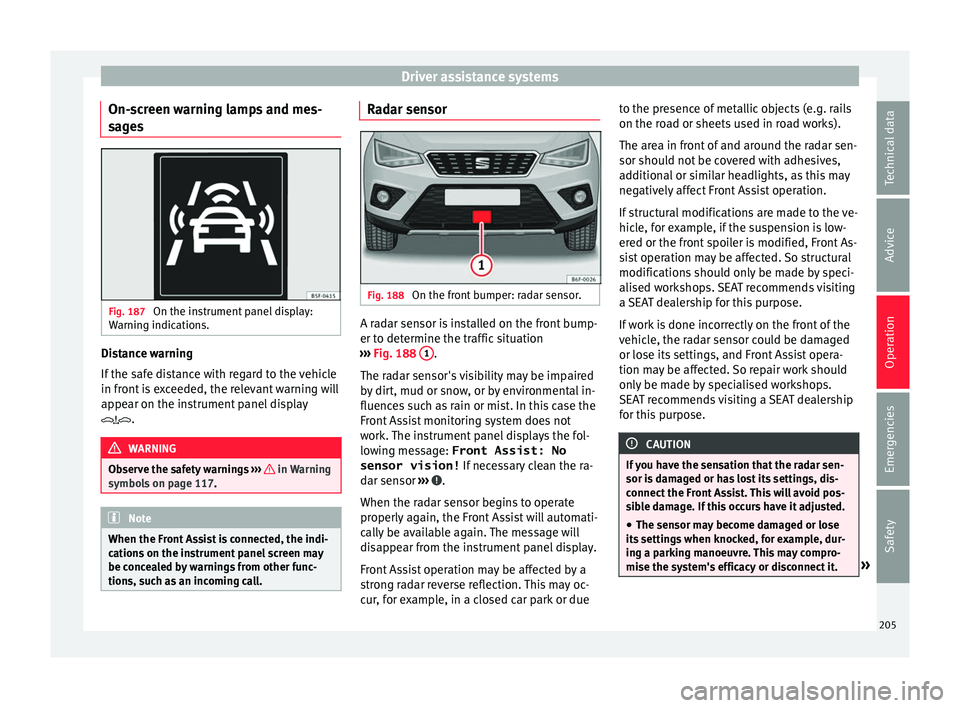
s Fig. 187
On the instrument panel display:
W arnin
g indic
ations. Distance warning
If
the s
af
e distance with regard to the vehicle
in front is exceeded, the relevant warning will
appear on the instrument panel display
. WARNING
Observe the safety warnings ›››
in Warning
symbol s on p
age 117. Note
When the Front Assist is connected, the indi-
cation s
on the instrument panel screen may
be concealed by warnings from other func-
tions, such as an incoming call. Radar sensor
Fig. 188
On the front bumper: radar sensor. A radar sensor is installed on the front bump-
er t
o det
ermine the tr
affic situation
››› Fig. 188 1 .
The r a
d
ar sensor's visibility may be impaired
by dirt, mud or snow, or by environmental in-
fluences such as rain or mist. In this case the
Front Assist monitoring system does not
work. The instrument panel displays the fol-
lowing message: Front Assist: No sensor vision! If necessary clean the ra-
dar sensor ››› .
When the r a
d
ar sensor begins to operate
properly again, the Front Assist will automati-
cally be available again. The message will
disappear from the instrument panel display.
Front Assist operation may be affected by a
strong radar reverse reflection. This may oc-
cur, for example, in a closed car park or due to the presence of metallic objects (e.g. rails
on the roa
d or sheets used in road works).
The area in front of and around the radar sen-
sor should not be covered with adhesives,
additional or similar headlights, as this may
negatively affect Front Assist operation.
If structural modifications are made to the ve-
hicle, for example, if the suspension is low-
ered or the front spoiler is modified, Front As-
sist operation may be affected. So structural
modifications should only be made by speci-
alised workshops. SEAT recommends visiting
a SEAT dealership for this purpose.
If work is done incorrectly on the front of the
vehicle, the radar sensor could be damaged
or lose its settings, and Front Assist opera-
tion may be affected. So repair work should
only be made by specialised workshops.
SEAT recommends visiting a SEAT dealership
for this purpose. CAUTION
If you have the sensation that the radar sen-
sor is d
amaged or has lost its settings, dis-
connect the Front Assist. This will avoid pos-
sible damage. If this occurs have it adjusted.
● The sensor may become damaged or lose
its settin
gs when knocked, for example, dur-
ing a parking manoeuvre. This may compro-
mise the system's efficacy or disconnect it. » 205
Technical data
Advice
Operation
Emergencies
Safety
Page 209 of 308
Driver assistance systems
Switching the Front Assist off tempo-
r ari
ly
in the following situations In the following situations the Front Assist
Monitorin
g
System should be deactivated
due to the system's limitations ››› :
● When the vehicle is to be towed.
● If the vehicle is on a test bed.
● When the radar sensor is damaged.
● If the radar sensor takes a heavy knock, for
ex amp
le in a rear collision.
● If it intervenes several times unnecessarily.
● If the radar sensor is covered temporarily
with some k ind of
accessory, such as an ad-
ditional headlight or the like.
● When the vehicle is to be loaded on a lorry,
ferry
or train. WARNING
If the Front Assist function is not switched off
in the sit uation
s described, serious accidents
and injuries may occur.
● Switch off the Front Assist function in criti-
cal
situations. System limitations
The Front Assist has certain physical limita-
tion
s inher
ent to the system. Thus, in certain
circumstances some of the system's reac- tions may be inopportune or be delayed from
the driver's s
tandpoint. So pay attention in
order to intervene if necessary.
The following conditions may cause the Front
Assist not to react or to do so too late:
● On taking tight bends.
● Pressing the accelerator all the way down.
● If the Front Assist is switched off or dam-
aged.
● If the ASR h
as been disconnected or the
ESC activ
ated in Sport mode manually
››› page 179.
● If the ESC is controlling.
● If several brake lights of the vehicle or elec-
trically
connected trailer are damaged.
● If the radar sensor is dirty or covered.
● If there are metal objects, e.g. rails on the
roa
d or sheets used in road works.
● If the vehicle is reversing.
● If the vehicle over-accelerates.
● In case of snow or heavy rain.
● In case of narrow vehicles, such as motor-
bike
s.
● Misaligned vehicles.
● Vehicles crossing the other's path.
● Vehicles approaching in the opposite direc-
tion. ●
Speci
al loads and accessories of other ve-
hicles that jut out over the sides, backwards
or over the top.
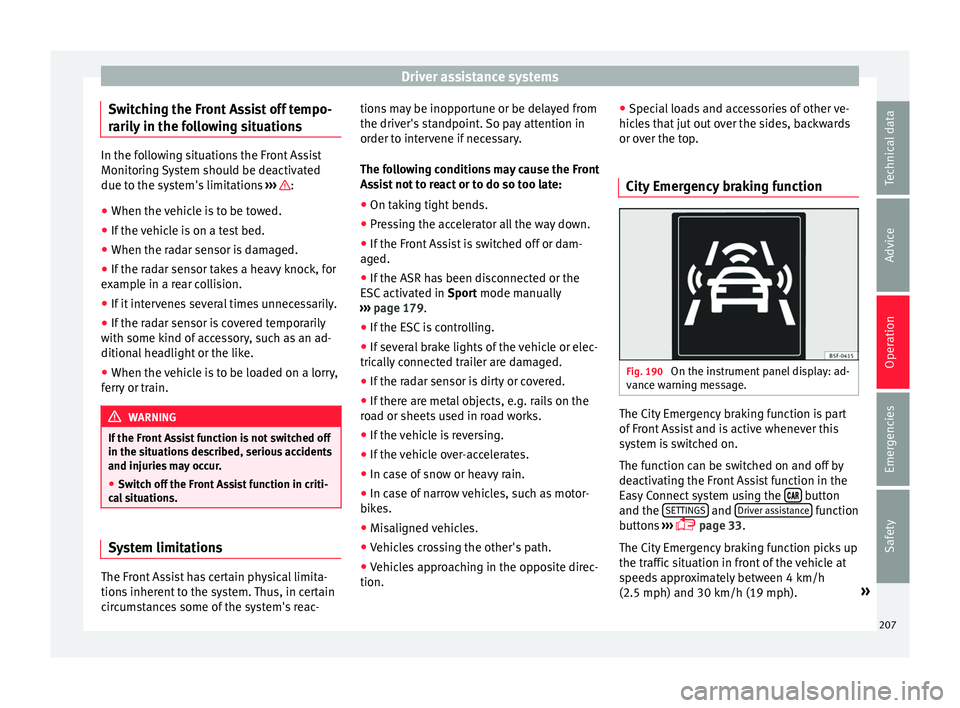
City Emergency braking function Fig. 190
On the instrument panel display: ad-
v anc
e w
arning message. The City Emergency braking function is part
of
Fr
ont
Assist and is active whenever this
system is switched on.
The function can be switched on and off by
deactivating the Front Assist function in the
Easy Connect system using the button
and the S
ET
TINGS and
Driv
er a
s
sistance function
b utt
on
s ›››
page 33.
The City Emergency braking function picks up
the traffic situation in front of the vehicle at
speeds approximately between 4 km/h
(2.5 mph) and 30 km/h (19 mph). »
207
Technical data
Advice
Operation
Emergencies
Safety