technical data Seat Arona 2018 Owner's Manual
[x] Cancel search | Manufacturer: SEAT, Model Year: 2018, Model line: Arona, Model: Seat Arona 2018Pages: 316, PDF Size: 6.77 MB
Page 273 of 316
Checking and refilling levels
We recommend the use of diesel
f uel which
complies to European standard EN 590. If
diesel fuel which meets European standard
EN 590 is not available, the Cetane number
(CZ) must, at minimum, be 51. If the engine
is equipped with a particulate filter, the sul-
phur content of the fuel must be below 50
parts per million.
Winter-grade diesel
Summer fuel becomes thicker in winter and it
is more difficult to start the engine. For this
reason, petrol stations in some countries al-
so offer winter diesel with improved fluidity
when cold (winter-grade diesel). CAUTION
● The v ehic
le is not designed for the use of
FAME fuel (biodiesel). The fuel system would
be damaged if you used biodiesel.
● Do not mix fuel additives, the so-called
“thinners”, petro
l or similar additives with
diesel fuel.
● If poor-quality diesel fuel is used, it may be
neces
sary to drain the fuel filter more fre-
quently than is specified in the Maintenance
Programme. We recommend having this done
by a specialised workshop. If water is allowed
to collect in the filter, this can cause engine
performance problems. AdBlue
®
Inf orm
ation on AdBlue ® The consumption of AdBlue
®
depends on
y
our personal driving style, the temperature
of the system and on the outdoor tempera-
ture when the vehicle is used.
AdBlue ®
freezes at temperatures of -11°C
(+13°F). The system has heating elements
that guarantee its operation even at low tem-
peratures.
The AdBlue ®
tank level capacity is approxi-
mately 10.4 litres.
The AdBlue ®
tank should never be empty.
When the distance to empty drops below
2400 km, a warning to refill the AdBlue ®
tank
will appear on the dash panel display
››› page 271. If this information is ignored,
later on it will not be possible to re-start the
engine. If this warning does not appear, it is
not necessary to refill the AdBlue ®
tank.
AdBlue ®
is a registered brand of the German
Association of the Automotive Industry (VDA)
and is also known as AUS32 or DEF (Diesel
Exhaust Fluid). CAUTION
Filling the AdBlue ®
tank e
xcessively can
cause damage to the tank. Refilling AdBlue
® Fig. 236
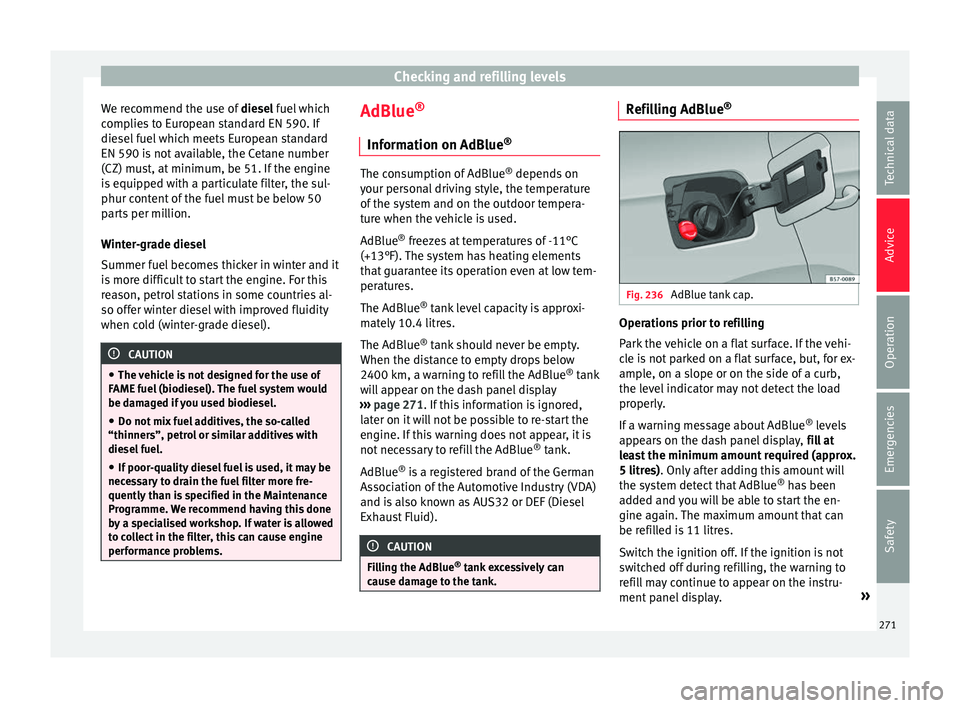
AdBlue tank cap. Operations prior to refilling
P
ark
the
vehicle on a flat surface. If the vehi-
cle is not parked on a flat surface, but, for ex-
ample, on a slope or on the side of a curb,
the level indicator may not detect the load
properly.
If a warning message about AdBlue ®
levels
appears on the dash panel display, fill at
least the minimum amount required (approx.
5 litres). Only after adding this amount will
the system detect that AdBlue ®
has been
added and you will be able to start the en-
gine again. The maximum amount that can
be refilled is 11 litres.
Switch the ignition off. If the ignition is not
switched off during refilling, the warning to
refill may continue to appear on the instru-
ment panel display. »
271
Technical data
Advice
Operation
Emergencies
Safety
Page 275 of 316
Checking and refilling levels
Working in the engine compart-
ment Saf ety
not
es for work in the engine
compartment Read the additional information carefully
›› ›
page 17
Before starting any work on the engine or in
the engine compartment:
1. Switch off the engine and remove the key from the ignition.
2. Ap
ply the handbrake.
3. Move the gear lever to neutral or the selec- tor lev
er to position P.
4. Wait for the engine to cool down.
5. Keep children away from the vehicle.
6. Raise the bonnet ›››
page 274.
You should not do any work in the engine
compartment unless you know exactly how to
carry out the jobs and have the correct tools!
Have the work carried out by a specialised
workshop if you are uncertain.
All service fluids and consumables, e.g. cool-
ant, engine oil, spark plugs and batteries,
are under constant development. SEAT pro-
vides a constant flow of information to Tech-
nical Services concerning modifications. For
this reason, we recommend you have service fluids and consumables replaced by a Techni-
cal
Service. Please observe the relevant in-
structions ››› page 259. The engine compart-
ment of the vehicle is a hazardous area ››› .
WARNING
All work on the engine or in the engine com-
par tment, e.
g. checking and refilling fluids,
involves the danger of injury and burns, acci-
dents and even fire.
● Never open the bonnet if you see steam,
smoke or coo
lant escaping from the engine
compartment. Otherwise, there is a risk of
sustaining burns. Wait until no more steam or
coolant is emitted, then allow the engine to
cool before carefully opening the bonnet.
● Switch off the engine and remove the key
from the ignition.
● App
ly the handbrake and move the gear
lever t
o neutral or selector lever to position P.
● Keep children away from the vehicle.
● Never touch hot engine parts. There is a
risk of
burns.
● Never spill liquids on a hot engine or on a
hot exh
aust gas system. This is a fire hazard.
● Avoid causing short-circuits in the electri-
cal
system, particularly at the points where
the jump leads are attached ›››
page 72.
The battery could explode.
● Never touch the radiator fan. It is tempera-
ture c
ontrolled and could start automatically,
even when the engine has been switched off
and the key removed from the ignition! ●
Never c o
ver the engine with additional in-
sulating materials such as a blanket. Risk of
fire!
● Do not unscrew the cap on the coolant ex-
pans
ion tank when the engine is hot. If the
coolant is hot, the cooling system will be
pressurised!
● Protect face, hands and arms by covering
the cap with a l
arge, thick cloth to protect
against escaping coolant and steam.
● Always make sure you have not left any ob-
jects, s
uch as cleaning cloths or tools, in the
engine compartment.
● If you have to work underneath the vehicle,
you mus
t use suitable stands additionally to
support the vehicle, there is a risk of acci-
dent!. A hydraulic jack is insufficient for se-
curing the vehicle and there is a risk of injury.
● If any work has to be performed when the
engine is
started or with the engine running,
there is an additional, potentially fatal, safety
risk from the rotating parts, such as the drive
belts, alternator, radiator fan, etc., and from
the high-voltage ignition system. You should
also observe the following:
– Never touch the electrical wiring of the
ignition system.
– Ensure that jewellery, loose clothing and
long hair do not get trapped in rotating
engine parts. Danger of death. Before
starting any work remove jewellery, tie
back and cover hair, and wear tight-fit-
ting clothes. » 273
Technical data
Advice
Operation
Emergencies
Safety
Page 277 of 316
Checking and refilling levels
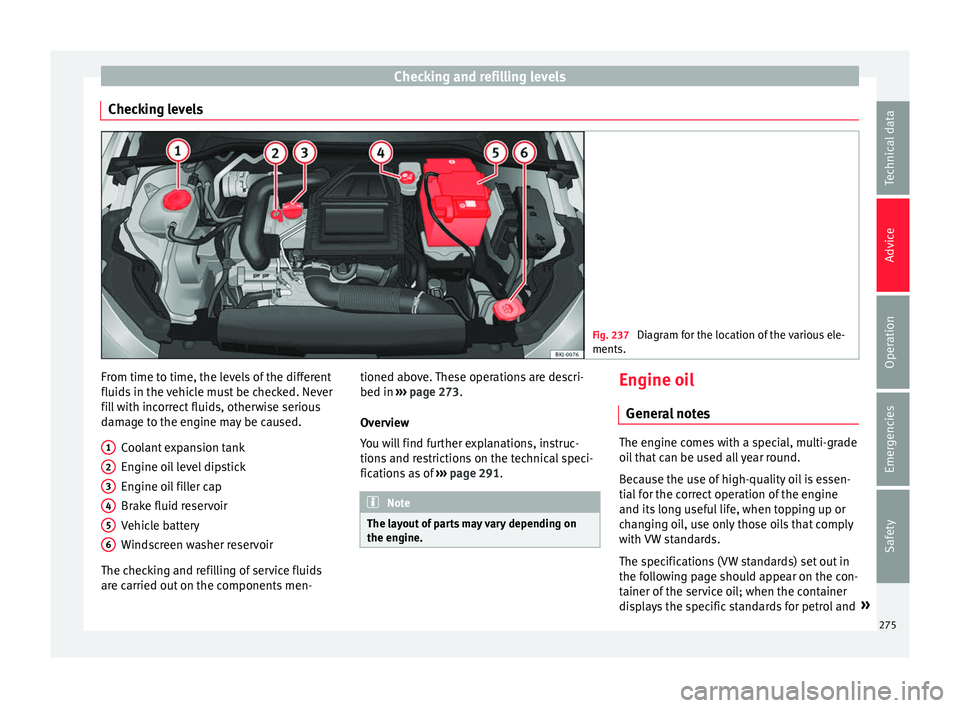
Checking levels Fig. 237
Diagram for the location of the various ele-
ments. From time to time, the levels of the different
fluid
s
in the
vehicle must be checked. Never
fill with incorrect fluids, otherwise serious
damage to the engine may be caused.
Coolant expansion tank
Engine oil level dipstick
Engine oil filler cap
Brake fluid reservoir
Vehicle battery
Windscreen washer reservoir
The checking and refilling of service fluids
are carried out on the components men- 1 2
3
4
5
6 tioned above. These operations are descri-
bed in
››
›
page 273.
Overview
You will find further explanations, instruc-
tions and restrictions on the technical speci-
fications as of ››› page 291. Note
The layout of parts may vary depending on
the engine. Engine oil
Gener a
l
notes The engine comes with a special, multi-grade
oil
th
at can be used all year round.
Because the use of high-quality oil is essen-
tial for the correct operation of the engine
and its long useful life, when topping up or
changing oil, use only those oils that comply
with VW standards.
The specifications (VW standards) set out in
the following page should appear on the con-
tainer of the service oil; when the container
displays the specific standards for petrol and »
275
Technical data
Advice
Operation
Emergencies
Safety
Page 279 of 316

Checking and refilling levels
If the warning lamp flashes although the oil
l ev
el
is correct, stop driving. Do not even run
the engine at idle speed! Obtain technical as-
sistance.
Checking oil level
If the warning lamp is yellow the engine
oil level should be checked as soon as possi-
ble. Top up the oil at the next opportunity
››› page 277.
Oil level sensor faulty*
If the yellow warning lamp flashes, take
the vehicle to a specialised workshop to have
the oil level sensor checked. Until then it is
advisable to check the oil level every time
you refuel.
Checking engine oil level Fig. 238
Engine oil dipstick. Read the additional information carefully
› ›
›
page 58
Checking oil level
– Park the vehicle in a horizontal position.
– Briefly run the engine at idle speed until
the operating t
emperature is reached and
then stop.
– Wait for about two minutes.
– Pull out the dipstick. Wipe the dipstick with
a cle
an cloth and insert it again, pushing it
in as far as it will go.
– Then pull it out again and check the oil lev-
el. T
op up with engine oil if necessary.
Depending on how you drive and the condi-
tions in which the vehicle is used, oil con-
sumption can be up to 0.5 l/1000 km. Oil
consumption is likely to be higher for the first
5,000 km. For this reason the engine oil level
must be checked at regular intervals, prefera-
bly when filling the tank and before a jour-
ney. WARNING
Any work carried out in the engine compart-
ment or on the en gine mu
st be carried out
cautiously.
● When working in the engine compartment,
alwa
ys observe the safety warnings
››› page 273. CAUTION
If the oil level is above area ›››
Fig. 238 A , do
not s t
art the engine. This could result in dam-
age to the engine and catalytic converter.
Contact a Technical Service. Topping up engine oil
Read the additional information carefully
›› ›
page 58
Before opening the bonnet, read and observe
the warnings ››› in Safety notes for work in
the en gine c
omp
artment on page 273.
The position of the filler neck is shown in the
corresponding engine compartment image
››› page 275.
Engine oil specification ›››
page 59. WARNING
Oil is highly inflammable! Ensure that no oil
come s
into contact with hot engine compo-
nents when topping up. CAUTION
If the oil level is above area ›››
Fig. 238 A , do
not s t
art the engine. This could result in dam-
age to the engine and catalytic converter.
Contact a specialised workshop. » 277
Technical data
Advice
Operation
Emergencies
Safety
Page 281 of 316
Checking and refilling levels
●
Never open the bonnet if
you can see or
hear steam or coolant escaping from the en-
gine compartment. Risk of scalding. Wait un-
til you can no longer see or hear escaping
steam or coolant.
● The engine compartment is a dangerous
area. B
efore carrying out any work in the en-
gine compartment, switch off the engine and
allow it to cool down. Always note the corre-
sponding warnings ››› page 273. Topping up coolant
Read the additional information carefully
› ›
›
page 59
Top up coolant when the level is below the
MIN (minimum) mark.
Checking coolant level – Park the vehicle in a horizontal position.
– Switch the ignition off.
– Read off the coolant level on coolant ex-
pans
ion tank. When the engine is cold, the
coolant level should be between the marks.
When the engine is hot, it may be slightly
above the upper mark.
Topping up coolant – Wait for the engine to cool down. –
Cov
er the coolant expansion tank cap with
a cloth and carefully unscrew it to the left
››› .
– Top up the coolant only if there is still cool-
ant in the e
xp
ansion tank, otherwise you
could damage the engine. If there is no
coolant in the expansion tank, do not con-
tinue driving. You should obtain professio- nal assistance ››› .
– If there is still some coolant in the expan-
sion t
ank, t
op up to the upper mark.
– Top up with coolant until the level becomes
stab
le.
– Screw the cap back on correctly.
Any lo
ss of coolant fluid normally indicates a
leak in the cooling system. Take the vehicle
straight to a specialised workshop to have
the cooling system examined. If there are no
leaks in the engine cooling system, a loss of
coolant can only occur if the coolant boils
and is forced out of the system as a result of
overheating. WARNING
● The coo lin
g system is under pressure. Do
not unscrew the cap on the coolant expan-
sion tank when the engine is hot: risk of
burns!
● The antifreeze and coolant fluid can be a
health h
azard. Therefore, the antifreeze
should be stored in the original container in a safe place out of reach of children. Failure to
comp
ly
could result in poisoning.
● If working inside the engine compartment,
remember that, ev
en when the ignition is
switched off, the radiator fan may start up au-
tomatically, and therefore there is a risk of in-
jury. WARNING
If there is not enough anti-freeze in the cool-
ant sys
tem, the engine may fail leading to se-
rious damage.
● Please make sure that the percentage of
additiv
e is correct with respect to the lowest
expected ambient temperature in the zone in
which the vehicle is to be used.
● When the outside temperature is very low,
the cool
ant could freeze and the vehicle
would be immobilised. In this case, the heat-
ing would not work either and inadequately
dressed passengers could die of cold. CAUTION
Do not top up the expansion tank with cool-
ant fluid if it
is empty! Air could enter the
cooling system. In this case, stop driving.
Seek specialist assistance. Otherwise, there
is a risk of engine damage. » 279
Technical data
Advice
Operation
Emergencies
Safety
Page 283 of 316
Checking and refilling levels
long. This would seriously affect the effec-
tivene
s
s of the brakes and the safety of the
vehicle. This may cause an accident. CAUTION
Brake fluid damages the vehicle paintwork.
W ipe off an
y brake fluid from the paintwork
immediately. For the sake of the environment
The brake pads and brake fluid must be col-
lect ed and di
sposed of according the applica-
ble regulations. The SEAT Technical Service
network has the necessary equipment and
qualified personnel for collecting and dispos-
ing of this waste material. Windscreen washer reservoir
Chec k
in
g and topping up the wind-
screen washer reservoir water Read the additional information carefully
› ›
›
page 60
The windscreen washer is supplied with liq-
uid from the windscreen washer reservoir in
the engine compartment. It has a capacity of
approximately 3 litres.
The tank is in the engine compartment. Plain water is not enough to clean the wind-
scr
een and headlights. We recommend that
you always add a product to the windscreen
washer fluid. Approved windscreen cleaning
products exist on the market with high deter-
gent and anti-freeze properties, these may be
added all-year-round. Please follow the dilu-
tion instructions on the packaging. WARNING
Any work carried out in the engine compart-
ment or on the en gine mu
st be carried out
cautiously.
● When working in the engine compartment,
alwa
ys observe the safety warnings
››› page 273. CAUTION
● Never p ut
radiator anti-freeze or other addi-
tives into the windscreen washer fluid.
● Always use approved windscreen cleansing
products
diluted as per instructions. If you
use other washer fluids or soap solutions,
the tiny holes in the fan-shaped nozzles
could become blocked. Vehicle battery
S ymbo
l
s and warnings on handling
the battery Read the additional information carefully
›› ›
page 60
Wear eye protection
Battery acid is extremely corrosive. Wear protec-
tive gloves and eye protection!
Fires, sparks, open flames and smoking are pro-
hibited!
A highly explosive mixture of gases is released
when the battery is under charge.
Keep children away from acid and batteries!
WARNING
Always be aware of the danger of injury and
chemic a
l burns as well as the risk of accident
or fire when working on the battery and the
electrical system:
● Wear eye protection. Protect your eyes,
skin and clothin
g from acid and particles con-
taining lead.
● Battery acid is extremely corrosive. Wear
protectiv
e gloves and eye protection. Do not
tilt the batteries. This could spill acid through
the vents.
● Rinse battery acid from eyes immediately
for sever
al minutes with clear water. Then » 281
Technical data
Advice
Operation
Emergencies
Safety
Page 285 of 316
Wheels
The position of the battery is shown in the
c orr
e
sponding engine compartment diagram
››› page 275.
The “magic eye” indicator, located on the top
of the battery changes colour, depending on
the charge state and electrolyte level of the
battery.
There are two different colours:
● Black: correct charge status.
● Transparent/clear yellow: the battery must
be repl
aced. Contact a specialised workshop.
Charging or changing the battery The battery is maintenance-free and is
c
hec
k
ed during the inspection service. All
work on the vehicle battery requires special-
ist knowledge.
If you often drive short distances or if the ve-
hicle is not driven for long periods, the bat-
tery should be checked by a specialised
workshop between the scheduled services.
If the battery has discharged and you have
problems starting the vehicle, the battery
might be damaged. If this happens, we rec-
ommend you have the vehicle battery
checked by a Technical Service where it will
be re-charged or replaced. Charging the battery
The vehic
le battery should be charged by a
specialised workshop only, as batteries us-
ing special technology have been installed
and they must be charged in a controlled en-
vironment.
Replacing a vehicle battery
The battery has been developed to suit the
conditions of its location and has special
safety features.
Genuine SEAT batteries meet the mainte-
nance, performance and safety specifications
of your vehicle. WARNING
● We r ec
ommend you use only maintenance-
free or cycle free leak-proof batteries which
comply with standards T 825 06 and
VW 7 50 73. This standard applies as of
2001.
● Before starting any work on the batteries,
you mus
t read and observe the warnings
››› in Symbols and warnings on handling
the batt er
y on page 281. For the sake of the environment
Batteries contain toxic substances such as
su lphuric
acid and lead. They must be dis-
posed of appropriately and must not be dis-
posed of with ordinary household waste. Wheels
Wheel s
and ty
res
General notes Avoiding damage
– If you have to drive over a kerb or similar
ob s
tacle, drive very slowly and at a right
angle.
– Keep grease, oil and fuel off the tyres.
– Inspect the tyres regularly for damage
(cuts, c r
acks or blisters, etc.). Remove any
foreign objects embedded in the treads.
Storing tyres
– When you remove the tyres, mark them in
order to m
aintain the same direction of ro-
tation when they are installed again.
– When removed, the wheels and/or tyres
should be s
tored in a cool, dry and prefera-
bly dark location.
– Store tyres in a vertical position, if they are
not fitted on wheel
rims.
New tyres
New tyres must be run in ›››
page 197.
The tread depth of new tyres may vary, ac-
cording to the type and make of tyre and the
tread pattern. »
283
Technical data
Advice
Operation
Emergencies
Safety
Page 287 of 316
Wheels
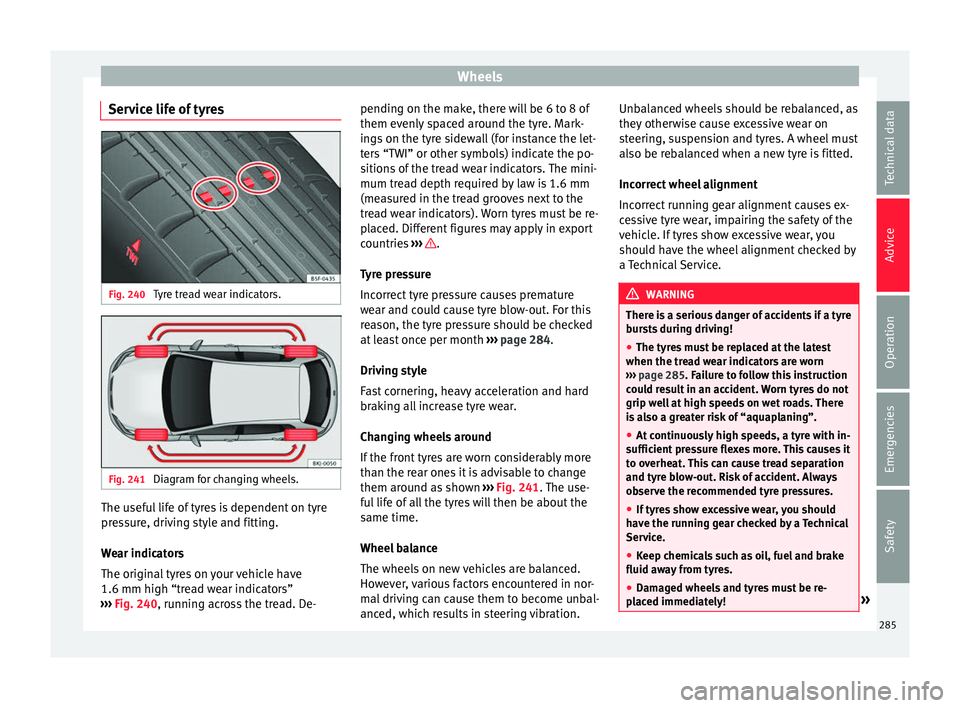
Service life of tyres Fig. 240
Tyre tread wear indicators. Fig. 241
Diagram for changing wheels. The useful life of tyres is dependent on tyre
pr
e
s
sure, driving style and fitting.
Wear indicators
The original tyres on your vehicle have
1.6 mm high “tread wear indicators”
››› Fig. 240, running across the tread. De- pending on the make, there will be 6 to 8 of
them evenly
spaced around the tyre. Mark-
ings on the tyre sidewall (for instance the let-
ters “TWI” or other symbols) indicate the po-
sitions of the tread wear indicators. The mini-
mum tread depth required by law is 1.6 mm
(measured in the tread grooves next to the
tread wear indicators). Worn tyres must be re-
placed. Different figures may apply in export
countries ››› .
T y
r
e pressure
Incorrect tyre pressure causes premature
wear and could cause tyre blow-out. For this
reason, the tyre pressure should be checked
at least once per month ››› page 284.
Driving style
Fast cornering, heavy acceleration and hard
braking all increase tyre wear.
Changing wheels around
If the front tyres are worn considerably more
than the rear ones it is advisable to change
them around as shown ››› Fig. 241. The use-
ful life of all the tyres will then be about the
same time.
Wheel balance
The wheels on new vehicles are balanced.
However, various factors encountered in nor-
mal driving can cause them to become unbal-
anced, which results in steering vibration. Unbalanced wheels should be rebalanced, as
they otherw
ise cause excessive wear on
steering, suspension and tyres. A wheel must
also be rebalanced when a new tyre is fitted.
Incorrect wheel alignment
Incorrect running gear alignment causes ex-
cessive tyre wear, impairing the safety of the
vehicle. If tyres show excessive wear, you
should have the wheel alignment checked by
a Technical Service. WARNING
There is a serious danger of accidents if a tyre
bur s
ts during driving!
● The tyres must be replaced at the latest
when the trea
d wear indicators are worn
››› page 285. Failure to follow this instruction
could result in an accident. Worn tyres do not
grip well at high speeds on wet roads. There
is also a greater risk of “aquaplaning”.
● At continuously high speeds, a tyre with in-
sufficient
pressure flexes more. This causes it
to overheat. This can cause tread separation
and tyre blow-out. Risk of accident. Always
observe the recommended tyre pressures.
● If tyres show excessive wear, you should
have the ru
nning gear checked by a Technical
Service.
● Keep chemicals such as oil, fuel and brake
fluid awa
y from tyres.
● Damaged wheels and tyres must be re-
plac
ed immediately! » 285
Technical data
Advice
Operation
Emergencies
Safety
Page 289 of 316
Wheels
Wheel bolts The design of wheel bolts is matched to the
rims. If diff
er
ent wheel rims are fitted, the
correct wheel bolts with the right length and
correctly shaped bolt heads must be used.
This ensures that wheels are fitted securely
and that the brake system functions correctly.
In certain circumstances, you should not use
wheel bolts from a different vehicle, even if it
is the same model ››› page 259. WARNING
If the wheel bolts are not tightened correctly,
the wheel c ou
ld become loose while driving.
Risk of accident.
● The wheel bolts must be clean and turn
eas
ily. Never apply grease or oil to them.
● Use only wheel bolts which belong to the
wheel.
● If the pr
escribed torque of the wheel bolts
is t
oo low, they could loosen whilst the vehi-
cle is in motion. Risk of accident! If the tight-
ening torque is too high, the wheel bolts and
threads can be damaged. CAUTION
The prescribed tightening torque for wheel
bolt s
for steel and alloy wheels is 120 Nm. Tyre monitoring indicator*
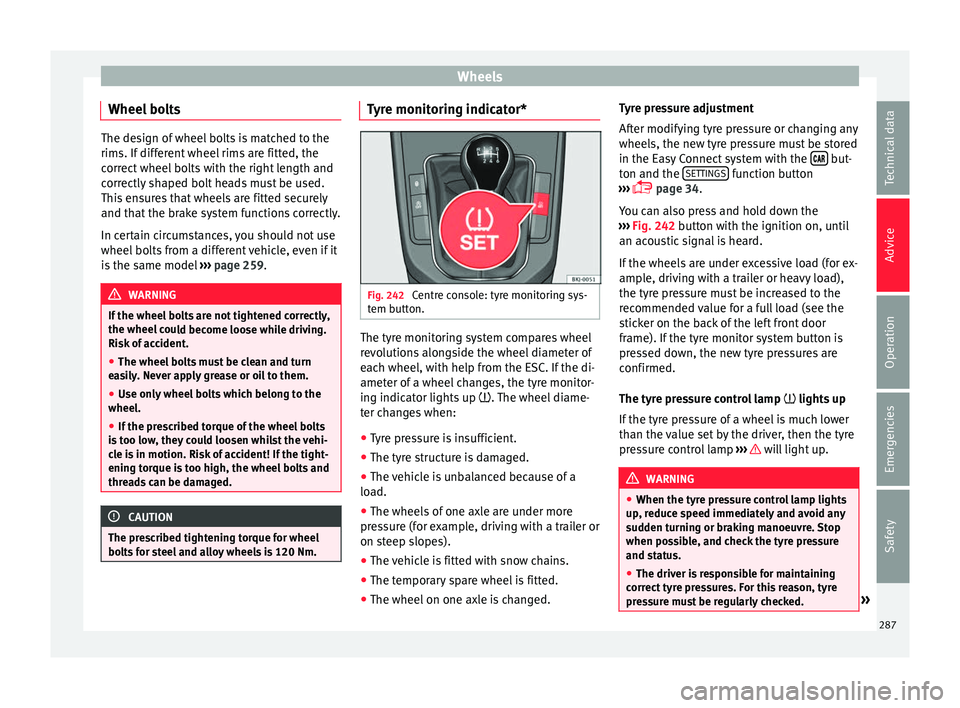
Fig. 242
Centre console: tyre monitoring sys-
t em b
utt
on. The tyre monitoring system compares wheel
r
ev
o
lutions alongside the wheel diameter of
each wheel, with help from the ESC. If the di-
ameter of a wheel changes, the tyre monitor-
ing indicator lights up . The wheel diame-
ter changes when:
● Tyre pressure is insufficient.
● The tyre structure is damaged.
● The vehicle is unbalanced because of a
load.
● The wheel
s of one axle are under more
pres
sure (for example, driving with a trailer or
on steep slopes).
● The vehicle is fitted with snow chains.
● The temporary spare wheel is fitted.
● The wheel on one axle is changed. Tyre pressure adjustment
After modif
ying tyre pressure or changing any
wheels, the new tyre pressure must be stored
in the Easy Connect system with the but-
t on and the S
ET
TINGS function button
› ›
›
page 34.
You can also press and hold down the
››› Fig. 242 button with the ignition on, until
an acoustic signal is heard.
If the wheels are under excessive load (for ex-
ample, driving with a trailer or heavy load),
the tyre pressure must be increased to the
recommended value for a full load (see the
sticker on the back of the left front door
frame). If the tyre monitor system button is
pressed down, the new tyre pressures are
confirmed.
The tyre pressure control lamp lights up
If the tyre pressure of a wheel is much lower
than the value set by the driver, then the tyre
pressure control lamp ››› will light up.
WARNING
● When the tyr e pr
essure control lamp lights
up, reduce speed immediately and avoid any
sudden turning or braking manoeuvre. Stop
when possible, and check the tyre pressure
and status.
● The driver is responsible for maintaining
correct
tyre pressures. For this reason, tyre
pressure must be regularly checked. » 287
Technical data
Advice
Operation
Emergencies
Safety
Page 291 of 316
Wheels
● When r ep
l
acing the spare wheel, place the
subwoofer speaker in the direction indicated
by the arrow and with the word “FRONT” fac-
ing forward.
● Reconnect the speaker cable and firmly ro-
tate the sec
uring wheel clockwise so that the
subwoofer system and wheel are firmly in
place.
Removing the 16” temporary spare wheel
(without subwoofer)
● Remove the luggage compartment variable
floor to acc
ess the wheel and the tools
››› page 161.
● Loosen the strap that secures the box by
pres
sing on the buckle.
● Remove the toolbox.
● Turn the securing wheel anti-clockwise and
remov
e it.
● Press the thread and turn it 90° clockwise
or anti-clock
wise and remove it.
● Pull on the front part of the spare wheel to
remov
e it. WARNING
● Aft er fittin
g the temporary spare wheel,
check the tyre pressures as soon as possible.
Failure to do so may cause an accident. The
tyre pressure is listed on the back of the left
front door frame. ●
Do not driv e at
over 80 km/h (50 mph)
when the temporary spare wheel is fitted on
the vehicle: risk of accident!
● Avoid heavy acceleration, hard braking and
fas
t cornering: risk of accident!
● Never use more than one temporary spare
wheel at the s
ame time, risk of accident.
● No other type of tyre (normal summer or
winter ty
re) may be fitted on the compact
temporary spare wheel rim. Winter service
W int
er ty
res In winter conditions winter tyres will consid-
er
ab
ly
improve the vehicle's handling. The
design of summer tyres (width, rubber com-
pound, tread pattern) gives less grip on ice
and snow.
Winter tyres must be inflated to a pressure of
0.2 bar (2.9 psi/20 kPa) higher than the pres-
sures specified for summer tyres (see the
sticker on the back of the left front door
frame).
Winter tyres must be fitted on all four wheels.
Information on permitted winter tyre sizes
can be found in the vehicle's registration
documentation. Use only radial winter tyres. All tyre sizes listed in the vehicle documenta-
tion also app
ly to winter tyres.
Winter tyres lose their effectiveness when the
tread is worn down to a depth of 4 mm.
The speed rating code ››› page 286, New
tyres and wheels determines the following
speed limits for winter tyres: ››› max. 160 km/h (99 mph)
m
ax. 180 km/h (112 mph)
m ax. 190 km/h (118 mph)
m
ax. 210 km/h (130 mph)
In some countries, vehicles which can exceed
the speed rating of the fitted tyre must have
an appropriate sticker in the driver's field of
view. These stickers are available from your
technical service. The legal requirements of
each country must be followed.
Do not have winter tyres fitted for unnecessa-
rily long periods. Vehicles with summer tyres
handle better when the roads are free of
snow and ice.
If you have a flat tyre, please refer to the
notes on the spare wheel ››› page 286, New
tyres and wheels . WARNING
The maximum speed for the winter tyres must
not be e x
ceeded. Otherwise, this could lead
to damage and risk of accident. » Q
S
T
H
289
Technical data
Advice
Operation
Emergencies
Safety