fuel pressure Seat Arona 2018 Owner's Manual
[x] Cancel search | Manufacturer: SEAT, Model Year: 2018, Model line: Arona, Model: Seat Arona 2018Pages: 316, PDF Size: 6.77 MB
Page 6 of 316
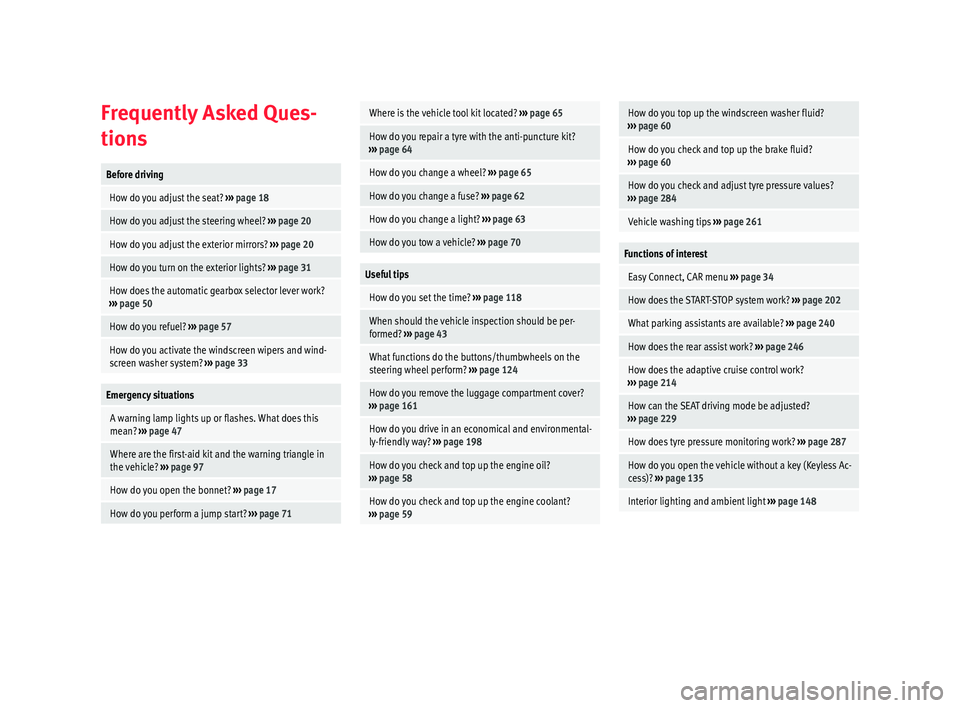
Frequently Asked Ques-
tion
sBefore driving
How do you adjust the seat?
››› page 18
How do you adjust the steering wheel? ››› page 20
How do you adjust the exterior mirrors? ››› page 20
How do you turn on the exterior lights? ››› page 31
How does the automatic gearbox selector lever work?
››› page 50
How do you refuel? ››› page 57
How do you activate the windscreen wipers and wind-
screen washer system? ››› page 33
Emergency situations
A warning lamp lights up or flashes. What does this
mean? ››› page 47
Where are the first-aid kit and the warning triangle in
the vehicle? ››› page 97
How do you open the bonnet? ››› page 17
How do you perform a jump start? ››› page 71
Where is the vehicle tool kit located? ››› page 65
How do you repair a tyre with the anti-puncture kit?
››› page 64
How do you change a wheel? ››› page 65
How do you change a fuse? ››› page 62
How do you change a light? ››› page 63
How do you tow a vehicle? ››› page 70
Useful tips
How do you set the time? ››› page 118
When should the vehicle inspection should be per-
formed? ››› page 43
What functions do the buttons/thumbwheels on the
steering wheel perform? ››› page 124
How do you remove the luggage compartment cover?
››› page 161
How do you drive in an economical and environmental-
ly-friendly way? ››› page 198
How do you check and top up the engine oil?
››› page 58
How do you check and top up the engine coolant?
››› page 59
How do you top up the windscreen washer fluid?
››› page 60
How do you check and top up the brake fluid?
››› page 60
How do you check and adjust tyre pressure values?
››› page 284
Vehicle washing tips ››› page 261
Functions of interest
Easy Connect, CAR menu ››› page 34
How does the START-STOP system work? ››› page 202
What parking assistants are available? ››› page 240
How does the rear assist work? ››› page 246
How does the adaptive cruise control work?
››› page 214
How can the SEAT driving mode be adjusted?
››› page 229
How does tyre pressure monitoring work? ››› page 287
How do you open the vehicle without a key (Keyless Ac-
cess)? ››› page 135
Interior lighting and ambient light ››› page 148
Page 38 of 316
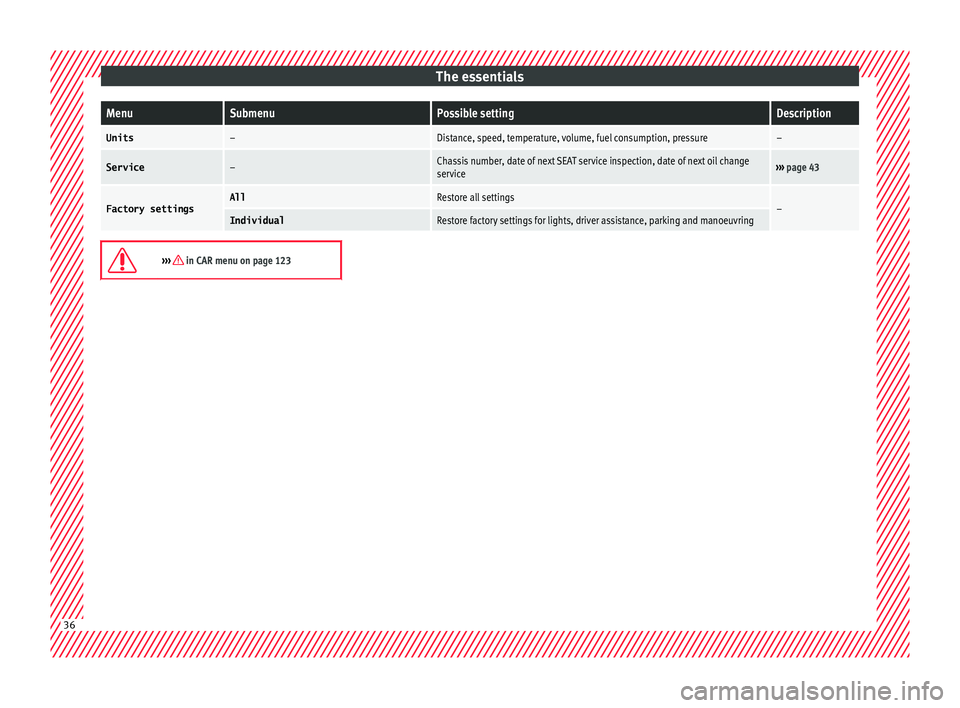
The essentialsMenuSubmenuPossible settingDescription
Units–Distance, speed, temperature, volume, fuel consumption, pressure–
Service–Chassis number, date of next SEAT service inspection, date of next oil change
service›››
page 43
Factory settingsAllRestore all settings–IndividualRestore factory settings for lights, driver assistance, parking and manoeuvring
››› in CAR menu on page 123
36
Page 50 of 316
The essentials
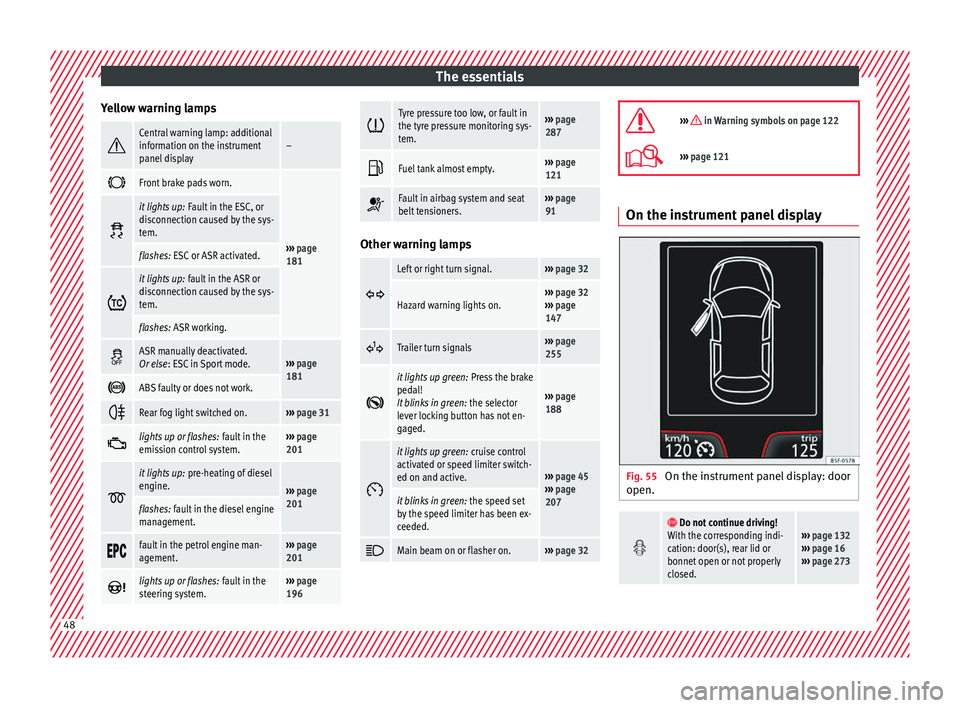
Yellow warning lamps Central warning lamp: additional
information on the instrument
panel display–
Front brake pads worn.
›››
page
181
it lights up:
Fault in the ESC, or
disconnection caused by the sys-
tem.
flashes: ESC or ASR activated.
it lights up:
fault in the ASR or
disconnection caused by the sys-
tem.
flashes: ASR working.
ASR manually deactivated.
Or else
: ESC in Sport mode.››› page
181
ABS faulty or does not work.
Rear fog light switched on.›››
page 31
lights up or flashes:
fault in the
emission control system.››› page
201
it lights up:
pre-heating of diesel
engine.
››› page
201
flashes: fault in the diesel engine
management.
fault in the petrol engine man-
agement.›››
page
201
lights up or flashes:
fault in the
steering system.››› page
196
Tyre pressure too low, or fault in
the tyre pressure monitoring sys-
tem.›››
page
287
Fuel tank almost empty.›››
page
121
Fault in airbag system and seat
belt tensioners.›››
page
91 Other warning lamps
Left or right turn signal.›››
page 32
Hazard warning lights on.››› page 32
››› page
147
Trailer turn signals›››
page
255
it lights up green:
Press the brake
pedal!
It blinks in green: the selector
lever locking button has not en-
gaged.
››› page
188
it lights up green:
cruise control
activated or speed limiter switch-
ed on and active.
››› page 45
››› page
207
it blinks in green: the speed set
by the speed limiter has been ex-
ceeded.
Main beam on or flasher on.›››
page 32
››› in Warning symbols on page 122
›››
page 121 On the instrument panel display
Fig. 55
On the instrument panel display: door
open.
Do not continue driving!
With the corresponding indi-
cation: door(s), rear lid or
bonnet open or not properly
closed.››› page 132
››› page 16
››› page 273 48
Page 73 of 316
The essentials
Attach the tow rope or the tow bar only to the
t o
wline anc
horages provided or a towing
bracket.
Notes for the driver of the towing vehicle
● The tow rope must be taut before you drive
off.
● Rel
ease the clutch very carefully when start-
ing the v
ehicle (manual gearbox), or acceler-
ate gently (automatic gearbox).
Driving style
Towing requires some experience, especially
when using a tow rope. Both drivers should
realise how difficult it is to tow a vehicle. In-
experienced drivers should not attempt to
tow.
Do not pull too hard with the towing vehicle
and take care to avoid jerking the tow rope.
When towing on an unpaved road, there is al-
ways a risk of overloading and damaging the
anchorage points.
The ignition of the vehicle being towed must
be switched on to prevent the steering wheel
from locking and also to allow the use of the
turn signals, horn, windscreen wipers and
washers.
Place the gear lever in neutral on vehicles
with a manual gearbox. With an automatic
gearbox, place the lever in N. The brake servo only works when the engine
is ru
nning. When not running, you must ap-
ply considerably more pressure to the brake
pedal.
As the power assisted steering does not work
if the engine is not running, you will need
more strength to steer than you normally
would.
››› in General information on page 100
››› page 100 Tow-starting
If the engine will not start, first try starting it
u
s
in
g the battery of another vehicle
››› page 71. You should only attempt to tow-
start a vehicle if charging the battery does
not work. This is done by leveraging wheel
movement.
When tow-starting a vehicle with a petrol en-
gine, do not tow it more than a short dis-
tance, otherwise unburned fuel can enter the
catalytic converter.
However, if your vehicle has to be tow-star-
ted:
● Engage 2 nd
or 3 rd
ge
ar.
● Keep the clutch pressed down. ●
Switc
h the ignition on.
● Once both vehicles are moving, release the
clutc
h.
● As soon as the engine starts, press the
clutc
h and move the gear lever into neutral.
This helps to prevent driving into the towing
vehicle.
››› in General information on page 100
››› page 100 How to jump start
Jump l e
a
ds The jump lead must have a sufficient wire
c
r
o
ss section.
If the engine fails to start because of a dis-
charged battery, the battery can be connec-
ted to the battery of another vehicle to start
the engine.
Jump leads
Jump leads must comply with standard DIN
72553 (see cable manufacturer's instruc-
tions). The wire cross section must be at least
25 mm 2
for petrol engines and at least
35 mm 2
for diesel engines. » 71
Page 107 of 316
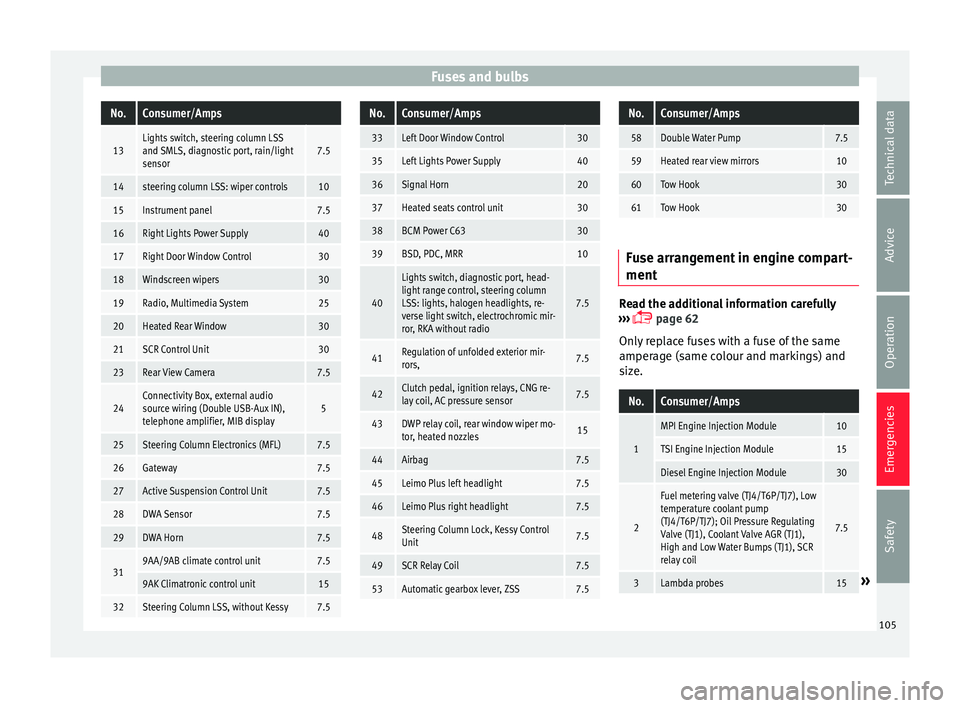
Fuses and bulbsNo.Consumer/Amps
13Lights switch, steering column LSS
and SMLS, diagnostic port, rain/light
sensor7.5
14steering column LSS: wiper controls10
15Instrument panel7.5
16Right Lights Power Supply40
17Right Door Window Control30
18Windscreen wipers30
19Radio, Multimedia System25
20Heated Rear Window30
21SCR Control Unit30
23Rear View Camera7.5
24Connectivity Box, external audio
source wiring (Double USB-Aux IN),
telephone amplifier, MIB display5
25Steering Column Electronics (MFL)7.5
26Gateway7.5
27Active Suspension Control Unit7.5
28DWA Sensor7.5
29DWA Horn7.5
319AA/9AB climate control unit7.5
9AK Climatronic control unit15
32Steering Column LSS, without Kessy7.5
No.Consumer/Amps
33Left Door Window Control30
35Left Lights Power Supply40
36Signal Horn20
37Heated seats control unit30
38BCM Power C6330
39BSD, PDC, MRR10
40
Lights switch, diagnostic port, head-
light range control, steering column
LSS: lights, halogen headlights, re-
verse light switch, electrochromic mir-
ror, RKA without radio
7.5
41Regulation of unfolded exterior mir-
rors,7.5
42Clutch pedal, ignition relays, CNG re-
lay coil, AC pressure sensor7.5
43DWP relay coil, rear window wiper mo-
tor, heated nozzles15
44Airbag7.5
45Leimo Plus left headlight7.5
46Leimo Plus right headlight7.5
48Steering Column Lock, Kessy Control
Unit7.5
49SCR Relay Coil7.5
53Automatic gearbox lever, ZSS7.5
No.Consumer/Amps
58Double Water Pump7.5
59Heated rear view mirrors10
60Tow Hook30
61Tow Hook30
Fuse arrangement in engine compart-
ment
Read the additional information carefully
› ›
›
page 62
Only replace fuses with a fuse of the same
amperage (same colour and markings) and
size.
No.Consumer/Amps
1
MPI Engine Injection Module10
TSI Engine Injection Module15
Diesel Engine Injection Module30
2
Fuel metering valve (TJ4/T6P/TJ7), Low
temperature coolant pump
(TJ4/T6P/TJ7); Oil Pressure Regulating
Valve (TJ1), Coolant Valve AGR (TJ1),
High and Low Water Bumps (TJ1), SCR
relay coil
7.5
3Lambda probes15» 105
Technical data
Advice
Operation
Emergencies
Safety
Page 108 of 316
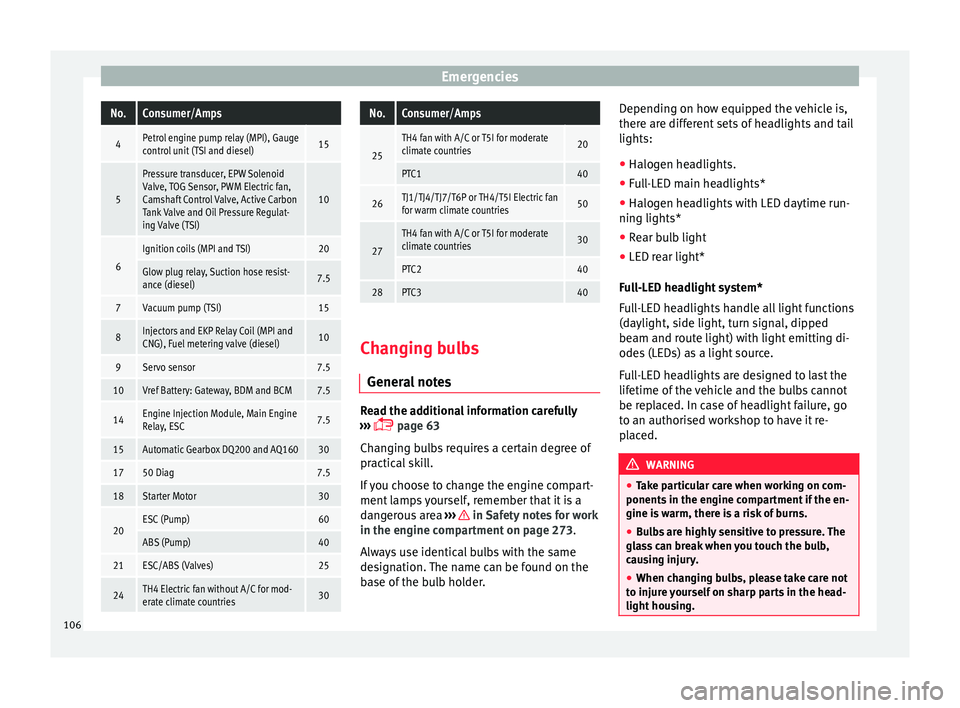
EmergenciesNo.Consumer/Amps
4Petrol engine pump relay (MPI), Gauge
control unit (TSI and diesel)15
5
Pressure transducer, EPW Solenoid
Valve, TOG Sensor, PWM Electric fan,
Camshaft Control Valve, Active Carbon
Tank Valve and Oil Pressure Regulat-
ing Valve (TSI)
10
6
Ignition coils (MPI and TSI)20
Glow plug relay, Suction hose resist-
ance (diesel)7.5
7Vacuum pump (TSI)15
8Injectors and EKP Relay Coil (MPI and
CNG), Fuel metering valve (diesel)10
9Servo sensor7.5
10Vref Battery: Gateway, BDM and BCM7.5
14Engine Injection Module, Main Engine
Relay, ESC7.5
15Automatic Gearbox DQ200 and AQ16030
1750 Diag7.5
18Starter Motor30
20ESC (Pump)60
ABS (Pump)40
21ESC/ABS (Valves)25
24TH4 Electric fan without A/C for mod-
erate climate countries30
No.Consumer/Amps
25
TH4 fan with A/C or T5I for moderate
climate countries20
PTC140
26TJ1/TJ4/TJ7/T6P or TH4/T5I Electric fan
for warm climate countries50
27
TH4 fan with A/C or T5I for moderate
climate countries30
PTC240
28PTC340
Changing bulbs
Gener a
l
notes Read the additional information carefully
› ›
›
page 63
Changing bulbs requires a certain degree of
practical skill.
If you choose to change the engine compart-
ment lamps yourself, remember that it is a
dangerous area ››› in Safety notes for work
in the en gine c
omp
artment on page 273.
Always use identical bulbs with the same
designation. The name can be found on the
base of the bulb holder. Depending on how equipped the vehicle is,
there are diff
erent sets of headlights and tail
lights:
● Halogen headlights.
● Full-LED main headlights*
● Halogen headlights with LED daytime run-
ning lights*
● Re
ar bulb light
● LED rear light*
Ful
l-LED headlight system*
Full-LED headlights handle all light functions
(daylight, side light, turn signal, dipped
beam and route light) with light emitting di-
odes (LEDs) as a light source.
Full-LED headlights are designed to last the
lifetime of the vehicle and the bulbs cannot
be replaced. In case of headlight failure, go
to an authorised workshop to have it re-
placed. WARNING
● Tak e p
articular care when working on com-
ponents in the engine compartment if the en-
gine is warm, there is a risk of burns.
● Bulbs are highly sensitive to pressure. The
glas
s can break when you touch the bulb,
causing injury.
● When changing bulbs, please take care not
to injure
yourself on sharp parts in the head-
light housing. 106
Page 124 of 316
Operation
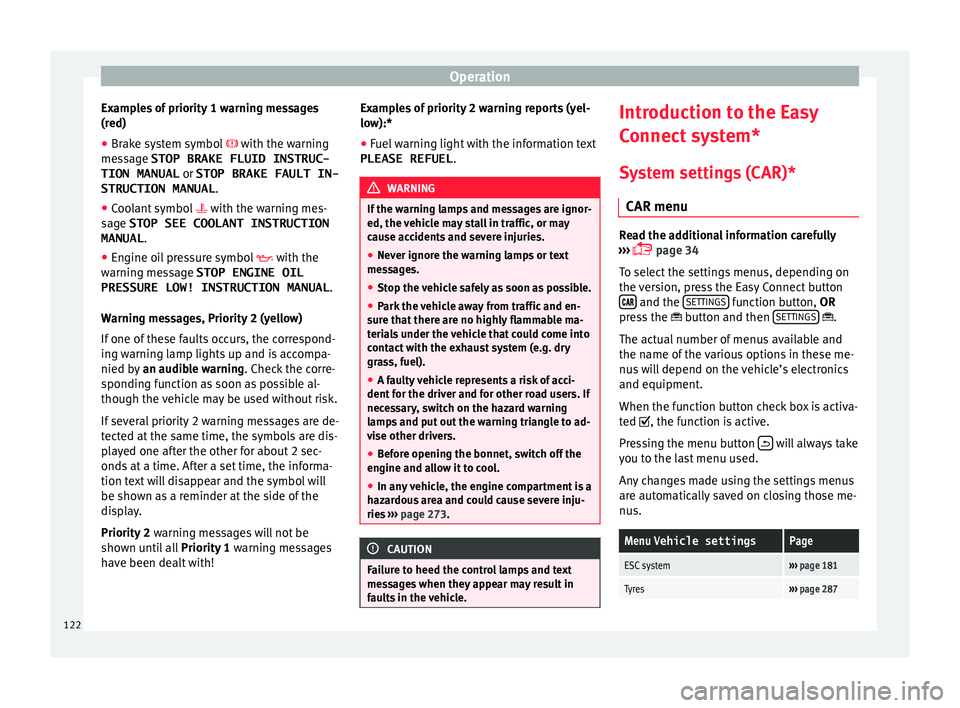
Examples of priority 1 warning messages
(r ed)
● Br ak
e system symbol with the warnin
g
message STOP BRAKE FLUID INSTRUC-
TION MANUAL or STOP BRAKE FAULT IN-
STRUCTION MANUAL .
● Coolant symbol with the warnin
g mes-
sage STOP SEE COOLANT INSTRUCTION
MANUAL .
● Engine oil pressure symbol with the
warnin
g message STOP ENGINE OIL
PRESSURE LOW! INSTRUCTION MANUAL .
Warning messages, Priority 2 (yellow)
If one of these faults occurs, the correspond-
ing warning lamp lights up and is accompa-
nied by an audible warning. Check the corre-
sponding function as soon as possible al-
though the vehicle may be used without risk.
If several priority 2 warning messages are de-
tected at the same time, the symbols are dis-
played one after the other for about 2 sec-
onds at a time. After a set time, the informa-
tion text will disappear and the symbol will
be shown as a reminder at the side of the
display.
Priority 2 warning messages will not be
shown until all Priority 1 warning messages
have been dealt with! Examples of priority 2 warning reports (yel-
low):*
●
Fuel
warning light with the information text
PLEASE REFUEL . WARNING
If the warning lamps and messages are ignor-
ed, the v ehic
le may stall in traffic, or may
cause accidents and severe injuries.
● Never ignore the warning lamps or text
mess
ages.
● Stop the vehicle safely as soon as possible.
● Park the vehicle away from traffic and en-
sure th
at there are no highly flammable ma-
terials under the vehicle that could come into
contact with the exhaust system (e.g. dry
grass, fuel).
● A faulty vehicle represents a risk of acci-
dent for the driv
er and for other road users. If
necessary, switch on the hazard warning
lamps and put out the warning triangle to ad-
vise other drivers.
● Before opening the bonnet, switch off the
engine and al
low it to cool.
● In any vehicle, the engine compartment is a
hazar
dous area and could cause severe inju-
ries ››› page 273. CAUTION
Failure to heed the control lamps and text
mes s
ages when they appear may result in
faults in the vehicle. Introduction to the Easy
C
onnect
sy
stem*
System settings (CAR)* CAR menu Read the additional information carefully
›› ›
page 34
To select the settings menus, depending on
the version, press the Easy Connect button and the
S
ET
TINGS function button, OR
pr e
s
s the button and then SETTINGS .
The act ual
number of
menus available and
the name of the various options in these me-
nus will depend on the vehicle’s electronics
and equipment.
When the function button check box is activa-
ted , the function is active.
Pressing the menu button will always take
y ou t
o the l
ast menu used.
Any changes made using the settings menus
are automatically saved on closing those me-
nus.
Menu Vehicle settingsPage
ESC system››› page 181
Tyres››› page 287 122
Page 156 of 316
Operation
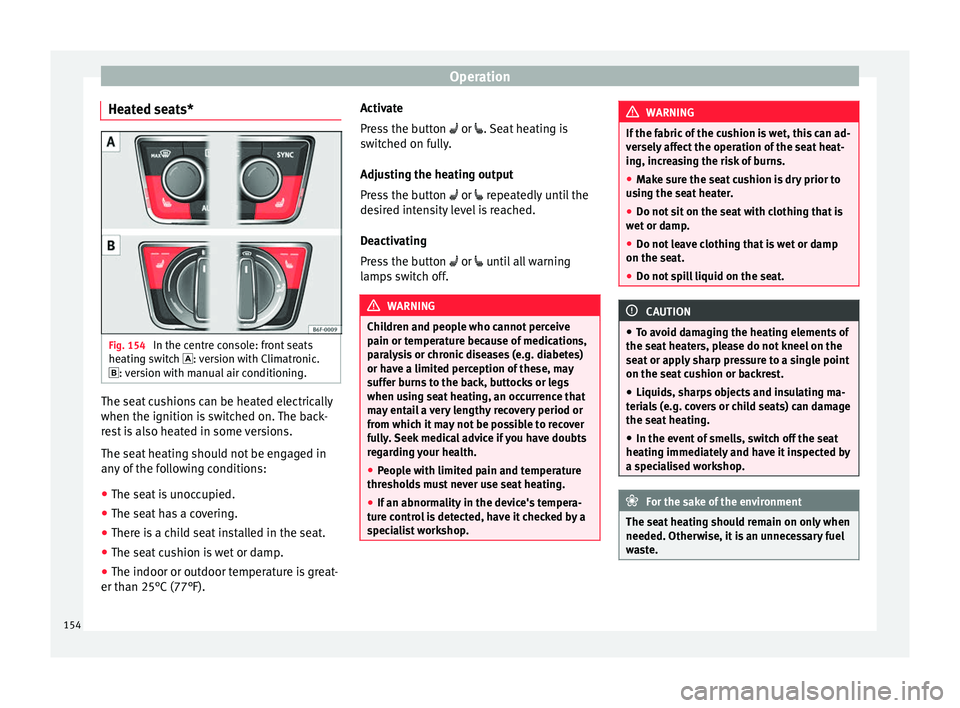
Heated seats* Fig. 154
In the centre console: front seats
he atin
g sw
itch : version with Climatronic.
: version with manual air conditioning. The seat cushions can be heated electrically
when the ignition i
s
sw
itched on. The back-
rest is also heated in some versions.
The seat heating should not be engaged in
any of the following conditions:
● The seat is unoccupied.
● The seat has a covering.
● There is a child seat installed in the seat.
● The seat cushion is wet or damp.
● The indoor or outdoor temperature is great-
er than 25°C (77°F). A
ctivate
Pres
s the button or . Seat heating is
switched on fully.
Adjusting the heating output
Press the button or repeatedly until the
desired intensity level is reached.
Deactivating
Press the button or until all warning
lamps switch off. WARNING
Children and people who cannot perceive
pain or t emper
ature because of medications,
paralysis or chronic diseases (e.g. diabetes)
or have a limited perception of these, may
suffer burns to the back, buttocks or legs
when using seat heating, an occurrence that
may entail a very lengthy recovery period or
from which it may not be possible to recover
fully. Seek medical advice if you have doubts
regarding your health.
● People with limited pain and temperature
thresho
lds must never use seat heating.
● If an abnormality in the device's tempera-
ture c
ontrol is detected, have it checked by a
specialist workshop. WARNING
If the fabric of the cushion is wet, this can ad-
ver sely
affect the operation of the seat heat-
ing, increasing the risk of burns.
● Make sure the seat cushion is dry prior to
usin
g the seat heater.
● Do not sit on the seat with clothing that is
wet or d
amp.
● Do not leave clothing that is wet or damp
on the seat.
● Do not
spill liquid on the seat. CAUTION
● To av oid d
amaging the heating elements of
the seat heaters, please do not kneel on the
seat or apply sharp pressure to a single point
on the seat cushion or backrest.
● Liquids, sharps objects and insulating ma-
teria
ls (e.g. covers or child seats) can damage
the seat heating.
● In the event of smells, switch off the seat
heating immedi
ately and have it inspected by
a specialised workshop. For the sake of the environment
The seat heating should remain on only when
needed. Otherw i
se, it is an unnecessary fuel
waste. 154
Page 197 of 316
Driving
Take the vehicle to a specialised workshop
and h av
e the f
ault repaired without delay.
Gearbox: System fault! You
can continue driving in D until
switching off the engine
Stop the vehicle in a safe place well away
from moving traffic. Seek specialist assis-
tance. Gearbox: too hot. Adapt your
driving accordingly
Continue driving at moderate speeds. When
the warning lamp switches off, you can con-
tinue driving in a normal manner. Gearbox: press the brake and
engage a gear again.
If the fault was caused by a gearbox with a
high temperature, this driver message will be
displayed when the gearbox has cooled
again.
Gear-change indicator
Selecting the optim
al gearWhile driving, and depending on vehicle
equipment, the in
s
trument
panel display may
show a recommendation with the gear num-
ber that would be advisable to save fuel. In vehicles with an
automatic gear
box, the
selector lever must be in the tiptronic posi-
tion ››› page 190.
No recommendation will appear if the opti-
mal gear is already engaged. The current
gear will be displayed.
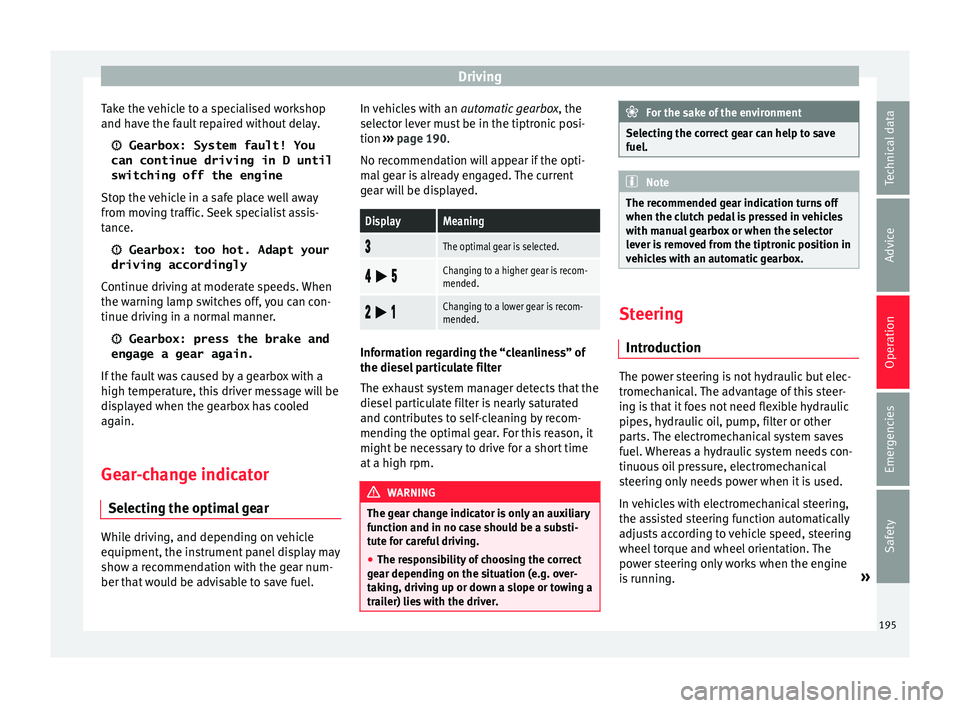
DisplayMeaning
The optimal gear is selected.
Changing to a higher gear is recom-
mended.
Changing to a lower gear is recom-
mended.
Information regarding the “cleanliness” of
the die
sel
p
articulate filter
The exhaust system manager detects that the
diesel particulate filter is nearly saturated
and contributes to self-cleaning by recom-
mending the optimal gear. For this reason, it
might be necessary to drive for a short time
at a high rpm. WARNING
The gear change indicator is only an auxiliary
fu nction and in no c
ase should be a substi-
tute for careful driving.
● The responsibility of choosing the correct
gear dependin
g on the situation (e.g. over-
taking, driving up or down a slope or towing a
trailer) lies with the driver. For the sake of the environment
Selecting the correct gear can help to save
fuel . Note
The recommended gear indication turns off
when the clut c
h pedal is pressed in vehicles
with manual gearbox or when the selector
lever is removed from the tiptronic position in
vehicles with an automatic gearbox. Steering
Intr oduction The power steering is not hydraulic but elec-
tr
omec
h
anical. The advantage of this steer-
ing is that it foes not need flexible hydraulic
pipes, hydraulic oil, pump, filter or other
parts. The electromechanical system saves
fuel. Whereas a hydraulic system needs con-
tinuous oil pressure, electromechanical
steering only needs power when it is used.
In vehicles with electromechanical steering,
the assisted steering function automatically
adjusts according to vehicle speed, steering
wheel torque and wheel orientation. The
power steering only works when the engine
is running. »
195
Technical data
Advice
Operation
Emergencies
Safety
Page 201 of 316
Driving
exhaust emissions and noise levels all in-
c r
e
ase very rapidly at higher speeds. Driving
at moderate speeds will help to save fuel.
Avoid idling
It is worthwhile switching off the engine
when waiting in a traffic jam, at level cross-
ings or at traffic lights with a long red phase.
The fuel saved after only 30 - 40 seconds is
greater than the amount of fuel needed to re-
start the engine.
The engine takes a long time to warm up
when it is idling. Mechanical wear and pollu-
tant emissions are also especially high dur-
ing this initial warm-up phase. It is therefore
best to drive off immediately after starting
the engine. Avoid running the engine at high
speed.
Periodic maintenance
Periodic maintenance work guarantees that,
before beginning a journey, you will not con-
sume more than the required amount of fuel.
A well-serviced engine gives you the benefit
of improved fuel efficiency as well as maxi-
mum reliability and an enhanced resale val-
ue.
A badly serviced engine can consume up to
10% more fuel than necessary. Avoid short journeys
To reduc
e the consumption and emission of
polluting exhaust gases, the engine and the
exhaust gas filtration systems should reach
the optimum operating temperature.
With the engine cold, fuel consumption is
proportionally higher. The engine does not
warm up and fuel consumption does not nor-
malise until having driven approximately four
kilometres (2.5 miles). This is why we recom-
mend avoiding short trips whenever possi-
ble.
Maintain the correct tyre pressures
Bear in mind that keeping the tyres at an ad-
equate pressure saves fuel. If the tyre pres-
sure is just one bar (14.5 psi/100 kPa) too
low, fuel consumption can increase by as
much as 5%. Due to the greater rolling resist-
ance, under-inflation also increases tyre wear
wear and impairs handling.
The tyre pressures should always be checked
when the tyres are cold.
Do not use winter tyres all year round as they
increase fuel consumption by up to 10%.
Avoid unnecessary weight
Given that every kilo of extra weight will in-
crease the fuel consumption, it is advisable
to always check the luggage compartment to
make sure that no unnecessary loads are be-
ing transported. A roof rack is often left in place for the sake
of con
venience, even when it is no longer
needed. At a speed of 100 km/h (62 mph)
and 120 km/h (75 mph) your vehicle will use
about 12% more fuel as a result of the extra
wind resistance caused by the roof rack even
when it is not in use.
Save electricity
The engine activates the alternator, which
produces electricity. With the need for elec-
tricity, fuel consumption also increases. Be-
cause of this, always turn off electrical devi-
ces when you do not need them. Examples of
devices that use a lot of electricity are: the
blower at high speeds, the rear window heat-
ing or the seat heaters*. Note
● If y
our vehicle has Start-Stop, it is not rec-
ommended that you switch this function off.
● It is recommended that you close
the win-
dows when driving at more than 60 km/h
(37 mph).
● Do not drive with your foot resting on the
clutc
h pedal,, as the pressure can make the
plate spin, more fuel will be used and it can
burn the clutch plate lining, causing a serious
fault.
● Do not hold the car on a hill with the clutch,
use the foot
brake or hand brake, using the
latter to start. The fuel consumption will be » 199
Technical data
Advice
Operation
Emergencies
Safety