technical data Seat Ateca 2016 Owner's Guide
[x] Cancel search | Manufacturer: SEAT, Model Year: 2016, Model line: Ateca, Model: Seat Ateca 2016Pages: 328, PDF Size: 6.32 MB
Page 121 of 328
Opening and closing
CAUTION
The sensor surfaces on the door handles
c ou
ld engage if hit with a water jet or high
pressure steam if there is a valid vehicle key
in the proximity. If at least one of the win-
dows is open and the sensor surface B on
one of the h
andles permanently activates, all
windows will close. If the water jet or steam
is briefly moved away from the sensor surface A (arrow) on one of the handles and then
point ed at
it again, all the windows will prob-
ably open ››› page 118. Note
● If the
vehicle battery has little or no charge,
or the vehicle key battery is almost or entire-
ly out of charge, you will probably not be able
to lock or unlock the vehicle with the Keyless
Access system. The vehicle can be unlocked
or locked manually ››› page 85.
● To control the proper locking of the vehicle,
the rel
ease function is disabled for approx. 2
seconds.
● If the message Keyless access system
faulty is
displayed on the screen of the
dash panel, abnormalities may occur in the
operation of the Keyless Access system. Con-
tact a specialised workshop. SEAT recom-
mends visiting a SEAT dealership for this.
● Depending on the function set on the info-
tainment
system for the mirrors, the exterior
mirrors will unfold and the surround lighting
will come on when unlocking the vehicle us- ing the sensor surface on the driver and pas-
sen
g
er door handles ››› page 141.
● If there is no valid key inside the vehicle or
the sys
tem fails to detect one, a warning will
display on the dash panel screen. This could
happen if any other radio frequency signal in-
terferes with the key signal (e.g. from a mo-
bile device accessory) or if the key is covered
by another object (e.g. an aluminium case).
● If the sensors are very dirty, e.g. have a lay-
er of s
alt, how the sensors on the door han-
dles operate may be affected. In this case,
clean the vehicle.
● If the vehicle is equipped with an automatic
ge
arbox, it may only be locked in the gear
stick is in position P. Anti-theft security system (Safelock)*
The following message is displayed on the in-
s
trument
panel to remind the driver that
when the vehicle is closed from the outside,
the anti-theft security system is switched on. Do not forget the Safelock.
Please see Instruction Manual . The
vehicle cannot be opened from inside. This
makes it more difficult for unauthorised per-
sons to break into the vehicle ››› in De-
s c
ription on page 112.
The anti-theft security system can be switch-
ed off each time the vehicle is locked: ●
Turn the k
ey a second time to the lock posi-
tion, in the door lock, within two seconds. If
necessary, remove the protective cover on
the driver door handle ›››
page 9 or else
● Press on the remote control key for a
sec ond time
within 2 seconds.
The flashing frequency of the diode in the
door sill immediately confirms the process.
Initially, the diode flashes in a fast sequence
for a brief period, then it stops for approxi-
mately 30 seconds and, lastly continues
flashing slowly.
119Technical data
Advice
Operation
Emergencies
Safety
Page 123 of 328
Opening and closing
The childproof lock prevents the rear doors
fr om bein
g opened from the inside. This sys-
tem prevents minors from opening a door ac-
cidentally while the vehicle is running.
This function is independent of the vehicle
electronic opening and locking systems. It
only affects rear doors. It can only be activa-
ted and deactivated manually, as described
below:
Activating the childproof lock
– Unlock the vehicle and open the door in
which
you wish to activate the childproof
lock.
– With the door open, rotate the groove in
the door us
ing the ignition key, clockwise
for the left hand side doors ››› Fig. 127 and
anti-clockwise for the right hand side
doors.
Deactivating the childproof lock
– Unlock the vehicle and open the door
whose c
hildproof lock you want to deacti-
vate.
– With the door open, rotate the groove in
the door us
ing the ignition key, anti-clock-
wise for the left hand side doors ››› Fig. 127
and clockwise for the right hand side
doors.
Once the childproof lock is activated, the
door can only be opened from the outside. The childproof lock can be activated or deac-
tivat
ed by inserting the key in the groove
when the door is open, as described above.
Anti-theft alarm system* De
scription The anti-theft alarm makes it more difficult to
br
e
ak into the vehicle or steal it.
The anti-theft alarm is automatically turned
on when the vehicle is locked with the key.
● The turn signal light will flash twice on
openin g and de
activating the alarm.
● The turn signal light will flash once on clos-
ing and activ
ating the alarm.
When does the system trigger an alarm?
The anti-theft alarm siren will be triggered for
about 30 seconds accompanied by sound
and optical (flashing) warning signals and
will be repeated about ten times when the
vehicle is locked and the following unauthor-
ised actions are attempted:
● Opening a door that is mechanically un-
lock
ed using the vehicle key without switch-
ing on the ignition in the next 15 seconds (in
certain markets, such as the Netherlands,
there is no 15 second waiting time and the alarm is activated immediately on opening
the door).
●
A door is opened.
● The bonnet is opened.
● The rear lid is opened.
● When the ignition is switched on with a
non-authori
sed key.
● When the vehicle battery is disconnected.
● Movement inside the vehicle (in vehicles
with int
erior monitoring ››› page 123).
● When the vehicle is towed (in vehicles with
anti-to
w system ››› page 123).
● When the vehicle is raised (in vehicles with
anti-to
w system ››› page 123).
● When the vehicle is transported on a ferry
or by
rail (vehicles with an anti-tow system or
vehicle interior monitoring ››› page 123).
● When a trailer connected to the anti-theft
alarm sy
stem is disconnected.
How to turn OFF the alarm
Unlock the vehicle with the unlocking button
on the key or turn on the ignition with a valid
key. Note
● Af t
er 28 days, the indicator light will be
switched off to prevent the battery from ex-
hausting if the vehicle has been left parked » 121
Technical data
Advice
Operation
Emergencies
Safety
Page 125 of 328
Opening and closing
●
The v
ibration of a mobile phone left inside
the vehicle may cause the vehicle interior
monitoring alarm to trigger, as both sensors
react to movements and shakes inside the ve-
hicle.
● If on activating the alarm, any door or the
re
ar lid is open, only the alarm will be activa-
ted. The vehicle interior monitoring and the
anti-tow system will only be activated once
all the doors are closed (including the rear
lid). Deactivating the vehicle interior moni-
t
orin
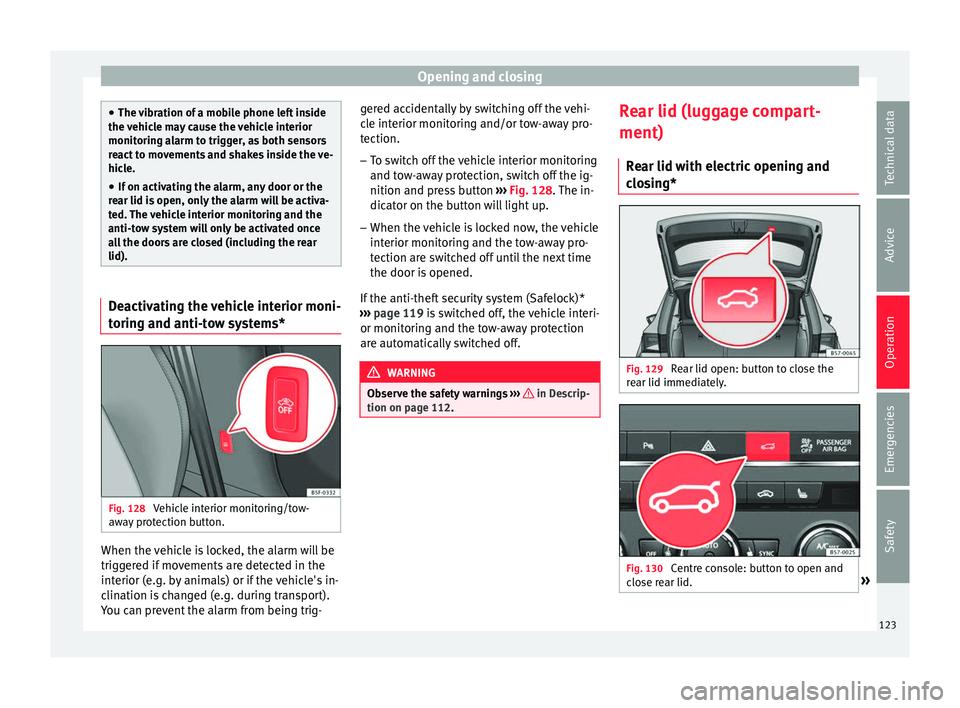
g and anti-tow systems* Fig. 128
Vehicle interior monitoring/tow-
a w
ay protection button. When the vehicle is locked, the alarm will be
trig
g
ered if movements are detected in the
interior (e.g. by animals) or if the vehicle's in-
clination is changed (e.g. during transport).
You can prevent the alarm from being trig- gered accidentally by switching off the vehi-
cl
e interior monitoring and/or tow-away pro-
tection.
– To switch off the vehicle interior monitoring
and to
w-away protection, switch off the ig-
nition and press button ››› Fig. 128. The in-
dicator on the button will light up.
– When the vehicle is locked now, the vehicle
interior monit
oring and the tow-away pro-
tection are switched off until the next time
the door is opened.
If the anti-theft security system (Safelock)*
››› page 119 is switched off, the vehicle interi-
or monitoring and the tow-away protection
are automatically switched off. WARNING
Observe the safety warnings ››
› in Descrip-
tion on p ag
e 112. Rear lid (luggage compart-
ment)
R e
ar lid with electric opening and
closing* Fig. 129
Rear lid open: button to close the
r e
ar lid immediately. Fig. 130
Centre console: button to open and
c lo
se rear lid. » 123
Technical data
Advice
Operation
Emergencies
Safety
Page 127 of 328
Opening and closing
The opening angle is memorised. Memorisa-
tion i s
indicated by blinking of the hazard
warning lights and an audible warning.
Resetting and memorising the opening angle
For the rear lid to reopen completely, the
opening angle must be reset and memorised
again.
● Release the rear lid and open it to the
memorised height
.
● Lift the rear lid by hand until it stops. To do
this, some f
orce will have to be used.
● Press the ››
› Fig. 129 button available in
the rear lid for at least 3 seconds.
● This resets and memorises the factory-set
opening an
gle. Memorisation is indicated by
blinking of the hazard warning lights and an
audible warning.
Automatic protection against overheating
If the system is operated repeatedly in a
short space of time, it automatically switches
off to prevent overheating.
Once the system is cool again, the function
can be reused. Until then the rear lid can only
be opened and closed by hand using reason-
able force.
If with the rear lid open the vehicle battery is
disconnected ››› page 289 or the corre-
sponding fuse burns out ››› page 90, the sys- tem will have to be reset. This requires clos-
ing the r
ear lid completely once.
Emergency unlocking
››› page 11 WARNING
If a lot of snow builds up on the rear lid or it
i s
heavily loaded, the rear lid may not open
or, after opening, it may lower by itself due to
the extra weight and cause serious injury.
● Never open the rear lid when there is a lot
of s
now on it or when carrying a load (e.g. on
a rack).
● Before opening the rear lid, remove the
sno
w or the load. WARNING
If the rear lid is closed incorrectly or without
due c ar
e, it could result in serious injury.
● Never leave the vehicle unattended or allow
chi
ldren to play inside or next to it, especially
if the rear lid is open. Children could enter
the luggage compartment, close the rear lid
and become trapped. A locked vehicle can
reach extremely high and low temperatures,
depending on the time of year, thus causing
serious injuries, illness or even death. CAUTION
Before opening or closing the rear lid, make
s ur
e that there is enough space to open or close it, e.g. when pulling a trailer or in a ga-
r
ag
e. Tailgate automatic lock
Where the vehicle has been locked by press-
in
g the button on the remote control with
the r e
ar lid open, the rear lid will lock auto-
matically when closed.
The automatic tailgate locking time extension
function can be activated. Where this func-
tion is activated and once the rear lid has
been unlocked by pressing the button on
the r emot
e control key ››› page 114, the rear
lid can be re-opened for a certain length of
time.
Where required, the automatic tailgate lock-
ing time extension function can be activated
or deactivated at an Authorised SEAT Service,
which will provide all the necessary informa-
tion.
Before the vehicle locks automatically, there
is a risk of intruders getting into the vehicle.
Therefore, we recommend you always lock
the vehicle by pressing the button on the
r emot
e control or by using the central locking
button. WARNING
Observe the safety warnings ››
› in Intro-
duction on p ag
e 85. » 125
Technical data
Advice
Operation
Emergencies
Safety
Page 129 of 328
Opening and closing
●
The el ectric
windows will work until the ig-
nition has been switched off and one of the
front doors has been opened.
● If necessary, use the safety switch to disa-
bl
e the rear electric windows. Make sure that
they have been disabled. Note
If the window is not able to close because it
i s
stiff or because of an obstruction, the win-
dow will automatically open again
››› page 127. If this happens, check why the
window could not be closed before attempt-
ing to close it again. Roll-back function
The roll-back function reduces the risk of in-
jur
y
when the electric windows close.
● If a window is obstructed when closing au-
tom
atically, the window stops at this point
and lowers immediately ››› .
● Next, check why the window does not close
bef or
e attempting it again.
● If you try within the following 10 seconds
and the windo
w closes again with difficulty
or there is an obstruction, the automatic clos-
ing will stop working for 10 seconds.
● If the window is still obstructed, the win-
dow w
ill stop at this point. ●
If ther
e is no obvious reason why the win-
dow cannot be closed, try to close it again by
pulling the tab within ten seconds. The win-
dow closes with maximum force. The roll-
back function is now deactivated.
● If more than 10 seconds pass, the window
wi
ll open fully when you operate one of the
buttons. One-touch closing is reactivated. WARNING
Observe the safety warnings ››
› in Electric
openin g and c
losing of windows on page 126.
● The roll-back function does not prevent fin-
ger
s or other parts of the body getting
pinched against the window frame. Risk of
accident. Convenience opening/closing
Use the convenience opening/closing func-
tion t
o e
asily open/close all the windows and
the sliding/tilting sunroof* from the outside.
Convenience open function
– Press and hold button on the remote
c ontr
ol key until all the windows and the
sliding/tilting sunroof* have reached the
desired position, or
– First unlock the vehicle using button on
the r emot
e control key and then keep the
key in the driver door lock until all the win- dows and the sliding/tilting sunroof* have
re
ached the required position.
Convenience close function
– Press and hold button on the remote
c ontr
ol key until all the windows and the
sliding/tilting sunroof* are closed ››› , or
– Keep the key in the driver door in the "lock"
po s
ition until all the windows and the slid-
ing/tilting sunroof* are closed.
Programming convenience opening in the
Easy Connect*
– Select: function button CAR > control but-
t on Vehicle systems
* > Vehicle set-
tings > Central locking > Open the
window by holding button down or
el
se > Front window on/off or else
Roof on/off *. WARNING
● Tak
e care when closing the sliding/tilting
sunroof* and windows. There is a risk of suf-
fering injury.
● For safety reasons, you should only use the
remot
e control open and close functions with-
in about 2 metres of the vehicle. To avoid in-
juries, always keep an eye on the windows
and the sliding/tilting sunroof* when press-
ing the button to close them. The windows
stop moving as soon as the button is re-
leased. 127
Technical data
Advice
Operation
Emergencies
Safety
Page 131 of 328
Opening and closing
Opening and closing the sunroof Fig. 132
On the interior roof lining: sunroof
b utt
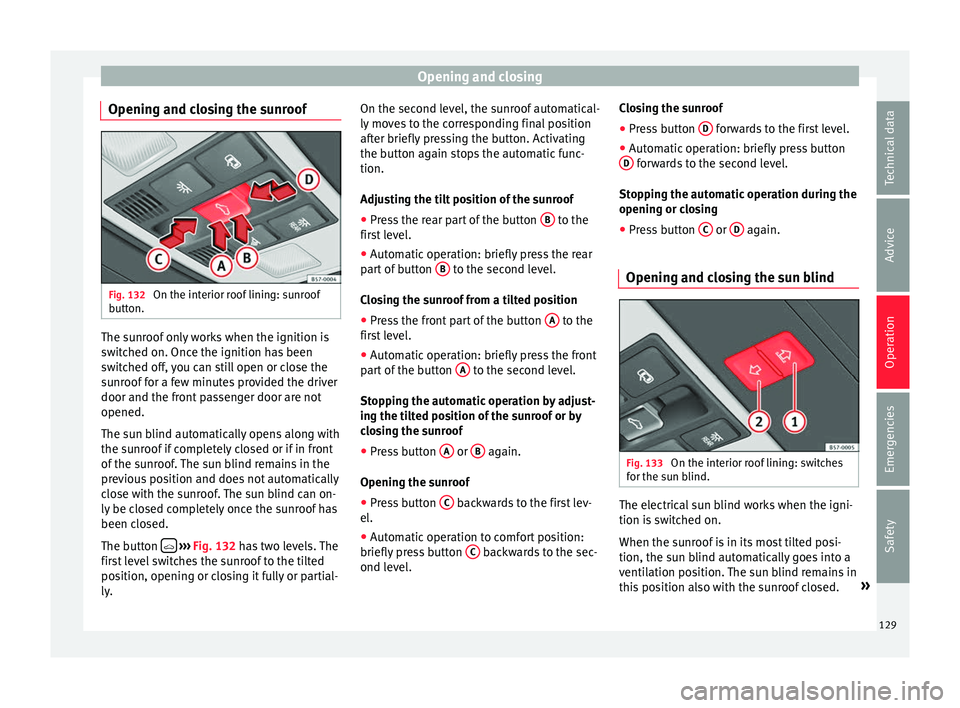
on. The sunroof only works when the ignition is
sw
it
ched on. Once the ignition has been
switched off, you can still open or close the
sunroof for a few minutes provided the driver
door and the front passenger door are not
opened.
The sun blind automatically opens along with
the sunroof if completely closed or if in front
of the sunroof. The sun blind remains in the
previous position and does not automatically
close with the sunroof. The sun blind can on-
ly be closed completely once the sunroof has
been closed.
The button
› ›
›
Fig. 132 has two levels. The
first level switches the sunroof to the tilted
position, opening or closing it fully or partial-
ly. On the second level, the sunroof automatical-
ly mo
ves to the corresponding final position
after briefly pressing the button. Activating
the button again stops the automatic func-
tion.
Adjusting the tilt position of the sunroof
● Press the rear part of the button B to the
fir s
t level.
● Automatic operation: briefly press the rear
par
t of button B to the second level.
C lo
sing the sunroof from a tilted position
● Press the front part of the button A to the
fir s
t level.
● Automatic operation: briefly press the front
par
t of the button A to the second level.
St op
ping the automatic operation by adjust-
ing the tilted position of the sunroof or by
closing the sunroof
● Press button A or
B again.
Openin g the s
unroof
● Press button C backwards to the first lev-
el .
● Aut
omatic operation to comfort position:
briefly pr
ess button C backwards to the sec-
ond l ev
el. Closing the sunroof
●
Press button D forwards to the first level.
● Automatic operation: briefly press button
D forwards to the second level.
St op
ping the automatic operation during the
opening or closing
● Press button C or
D again.
Opening and closing the sun blind Fig. 133
On the interior roof lining: switches
f or the s
un blind. The electrical sun blind works when the igni-
tion i
s
switched on.
When the sunroof is in its most tilted posi-
tion, the sun blind automatically goes into a
ventilation position. The sun blind remains in
this position also with the sunroof closed. »
129
Technical data
Advice
Operation
Emergencies
Safety
Page 133 of 328
Lights and visibility
Lights and visibility Light s
Side light
and dipped beam headlightRead the additional information carefully
› ›
› page 23
The legal requirements regarding the use of
vehicle lights in each country must be ob-
served.
The driver is personally responsible for the
correct use and adjustment of the lights in all
situations.
Audible warnings to advise the driver that
the lights have not been switched off
If the key is not in the ignition and the driver
door is open, an audible warning signal is
heard in the following cases: this is a remind-
er to turn off the lights.
● When the parking light is on ›
›
›
page 131.
● When the light switch is in position or
. WARNING
The side lights or daytime running lights are
not bright
enough to illuminate the road
ahead and to ensure that other road users are
able to see you.
● Always use your dipped beam head lights if
it i
s raining or if visibility is poor. WARNING
If the headlights are set too high and not
u sed c
orrectly, there is a risk of dazzling or
distracting other road users. This could result
in a serious accident.
● Always make sure that the headlights are
corr
ectly adjusted. Daytime running lights
The daytime running lights consist of individ-
ual
lights, int
egrated in the front headlights.
By connecting the daytime running lights,
these lights are switched on 1)
››› .
The d a
ytime running lights switch on every
time the ignition is switched on, if the switch
is in positions or , according to the level
of exterior lighting. When the light switch is in position
, a
light
sensor automatically switches dipped
beam on and off (including the control and
instrument lighting) or the daytime running
lights depending on the level of exterior
lighting. WARNING
● Nev er driv
e with daytime lights if the road
is not well lit due to weather or lighting con-
ditions. Daytime lights do not provide
enough light to illuminate the road properly
or be seen by other road users.
● On vehicles with rear lights with bulbs,
when activatin
g the daytime running light
the rear lights are not switched on. A vehicle
which does not have the rear lights on may
not be visible to other drivers in the dark-
ness, in the case of heavy rain or in condi-
tions of poor visibility. Turn signal and main beam lever
Read the additional information carefully
› ›
› page 24
Push the lever all the way down to turn off
the corresponding function. »1)
On vehicles equipped with rear LED lights, the rear
s ide light
is switched on as well. 131
Technical data
Advice
Operation
Emergencies
Safety
Page 135 of 328
Lights and visibility
When the system is activated and the camera
det ects
other vehicles that may be dazzled,
the main beam is automatically switched off.
Otherwise, the main beam is automatically
switched on.
The main beam assist generally detects illu-
minated areas and deactivates the main
beam when passing through a town, for ex-
ample.
Switching the main beam assist on and off
Func-
tionUse
Activate:
– Switch the ignition on and turn the light
switch to position .
– From the base position, move the main
beam and turn signal lever forwards
››› page 131. When the warning lamp
is
displayed on the instrument panel display,
the main beam assist is switched on.
To switch system off:
– Switch off the ignition.
– OR: turn the light switch to a different po-
sition to
››› page 131.
– OR: with main beam on, move the main
beam and turn signal lever backwards.
– OR: move the main beam and turn the
signal lever forwards to manually switch
the main beam on. The main beam assist
will then be deactivated. Malfunctions
The f
o
llowing conditions may prevent the
main beam headlight control from turning off the headlights in time or from turning off al-
tog
ether:
● In poorly lit towns with highly reflective
sign
s.
● Other insufficiently lit road users (such as
pedes
trians or cyclists).
● On tight bends and steep slopes (bumps)
and when oncomin
g vehicles are partially ob-
scured.
● When the drivers of other oncoming vehi-
cl
es (such as a truck) can see over a guard
rail in the centre of the road.
● If the camera is damaged or the power sup-
ply
is cut off.
● In fog, snow and heavy rain.
● With dust and sand turbulence.
● With loose gravel in the field of vision of
the camer
a.
● When the field of vision of the camera is
mis
ted up, dirty or covered by stickers, snow,
ice, etc. WARNING
The convenience features of the main beam
a s
sist should not encourage the taking of
risks. The system is not a replacement for
driver concentration.
● You are always in control of the main beam
and ad
apting it to the light, visibility and traf-
fic conditions. ●
It i
s possible that the main beam headlight
control does not recognise all driving situa-
tions and is limited under certain circumstan-
ces.
● When the field of vision of the camera is
dirty
, covered or damaged, operation of the
main beam control may be affected. This also
applies when changes are made to the vehi-
cle lighting system, for example, if additional
headlights are installed. CAUTION
To avoid affecting the operation of the sys-
t em, t
ake the following points into considera-
tion:
● Clean the field of vision of the camera regu-
larly
and make sure it is free of snow and ice.
● Do not cover the field of vision of the cam-
era.
● Chec
k that the windscreen is not damaged
in the are
a of the field of vision of the camera. Note
Main beam and headlight flasher can be
t urned on and off
manually at any time with
the turn signal and main beam lever
››› page 131. 133
Technical data
Advice
Operation
Emergencies
Safety
Page 137 of 328
Lights and visibility
● When the c ar door i
s opened, the “Coming
Home” lighting comes on. The headlights are
turned off 60 seconds after the vehicle door
is opened.
Deactivation
● If no door has been closed, they go out au-
tom
atically after 60 seconds.
● After the last door has been closed, the
hea
dlights will be switched off after the
“Coming Home” delay (as established in the
radio menu) has elapsed.
● On turning the light switch to position
››
› page 23.
● When the ignition is switched on (when
st
arting the engine).
Function “Leaving Home” The “Leaving Home” function is only availa-
b
l
e for vehicles with a light and rain sensor
(rotary light switch in position ).
This function may be connected/disconnec-
ted through the radio menu. The “Leaving
Home” function switch-off delay may also be
set (default: 30 sec).
Vehicle with halogen headlights
In the “Leaving Home” function, the daytime
running lights (DRL), the rear side lights and
the licence plate lights are switched on. Vehicle with full-LED headlights
In the “Le
aving Home” function, the dipped
beams, the daytime running lights (DRL), the
rear side lights and the registration plate
lights switch on (“Welcome Light”).
Activation
● When the vehicle is unlocked using the re-
mote c
ontrol.
● The “Leaving Home” function is only activa-
ted when the r
otary light switch is in position
and the light sensor detects darkness.
Deactivation
● When the “Leaving Home” delay period
ends
(default: 30 sec).
● When the vehicle is locked using the re-
mote c
ontrol.
● When the light control is switched into a
pos
ition other than .
● With the ignition is switched on. Hazard warning lights
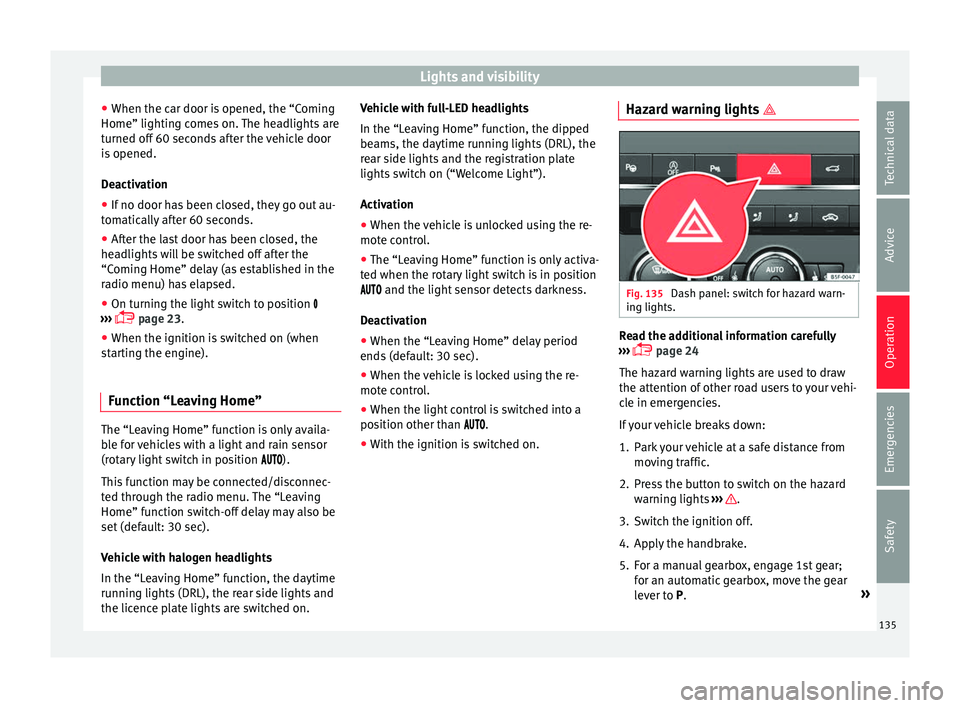
Fig. 135
Dash panel: switch for hazard warn-
in g lights. Read the additional information carefully
› ›
› page 24
The hazard warning lights are used to draw
the attention of other road users to your vehi-
cle in emergencies.
If your vehicle breaks down:
1. Park your vehicle at a safe distance from mov
ing traffic.
2. Press the button to switch on the hazard warnin
g lights ››› .
3. Switch the ignition off.
4. Apply the handbrake.
5. For a manual gearbox, engage 1st gear; for an aut
omatic gearbox, move the gear
lever to P. »
135
Technical data
Advice
Operation
Emergencies
Safety
Page 139 of 328
Lights and visibility
The light distribution of the halogen and full-
LED he a
dlights allows the specific “tourist
light” values to be met without the need for
stickers or changes in the settings. Note
“Tourist light” is only allowed temporarily. If
y ou ar
e planning a long stay in a country that
drives on the other side, you should take the
vehicle to an Authorised Technical Service to
change the headlights. Headlight range control, lighting of
the in
s
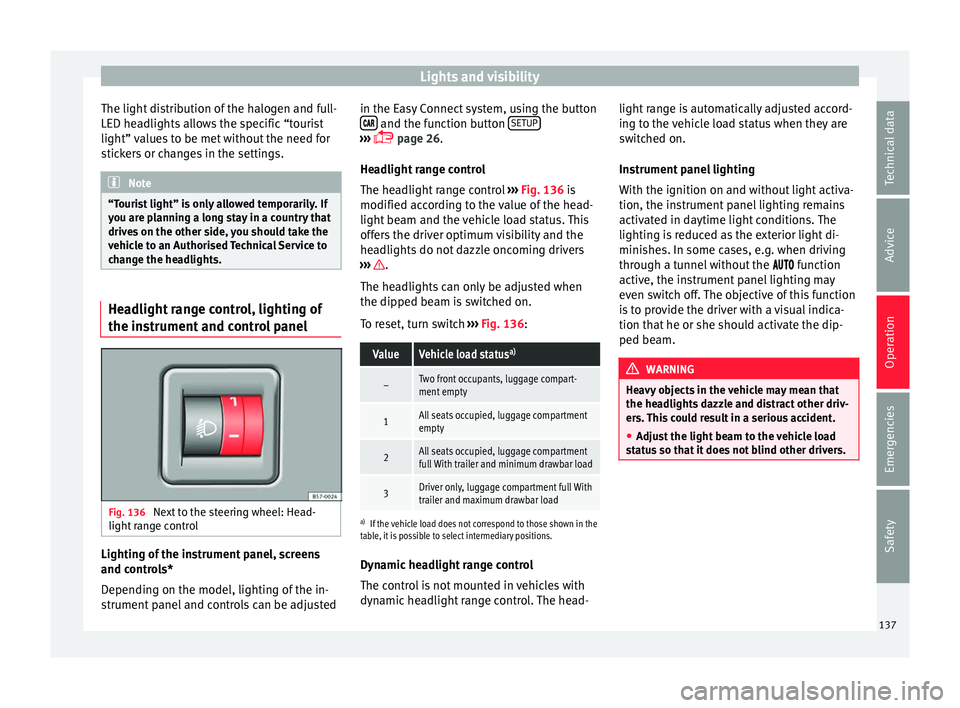
trument and control panel Fig. 136
Next to the steering wheel: Head-
light r
ange control Lighting of the instrument panel, screens
and c
ontr
ols*
Depending on the model, lighting of the in-
strument panel and controls can be adjusted in the Easy Connect system, using the button
and the function button
S
ETUP ›››
p
age 26.
He
adlight range control
The headlight range control ››› Fig. 136 is
modified according to the value of the head-
light beam and the vehicle load status. This
offers the driver optimum visibility and the
headlights do not dazzle oncoming drivers
››› .
The he a
dlights can only be adjusted when
the dipped beam is switched on.
To reset, turn switch ››› Fig. 136:
ValueVehicle load status a)
–Two front occupants, luggage compart-
ment empty
1All seats occupied, luggage compartment
empty
2All seats occupied, luggage compartment
full With trailer and minimum drawbar load
3Driver only, luggage compartment full With
trailer and maximum drawbar load
a)
If the vehicle load does not correspond to those shown in the
table, it is possible to select intermediary positions.
Dynamic headlight range control
The control is not mounted in vehicles with
dynamic headlight range control. The head- light range is automatically adjusted accord-
ing t
o the vehicle load status when they are
switched on.
Instrument panel lighting
With the ignition on and without light activa-
tion, the instrument panel lighting remains
activated in daytime light conditions. The
lighting is reduced as the exterior light di-
minishes. In some cases, e.g. when driving
through a tunnel without the function
active, the instrument panel lighting may
even switch off. The objective of this function
is to provide the driver with a visual indica-
tion that he or she should activate the dip-
ped beam. WARNING
Heavy objects in the vehicle may mean that
the he a
dlights dazzle and distract other driv-
ers. This could result in a serious accident.
● Adjust the light beam to the vehicle load
st
atus so that it does not blind other drivers. 137
Technical data
Advice
Operation
Emergencies
Safety