wipers Seat Ateca 2018 User Guide
[x] Cancel search | Manufacturer: SEAT, Model Year: 2018, Model line: Ateca, Model: Seat Ateca 2018Pages: 348, PDF Size: 7.32 MB
Page 155 of 348
Lights and visibility
Vanity mirror light
Ther e m
a
y be a vanity mirror, with a cover, on
the rear of the sun visor. When the cover is
opened 2 a light comes on.
The l amp g
oe
s out when the vanity mirror
cover is closed or the sun visor is pushed
back up. WARNING
Folded sun blinds can reduce visibility.
● Always store sun blinds and visors in their
hous in
g when not in use. Note
The light above the sun visor automatically
swit c
hes off after a few minutes in certain
conditions. This prevents the battery from
discharging. Windscreen wiper and window
w
iper sy
s
tems
Window wiper lever Read the additional information carefully
› ›
›
page 32 CAUTION
If the ignition is switched off with the wind-
sc r
een wipers active, they complete their
wipe before returning to the rest position.
When switching the ignition back on, the
windscreen wiper will continue to operate at
the same wiping level. Ice, snow and other
obstacles on the windscreen may damage the
wiper and the windscreen wiper motor.
● If necessary, remove snow and ice from the
winds
creen wipers before starting your jour-
ney.
● Carefully lift the frozen windscreen wipers
from the gla
ss. SEAT recommends a de-icer
spray for this operation.
● Do not switch on the windscreen wipers if
the winds
creen is dry. Cleaning with the
windscreen wipers while dry can cause dam-
age.
● In icy conditions, always check that the
wiper bl
ades are not frozen to the glass be-
fore using the wipers. In cold weather, it may
help to leave the vehicle parked with the wip-
ers in service position ›››
page 71. Note
● The wind s
creen and window wipers only
function when the ignition is switched on and
the bonnet or rear lid, respectively, are
closed.
● The interval wipe speed varies according to
the vehic
le speed. The faster the vehicle is moving, the more often the windscreen is
cl
e
aned.
● The rear wiper is automatically switched on
when the winds
creen wiper is on and the car
is in reverse gear. Windscreen wiper functions
Windscreen wiper performance in different sit-
uations
If the vehicle is at a
standstillThe activated position provision-
ally changes to the previous posi-
tion.
During automatic
wipe
The air conditioner comes on for
approximately 30 seconds in air
recirculation mode to prevent the
smell of the windscreen washer
fluid entering the inside the vehi-
cle.
For the interval wipe
Intervals between wipes depend
on the vehicle's speed. The high-
er the vehicle speed the shorter
the intervals.
Heated windscreen washer jets*
The he
atin
g on
ly thaws the frozen jets, it
does not thaw the water in the washer hoses.
When the ignition is switched on the heated
windscreen washer jets automatically adjust
the heat depending on the ambient tempera-
ture. »
153
Technical data
Advice
Operation
Emergencies
Safety
Page 156 of 348
Operation
Headlight wash/wipe system*
The he a
dlight
washers/wipers clean the
headlight lenses.
After the ignition is switched on, the first and
every fifth time the windscreen washer is
switched on, the headlights are also washed.
Therefore, the windscreen wiper lever should
be pulled towards the steering wheel when
the dipped beam or main beam are on. Any
incrusted dirt (such as insects) should be
cleaned regularly (e.g. when refuelling).
To ensure the headlight washers work cor-
rectly in winter, any snow which has got into
the bumper jet supports should be cleaned
away. If necessary, remove snow with an anti-
icing spray. Note
The wiper will try to wipe away any obstacles
that ar
e on the windscreen. The wiper will
stop moving if the obstacle blocks its path.
Remove the obstacle and switch the wiper
back on again. Rain sensor*
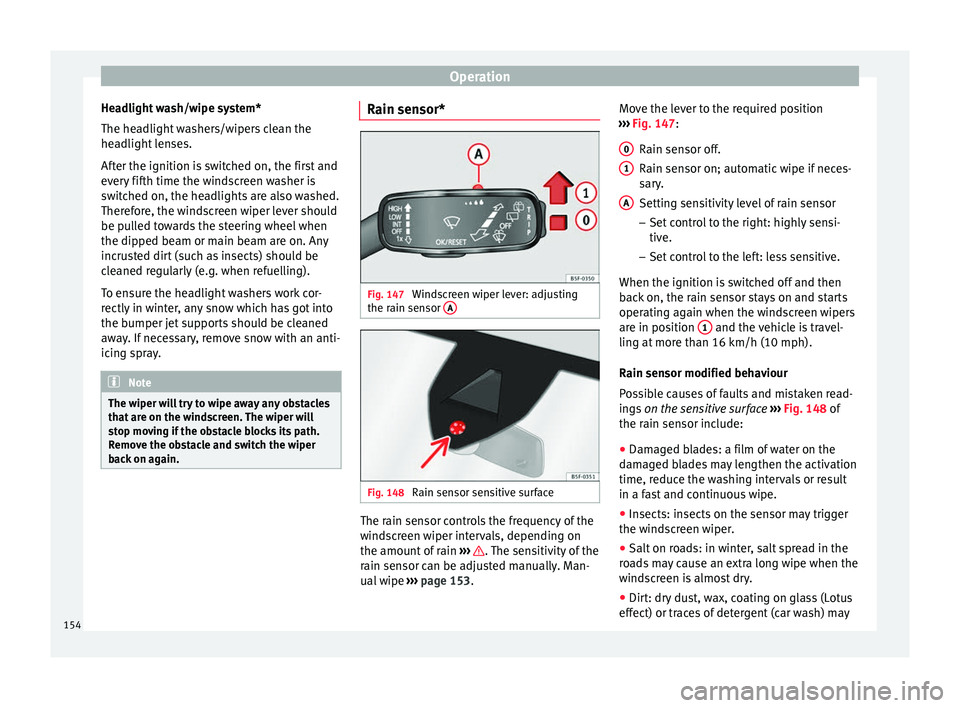
Fig. 147
Windscreen wiper lever: adjusting
the r ain sen
sor A Fig. 148
Rain sensor sensitive surface The rain sensor controls the frequency of the
w
ind
s
creen wiper intervals, depending on
the amount of rain ››› . The sensitivity of the
r ain sen
sor c
an be adjusted manually. Man-
ual wipe ››› page 153. Move the lever to the required position
›››
Fig. 147:
Rain sensor off.
Rain sensor on; automatic wipe if neces-
sary.
Setting sensitivity level of rain sensor
– Set control to the right: highly sensi-
tive.
– Set control to the left: less sensitive.
When the ignition is switched off and then
back on, the rain sensor stays on and starts
operating again when the windscreen wipers
are in position 1 and the vehicle is travel-
lin g at
mor
e than 16 km/h (10 mph).
Rain sensor modified behaviour
Possible causes of faults and mistaken read-
ings on the sensitive surface ››› Fig. 148 of
the rain sensor include:
● Damaged blades: a film of water on the
damag
ed blades may lengthen the activation
time, reduce the washing intervals or result
in a fast and continuous wipe.
● Insects: insects on the sensor may trigger
the winds
creen wiper.
● Salt on roads: in winter, salt spread in the
roa
ds may cause an extra long wipe when the
windscreen is almost dry.
● Dirt: dry dust, wax, coating on glass (Lotus
effect) or trac
es of detergent (car wash) may
0 1
A
154
Page 157 of 348
Lights and visibility
reduce the effectiveness of the rain sensor or
m ak
e it
react more slowly, later or not at all.
● Cracked windscreen: the impact of a stone
wil
l trigger a single wipe cycle with the rain
sensor on. Next the rain sensor detects the
reduction in the sensitive surface area and
adapts accordingly. The behaviour of the sen-
sor will vary with the size of the damage
caused by the stone. WARNING
The rain sensor may not detect enough rain
to sw it
ch on the wipers.
● If necessary, switch on the wipers manually
when water on the w
indscreen obstructs visi-
bility. Note
● Cle
an the sensitive surface of the rain sen-
sor regularly and check the blades for dam-
age ››› Fig. 148 (arrow).
● To remove wax and coatings, we recom-
mend a window c
leaner containing alcohol.Mirror
Anti-d azz
l
e rear view mirrorIt is dangerous to drive if you cannot see
c
l
e
arly through the rear window. Rear view mirror with automatic anti-dazzle
function*
The anti-d
azzle function is activated every
time the ignition is switched on.
When the anti-dazzle function is enabled, the
interior rear vision mirror will darken auto-
matically according to the amount of light it
receives. The anti-dazzle function is cancel-
led if reverse gear is engaged. WARNING
In the event that an automatic anti-dazzle
re ar
vision mirror breaks, an electrolyte fluid
may leak. This could cause irritation to the
skin, eyes and respiratory organs. If you
come into contact with this liquid, it must be
rinsed with large quantities of water. If neces-
sary, get medial help. CAUTION
In the event that an automatic anti-dazzle
re ar
vision mirror breaks, an electrolyte fluid
may leak. This liquid attacks plastic surfaces.
Clean it with a wet sponge as soon as possi-
ble. Note
● If the light inc
ident in the interior rear vi-
sion mirror is obstructed (e.g. with the sun
blind*), the anti-dazzle rear vision mirror with
automatic setting will not operate perfectly. ●
When the interior light s
are on or reverse
gear engaged, the mirrors do not darken with
automatic adjustment for anti-dazzle posi-
tion. Adjusting the exterior rear-view mir-
ror
s Fig. 149
Driver door: control for the exterior
mirr or
. Read the additional information carefully
› ›
›
page 20
Synchronized regulation of the exterior mir-
rors
● In the Settings - Convenience menu,
select whether or not
the exterior mirrors
should move in synchronisation. »
155
Technical data
Advice
Operation
Emergencies
Safety
Page 158 of 348
Operation
● Turn the kno
b t
o position L1)
.
● Adjust the left-hand exterior mirror. The
right ext
erior mirror will be adjusted at the
same time (synchronised).
● If necessary the right exterior mirror adjust-
ment ma
y need correcting. turn the control to
position R 1)
.
● In the Easy Connect system the exterior mir-
rors
can be adjusted using the button
and the S
ET
TINGS function button.
F o
l
d in the exterior mirrors after parking
(convenience function)*
The Easy Connect system, the button and
the f u
nction b
uttons SETTINGS and
Mirr or
s
and windscreen wipers can be used to
h av
e the e
xterior mirrors fold in when the ve-
hicle is parked ››› page 120.
When the vehicle is locked with the remote
control, by pressing for more than approxi-
mately 1 second the exterior mirrors are fol-
ded in automatically. When the vehicle is
opened with the remote control, the exterior
mirrors are deployed automatically. WARNING
Convex or wide-angle* exterior mirrors give a
lar g
er field of vision. However, they make ob- jects look smaller and further away than they
re
a
lly are. If you use these mirrors to esti-
mate the distance to vehicles behind you
when changing lane, you could misjudge the
distance. Risk of accident! CAUTION
● If one of the mirr
or housings is knocked out
of position (e.g. when parking), the mirrors
must first be fully retracted with the electric
control. Do not readjust the mirror housing by
hand, as this will interfere with the mirror ad-
juster function.
● Before washing the vehicle in an automatic
car wa
sh, please make sure to retract the ex-
terior mirrors to prevent them from being
damaged. Electrically retractable exterior
mirrors must not be folded in or out by hand.
Always use the electrical power control. Note
If the electrical adjustment should fail to op-
erat e, both of
the mirrors can be adjusted by
hand by lightly pressing the edge of the mir-
ror glass. Seats and head restraints
Adju
s
tin
g the seats and headr-
ests
Manual adjustment of the seats Read the additional information carefully
›› ›
page 18 WARNING
The safe driving chapter contains important
inform ation, tip
s, suggestions and warnings
that you should read and observe for your
own safety and the safety of your passengers
››› page 73. WARNING
● Adjus t
the front seats only when the vehi-
cle is stationary. Failure to follow this instruc-
tion could result in an accident.
● Be careful when adjusting the seat height.
Carel
ess or uncontrolled adjustment can
cause injuries.
● The front seat backrests must not be re-
clined for driv
ing. Otherwise, seat belts and
the airbag system might not protect as they
should, with the subsequent danger of injury. 1)
Regulation in right-hand drive vehicles is symmet-
rical .
156
Page 177 of 348
Air conditioning
Functioning mode of automatic air recircula-
tion (air c onditionin
g menu)
W
ith the automatic air recirculation mode ac-
tivated, the entry of fresh air into the cabin
interior is enabled. If the system detects a
high concentration of hazardous substances
in the ambient air, air recirculation mode is
switched on automatically. When the level of
impurities drops to within a normal range, re-
circulation mode is switched off.
The system is unable to detect unpleasant
smells.
The air recirculation will not connect auto-
matically in versions without humidity sensor
and in the following external conditions:
● The outside temperature is lower than +3°C
(+38°F).
● The cooling system is switched off and the
outside temper
ature is below +10°C (+50°F).
● The cooling system is switched off, the out-
side temper
ature is below +15°C (+59°F) and
the windscreen wipers are switched on.
Activation/deactivation of automatic air recir-
culation is done in the air conditioner menu,
under Configuration. WARNING
Observe the safety warnings ›››
in Intro-
duction on pag e 171
. ●
If the c oo
ling system is switched off and air
recirculation mode switched on, the windows
can mist over very quickly, considerably limit-
ing visibility.
● Switch air recirculation mode off when it is
not requir
ed. CAUTION
Do not smoke when air recirculation is
sw itc
hed on in vehicles with an air condition-
er. The smoke taken in could lie on the cool-
ing system vaporiser and on the activated
charcoal cartridge of the dust and pollen fil-
ter, leading to a permanently unpleasant
smell. Note
Climatronic: air recirculation mode is activa-
ted t o pr
event exhaust gas or unpleasant
odours from entering the vehicle interior
when it is in reverse and while the automatic
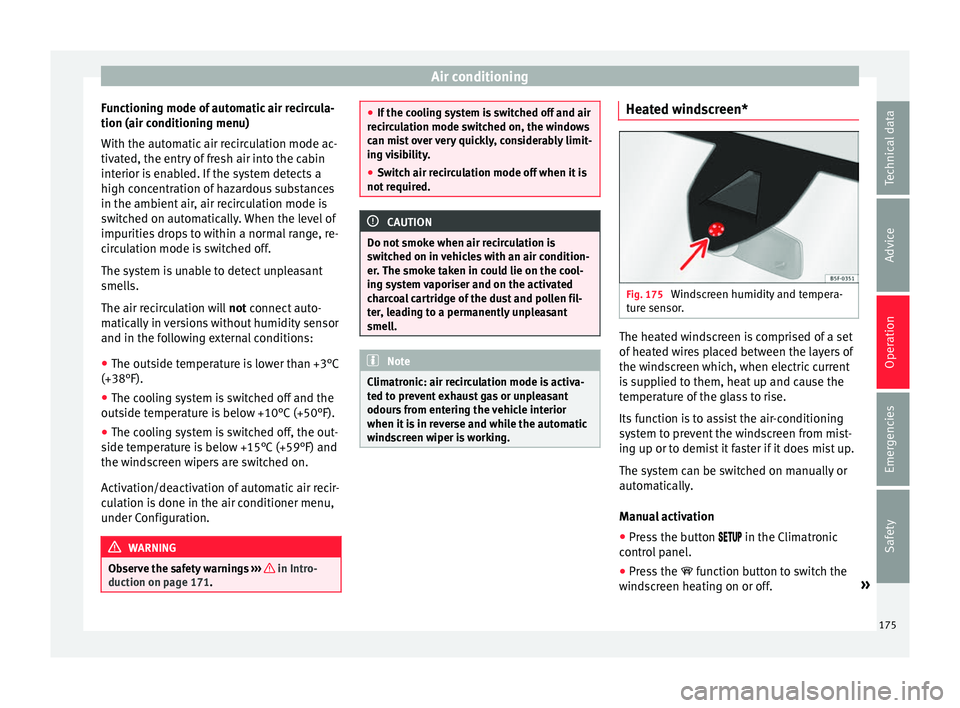
windscreen wiper is working. Heated windscreen*
Fig. 175
Windscreen humidity and tempera-
t ur
e sen
sor. The heated windscreen is comprised of a set
of
he
at
ed wires placed between the layers of
the windscreen which, when electric current
is supplied to them, heat up and cause the
temperature of the glass to rise.
Its function is to assist the air-conditioning
system to prevent the windscreen from mist-
ing up or to demist it faster if it does mist up.
The system can be switched on manually or
automatically.
Manual activation
● Press the button in the Climatr
onic
control panel.
● Press the function b
utton to switch the
windscreen heating on or off. »
175
Technical data
Advice
Operation
Emergencies
Safety
Page 290 of 348
Advice
Plastic parts Plastic parts are cleaned with a power wash-
er. If
thi
s is not sufficient, plastic parts
should only be treated with a special solvent-
free plastic cleaning agent . Do not use paint-
work cleaners, polishes or wax on plastic
parts.
Carbon parts The carbon parts on your vehicle have a pain-
t
ed s
ur
face. They do not need any special
care and are cleaned just like any other pain-
ted part ›››
page 285.
Paint damage Minor damage to the paint, such as scratches
or s
t
one c
hips, should be touched up without
delay before the metal starts to corrode. Suit-
able touch-up brushes or sprays for your car
can be obtained from a SEAT Official Service.
The number of the original paint finish on the
vehicle is given on the data sticker
››› page 317.
If corrosion is already visible it must be thor-
oughly removed by a specialised workshop. Windows Clear vision is an essential safety factor.
The wind
s
creen must not be cleaned with in-
sect remover or wax, otherwise the wind-
screen wipers will not function properly (jud-
dering).
Traces of rubber, oil, grease or silicone can
be removed with a window cleaning solution
or a silicone remover. Wax residue can only
be removed with a special cleaner. Your SEAT
Official Service will be able to provide you
with more detailed information.
The windows should also be cleaned on the
inside at regular intervals.
Use a separate cloth or chamois to dry the
windows. Cloths used for waxing and polish-
ing contain residues that will cause smears
on the glass. WARNING
Do not use water-repellent coatings on the
wind s
creen. In bad visibility conditions (e.g.
in the rain, dark or with a low sun), these
coatings may cause dazzle: risk of accident!
Such coatings can also cause the windscreen
wiper blades to make noise. CAUTION
● Remo v
e snow and ice from windows and ex-
terior mirrors with a plastic scraper only. To avoid scratches caused by dirt on the glass,
the sc
r
aper should only be pushed in one di-
rection and not moved to and fro.
● The heating element for the rear window is
located on the inner s
ide of the window. To
avoid damaging them, do not apply stickers
to these heating elements.
● Never use warm or hot water to remove
snow and ic
e from windows and mirrors. This
could cause the glass to crack! Rims
The wheels require regular attention to pre-
ser
v
e their ap
pearance. It is important to re-
move road salt and brake dust by washing
the wheels at regular intervals, otherwise the
finish will be impaired.
After washing, the wheels should only be
cleaned with an "acid-free" cleaning agent
for alloy wheels. This is available from SEAT
Official Services and specialist retailers. Nev-
er leave the cleaning agent on the rims for
any longer than specified in the instructions
before rinsing it off. If the wheel cleaner fluid
contains acid it can attack the surfaces of the
wheel bolts.
Car polish or other abrasive agents should
not be used for maintaining the rims. If the
protective coating is damaged, e.g. by flying
stones, the damaged area should be re-
paired immediately.
288
Page 306 of 348
Advice
However, if the brake fluid level goes down
notic e
ab
ly in a short time, or drops below the
MIN mark, there may be a leak in the brake
system. Seek specialist assistance. A warn-
ing light on the instrument panel display
monitors the brake fluid level ››› page 119.
In right-hand drive vehicles the brake fluid
reservoir is on the other side of the engine
compartment.
Changing brake fluid
The regular intervals at which the brake fluid
should be replaced are listed in the Mainte-
nance Programme. We recommend you have
it replaced at a SEAT Official Service, during
an Inspection Service. WARNING
● Brak e fluid shou
ld be stored in the closed
original container in a safe place out of reach
of children. Risk of poisoning!
● If the brake fluid is left in the system for
too long and the br
akes are subjected to
heavy use, vapour bubbles may form in the
brake system. This would seriously affect the
efficiency of the brakes and the safety of the
vehicle. This may cause an accident. CAUTION
Brake fluid should not come into contact with
the v ehic
le paintwork, as it is abrasive. Windscreen washer reservoir
Chec k
in
g and topping up the wind-
screen washer reservoir Read the additional information carefully
›› ›
page 59
Check the water level in the windscreen
washer reservoir regularly and top up as re-
quired.
The container for the windscreen washer con-
tains the cleaning fluid for the windscreen,
the rear window and the headlight washer
system*.
● Open the bonnet ››
›
page 298.
● The windscreen washer reservoir is marked
with the symbol
on the cap.
● Check there is enough windscreen water in
the reser
voir.
Recommended windscreen wipers
● For the hottest seasons we recommend
summer G 052 184 A1 for c
lear glass. Propor-
tions of the mixture in the washer fluid tank:
1:100 (1 part concentrate per 100 parts wa-
ter).
● All year round, G 052 164 A2 for clear
glas
s. Approximate proportion of the winter
mixture, up to -18°C (0°F): 1:2 (1 part con-
centrate per 2 parts water); otherwise, a 1:4 proportion of mixture in the washer fluid
tank.
Cap
acity
The reservoir holds approximately 3 litres in
versions without headlight washer and 5 li-
tres in versions with headlight washer. WARNING
If the water from the windscreen washer does
not c ont
ain enough anti-freeze, it may freeze
on the windscreen and rear window, reducing
forward and rear visibility.
● In winter, ensure the windscreen washer
contain
s enough anti-freeze.
● In cold conditions, you should not use the
winds
creen wiper system unless you have
warmed the windscreen with the ventilation
system. The antifreeze could freeze on the
windscreen and reduce visibility. WARNING
Never mix an unsuitable antifreeze or other
simi l
ar additives with the windscreen washer
water. A greasy layer may be formed on the
windscreen which will impair visibility.
● Use clean water with a window cleaner rec-
ommended by
SEAT.
● If necessary, add a suitable antifreeze to
the water in the r
eservoir.304
Page 342 of 348
Index
Trailer . . . . . . . . . . . . . . . . . . . . . . . . . . . . . . . . . . 273 adju
s
ting the headlights . . . . . . . . . . . . . . . . . 280
anti-theft alarm . . . . . . . . . . . . . . . . . . . . . . . . . 279
anti-theft system . . . . . . . . . . . . . . . . . . . . . . . 278
connecting . . . . . . . . . . . . . . . . . . . . . . . . . . . . 278
exterior mirrors . . . . . . . . . . . . . . . . . . . . . . . . . 275
hooking up . . . . . . . . . . . . . . . . . . . . . . . . . . . . 278
loading . . . . . . . . . . . . . . . . . . . . . . . . . . . . . . . 279
malfunction . . . . . . . . . . . . . . . . . . . . . . . . . . . . 279
maximum trailer weight . . . . . . . . . . . . . . . . . . 279
mode . . . . . . . . . . . . . . . . . . . . . . . . . . . . 280, 319
parking aid . . . . . . . . . . . . . . . . . . . . . . . 262, 265
power socket . . . . . . . . . . . . . . . . . . . . . . . . . . . 278
rear LED lights . . . . . . . . . . . . . . . . . . . . . 275, 278
rear lights . . . . . . . . . . . . . . . . . . . . . . . . 275, 278
retrofitting a towing bracket . . . . . . . . . . . . . . 282
stabilisation of the towing vehicle and trailer 281
technical requirements . . . . . . . . . . . . . . . . . . 275
tow rope . . . . . . . . . . . . . . . . . . . . . . . . . 275, 278
trailer mode . . . . . . . . . . . . . . . . . . . . . . . . . . . 280
unlocking the electrical unlocking tow hitch . 276
vertical load on the coupling . . . . . . . . . 273, 279
Trailer mode also see towing bracket . . . . . . . . . . . . . . . . . . 273
see Driving with a trailer . . . . . . . . . . . . . . . . . 273
Trailer weights . . . . . . . . . . . . . . . . . . . . . . . . . . . 319
Transporting children . . . . . . . . . . . . . . . . . . . . . . . 90
Transporting items fastening rings . . . . . . . . . . . . . . . . . . . . . . . . . 165
roof carrier . . . . . . . . . . . . . . . . . . . . . . . . . . . . . 168
roof carrier system . . . . . . . . . . . . . . . . . . . . . . 168
Transporting objects loading the trailer . . . . . . . . . . . . . . . . . . . . . . . 279
net bag . . . . . . . . . . . . . . . . . . . . . . . . . . . . . . . 166
retaining hooks . . . . . . . . . . . . . . . . . . . . . . . . 166
roof carrier system . . . . . . . . . . . . . . . . . . . . . . 170 tailboard for transporting long items . . . . . . . 164
trail
er mode . . . . . . . . . . . . . . . . . . . . . . . . . . . 280
Trims cleaning . . . . . . . . . . . . . . . . . . . . . . . . . . . . . . 287
Turn signal convenience function . . . . . . . . . . . . 145
Turn signal lever . . . . . . . . . . . . . . . . . . . . . . . . . . 145
Tyre Mobility Set . . . . . . . . . . . . . . . . . . . . . . . . . . . 63 components . . . . . . . . . . . . . . . . . . . . . . . . . . . . 96
inflating a tyre . . . . . . . . . . . . . . . . . . . . . . . . . . . 96
sealing a tyre . . . . . . . . . . . . . . . . . . . . . . . . . . . 96
Tyre Mobility System see Anti-puncture kit . . . . . . . . . . . . . . . . . . . . . 95
Tyre monitoring system . . . . . . . . . . . . . . . . . . . . 311 tyre monitoring indicator . . . . . . . . . . . . . . . . . 313
Tyre pressure . . . . . . . . . . . . . . . . . . . . . . . 308, 319
Tyre profile . . . . . . . . . . . . . . . . . . . . . . . . . . . . . . 309
Tyre repair . . . . . . . . . . . . . . . . . . . . . . . . . . . . . . . . 95
Tyre repair kit . . . . . . . . . . . . . . . . . . . . . . . . . . . . . 95 see also Anti-puncture kit . . . . . . . . . . . . . . . . . 95
Tyres . . . . . . . . . . . . . . . . . . . . . . . . . . . . . . . . . . . 307 accessories . . . . . . . . . . . . . . . . . . . . . . . . . . . . 307
changing . . . . . . . . . . . . . . . . . . . . . . . . . . . . . . . 64
dimensions . . . . . . . . . . . . . . . . . . . . . . . . . . . . 309
interchanging . . . . . . . . . . . . . . . . . . . . . . . . . . 309
new tyres . . . . . . . . . . . . . . . . . . . . . . . . . . . . . . 309
repair kit . . . . . . . . . . . . . . . . . . . . . . . . . . . . . . . 95
service life . . . . . . . . . . . . . . . . . . . . . . . . . . . . . 308
tyre pressure . . . . . . . . . . . . . . . . . . . . . . . . . . . 308
wear indicators . . . . . . . . . . . . . . . . . . . . . . . . . 309
with compulsory direction of rotation . . . . . . . . 67
with directional tread pattern . . . . . . . . . . . . . 307
Tyre tread depth . . . . . . . . . . . . . . . . . . . . . . . . . . 309
Tyre wear . . . . . . . . . . . . . . . . . . . . . . . . . . . . . . . . 309
U Unfastening your seat belt . . . . . . . . . . . . . . . . . . 82
Unfasten the seat belt . . . . . . . . . . . . . . . . . . . . . . 19 Unlocking and locking . . . . . . . . . . . . . . . . . . . . . . 15
by r emote control . . . . . . . . . . . . . . . . . . . . . . . 127
with Keyless Access . . . . . . . . . . . . . . . . . . . . . 129
with the central locking switch . . . . . . . . . . . . 128
Upholstery: cleaning alcantara . . . . . . . . . . . . . . . . . . . . . . . . . . . . . . 291
upholstery . . . . . . . . . . . . . . . . . . . . . . . . . . . . . 289
USB . . . . . . . . . . . . . . . . . . . . . . . . . . . . . . . . . . . . 123
USB/AUX-IN Port . . . . . . . . . . . . . . . . . . . . . . . . . 123
V Vanity mirror . . . . . . . . . . . . . . . . . . . . . . . . . . . . . 152
Vehicle chassis number . . . . . . . . . . . . . . . . . . . . . . . . 317
data label . . . . . . . . . . . . . . . . . . . . . . . . . . . . . 317
identification data . . . . . . . . . . . . . . . . . . . . . . 317
identification number . . . . . . . . . . . . . . . . . . . . 317
raising . . . . . . . . . . . . . . . . . . . . . . . . . . . . . . . . . 66
unlocking and locking the vehicle with Keyless Access . . . . . . . . . . . . . . . . . . . . . . . . . . . . . . 129
Vehicle battery . . . . . . . . . . . . . . . . . . . . . . . 59, 305 assisted starting . . . . . . . . . . . . . . . . . . . . . . . . . 69
charge level . . . . . . . . . . . . . . . . . . . . . . . . . . . . 203
charging . . . . . . . . . . . . . . . . . . . . . . . . . . . . . . 306
connecting and disconnecting . . . . . . . . . . . . 305
disconnect and connect . . . . . . . . . . . . . . . . . . . 44
power management . . . . . . . . . . . . . . . . . . . . . 203
replacing . . . . . . . . . . . . . . . . . . . . . . . . . . . . . . 306
winter conditions . . . . . . . . . . . . . . . . . . . . . . . 305
Vehicle care natural leather . . . . . . . . . . . . . . . . . . . . . . . . . 291
windscreen wipers service position . . . . . . . . . 71
Vehicle interior monitoring and anti-tow system 136 activation . . . . . . . . . . . . . . . . . . . . . . . . . . . . . 135
Vehicle seats . . . . . . . . . . . . . . . . . . . . . . . . . . . . . 79
Vehicle tool kit . . . . . . . . . . . . . . . . . . . . . . . . . 64, 95
Ventilation slits . . . . . . . . . . . . . . . . . . . . . . . . . . 163
340
Page 343 of 348
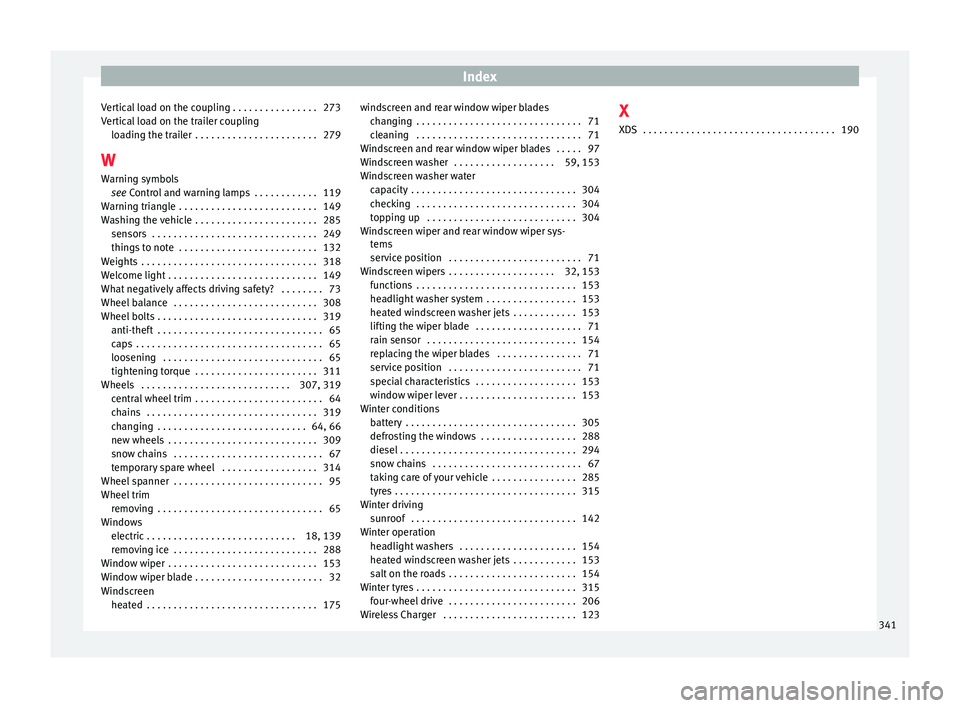
Index
Vertical load on the coupling . . . . . . . . . . . . . . . . 273
V er
tic
al load on the trailer coupling
loading the trailer . . . . . . . . . . . . . . . . . . . . . . . 279
W Warning symbols see Control and warning lamps . . . . . . . . . . . . 119
Warning triangle . . . . . . . . . . . . . . . . . . . . . . . . . . 149
Washing the vehicle . . . . . . . . . . . . . . . . . . . . . . . 285 sensors . . . . . . . . . . . . . . . . . . . . . . . . . . . . . . . 249
things to note . . . . . . . . . . . . . . . . . . . . . . . . . . 132
Weights . . . . . . . . . . . . . . . . . . . . . . . . . . . . . . . . . 318
Welcome light . . . . . . . . . . . . . . . . . . . . . . . . . . . . 149
What negatively affects driving safety? . . . . . . . . 73
Wheel balance . . . . . . . . . . . . . . . . . . . . . . . . . . . 308
Wheel bolts . . . . . . . . . . . . . . . . . . . . . . . . . . . . . . 319 anti-theft . . . . . . . . . . . . . . . . . . . . . . . . . . . . . . . 65
caps . . . . . . . . . . . . . . . . . . . . . . . . . . . . . . . . . . . 65
loosening . . . . . . . . . . . . . . . . . . . . . . . . . . . . . . 65
tightening torque . . . . . . . . . . . . . . . . . . . . . . . 311
Wheels . . . . . . . . . . . . . . . . . . . . . . . . . . . . 307, 319 central wheel trim . . . . . . . . . . . . . . . . . . . . . . . . 64
chains . . . . . . . . . . . . . . . . . . . . . . . . . . . . . . . . 319
changing . . . . . . . . . . . . . . . . . . . . . . . . . . . . 64, 66
new wheels . . . . . . . . . . . . . . . . . . . . . . . . . . . . 309
snow chains . . . . . . . . . . . . . . . . . . . . . . . . . . . . 67
temporary spare wheel . . . . . . . . . . . . . . . . . . 314
Wheel spanner . . . . . . . . . . . . . . . . . . . . . . . . . . . . 95
Wheel trim removing . . . . . . . . . . . . . . . . . . . . . . . . . . . . . . . 65
Windows electric . . . . . . . . . . . . . . . . . . . . . . . . . . . . 18, 139
removing ice . . . . . . . . . . . . . . . . . . . . . . . . . . . 288
Window wiper . . . . . . . . . . . . . . . . . . . . . . . . . . . . 153
Window wiper blade . . . . . . . . . . . . . . . . . . . . . . . . 32
Windscreen heated . . . . . . . . . . . . . . . . . . . . . . . . . . . . . . . . 175 windscreen and rear window wiper blades
chan ging . . . . . . . . . . . . . . . . . . . . . . . . . . . . . . . 71
cleaning . . . . . . . . . . . . . . . . . . . . . . . . . . . . . . . 71
Windscreen and rear window wiper blades . . . . . 97
Windscreen washer . . . . . . . . . . . . . . . . . . . 59, 153
Windscreen washer water capacity . . . . . . . . . . . . . . . . . . . . . . . . . . . . . . . 304
checking . . . . . . . . . . . . . . . . . . . . . . . . . . . . . . 304
topping up . . . . . . . . . . . . . . . . . . . . . . . . . . . . 304
Windscreen wiper and rear window wiper sys- tems
service position . . . . . . . . . . . . . . . . . . . . . . . . . 71
Windscreen wipers . . . . . . . . . . . . . . . . . . . . 32, 153 functions . . . . . . . . . . . . . . . . . . . . . . . . . . . . . . 153
headlight washer system . . . . . . . . . . . . . . . . . 153
heated windscreen washer jets . . . . . . . . . . . . 153
lifting the wiper blade . . . . . . . . . . . . . . . . . . . . 71
rain sensor . . . . . . . . . . . . . . . . . . . . . . . . . . . . 154
replacing the wiper blades . . . . . . . . . . . . . . . . 71
service position . . . . . . . . . . . . . . . . . . . . . . . . . 71
special characteristics . . . . . . . . . . . . . . . . . . . 153
window wiper lever . . . . . . . . . . . . . . . . . . . . . . 153
Winter conditions battery . . . . . . . . . . . . . . . . . . . . . . . . . . . . . . . . 305
defrosting the windows . . . . . . . . . . . . . . . . . . 288
diesel . . . . . . . . . . . . . . . . . . . . . . . . . . . . . . . . . 294
snow chains . . . . . . . . . . . . . . . . . . . . . . . . . . . . 67
taking care of your vehicle . . . . . . . . . . . . . . . . 285
tyres . . . . . . . . . . . . . . . . . . . . . . . . . . . . . . . . . . 315
Winter driving sunroof . . . . . . . . . . . . . . . . . . . . . . . . . . . . . . . 142
Winter operation headlight washers . . . . . . . . . . . . . . . . . . . . . . 154
heated windscreen washer jets . . . . . . . . . . . . 153
salt on the roads . . . . . . . . . . . . . . . . . . . . . . . . 154
Winter tyres . . . . . . . . . . . . . . . . . . . . . . . . . . . . . . 315 four-wheel drive . . . . . . . . . . . . . . . . . . . . . . . . 206
Wireless Charger . . . . . . . . . . . . . . . . . . . . . . . . . 123 X
XDS . . . . . . . . . . . . . . . . . . . . . . . . . . . . . . . . . . . . 190
341