service indicator Seat Cordoba 2007 Owner's Manual
[x] Cancel search | Manufacturer: SEAT, Model Year: 2007, Model line: Cordoba, Model: Seat Cordoba 2007Pages: 256, PDF Size: 7.75 MB
Page 30 of 256
Airbag system
28Monitoring of airbag and belt tension device system
The functionality of the airbag and belt tension device system is constantly
monitored electronically. The warning lamp
will light up for a few seconds
every time the ignition is switched on (self-diagnosis).
The system must be checked when the warning lamp
:
•
does not come on when the ignition is switched on,
•
does not go out about 4 seconds after the ignition is switched on,
•
goes out and then comes on again after the ignition is switched on,
•
or if it comes on or flickers while the car is moving.
In the event of a malfunction, the warning lamp remains on continuously.
Have the airbag system inspected immediately by a qualified workshop.
If any of the airbags are deactivated by the Authorised Service Centre, the
indicator lights for several seconds more after the veri fication and will turn off
if there is no fault.
WARNING
•
If there is a malfunction, the air bag and belt tension device system
cannot properly perform its protective function.
•
If a malfunction should occur, have the system checked immediately by
a qualified workshop. Otherwise there is a risk that, in the event of an acci-
dent, the airbag system and belt tension devices may not be triggered, or
may not be triggered correctly.
Repair, care and disposal of the airbagsThe parts of the airbag system are installed in various places in your vehicle.
If you work on the airbag system or remove and install parts of the system
when performing other repair work, parts of the airbag system may be damaged. The consequence may be that, in the event of an accident, the
airbag inflates incorrectly
or does not inflate at all.
The relevant safety requirements must be observed when the vehicle or
components of the airbag are scrapped. The specialist workshops and the
Vehicle disposal centres are familiar with these requirements.
WARNING
•
If repairs are not carried out by a professional, or if the airbags are used
incorrectly, the risk of severe or fatal injuries is increased. The airbags may
fail to inflate, or could inflate in the wrong circumstances.
•
Do not cover or stick anything on the steering wheel hub or the soft
plastic surface of the airbag unit on the passenger side of the dashboard,
and do not obstruct or modify them in any way.
•
It is important not to attach any objects such as cup holders or tele-
phone mountings to the surfaces covering the airbag units.
•
To clean the steering wheel or dash panel, you may use only a dry cloth
or one moistened with water. Never clean the dash panel and surface of the
airbag module with cleansers containing solvents. Solvents cause the
surface to become porous. If the airbag inflates, disintegrating plastic
parts can cause substantial injuries.
•
Never attempt to repair, adjust, remove or install parts of the airbag
system.
•
Any work on the airbag system or re moval and installation of the airbag
components for other repairs (such as repairs to the steering wheel) should
be performed only by a qualified workshop. Qualified workshops have the
necessary tools, repair information and qualified personnel.
•
We urgently recommend that you go to a qualified workshop for all work
on the airbag system.
•
Never attempt to alter the front bumper or the body.
•
The airbags provide protection for one accident only, if they have been
deployed they must be replaced.
cordoba_ingles_0706 Seite 28 Montag, 28. August 2006 1:18 13
Page 54 of 256
Cockpit
52
WARNING
When working in the engine compartment, always bear in mind the safety
warnings. ⇒page 172
Caution
Accessories in front of the air inlet reduce the cooling effect of the coolant. At
high outside temperatures and high engine loads, there is a risk of the
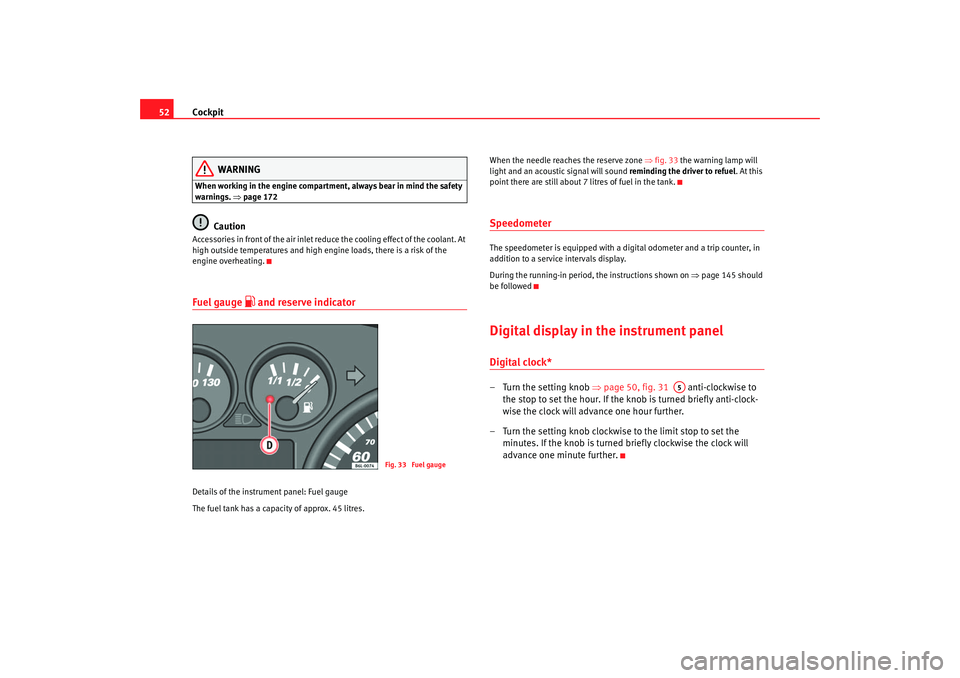
engine overheating.Fuel gauge
and reserve indicator
Details of the instrument panel: Fuel gauge
The fuel tank has a capacity of approx. 45 litres. When the needle reaches the reserve zone
⇒fig. 33 the warning lamp will
light and an acoustic signal will sound reminding the driver to refuel. At this
point there are still about 7 litres of fuel in the tank.
SpeedometerThe speedometer is equipped with a digital odometer and a trip counter, in
addition to a service intervals display.
During the running-in period, the instructions shown on ⇒page 145 should
be followedDigital display in the instrument panelDigital clock* – Turn the setting knob ⇒page 50, fig. 31 anti-clockwise to
the stop to set the hour. If the kn ob is turned briefly anti-clock-
wise the clock will advance one hour further.
– Turn the setting knob clockwise to the limit stop to set the minutes. If the knob is turned briefly clockwise the clock will
advance one minute further.
Fig. 33 Fuel gauge
A5
cordoba_ingles_0706 Seite 52 Montag, 28. August 2006 1:18 13
Page 58 of 256
Cockpit
56
NoteWhen the vehicle is stationary or travelling at very low speeds, the tempera-
ture displayed may be slightly higher than the actual ambient temperature as
a result of the heat radiated from the engine.Display field for selector lever position*The position of the automatic gearbox selector lever is shown on the display
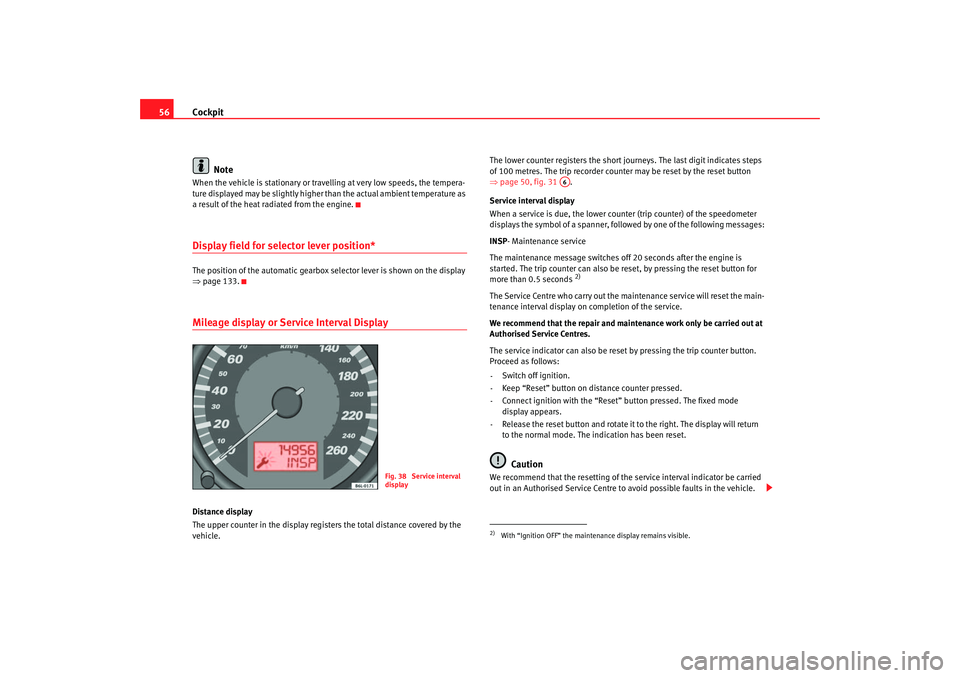
⇒page 133.Mileage display or Service Interval DisplayDistance display
The upper counter in the display registers the total distance covered by the
vehicle. The lower counter registers the short journeys. The last digit indicates steps
of 100 metres. The trip recorder counter may be reset by the reset button
⇒
page 50, fig. 31 .
Service interval display
When a service is due, the lower coun ter (trip counter) of the speedometer
displays the symbol of a spanner, followed by one of the following messages:
INSP- Maintenance service
The maintenance message switches off 20 seconds after the engine is
started. The trip counter can also be reset, by pressing the reset button for
more than 0.5 seconds
2)
The Service Centre who carry out the maintenance service will reset the main-
tenance interval display on completion of the service.
We recommend that the repair and main tenance work only be carried out at
Authorised Service Centres.
The service indicator can also be reset by pressing the trip counter button.
Proceed as follows:
Switch off ignition.
Keep “Reset” button on distance counter pressed.
Connect ignition with the “Reset” button pressed. The fixed mode
display appears.
Release the reset button and rotate it to the right. The display will return
to the normal mode. The indication has been reset.
Caution
We recommend that the resetting of the service interval indicator be carried
out in an Authorised Service Centre to avoid possible faults in the vehicle.
Fig. 38 Service interval
display
2)With “Ignition OFF” the mainte nance display remains visible.
A6
-
-
-
-
cordoba_ingles_0706 Seite 56 Montag, 28. August 2006 1:18 13
Page 80 of 256
Unlocking and locking
78
–Maximum time allowed for synchronising is 30 seconds.
– The normal key is used to activate the ignition, and the key with the remote control is the key to be programmed.
– Check that the car is open before commencing programming.
– Place the key without remote control in the contact inside the steering and ignition lock.
– Use the key with remote control and mechanically lock the vehicle from the driver’s door.
– Open and close the driver’s door lock mechanically, using the remote control key.
– At the same time press the button on the remote control key.
– Complete the procedure by removing the key from the contactIt is possible that the vehicle could no longer be opened and closed with the
remote control if the button is repeatedly pressed outside of the effective
range of the radio frequency remote cont rol. The remote control key will have
to be resynchronised.
Spare remote control keys are available from Authorised Service Centres, they
must be matched to the locking system.
Anti-theft alarm system*Description of anti-theft alarm system*
The anti-theft alarm triggers an alarm if unauthorised move-
ments are detected around the vehicle.The anti-theft alarm makes it more difficult to break into the vehicle or steal
it. Audible and visible alarms are triggered if the car is opened using the
mechanical key, or if unauthorised access is gained to the vehicle.
The anti-theft alarm system is automatically switched on when the vehicle is
locked. To lock the door either turn the key once in the lock towards the
locking position or press button on the radio-frequency remote
control*. The system is activated imme diately and the indicator light located
on the driver’s door will flash along with the indicators indicating that the
alarm and the locking security system (double lock) have been turned on.
When the vehicle is locked the indicator lamps light up only if the alarm has
been correctly activated (all the protection zones should be correctly closed).
If any of the doors or the bonnet are open, when the alarm is connected these
will not be included in the protection zones of the vehicle. If the door or
bonnet is subsequently closed, they wi ll automatically be included in the
vehicle protection zones and the indicators will flash accordingly.
When does the system trigger an alarm?
The alarm system is triggered, in the locked vehicle, when:•
a door
•
the bonnet or
•
the tailgate
are unduly opened
•
or the ignition is switched on
A1
A2
cordoba_ingles_0706 Seite 78 Montag, 28. August 2006 1:18 13
Page 155 of 256
Driving and the environment153
Safety First
Operating instructions
Tips and Maintenance
Te c h n i c a l D a t a
Note
•
Towing a trailer places additional demands on the vehicle. We recom-
mend additional services between the normal inspection intervals if the
vehicle is used frequently for towing a trailer.
•
Find out whether special regulations apply to towing a trailer in your
country.
Ball coupling of towing bracket*
The ball coupling of the towing bracket is located in the tool
boxThe ball coupling is provided with instructions on fitting and removing the
ball coupling of the towing bracket.
WARNING
The towing bracket ball coupling must be stored securely in the luggage
compartment to prevent them being flung through the vehicle and causing
injury.
Note
•
By law, the ball coupling must be re moved if a trailer is not being towed
and it obscures the number plate.
Driving tips
Driving with a trailer always requires extra care.Weight distribution
The weight distribution of a loaded trailer with an unladen vehicle is very
unfavourable. However, if this cannot be avoided, drive extra slowly to allow
for the unbalanced we ight distribution.
Speed
The stability of the vehicle and trailer is reduced with increasing speed. For
this reason it is advisable not to drive at the maximum permissible speed in
unfavourable road, weather or wind conditions. This applies especially when
driving downhill.
You should always reduce speed immediately if the trailer shows the slightest
sign of snaking . Never try to stop the “s naking” by increasing speed.
Always brake in good time. If the trailer has an overrun brake, apply the
brakes gently at first and then firmly. This will pr event the jerking that can be
caused by the trailer wheel s locking. Select a low gear in good time before
going down a steep descent. This enables you to use the engine braking to
slow down the vehicle.
Heating
At very high temperatures and during prolonged ascents, driving in a low gear
and high engine speed, always monitor the temperature indicator for the
coolant ⇒page 49.
Electronic Stabilisation programme*
Do not switch off the ESP* when towing a trailer. The ESP* makes it easier to
stabilise if the trailer starts to snake.
cordoba_ingles_0706 Seite 153 Montag, 28. August 2006 1:18 13
Page 190 of 256
Checking and refilling levels
188Checking tyre pressure
The correct tyre pressure can be seen on the sticker on the
inside of the tank flap.1. Read the required tyre inflation pressure from the sticker. The
values refer to Summer tyres. For Winter tyres, you must add 0.2
bar to the values given on the sticker.
2. The tyre pressures should only be checked when the tyres are cold. The slightly raised pressures of warm tyres must not be
reduced.
3. Adjust the tyre pressure to the load you are carrying.Tyre pressure
The correct tyre pressure is especially important at high speeds. The pressure
should therefore be checked at least once a month and before starting a
journey.
WARNING
A tyre can easily burst if the pressure is too low, causing an accident!•
At continuously high speeds, a tyre with insufficient pressure flexes
more. In this way it becomes too hot, and this can cause tread separation
and tyre blow-out. Always observ e the recommended tyre pressures.
•
If the tyre pressure is too low or too high, the tyres will wear prema-
turely and the vehicle will not h andle well. Risk of accident!For the sake of the environment
Under-inflated tyres will increase fuel consumption.
Tyre service life
The service life of tyres is dependent on tyre pressure, driving
style and fitting.
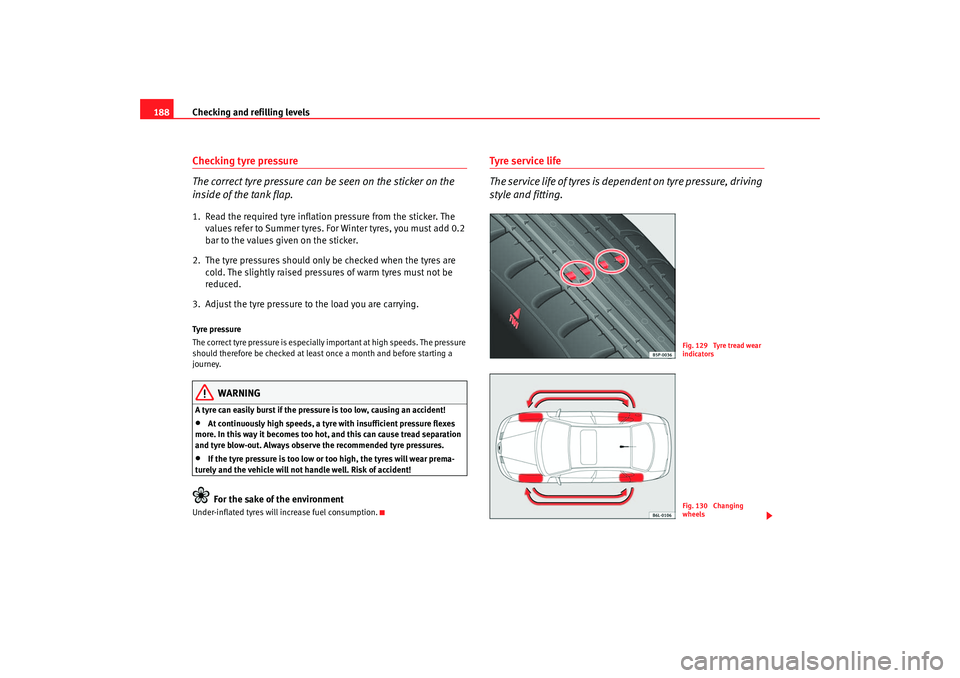
Fig. 129 Tyre tread wear
indicatorsFig. 130 Changing
wheels
cordoba_ingles_0706 Seite 188 Montag, 28. August 2006 1:18 13
Page 191 of 256
Checking and refilling levels189
Safety First
Operating instructions
Tips and Maintenance
Te c h n i c a l D a t a
Wear indicators
The original tyres on your vehicle have 1.6 mm high “tread wear indicators”
⇒
page 188, fig. 129 running across the tread. Depending on the ma ke, there
will be six to eight of them evenly spaced around the tyre. Markings on the
tyre sidewall (for instance the letters “TWI” or other symbols) indicate the
positions of the tread wear indicators. The minimum tread depth required by
law is 1.6 mm (measured in the tread grooves next to the tread wear indica-
tors). Worn tyres must be replaced. Different figures may apply in export
countries ⇒.
Tyre pressure
Incorrect tyre pressure causes premature wear and could cause tyre blow-out.
For this reason, the tyre pressure should be checked at least once per month
⇒ page 188.
Driving style
Fast cornering, heavy acceleration and hard braking all increase tyre wear.
Changing wheels around
If the front tyres are worn considerably more than the rear ones it is advisable
to change them around as shown ⇒page 188, fig. 130 . All the tyres will then
last for about the same time.
Wheel balance
The wheels on new vehicles are balanced. However, various factors encoun-
tered in normal driving can cause them to become unbalanced, which results
in steering vibration.
Unbalanced wheels should be rebalanced, as they otherwise cause excessive
wear on steering, suspension and tyres. A wheel must also be rebalanced
when a new tyre is fitted.
Incorrect wheel alignment
Incorrect wheel alignment causes excessive tyre wear, impairing the safety of
the vehicle. If tyres show excessive wear, you should have the wheel align-
ment checked by an Authorised Service Centre.
WARNING
There is a serious danger of accidents if a tyre bursts during driving!•
The tyres must be replaced at the latest when the tread is worn down to
the tread wear indicators. Failure to do so could result in an accident. Worn
tyres do not grip well at high speeds on wet roads. There is also a greater
risk of “aquaplaning”.
•
At continuously high speeds, a tyre with insufficient pressure flexes
more. This causes it to overheat. This can cause tread separation and tyre
blow-out. Risk of accident. Always observe the recommended tyre pres-
sures.
•
If tyres show excessive wear, you should have the running gear checked
by an Authorised Service Centre.
•
Keep chemicals such as oil, fuel and brake fluid away from tyres.
•
Damaged wheels and tyres must be replaced immediately!For the sake of the environment
Under-inflated tyres will increase fuel consumption.New tyres and wheels
New tyres and wheels have to be run-in.The tyres and wheel rims are an essential part of the vehicle’s design. The
tyres and rims approved by SEAT are specially matched to the characteristics
of the vehicle and make a major contribution to good road holding and safe
handling ⇒.
Tyres should be replaced at least in pair s and not individually (i.e. both front
tyres or both rear tyres together). A knowledge of tyre designations makes it
cordoba_ingles_0706 Seite 189 Montag, 28. August 2006 1:18 13
Page 253 of 256
Index251
TTailgate . . . . . . . . . . . . . . . . . . . . . . . . . . . . . . . . . 81
Tank
fuel level . . . . . . . . . . . . . . . . . . . . . . . . . . . . . 52
reserve indicator . . . . . . . . . . . . . . . . . . . . . . 52
tank capacity . . . . . . . . . . . . . . . . . . . . . . . . . 52
TCS . . . . . . . . . . . . . . . . . . . . . . . . . . . . . . . . . . . 142
TCS (Traction control system) Warning lamp . . . . . . . . . . . . . . . . . . . . . . . . . 64
The danger of not using the seat belt . . . . . . . . 19
Tightening torque of wheel bolts . . . . . . . . . . . 229
Tools . . . . . . . . . . . . . . . . . . . . . . . . . . . . . . . . . . 193
Towing . . . . . . . . . . . . . . . . . . . . . . . . . . . . . . . . 221
Towing a trailer . . . . . . . . . . . . . . . . . . . . 152, 228
Towing bracket . . . . . . . . . . . . . . . . . . . . . . . . . . 153
Towing bracket, fitting . . . . . . . . . . . . . . . . . . . 167
Towing eye . . . . . . . . . . . . . . . . . . . . . . . . . . . . . 221
Tow-starting . . . . . . . . . . . . . . . . . . . . . . . . . . . . 221
Traction control system warning lamp . . . . . . . . . . . . . . . . . . . . . . . . . 64
Trailer turn signals Indicator lamps . . . . . . . . . . . . . . . . . . . . . . . 65
Warning lamp . . . . . . . . . . . . . . . . . . . . . . . . . 91
Trailer weights . . . . . . . . . . . . . . . . . . . . . . . . . . 228
Trips, checklist . . . . . . . . . . . . . . . . . . . . . . . . . . . . 8
Turn signals . . . . . . . . . . . . . . . . . . . . . . . . . . . . . 90 Warning lamp . . . . . . . . . . . . . . . . . . . . . . 61, 91
Two-way radio . . . . . . . . . . . . . . . . . . . . . . . . . . 166
Type plate . . . . . . . . . . . . . . . . . . . . . . . . . . . . . . 226 Tyre Mobility-System (Tyre repair kit) . . . 194, 200
Tyre pressure . . . . . . . . . . . . . . . . . . . . . . . . . . . 188
Tyre pressures . . . . . . . . . . . . . . . . . . . . . . . . . . 228
Tyre repair kit . . . . . . . . . . . . . . . . . . . . . . 194, 200
Tyres and wheels
Dimensions . . . . . . . . . . . . . . . . . . . . . . . . . 189
Tyres service life . . . . . . . . . . . . . . . . . . . . . . . . 188
Tyres tread depth . . . . . . . . . . . . . . . . . . . . . . . . 189
Tyres with directional tread pattern . . . . . . . . . 187
UUnderbody sealant . . . . . . . . . . . . . . . . . . . . . . 161
USB* connection . . . . . . . . . . . . . . . . . . . . . . . . 111VVehicle battery . . . . . . . . . . . . . . . . . . . . . . . . . . 185
Vehicle data . . . . . . . . . . . . . . . . . . . . . . . . . . . . 226
Vehicle identification data . . . . . . . . . . . . . . . . 226
Vehicle identification number . . . . . . . . . . . . . 226
Vehicle interior heating or cooling system . . . 118
Vehicle paint Car care products . . . . . . . . . . . . . . . . . . . . . 156
Vehicle tools Storage . . . . . . . . . . . . . . . . . . . . . . . . . . . . . 193
Vehicle wallet storage . . . . . . . . . . . . . . . . . . . . 106
Ventilation . . . . . . . . . . . . . . . . . . . . . . . . . . . . . 115
Ventilation slits . . . . . . . . . . . . . . . . . . . . . . . . . . 15 Volumetric sensor*
Activation . . . . . . . . . . . . . . . . . . . . . . . . . . . . 79
Deactivation . . . . . . . . . . . . . . . . . . . . . . . . . . 79
WWarning lamp . . . . . . . . . . . . . . . . . . . . . . . . . . . 27
Warning lamps . . . . . . . . . . . . . . . . . . . . . . . . . . . 58
Warning triangles . . . . . . . . . . . . . . . . . . . . . . . 111
Washer fluid . . . . . . . . . . . . . . . . . . . . . . . . . . . . 181
Washing by hand . . . . . . . . . . . . . . . . . . . . . . . . 157
Washing the vehicle . . . . . . . . . . . . . . . . . . . . . 157
Washing with high pressure cleaners . . . . . . . 158
Water in the windscreen washer tank . . . . . . . 181
Wear indicators . . . . . . . . . . . . . . . . . . . . . . . . . 189
Wheel bolts . . . . . . . . . . . . . . . . . . . . . . . 197, 229Torque . . . . . . . . . . . . . . . . . . . . . . . . . . . . . 190
Wheel change . . . . . . . . . . . . . . . . . . . . . . . . . . 194
Wheel trims . . . . . . . . . . . . . . . . . . . . . . . . . . . . 196
Wheels . . . . . . . . . . . . . . . . . . . . . . . . . . . 187, 228
Why assume the correct sitting position? . . . . . 26
Why should head restraints be correctly adjusted? 12
Why wear seat belts? . . . . . . . . . . . . . . . . . . . 16, 18
Why wear seatbelts? . . . . . . . . . . . . . . . . . . . . . . 26
Windows . . . . . . . . . . . . . . . . . . . . . . . . . . . . . . . . 82
Windscreen . . . . . . . . . . . . . . . . . . . . . . . . . . . . . 96
Windscreen defrosting . . . . . . . . . . . . . . . . . . . 115
Windscreen wiper blades Cleaning . . . . . . . . . . . . . . . . . . . . . . . . . . . . 160
cordoba_ingles_0706 Seite 251 Montag, 28. August 2006 1:18 13