snow chains Seat Cordoba 2007 Owner's Manual
[x] Cancel search | Manufacturer: SEAT, Model Year: 2007, Model line: Cordoba, Model: Seat Cordoba 2007Pages: 256, PDF Size: 7.75 MB
Page 128 of 256
Driving
126•
Adjust the driver seat or steering wheel so that there is a distance of at
least 25 cm between the steering wheel and your chest ⇒ page 125,
fig. 93. If you fail to observe the minimum distance, the airbag will not
protect you. Risk of fatal injury.
•
If your physical constitution prevents you from maintaining the
minimum distance of 25 cm, contact an Authorised Service Centre. The
Authorised Service Centre will help you decide if special specific modifica-
tions are necessary.
•
If you adjust the steering wheel so tha t it points towards your face, the
driver airbag will not protect you properly in the event of an accident. Make
sure that the steering wheel points towards your chest.
•
When driving, always hold the steer ing wheel with both hands on the
outside of the ring at the 9 o’clock and 3 o’clock positions. Never hold the
steering wheel at the 12 o’clock positi on, or in any other manner (e.g. in
the centre of the steering wheel, or on the inside of the rim). In such cases,
you could receive severe injuries to the arms, hands and head.
SafetyElectronic stabilisation programme (ESP)*
ESP helps make driving safer in certain situations.The Electronic Stabilisation programme (ESP) contains the electronic differ-
ential lock (EDL) and the traction co ntrol system (TCS). The ESP function
works in conjunction with the ABS. Both warning lamps will light up if the ESP
or ABS systems are faulty.
The ESP is started automatically when the engine is started.
In specific circumstances where you require less traction, you can switch off
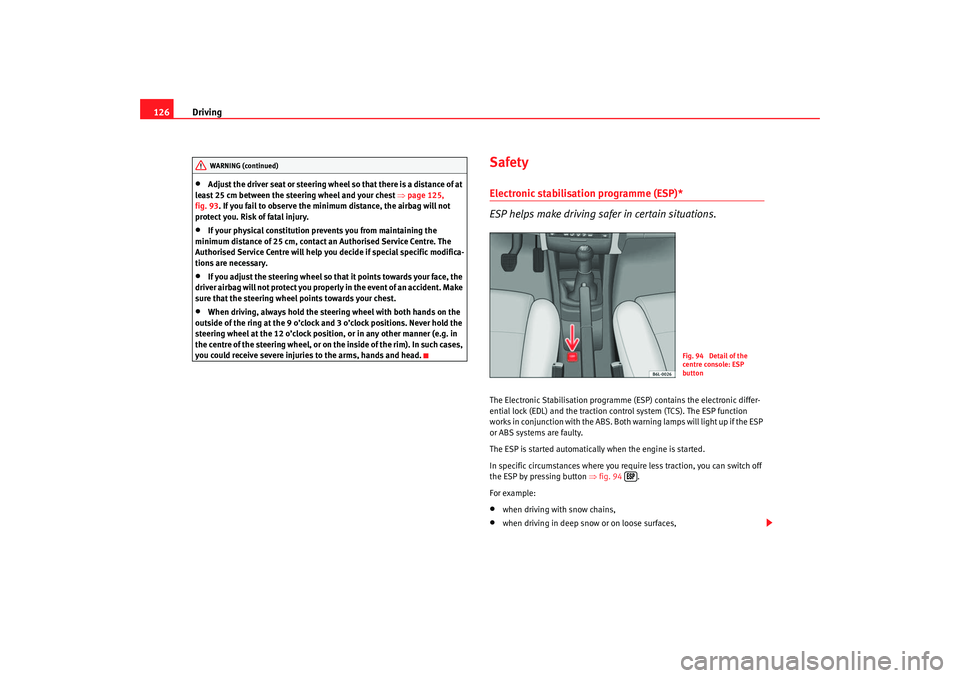
the ESP by pressing button ⇒fig. 94 .
For example:•
when driving with snow chains,
•
when driving in deep snow or on loose surfaces,
WARNING (continued)
Fig. 94 Detail of the
centre console: ESP
button
cordoba_ingles_0706 Seite 126 Montag, 28. August 2006 1:18 13
Page 144 of 256
Intelligent technology
142Anti-lock brake system and traction control
ABSAnti-lock brake system (ABS)
The anti-lock brake system prevents the wheels locking
during braking.The anti-lock brake system (ABS) is an important part of the vehicle’s active
safety system.
How the ABS works
If one of the wheels turns too slowly in relation to the road speed, and is close
to locking, the system will reduce the braking pressure for this wheel. The
driver is made aware of this control process by a pulsating of the brake pedal
and audible noise. This is a deliberate warning to the driver that one or more
of the wheels is tending to lock and the ABS control function has intervened.
In this situation it is important to keep the brake pedal fully depressed so the
ABS can regulate the brake application. Do not “pump”.
If you brake hard on a slippery road surface, the best possible control is
retained as the wheels do not lock.
However, ABS will not necessarily guarantee shorter braking distances in all
conditions. The braking distance could even be longer if you brake on gravel
or on fresh snow covering a slippery surface.
WARNING
•
The anti-lock brake system cannot defy the laws of physics. Slippery
and wet roads are dangerous even with ABS! If you notice that the ABS is
working (to counteract locked wheels under braking), you should reduce
speed immediately to suit the road and traffic conditions. Do not let the
extra safety features tempt you into taking any risks when driving.
•
The effectiveness of ABS is also determined by the tyres fitted
⇒ page 187.
•
If the running gear or brakes are mo dified, the effectiveness of the ABS
could be severely limited.
Traction control system (TCS)*
The traction control system prevents the drive wheels from
spinning when the car is acce lerating. The system always
includes ABS.Description and operation of the traction control system during acceleration
(TCS)
TCS reduces engine power to help prevent the drive wheels of front-wheel
drive vehicles losing traction during acceleration. The system works in the
entire speed range in conjunction with ABS. If a malfunction should occur in
the ABS, the TCS will also be out of action.
TCS helps the vehicle to start moving, accelerate and climb a gradient in slip-
pery conditions where this may otherwise be difficult or even impossible.
The TCS is switched on automatically when the engine is started. If necessary,
it may be turned on or off pushing the button on the centre console.
When the TCS is off, the warning lamp is lit. The TCS should normally be left
switched on at all times. Only in exceptional circumstances, when slipping of
the wheels is required, should it be disconnected, for example•
With compact temporary spare wheel.
•
When using the snow chains.
•
When driving in deep snow or on loose surfaces.
•
When the vehicle is bogged-down, to free it by “rocking.”WARNING (continued)
cordoba_ingles_0706 Seite 142 Montag, 28. August 2006 1:18 13
Page 194 of 256

Checking and refilling levels
192Snow chainsSnow chains are only permitted on th e front wheels and only for tyres 155/80
R13; 165/70 R14 and 185/80 R14. Snow chains must have fine-pitch links
which do not protrude more than 15 mm, including tension device.
Remaining tyres can be fitted with chains no thicker than 9 mm.
Remove wheel hub covers and trim rings before fitting snow chains. For safety
reasons cover caps, available in any Authorised Service Centre, must then be
fitted over the wheel bolts.
WARNING
Observe the fitting instructions provided by the snow chain manufacturer.
Caution
You must remove the snow chains to drive on roads which are free of snow.
Otherwise they will impair handling, damage the tyres and wear out very
quickly.
Note
In some countries, the speed limit for using snow chains is 50 km/h. The legal
requirements of the country should be followed.
cordoba_ingles_0706 Seite 192 Montag, 28. August 2006 1:18 13
Page 196 of 256
If and when
194Snow chains
For technical reasons, snow chains must not be used on the compact tempo-
rary spare wheel.
If you should have a puncture on one of the front wheels when using snow
chains, fit the compact temporary spare in place of one of the rear wheels.
You can then attach the snow chains to the wheel taken from the rear and use
this wheel to replace the punctured front wheel.
WARNING
•
The tyre pressures must be checked and corrected as soon as possible.
•
Do not drive faster than 80 km/h. H igher speeds can cause an accident.
•
Avoid heavy acceleration, hard brakin g and fast cornering, risk of acci-
dent.
•
Never use two or more compact spare tyres at the same time, risk of
accident.
•
No other type of tyre (normal summer or winter tyre) may be fitted on
the compact temporary spare wheel rim.
Tyre repair kit*
The tyre repair kit (for vehicles not including a spare wheel) is
stored under the floor panel in the luggage compartment.Your vehicle is equipped with the Tyre Mobility System “Tyre repair kit”.
The tyre repair kit consists of a container with sealing compound to repair the
puncture and a compressor to generate the required tyre pressure. The kit will
reliably seal punctures up to a size of about 4 mm caused by the penetration
of a foreign body into the tyre.
Note
•
Seek professional assistance if the repair of a tyre puncture is not
possible with the sealing compound.
Wheel changePreparation work
What you must do before changing a wheel.– If you have a flat tyre or puncture, park the vehicle as far away from the flow of traffic as possible. Choose a location that is as
level as possible.
– All passengers should leave the vehicle. They should wait in a
safe area (for instance behind the roadside crash barrier).
– Switch off the engine. Switch on the hazard warning lights.
–Apply the handbrake firmly.
– Engage the first gear, or put the selector lever to position P for
those vehicles with an automatic gearbox.
– If you are towing a trailer, unhitch it from your vehicle.
–Take the vehicle tools and the spare wheel out of the luggage
compartment.
cordoba_ingles_0706 Seite 194 Montag, 28. August 2006 1:18 13
Page 230 of 256
General notes on the technical data
228WeightsKerb weight refers to the basic model with a fuel tank filled to 90% capacity
and without optional extras. The figure quoted includes 75 kg to allow for the
weight of the driver.
For special versions and optional equipment fittings or for the addition of
accessories, the weight of the vehicle will increase ⇒.
WARNING
•
Please note that the centre of gravity may shift when transporting
heavy objects; this may affect the vehicle’s handling and lead to an acci-
dent. Always adjust your speed and dr iving style to suit road conditions
and requirements.
•
Never exceed the gross axle weight rating or the gross vehicle weight
rating. If the allowed axle load or the allowed total weight is exceeded, the
driving characteristics of the vehicle may change, leading to accidents,
injuries and damage to the vehicle.
To w i n g a t r a i l e rTrailer weightsTrailer weights
The trailer weights and drawbar loads approved are selected in intensive
trials according to precisely defined criteria. The approved trailer weights are
valid for vehicles in EU for maximum speeds of 80 km/h (in certain circum-
stances up to 100 km/h). The figures may be different in other countries. All
data in the official vehicle documents take precedence over these data ⇒. Drawbar load
The
maximum permitted weight exerted by the trailer drawbar on the ball joint
of the towing bracket must not exceed 75 kg.
In the interest of road safety, we recommend that you always tow
approaching the maximum drawbar load. The response of the trailer on the
road will be poor if th e drawbar load is too small.
If the maximum permissible drawbar load cannot be met (e.g. with small,
empty and light-weight single axle trailers or tandem axle trailers with an axle
base of less than 1 metre), at least 4% of the actual trailer weight is a legal
stipulation for a drawbar load.
WARNING
•
For safety reasons, you should not drive at speeds above 80 km/h when
towing a trailer. This also applies to countries where higher speeds are
permitted.
•
Never exceed the maximum trailer weights or the draw bar loading. If
the permissible axle load or the perm issible total weight is exceeded, the
driving characteristics of the vehicle may change, leading to accidents,
injuries and damage to the vehicle.
WheelsTyre pressure, snow chains, wheel boltsTyre pressures
The sticker with the tyre pressure values can be found on the inside of the
tank flap. The tyre pressure values given there are for cold tyres. The slightly
raised pressures of warm tyres must not be reduced ⇒.
cordoba_ingles_0706 Seite 228 Montag, 28. August 2006 1:18 13
Page 231 of 256
General notes on the technical data 229
Safety First
Operating instructions
Tips and Maintenance
Te c h n i c a l D a t a
Snow chains
Snow chains are only permitted on the front wheels and only for tyres 155/80
R13; 165/70 R14 and 185/80 R14. Snow ch
ains must have fine-pitch links
which do not protrude more than 15 mm, including tension device.
Remaining tyres can be fitted with chains no thicker than 9 mm.
Wheel bolts
After the wheels have been changed, the tightening torque of the wheel bolts
should be checked as soon as possible with a torque wrench ⇒. The tight-
ening torque for steel and alloy wheels is 120 Nm.
WARNING
•
Check the tyre pressure at least once per month. Correct tyre pressure
is very important. If the tyre pressure is too high or too low, there is an
increased danger of accidents, particularly at high speeds.
•
If the torque of the wheel bolts is too low, they could loosen whilst the
vehicle is in motion. Risk of accident! If the tightening torque is too high,
the wheel bolts and threads could be damaged.Note
We recommend that you ask your Authorised Service Centre for information
about appropriate wheel, tyre and snow chain size.
cordoba_ingles_0706 Seite 229 Montag, 28. August 2006 1:18 13
Page 252 of 256
Index
250Roll-back function
Sliding/tilting roof . . . . . . . . . . . . . . . . . . . . 86
Windows . . . . . . . . . . . . . . . . . . . . . . . . . . . . 84
Roof aerial* . . . . . . . . . . . . . . . . . . . . . . . . . . . . 166
Roof carrier* . . . . . . . . . . . . . . . . . . . . . . . . . . . . 113
Rubber seals . . . . . . . . . . . . . . . . . . . . . . . . . . . 160
Running-in Brake pads . . . . . . . . . . . . . . . . . . . . . . . . . . 145
Engine . . . . . . . . . . . . . . . . . . . . . . . . . . . . . 145
Tyres . . . . . . . . . . . . . . . . . . . . . . . . . . . . . . . 145
Running-in tyres . . . . . . . . . . . . . . . . . . . . . . . . 145SSafe driving . . . . . . . . . . . . . . . . . . . . . . . . . . . . . . 7
Safety . . . . . . . . . . . . . . . . . . . . . . . . . . . . . . . . . . . 8
Safety equipment . . . . . . . . . . . . . . . . . . . . . . . . . 7
Safety instructions Coolant temperature . . . . . . . . . . . . . . . . . . . 62
Safety notes Belt tension devices . . . . . . . . . . . . . . . . . . . 25
Curtain airbags . . . . . . . . . . . . . . . . . . . . . . . 37
Disabling front passenger airbag . . . . . . . . 40
Front airbags . . . . . . . . . . . . . . . . . . . . . . . . . 32
Side airbags . . . . . . . . . . . . . . . . . . . . . . . . . 35
Using child seats . . . . . . . . . . . . . . . . . . . . . . 41
Using seat belts . . . . . . . . . . . . . . . . . . . . . . 20
Safety system- safe . . . . . . . . . . . . . . . . . . . . . . . 69
Seals . . . . . . . . . . . . . . . . . . . . . . . . . . . . . . . . . 160
Seat adjustment . . . . . . . . . . . . . . . . . . . . 100, 103 Seat belt position
Pregnant women . . . . . . . . . . . . . . . . . . . . . . 23
Seat belts . . . . . . . . . . . . . . . . . . . . . . . . . . . . 22
Seat belt release . . . . . . . . . . . . . . . . . . . . . . . . . 24
Seat belt warning lamp . . . . . . . . . . . . . . . . . . . . 16
Seat belts . . . . . . . . . . . . . . . . . . . . . . . . . . . . . . . 16 adjustment . . . . . . . . . . . . . . . . . . . . . . . . . . 21
Incorrectly fastened . . . . . . . . . . . . . . . . . . . 24
Not worn . . . . . . . . . . . . . . . . . . . . . . . . . . . . 19
Safety notes . . . . . . . . . . . . . . . . . . . . . . . . . . 20
Warning lamp . . . . . . . . . . . . . . . . . . . . . . . . 16
Seat belts protect . . . . . . . . . . . . . . . . . . . . . . . . 20
Seat heating . . . . . . . . . . . . . . . . . . . . . . . . . . . 104
Seats . . . . . . . . . . . . . . . . . . . . . . . . . . . . . . . . . . 16
Selective opening* . . . . . . . . . . . . . . . . . . . . . . . 70
Semiautomatic air conditioning controls . . . . . . . . . . . . . . . . . . . . . . . . . . . . 117
Shoes . . . . . . . . . . . . . . . . . . . . . . . . . . . . . . . . . . 14
Side airbags . . . . . . . . . . . . . . . . . . . . . . . . . . . . 32 Description . . . . . . . . . . . . . . . . . . . . . . . . . . 32
Function . . . . . . . . . . . . . . . . . . . . . . . . . . . . . 34
Safety notes . . . . . . . . . . . . . . . . . . . . . . . . . . 35
Side lights . . . . . . . . . . . . . . . . . . . . . . . . . . . . . . 87
Sitting position Driver . . . . . . . . . . . . . . . . . . . . . . . . . . . . . . . . 9
Front passenger . . . . . . . . . . . . . . . . . . . . . . 10
Incorrect sitting position . . . . . . . . . . . . . . . 13
Passengers . . . . . . . . . . . . . . . . . . . . . . . . . . 11
Sitting position, occupants . . . . . . . . . . . . . . . . . 9
Sliding/tilting roof . . . . . . . . . . . . . . . . . . . . . . . 85
Snow chains . . . . . . . . . . . . . . . . . . . . . . . 192, 229 Soot accumulation in the
diesel engine particulate
filter *
Indicator . . . . . . . . . . . . . . . . . . . . . . . . . . . . 64
Spare wheel* . . . . . . . . . . . . . . . . . . . . . . . . . . . 193
Speedometer . . . . . . . . . . . . . . . . . . . . . . . . . . . . 52
Starting Petrol engines . . . . . . . . . . . . . . . . . . . 129
Starting the engine . . . . . . . . . . . . . . . . . . 128, 129 After the fuel tank has been run dry . . . . . 130
Steam cleaners . . . . . . . . . . . . . . . . . . . . . . . . . 158
Steering . . . . . . . . . . . . . . . . . . . . . . . . . . . . . . . 125 Steering lock . . . . . . . . . . . . . . . . . . . . . . . . 127
Steering wheel controls . . . . . . . . . . . . . . . . . . . 66
Steering wheel height adjustment . . . . . . . . . 125
Stowage frnt right seats . . . . . . . . . . . . . . . . . . . . . . . 107
Stowage compartment Front passenger side . . . . . . . . . . . . . . . . . 106
Sun visors . . . . . . . . . . . . . . . . . . . . . . . . . . . . . . 93
Sunroof . . . . . . . . . . . . . . . . . . . . . . . . . . . . . . . . 85
Sunroof blind Sliding/tilting roof . . . . . . . . . . . . . . . . . . . . 85
Switch Hazard warning lights . . . . . . . . . . . . . . . . . . 89
Rear window heating . . . . . . . . . . . . . . . . . . 88
Switches electric windows . . . . . . . . . . . . . . . . . . . . . . 82
Sliding/tilting roof . . . . . . . . . . . . . . . . . . . . 85
Switching off the engine . . . . . . . . . . . . . . . . . 130
cordoba_ingles_0706 Seite 250 Montag, 28. August 2006 1:18 13