tow Seat Cordoba 2008 Owner's Guide
[x] Cancel search | Manufacturer: SEAT, Model Year: 2008, Model line: Cordoba, Model: Seat Cordoba 2008Pages: 258, PDF Size: 7.87 MB
Page 108 of 258
Seats and stowage
106
WARNING
•
Never adjust the driver or front passenger seat while the vehicle is in
motion. While adjusting your seat, you will assume an incorrect sitting
position. Risk of fatal accidents. Adju st the driver or front passenger seat
only when the vehicle is stationary.
•
To reduce the risk of injury to the driver and front passenger during
sudden braking manoeuvres or an accident, never drive with the backrest
tilted far to the rear. The maximum protection of the seat belt can be
achieved only when the backrests are in an upright position and the driver
and front passenger have properly adjusted their seat belts. The further
the backrests are tilted to the rear, the greater the risk of injury due to
improper positioning of the belt web!
•
Exercise caution when adjusting the seat height or forwards/back-
wards position. Injuries can be caused if the backrest is tilted without due
care and attention.
Heated seats*
The front seat cushions and backrests can be heated electri-
cally.
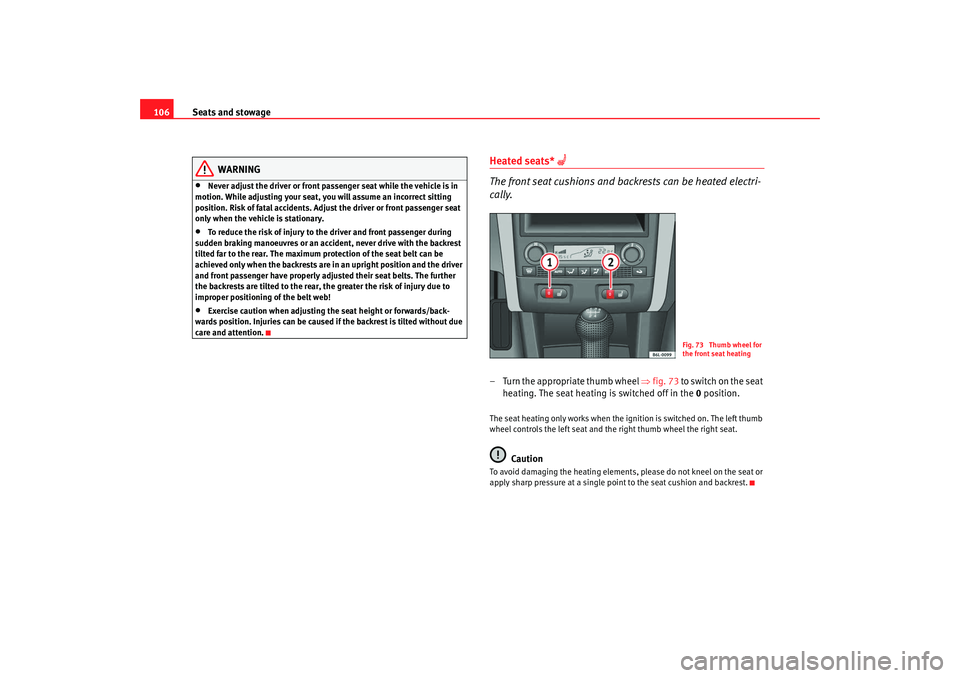
– Turn the appropriate thumb wheel ⇒fig. 73 t o s wi t ch o n t h e s e a t
heating. The seat heating is switched off in the 0 position.The seat heating only works when the ignition is switched on. The left thumb
wheel controls the left seat and the right thumb wheel the right seat.
Caution
To avoid damaging the heating elements, please do not kneel on the seat or
apply sharp pressure at a single point to the seat cushion and backrest.
Fig. 73 Thumb wheel for
the front seat heating
COR_ING_0707 Seite 106 Mittwoch, 1. August 2007 6:25 18
Page 109 of 258
Seats and stowage107
Safety First
Operating instructions
Tips and Maintenance
Te c h n i c a l D a t a
Rear seat benchFolding down rear seats
Folding seat down
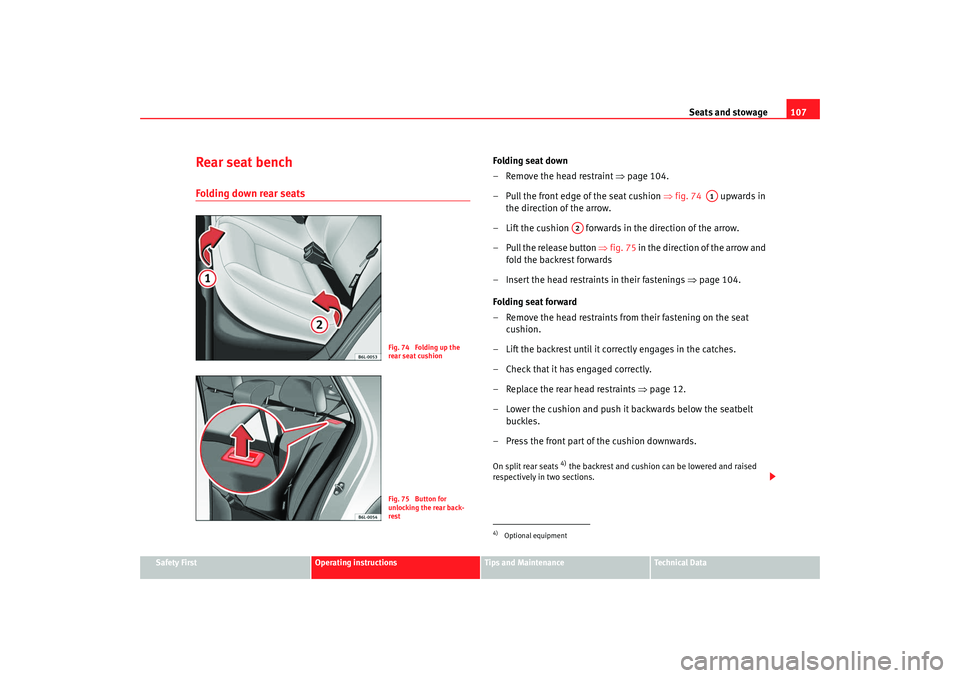
– Remove the head restraint ⇒page 104.
– Pull the front edge of the seat cushion ⇒fig. 74 upwards in
the direction of the arrow.
– Lift the cushion forwards in the direction of the arrow.
– Pull the release button ⇒ fig. 75 in the direction of the arrow and
fold the backrest forwards
– Insert the head restraints in their fastenings ⇒page 104.
Folding seat forward
– Remove the head restraints from their fastening on the seat cushion.
– Lift the backrest until it correctly engages in the catches.
– Check that it has engaged correctly.
– Replace the rear head restraints ⇒page 12.
– Lower the cushion and push it backwards below the seatbelt buckles.
– Press the front part of the cushion downwards.On split rear seats
4) the backrest and cushion can be lowered and raised
respectively in two sections.
Fig. 74 Folding up the
rear seat cushionFig. 75 Button for
unlocking the rear back-
rest
4)Optional equipment
A1
A2
COR_ING_0707 Seite 107 Mittwoch, 1. August 2007 6:25 18
Page 110 of 258
Seats and stowage
108
WARNING
•
Please be careful when folding back the backrest! Injuries can be
caused if the backrest is tilted without due care and attention.
•
Do no trap or damage seatbelts when raising the backrest.
•
After raising the backrest, check it has engaged properly in position.
•
The three point automatic seat belt only works correctly when the back-
rest of the central seat is correctly engaged.
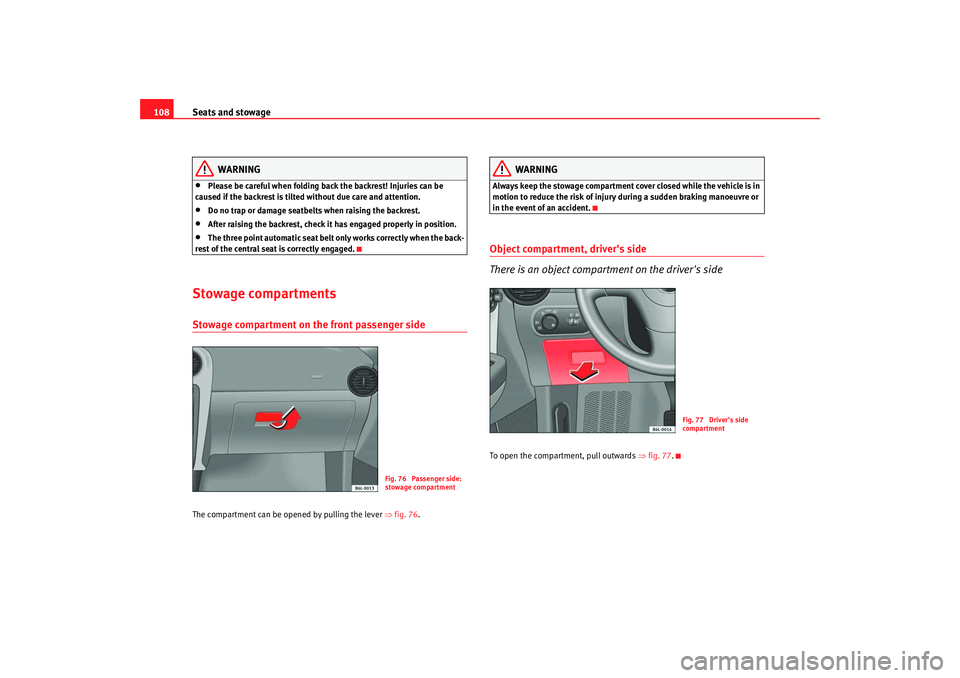
Stowage compartmentsStowage compartment on the front passenger sideThe compartment can be opened by pulling the lever ⇒fig. 76 .
WARNING
Always keep the stowage compartment co ver closed while the vehicle is in
motion to reduce the risk of injury during a sudden braking manoeuvre or
in the event of an accident.Object compartment, driver's side
There is an object compartment on the driver's sideTo open the compartment, pull outwards ⇒ fig. 77.
Fig. 76 Passenger side:
stowage compartment
Fig. 77 Driver's side
compartment
COR_ING_0707 Seite 108 Mittwoch, 1. August 2007 6:25 18
Page 111 of 258
Seats and stowage109
Safety First
Operating instructions
Tips and Maintenance
Te c h n i c a l D a t a
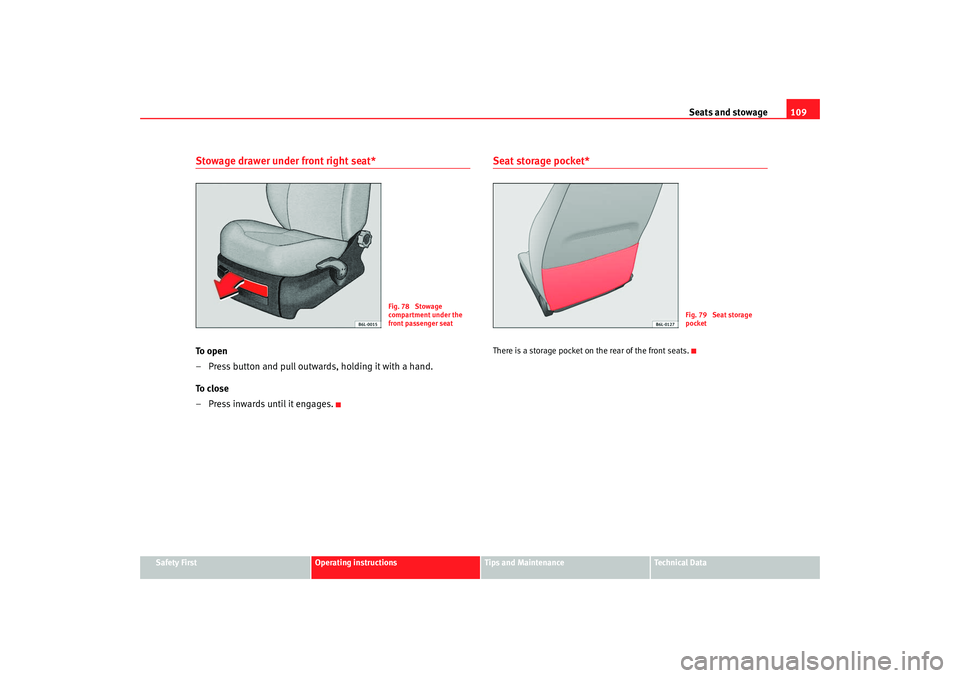
Stowage drawer under front right seat*To o p e n
– Press button and pull outwards, holding it with a hand.
To c l o s e
– Press inwards until it engages.
Seat storage pocket*There is a storage pocket on the rear of the front seats.
Fig. 78 Stowage
compartment under the
front passenger seat
Fig. 79 Seat storage
pocket
COR_ING_0707 Seite 109 Mittwoch, 1. August 2007 6:25 18
Page 112 of 258
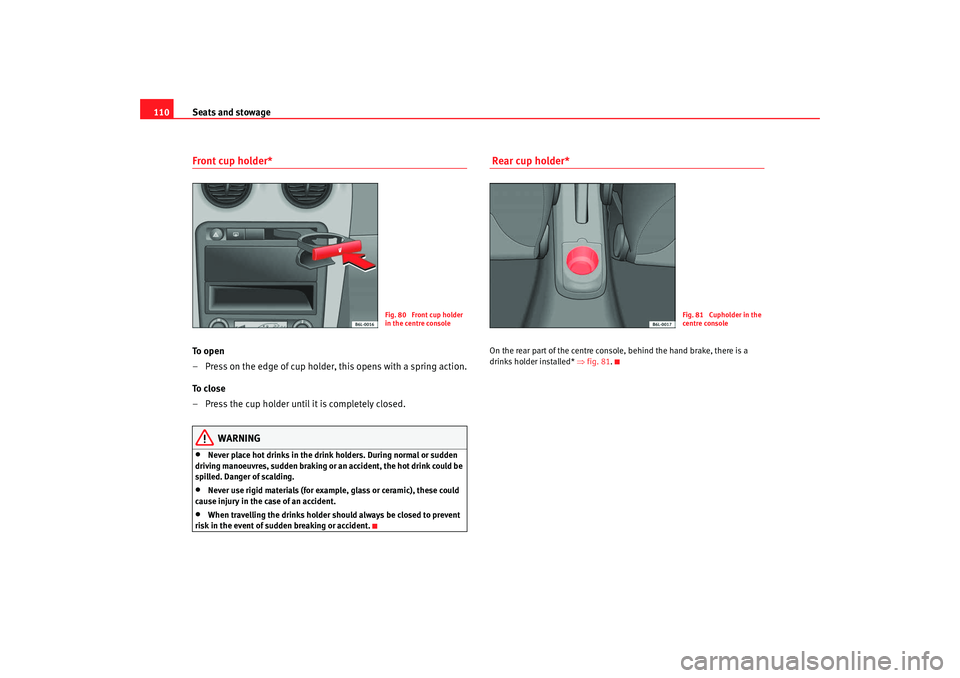
Seats and stowage
110Front cup holder* To o p e n
– Press on the edge of cup holder, this opens with a spring action.
To close
– Press the cup holder until it is completely closed.
WARNING
•
Never place hot drinks in the drink holders. During normal or sudden
driving manoeuvres, sudden braking or an accident, the hot drink could be
spilled. Danger of scalding.
•
Never use rigid materials (for example, glass or ceramic), these could
cause injury in the case of an accident.
•
When travelling the drinks holder should always be closed to prevent
risk in the event of sudden breaking or accident.
Rear cup holder* On the rear part of the centre console, behind the hand brake, there is a
drinks holder installed* ⇒fig. 81 .
Fig. 80 Front cup holder
in the centre console
Fig. 81 Cupholder in the
centre console
COR_ING_0707 Seite 110 Mittwoch, 1. August 2007 6:25 18
Page 113 of 258
Seats and stowage111
Safety First
Operating instructions
Tips and Maintenance
Te c h n i c a l D a t a
Ashtrays, cigarette lighter and electrical
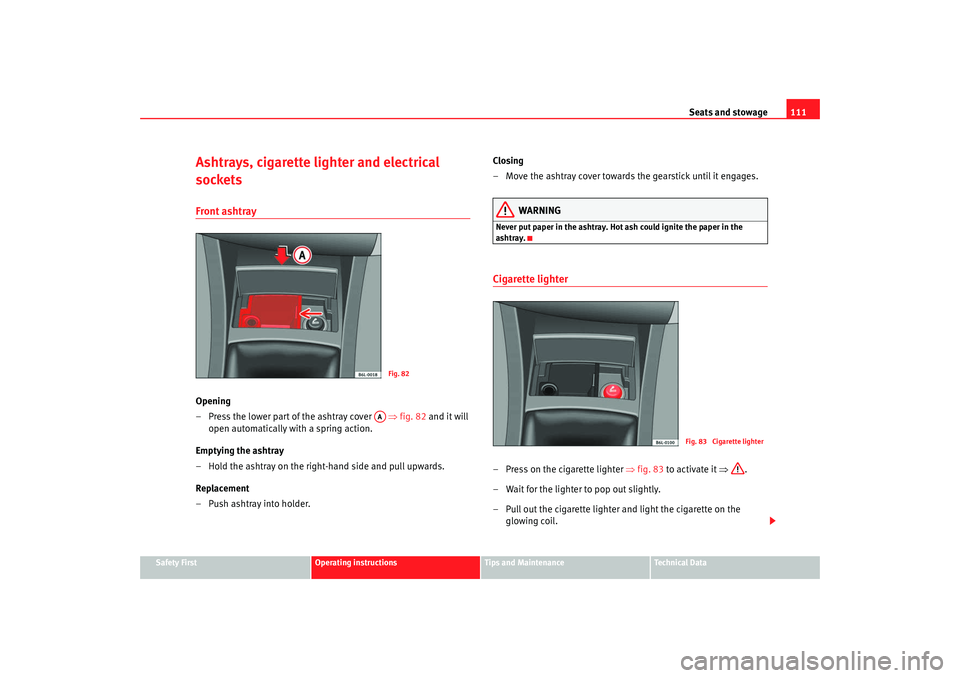
socketsFront ashtrayOpening
– Press the lower part of the ashtray cover ⇒fig. 82 and it will
open automatically with a spring action.
Emptying the ashtray
– Hold the ashtray on the right-hand side and pull upwards.
Replacement
– Push ashtray into holder. Closing
– Move the ashtray cover towards the gearstick until it engages.
WARNING
Never put paper in the ashtray. Hot ash could ignite the paper in the
ashtray.Cigarette lighter– Press on the cigarette lighter
⇒fig. 83 to activate it ⇒.
– Wait for the lighter to pop out slightly.
– Pull out the cigarette lighter and light the cigarette on the glowing coil.
Fig. 82
AA
Fig. 83 Cigarette lighter
COR_ING_0707 Seite 111 Mittwoch, 1. August 2007 6:25 18
Page 114 of 258
Seats and stowage
112
WARNING
•
Improper use of the cigarette lighter can lead to serious injuries or start
a fire.
•
Take care when using the cigarette lighter. Carelessness or negligence
when using the cigarette lighter can cause burns, risk of injury.
•
The lighter only works when the ignition is turned on or the engine is
running. To avoid the risk of fire, never leave children unsupervised in the
vehicle.
Electrical sockets The 12 Volt cigarette lighter socket can also be used for other electrical
components with a power rating of up to 120 Watt. When the engine is
switched off, however, the vehicle battery will discharge. Further information
⇒ page 167.
WARNING
The current sockets and the connected accessories will only operate when
the ignition is on or when the engine is running. Improper use of the
sockets or electrical accessories can lead to serious injuries or cause a fire.
To avoid the risk of injury, never leave children unsupervised in the vehicle.
Note
•
Using electrical appliances with the engine switched off will drain the
battery.
•
Before using any electrical accessories, see the instructions on
⇒ page 167.
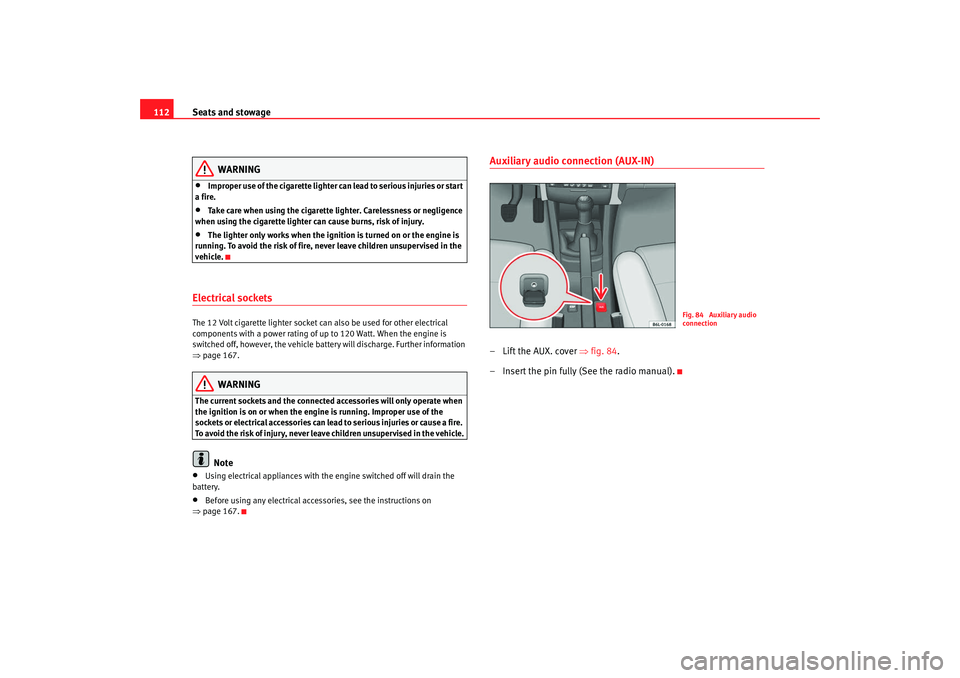
Auxiliary audio connection (AUX-IN)– Lift the AUX. cover ⇒fig. 84 .
– Insert the pin fully (See the radio manual).
Fig. 84 Auxiliary audio
connection
COR_ING_0707 Seite 112 Mittwoch, 1. August 2007 6:25 18
Page 115 of 258
Seats and stowage113
Safety First
Operating instructions
Tips and Maintenance
Te c h n i c a l D a t a
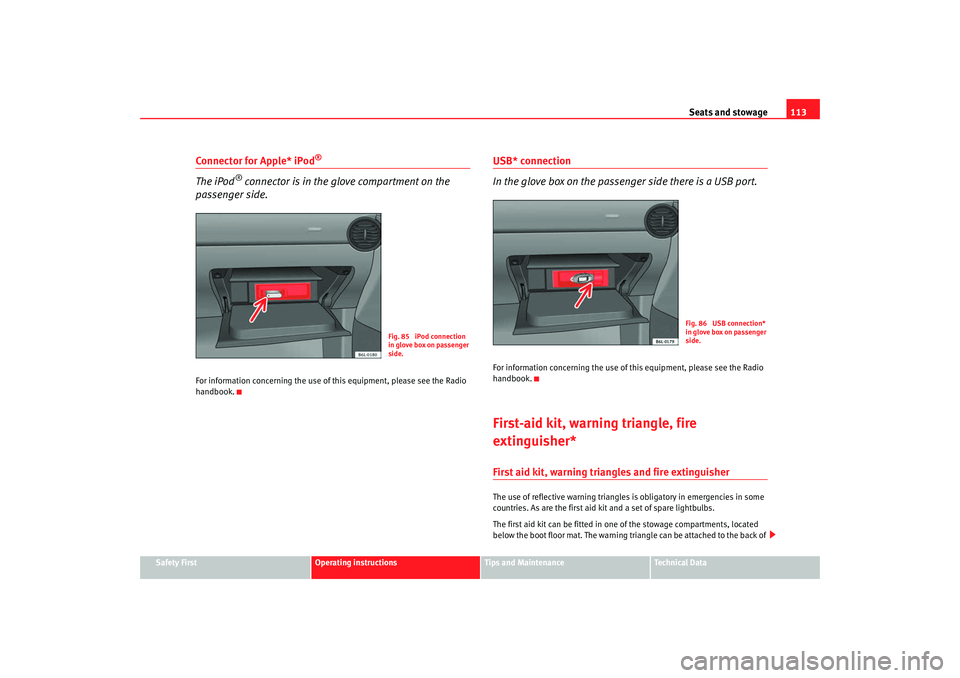
Connector for Apple* iPod
®
The iPod
® connector is in the glove compartment on the
passenger side.
For information concerning the use of this equipment, please see the Radio
handbook.
USB* connection
In the glove box on the passenger side there is a USB port.For information concerning the use of this equipment, please see the Radio
handbook.First-aid kit, warning triangle, fire
extinguisher*First aid kit, warning triangles and fire extinguisherThe use of reflective warning triangles is obligatory in emergencies in some
countries. As are the first aid kit and a set of spare lightbulbs.
The first aid kit can be fitted in one of the stowage compartments, located
below the boot floor mat. The warning tr iangle can be attached to the back of
Fig. 85 iPod connection
in glove box on passenger
side.
Fig. 86 USB connection*
in glove box on passenger
side.
COR_ING_0707 Seite 113 Mittwoch, 1. August 2007 6:25 18
Page 116 of 258
Seats and stowage
114the boot using rubber straps. The fire ex tinguisher can be fixed on the left-
hand side of the boot floor, fastened with velcro.
Note
•
The first aid kit, the warning triangles and the fire extinguisher are not
supplied with the vehicle as standard.
•
The first aid kit, the warning triangles and the fire extinguisher should
meet legal requirements.
•
The expiry date of the content of the first aid kit should be checked.
•
Ensure that the fire extinguisher is fully functional. The fire extinguisher
should, therefore, be checked regularly. The sticker on the fire extinguisher
will inform you of the next date for checking.
•
Before acquiring accessories and emergency equipment see the instruc-
tions on ⇒ page 167, “Accessories, parts replacement and modifications”.
Luggage compartmentStowing luggage
All luggage must be securely stowed.Please observe the following points to ensure the vehicle handles
well at all times:
– Distribute the load as evenly as possible.
– Place heavy objects as far forward in the luggage compartment
as possible.
WARNING
•
Loose luggage and other loose items in the vehicle can cause serious
injuries.
•
Loose objects in the luggage compartment can suddenly move and
change the way the vehicle handles.
•
During sudden manoeuvres or accidents, loose objects in the
passenger compartment can be flung forward, injuring vehicle occupants.
•
Always put objects in the luggage compartment.
•
When you transport heavy objects, always keep in mind that a change
in the centre of gravity can also cause changes in vehicle handling.
•
Please observe information on safe driving ⇒page 7, “Safe driving”.Caution
Hard objects on the shelf could chafe against the wires of the heating
element in the rear window and cause damage.
Note
The ventilation slots in front of the rear side windows must not be covered as
this would prevent stale air being extracted from the vehicle.Luggage compartment coverThe tray behind the rear seat back can be used for clothing.
The groove between the tray and the re ar window heater should never be
covered to allow free air ventilation.
COR_ING_0707 Seite 114 Mittwoch, 1. August 2007 6:25 18
Page 117 of 258
Seats and stowage115
Safety First
Operating instructions
Tips and Maintenance
Te c h n i c a l D a t a
WARNING
Do not place heavy or hard objects on the luggage compartment cover, this
will endanger the vehicle occupants in case of sudden braking.
Caution
•
Before closing the tailgate, ensure that the stowage compartment tray is
correctly fitted.
•
An overloaded boot could mean that the rear stowage tray is not correctly
seated and it may be bent or damaged.Note
•
Below the boot floor trim, next to the spare wheel, is a removable stowage
tray.
Roof carrier*Please observe the following points if you intend to carry loads on the roof:•
For safety reasons, only luggage racks and accessories approved by SEAT
should be used.
•
It is imperative to precisely follow the fitting instructions included for the
rack, taking special care when fitting the front bar in the holes designed for
this and the rear bar between the marks on the upper part of the rear door
frame while respecting the correct direction of travel indicated in the installa-
tion manual. Not following these instructions may lead to paintwork damage
or marks on the bodywork.
•
Pay special attention to the tightening torque of the attachment bolts and
check them following a short journey. If necessary, retighten the bolts and
check them at regular intervals.
•
Distribute the load evenly. A maximum load of 40 kg only is permitted for
each roof carrier system support bar, the load must be distributed evenly over
the entire length. However, the maximum load permitted for the entire roof
(including the support system) of 75 kg must not be exceeded nor should the
total weight of the vehicle be exceeded. See the chapter on “Technical Data”.
•
When transporting heavy or large objects on the roof, any change in the
normal vehicle behaviour due to a change in the centre of gravity or an
increased wind resistance must be taken into account. For this reason, a suit-
able speed and driving style must be used.
•
For those vehicles fitted with a sunroof*, ensure that it does not interfere
with the load on the roof carrier system when opened.
COR_ING_0707 Seite 115 Mittwoch, 1. August 2007 6:25 18