radio Seat Exeo 2008 ADAGIO
[x] Cancel search | Manufacturer: SEAT, Model Year: 2008, Model line: Exeo, Model: Seat Exeo 2008Pages: 47, PDF Size: 1.76 MB
Page 1 of 47
RADIO ADAGIOOWNER’S MANUAL · MANUAL DE INSTRUÇÕESInglés, Portugués 3R0012006A (09.08) (GT9)
3R0012006A
Portada Adagio_EN PT.qxd 9/10/08 10:00 Página 1
Page 3 of 47
Contents
2ContentsGeneral information
. . . . . . . . . . . . . . . .
Introduction
. . . . . . . . . . . . . . . . . . . . . . . . . .
Overview
. . . . . . . . . . . . . . . . . . . . . . . . . . . . . .
Control Panel
. . . . . . . . . . . . . . . . . . . . . . . . . . . . .
Notes on traffic safety
. . . . . . . . . . . . . . . . . . . . .
Cleaning and care
. . . . . . . . . . . . . . . . . . . . . . . .
Operations: General informationSwitching on and off
. . . . . . . . . . . . . . . . . . . . . .
Adjusting the volume
. . . . . . . . . . . . . . . . . . . . .
Display
. . . . . . . . . . . . . . . . . . . . . . . . . . . . . . . . . . .
Enabling/disabling the time
. . . . . . . . . . . . . .
SEEK
. . . . . . . . . . . . . . . . . . . . . . . . . . . . . . . . . . . . .
Adjusting the sound
. . . . . . . . . . . . . . . . . . . . . .
Radio
. . . . . . . . . . . . . . . . . . . . . . . . . . . . . . . . . .
Setting the bandwidth
. . . . . . . . . . . . . . . . . . . .
Tuning a station
. . . . . . . . . . . . . . . . . . . . . . . . . .
Storing stations
. . . . . . . . . . . . . . . . . . . . . . . . . .
Tuning a stored station
. . . . . . . . . . . . . . . . . . .
Alternative frequencies
. . . . . . . . . . . . . . . . . . .
Regional stations
. . . . . . . . . . . . . . . . . . . . . . . . .
Traffic Programme, TP
. . . . . . . . . . . . . . . . . . . . .
Media drives
. . . . . . . . . . . . . . . . . . . . . . . . .
CD player
. . . . . . . . . . . . . . . . . . . . . . . . . . . . . . . .
Handling CDs
. . . . . . . . . . . . . . . . . . . . . . . . . . . .
iPod interface*
. . . . . . . . . . . . . . . . . . . . . . . . . . .
USB port*
. . . . . . . . . . . . . . . . . . . . . . . . . . . . . . . .
Aux-in connection
. . . . . . . . . . . . . . . . . . . . . . . .
CD
. . . . . . . . . . . . . . . . . . . . . . . . . . . . . . . . . . . . . .
Selecting CD Mode
. . . . . . . . . . . . . . . . . . . . . . .
Selecting an MP3 di rectory ("browse")
. . . . .
Selecting a track
. . . . . . . . . . . . . . . . . . . . . . . . . .
Fast forwards/Rewind
. . . . . . . . . . . . . . . . . . . . .
Shuffle mode ("mix")
. . . . . . . . . . . . . . . . . . . . .
Playing all tracks on the CD briefly ("scan")
External audio source (AUX)
. . . . . . . . . . . . . . .
Mobile phone interface
. . . . . . . . . . . .
Introduction
. . . . . . . . . . . . . . . . . . . . . . . . . . . . . .
Installation
. . . . . . . . . . . . . . . . . . . . . . . . . . . . . . .
Speech control system
. . . . . . . . . . . . . . . . . . . .
Speech recognition for some markets
. . . . . .
The multi-function steering
wheel
. . . . . . . . . . . . . . . . . . . . . . . . . . . . . . . . . .
Introduction
. . . . . . . . . . . . . . . . . . . . . . . . . . . . . .
Radio mode
. . . . . . . . . . . . . . . . . . . . . . . . . . . . . .
CD mode
. . . . . . . . . . . . . . . . . . . . . . . . . . . . . . . . .
Telephone mode
. . . . . . . . . . . . . . . . . . . . . . . . .
Index
. . . . . . . . . . . . . . . . . . . . . . . . . . . . . . . . . .
3
4
7
7
7
8
9
9
9
9
10
10
10
12
12
12
13
13
13 14
14
15
15
16
17
20
23
24
24
24
25
25
25
26
26
27
27
28
31
38
41
41
42
42
42
44
Adagio_EN Seite 2 Dienstag, 7. Oktober 2008 10:55 10
Page 4 of 47
General information3
General informationThis manual contains information, recommendations, advice and warnings
related to your radio equipment. The other publications in the vehicle wallet
contain further information of which you should be aware for your own safety
and for that of your passengers.
Make sure that the onboard documentation is kept in the vehicle at all times.
This is especially important when lending or selling the vehicle to another
person.
This manual contains a description of the equipment supplied with the
vehicle at the time of going to press. Some of the equipment described herein
will not be available until a later date or is only available in certain markets.
The illustrations are intended as a general guide and may vary from the
equipment fitted in your vehicle in some details.
Directions and positions (e.g. right, left, front, rear) are always relative to the
direction of travel of the vehicle, unless otherwise stated.
The equipment marked with an asterisk * is only supplied as standard in
certain model versions, is optional in others or is only available in specific
countries.
® Registered trademarks are marked ®. The absence of this symbol does
not constitute a waiver of the righ ts concerning any proprietary name.
The section is continued on the following page.
This shows the end of the section .WARNING
Texts preceded by this symbol contain safety information. They warn you
of serious dangers, possibly involving accident or injury.
Caution
Texts preceded by this symbol draw your attention to a possible risk of
damage to your vehicle.
For the sake of the environment
Texts preceded by this symbol refer to relevant points concerning environ-
mental protection.
Note
Texts preceded by this symbol contain additional information.
Adagio_EN Seite 3 Dienstag, 7. Oktober 2008 10:55 10
Page 5 of 47
Introduction
4IntroductionImportant Information. Traffic safetyTravelling on today's roads requires the driver's full attention at all times.
Only operate the radio and its various functions when the traffic situation
really permits this.
WARNING
•
Before starting the trip, you should familiarise yourself with the
different radio functions.
•
High audio volume may represent a danger to you and to others.
•
Adjust the volume in a way that you can distinguish surrounding noise,
for example, horns and sirens, etc.
•
Radio settings should be made when the car is stopped or by a
passenger.Note
Separate the radio navigation card and keep it in a safe place, but never
within the vehicle. If the radio is lost with the code, go to a SEAT Dealer, who
will help you.
Adagio_EN Seite 4 Dienstag, 7. Oktober 2008 10:55 10
Page 8 of 47
Overview7
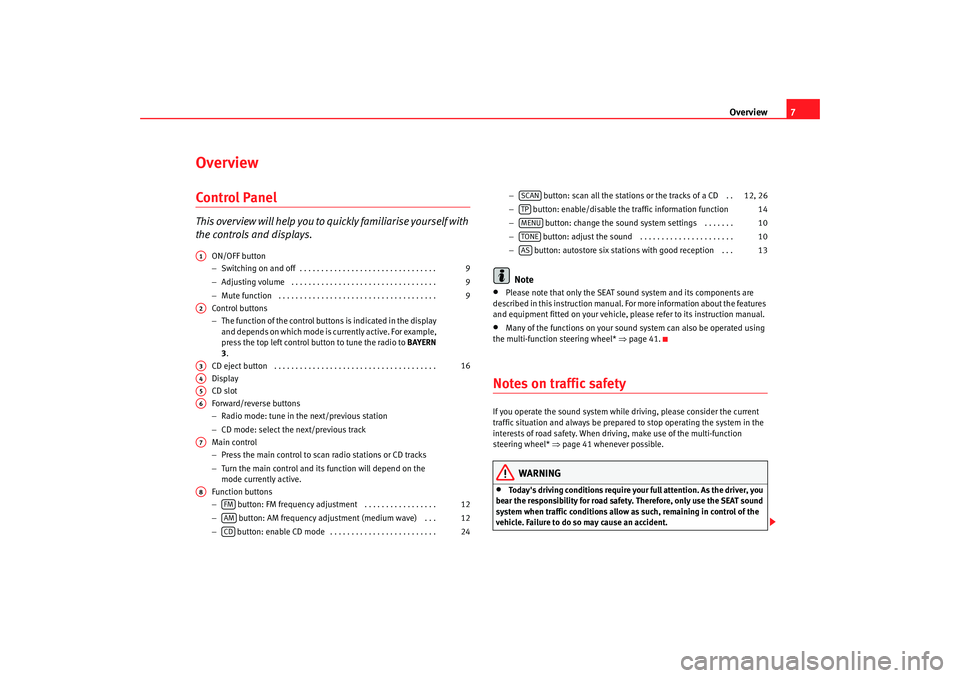
OverviewControl PanelT h i s ov e r v i ew w i ll h el p y o u t o quickly familiarise yourself with
the controls and displays.
ON/OFF button
−Switching on and off . . . . . . . . . . . . . . . . . . . . . . . . . . . . . . . .
− Adjusting volume . . . . . . . . . . . . . . . . . . . . . . . . . . . . . . . . . .
− Mute function . . . . . . . . . . . . . . . . . . . . . . . . . . . . . . . . . . . . .
Control buttons
− The function of the control buttons is indicated in the display
and depends on which mode is currently active. For example,
press the top left control button to tune the radio to BAYERN
3.
CD eject button . . . . . . . . . . . . . . . . . . . . . . . . . . . . . . . . . . . . . .
Display
CD slot
Forward/reverse buttons
− Radio mode: tune in the next/previous station
− CD mode: select the next/previous track
Main control
− Press the main control to scan radio stations or CD tracks
− Turn the main control and its function will depend on the
mode currently active.
Function buttons
− button: FM frequency adjustment . . . . . . . . . . . . . . . . .
− button: AM frequency adju stment (medium wave) . . .
− button: enable CD mode . . . . . . . . . . . . . . . . . . . . . . . . . −
button: scan all the stations or the tracks of a CD . .
− button: enable/disable the traffic information function
− button: change the sound sy stem settings . . . . . . .
− button: adjust the sound . . . . . . . . . . . . . . . . . . . . . .
− button: autostore six stations with good reception . . .
Note
•
Please note that only the SEAT sound system and its components are
described in this instruction manual. Fo r more information about the features
and equipment fitted on your vehicle, please refer to its instruction manual.
•
Many of the functions on your sound system can also be operated using
the multi-function steering wheel* ⇒page 41.
Notes on traffic safetyIf you operate the sound system while driving, please consider the current
traffic situation and always be prepared to stop operating the system in the
interests of road safety. When driving, make use of the multi-function
steering wheel* ⇒page 41 whenever possible.
WARNING
•
Today's driving conditions require your full attention. As the driver, you
bear the responsibility for road safety. Therefore, only use the SEAT sound
system when traffic conditions allow as such, remaining in control of the
vehicle. Failure to do so may cause an accident.
A1
9
9
9
A2A3
16
A4A5A6A7A8
FM
12
AM
12
CD
24
SCAN
12, 26
TP
14
MENU
10
TONE
10
AS
13
Adagio_EN Seite 7 Dienstag, 7. Oktober 2008 10:55 10
Page 11 of 47
Operations: General information
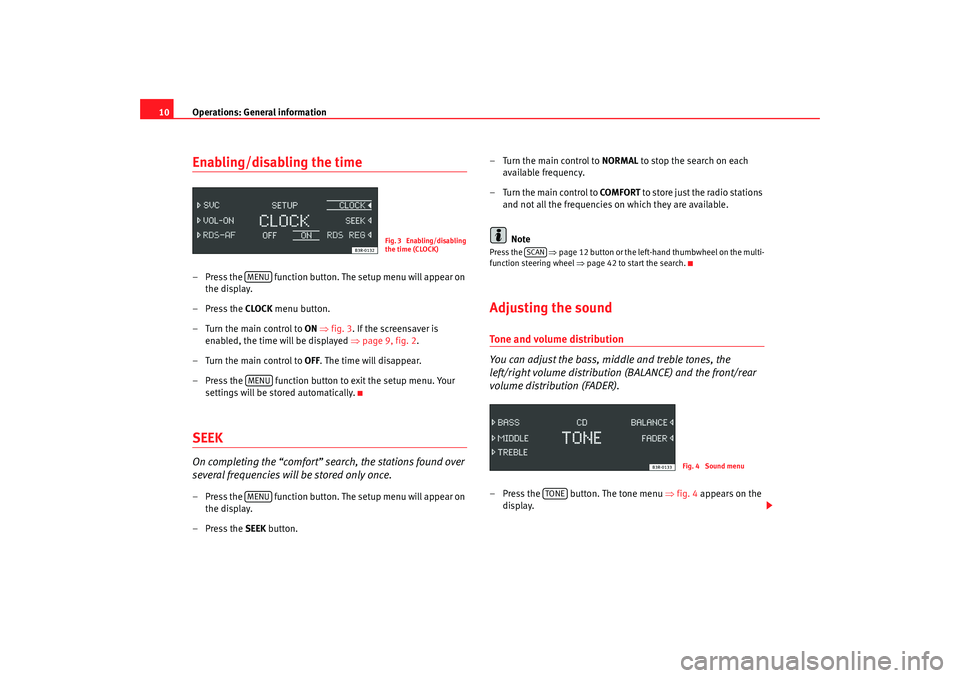
10Enabling/disabling the time– Press the function button. The setup menu will appear on
the display.
– Press the CLOCK menu button.
–Turn the main control to ON ⇒fig. 3 . If the screensaver is
enabled, the time will be displayed ⇒page 9, fig. 2 .
–Turn the main control to OFF . The time will disappear.
– Press the function button to exit the setup menu. Your
settings will be stored automatically.SEEKOn completing the “comfort” search, the stations found over
several frequencies will be stored only once.– Press the function button. The setup menu will appear on the display.
– Press the SEEK button. – Turn the main control to
NORMAL to stop the search on each
available frequency.
– Turn the main control to COMFORT to store just the radio stations
and not all the frequencies on which they are available.
Note
Press the ⇒page 12 button or the left-hand thumbwheel on the multi-
function steering wheel ⇒page 42 to start the search.Adjusting the soundTone and volume distribution
You can adjust the bass, middle and treble tones, the
left/right volume distribution (BALANCE) and the front/rear
volume distribution (FADER).– Press the button. The tone menu ⇒fig. 4 appears on the
display.
Fig. 3 Enabling/disabling
the time (CLOCK)
MENUMENUMENU
SCAN
Fig. 4 Sound menu
TONE
Adagio_EN Seite 10 Dienstag, 7. Oktober 2008 10:55 10
Page 13 of 47
Radio
12RadioSetting the bandwidthThe radio has two bandwidths: FM (VHF) and AM (medium
wave). Each bandwidth has three station setting levels (FM1,
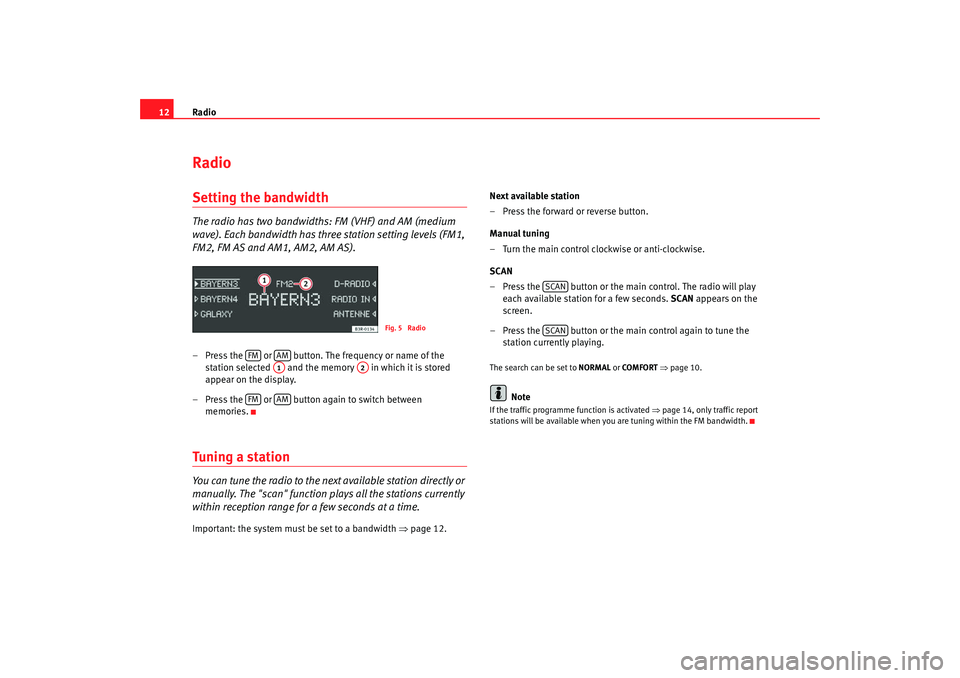
FM2, FM AS and AM1, AM2, AM AS).– Press the or button. The frequency or name of the
station selected and the memory in which it is stored
appear on the display.
– Press the or button again to switch between memories.Tuning a stationYou can tune the radio to the next available station directly or
manually. The "scan" function plays all the stations currently
within reception range for a few seconds at a time.Important: the system must be set to a bandwidth ⇒page 12. Next available station
– Press the forward or reverse button.
Manual tuning
– Turn the main control clockwise or anti-clockwise.
SCAN
– Press the button or the main control. The radio will play
each available station for a few seconds. SCAN appears on the
screen.
– Press the button or the main control again to tune the station currently playing.
The search can be set to NORMAL or COMFORT ⇒ page 10.
Note
If the traffic programme function is activated ⇒page 14, only traffic report
stations will be available when you are tuning within the FM bandwidth.
Fig. 5 Radio
FM
AMA1
A2
FM
AM
SCANSCAN
Adagio_EN Seite 12 Dienstag, 7. Oktober 2008 10:55 10
Page 14 of 47
Radio13
Storing stationsYou can store the selected station at any position in the
memory. The Autostore function (A S) stores six stations with
good reception in the third memory.Storing a single station
– Press the or button one or more times to select the
bandwidth and memory.
– Tune a station ⇒page 12.
– Press and hold one of the contro l buttons until you hear a tone.
The station will be stored at that memory position.
AutoStore (AS)
– Press and hold the button until STORE appears in the
display. Six stations with good reception will be stored in the
third memory of the current bandwidth ( FM AS or AM AS ).
NoteIt is best to use the first two memories when storing a single station. The third
memory is automatically filled by the Autostore function (AS).Tuning a stored stationYou can tune the radio to a station stored manually or auto-
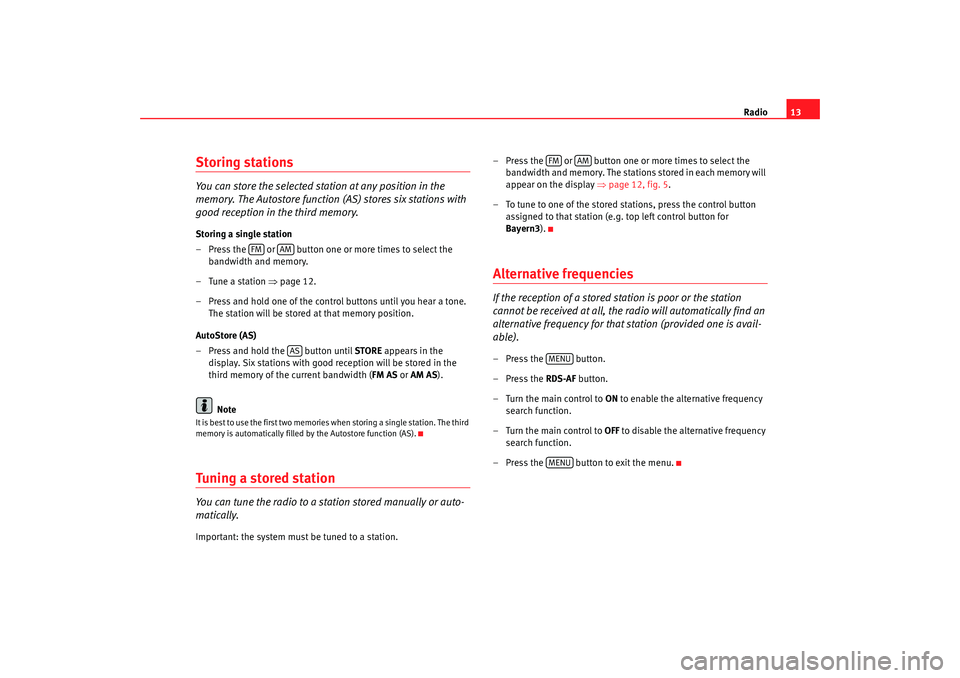
matically.Important: the system must be tuned to a station. – Press the or button one or more times to select the
bandwidth and memory. The stations stored in each memory will
appear on the display ⇒page 12, fig. 5 .
– To tune to one of the stored st ations, press the control button
assigned to that station (e.g. top left control button for
Bayern3 ).
Alternative frequenciesIf the reception of a stored station is poor or the station
cannot be received at all, the radio will automatically find an
alternative frequency for that station (provided one is avail-
able).– Press the button.
– Press the RDS-AF button.
–Turn the main control to ON to enable the alternative frequency
search function.
–Turn the main control to OFF to disable the alternative frequency
search function.
– Press the button to exit the menu.
FM
AMAS
FM
AM
MENUMENU
Adagio_EN Seite 13 Dienstag, 7. Oktober 2008 10:55 10
Page 15 of 47
Radio
14Regional stationsSome FM stations broadcast different regional programmes
under the same name.– Press the button.
– Press the RDS-REG control button.
–Turn the main control to AUTO i f y o u w i s h t o r e - t u n e a u t o m a t i c a l l y
to regional broadcasts. The radio will tune to the regional station
with the best reception.
–Turn the main control to OFF to prevent the radio from re-tuning
to regional broadcasts.
– Press the button to exit the menu.Traffic Programme, TPTraffic announcements broadcast by FM stations are played
even if you are listening to an AM station or a CD.Switching on the Traffic Programme
– Press the button. TP will appear on the display. You will then
hear the latest traffic announcements when they are broadcast.
Interrupting a traffic announcement
– Press the button. The current traffic announcement will be interrupted. The Traffic Programme will remain active. Adjusting the volume for traffic announcements
– Turn the ON/OFF button clockwise or anti-clockwise during a
traffic announcement. The volume for traffic announcements will
be stored. The volume for radio and CD mode will not be
changed.
Switching off the Traffic Programme
–Press the button.
What happens when the selected traffic report station can no longer be
received?•
If you are tuned to the FM bandwidth, you will hear a tone and NO TP will
appear on the display for a few seconds. Tune to another station manually
⇒ page 12.
•
If you are tuned to the AM bandwidth a new traffic report station will be
selected automatically.
If no traffic report st ations can be received, NO TP will appear on the display.Note
If the Traffic Programme func tion is enabled, only traffic report stations will be
available when you are tuning within the FM bandwidth.
MENUMENUTPTP
TP
Adagio_EN Seite 14 Dienstag, 7. Oktober 2008 10:55 10
Page 21 of 47
Media drives
20•
The track numbers are counted up sequentially in the sound system
display when you play tracks in shuffle mode (MIX).
USB port*Introduction
You can connect a memory stick or an MP3 player to the USB
port for operating through the sound system.The USB port is located in your car's glove compartment. The port is compat-
ible with all memory sticks and MP3 players ( ⇒table on page 21). Problems
can occur if you use a memory stick or MP3 player not listed in the table. Your
memory device must be USB-certi fied as a minimum requirement.
WARNING
Today's driving conditions require your full attention. As the driver, you
bear the responsibility for road safety. Do not remove the memory stick or
MP3 player while driving. Failure to do so may cause an accident.
Caution
Very high or very low temperatures (a common occurrence in a car's interior)
can cause damage to the memory stick or MP3 player and/or impair its
performance.•
Never leave your memory stick or MP3 player in the vehicle in case of
extreme temperatures.
Note
Please refer to the manufacturer's oper ating instructions for important infor-
mation on how to use your memory stick or MP3 player.Connecting a memory stick / MP3 player
For problem-free operation, use only approved memory sticks
and MP3 players.– Switch on your car's sound system.
–Enable radio mode.
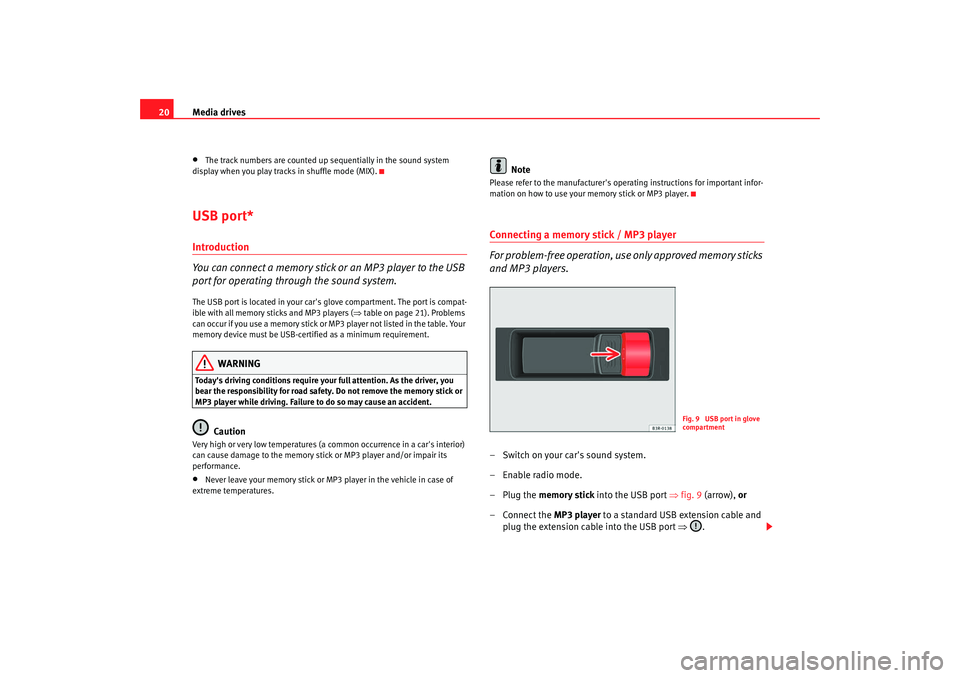
–Plug the memory stick into the USB port ⇒fig. 9 (arrow), or
–Connect the MP3 player to a standard USB extension cable and
plug the extension cable into the USB port ⇒ .
Fig. 9 USB port in glove
compartment
Adagio_EN Seite 20 Dienstag, 7. Oktober 2008 10:55 10