clock Seat Exeo 2011 MEDIA SYSTEM 1.0
[x] Cancel search | Manufacturer: SEAT, Model Year: 2011, Model line: Exeo, Model: Seat Exeo 2011Pages: 124, PDF Size: 6.35 MB
Page 10 of 124

Handling: General information9
Operating
RADIO, CD/MP3
TEL (telephone)
NAV, INFO
SETUP
The display will show the main menu for that function, or one of its submenus
⇒
page 13, “History function”. Press the function selector button a second
time to exit the submenu and return to the main menu for that function
⇒ page 12, “Home function”.
If you have pressed the button while in one of the main functions, you
can exit the SETUP menu by pressing the button again ⇒page 115.
The Setup menu only works in conjunction with the main function that is
currently activated.
button . . . . . . . . . . . . . . . . . . . . . . . . . . . . . . . . . . . . . . . button . . . . . . . . . . . . . . . . . . . . . . . . . . . . . . . . . . . . . .
button . . . . . . . . . . . . . . . . . . . . . . . . . . . . . . . . . . . . . . . . .
button . . . . . . . . . . . . . . . . . . . . . . . . . . . . . . . . . . . . . . . . . button . . . . . . . . . . . . . . . . . . . . . . . . . . . . . . . . . . . . . . . .
button . . . . . . . . . . . . . . . . . . . . . . . . . . . . . . . . . . . . . . .
Rotary pushbutton
You can scroll and select options in the display by turning and
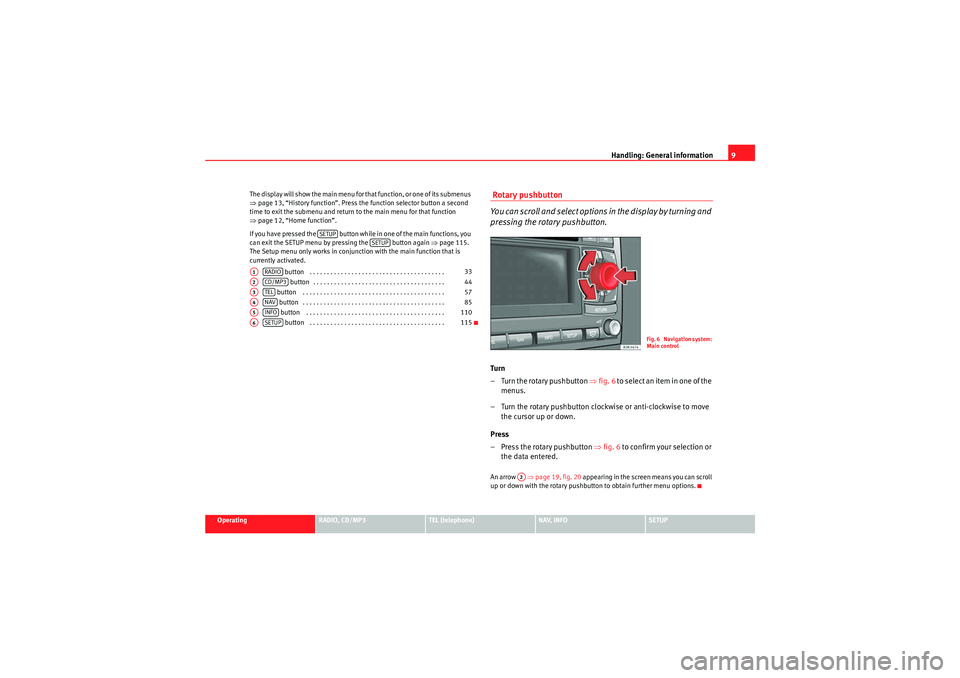
pressing the rotary pushbutton.Turn
– Turn the rotary pushbutton ⇒fig. 6 t o s e l e c t a n i t e m i n o n e o f t h e
menus.
– Turn the rotary pushbutton clockwise or anti-clockwise to move the cursor up or down.
Press
– Press the rotary pushbutton ⇒fig. 6 to confirm your selection or
the data entered.An arrow ⇒page 19, fig. 20 appearing in the screen means you can scroll
up or down with the rotary pushbutton to obtain further menu options.
SETUP
SETUP
A1
RADIO
33
A2
CD/MP3
44
A3
TEL
57
A4
NAV
85
A5
INFO
110
A6
SETUP
115
Fig. 6 Navigation system:
Main control
A2
Media System 1.0_EN.book Seite 9 Donnerstag, 10. September 2009 1:52 13
Page 47 of 124

CD/MP3
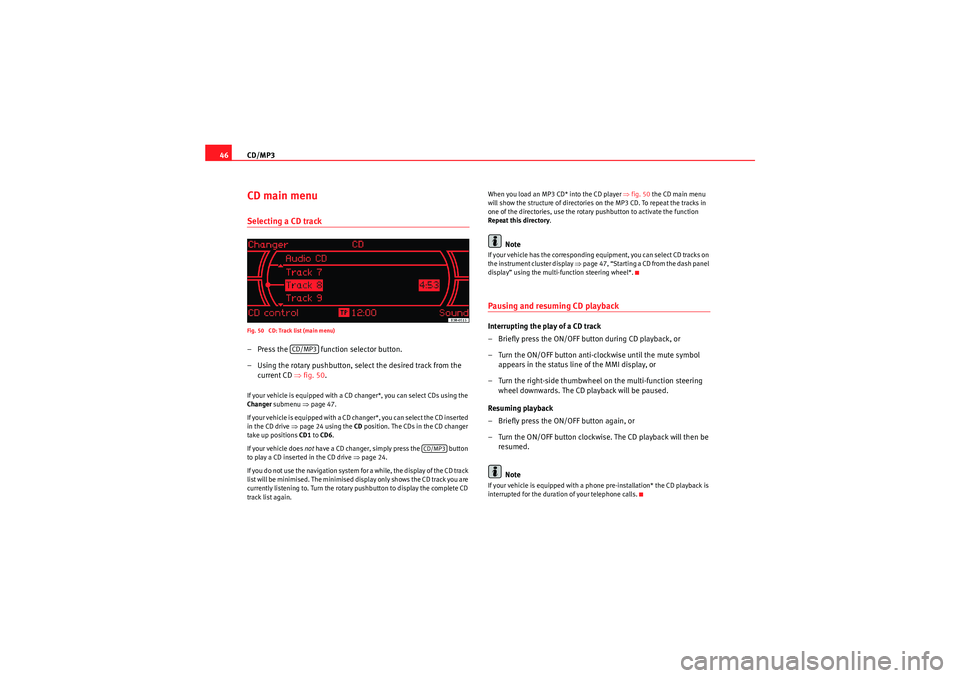
46CD main menuSelecting a CD trackFig. 50 CD: Track list (main menu)– Press the function selector button.
– Using the rotary pushbutton, select the desired track from the
current CD ⇒fig. 50 .If your vehicle is equipped with a CD changer*, you can select CDs using the
Changer submenu ⇒page 47.
If your vehicle is equipped with a CD changer*, you can select the CD inserted
in the CD drive ⇒page 24 using the CD position. The CDs in the CD changer
take up positions CD1 to CD6 .
If your vehicle does not have a CD changer, simply press the button
to play a CD inserted in the CD drive ⇒page 24.
If you do not use the navigation system for a while, the display of the CD track
list will be minimised. The minimised display only shows the CD track you are
currently listening to. Turn the rotary pushbutton to display the complete CD
track list again. When you load an MP3 CD* into the CD player
⇒fig. 50 the CD main menu
will show the structure of directories on the MP3 CD. To repeat the tracks in
one of the directories, use the rotary pushbutton to activate the function
Repeat this directory .
Note
If your vehicle has the corresponding equipment, you can select CD tracks on
the instrument cluster display ⇒page 47, “Starting a CD from the dash panel
display” using the multi-function steering wheel*.Pausing and resuming CD playbackInterrupting the play of a CD track
– Briefly press the ON/OFF button during CD playback, or
– Turn the ON/OFF button anti-clockwise until the mute symbol appears in the status line of the MMI display, or
– Turn the right-side thumbwheel on the multi-function steering wheel downwards. The CD playback will be paused.
Resuming playback
– Briefly press the ON/OFF button again, or
– Turn the ON/OFF button clockwise. The CD playback will then be resumed.
NoteIf your vehicle is equipped with a phone pre-installation* the CD playback is
interrupted for the duration of your telephone calls.
CD/MP3
CD/MP3
Media System 1.0_EN.book Seite 46 Donnerstag, 10. September 2009 1:52 13
Page 79 of 124

Mobile phone system
78
– Press the talk button on the mobile phone adapter ⇒page 77, fig. 90 . The speech control system will answer with
Cancel and will be switched off.
Volume adjustment
– With the speech control system switched on, scroll the right thumbwheel of the multi-function steering wheel*
⇒page 77, fig. 89 up
or down
, or
– With the speech control system switched on, turn the ON/OFF button ⇒page 11 clockwise or anti-clockwise.
Commands
The speech control system processes speech commands.The system confirms acceptance of speech commands verbally and guides
you through the dialogue.To ...
Speak this command:
Instruct the system to tell you
which commands are possible
while a dialogue is active.
HELP
Enter the PIN code for the SIM
card.
ENTER PIN ⇒page 79
Enter a telephone number you
want to dial.
DIAL NUMBER ⇒ page 79
Select the telephone number
associated with a name tag
from the phone book for the
speech control system.
SELECT NAME ⇒ page 81
A2
Dial a selected telephone
number.
DIAL ⇒ page 79
redial the last number dialled.
REDIAL ⇒ page 79
Store a name tag in the speech
control system for a phone
book entry shown in the instru-
ment panel display.
STORE ⇒ page 80
store a spoken name and tele-
phone number in the phone
book for the speech control
system.
STORE ⇒ page 81
End a dialogue
CANCEL
Repeat a specified name or all
of the digits specified up to
this point.
REPEAT
The system prompts you to Please con-
tinue to enter other figures or commands.
Delete the specified name or
the last entered block of digits.
BACK
The blocks of digits entered previously will
be repeated. The system prompts you to
Please continue to enter other figures or
orders.
Delete all specified digits.
DELETE
The system will then give the cue The
number has been deleted. Please con-
tinue so that you can enter more figures or
give another command.
store names along with a tele-
phone number in the phone
book for the speech control
system.
STORE NAME ⇒ page 81
To ...
Speak this command:
Media System 1.0_EN.book Seite 78 Donnerstag, 10. September 2009 1:52 13
Page 119 of 124

SETUP
118
– Disable all the systems not to be reset to zero by turning and
pressing the rotary pushbutton.
– Select Reset.
–Confirm Reset selected systems? with Ye s to return the selected
functions to the default settings.MMI settings
The settings for the functions available under the Settings menu ⇒ page 116
will be returned to the factory defaults.
Radio / Sound memory
Radio stations stored in the list ⇒page 37 are deleted and the factory sound
settings are reset ⇒page 53.
Navigation memory
The destination memory (individual destinations and route plans) is deleted.
Other navigation settings
The settings / stored data for the functions available in the navigation (e.g.
route criteria) will be returned to the factory default values.
Te l e p h o n e *
Personalised data (e.g. stored telephone numbers) is deleted and factory
telephone settings are reset.
"Display" MenuBrightnessFig. 136 Setup: Adjusting the brightness of the display–Press the Display control button in the Setup menu.
– Turn the rotary pushbutton in a clockwise direction to increase
the brightness of the display, or anti-clockwise to reduce the
brightness.The setting is saved even if you switch to another menu.
Media System 1.0_EN.book Seite 118 Donnerstag, 10. September 2009 1:52 13